


My 1979 mini/budget resto.

Posted
Settled In

My 1979 mini/budget resto.
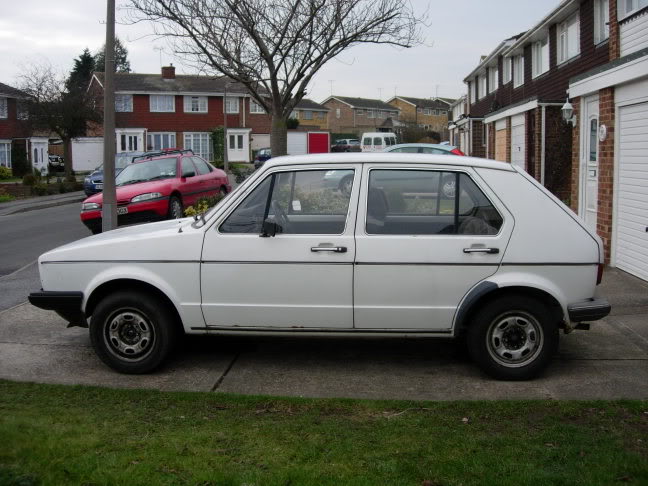
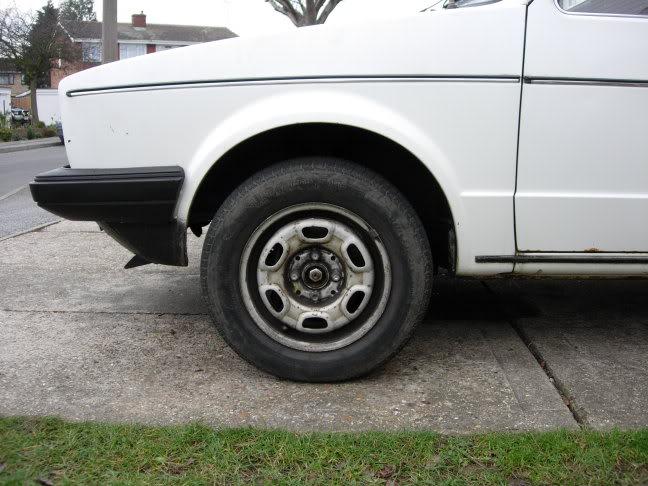
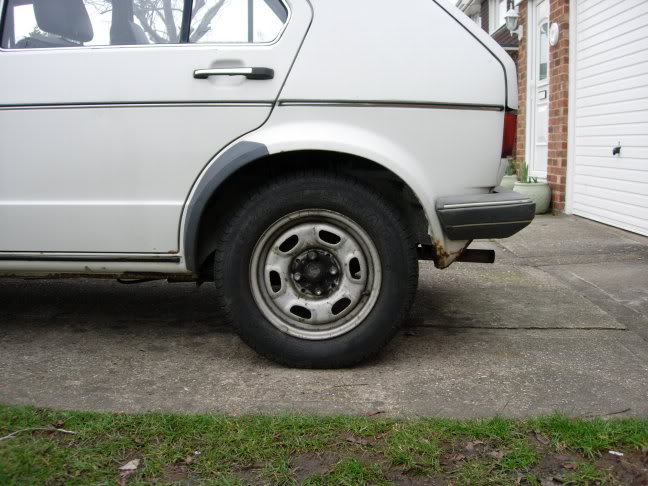
So here's the car at the start of the day.
Full on side;
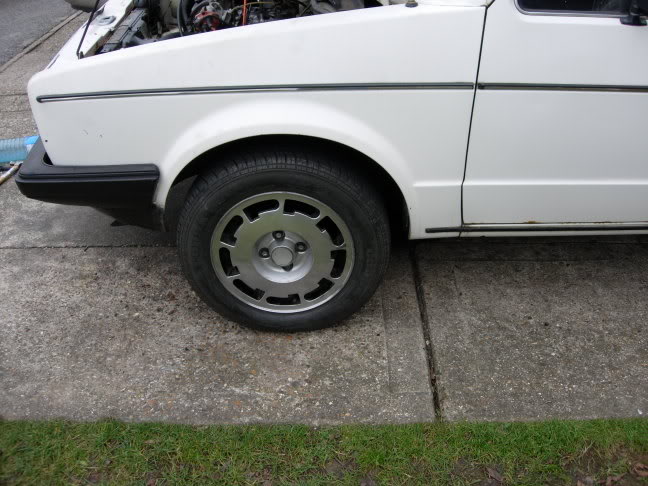
Front wheel;
Back wheel:

Posted
Settled In
Once we got there and got the car on the jacks off came the wheels. Now the car's been knocking a bit lately so I wasn't expecting the shocks to be looking all that - and I was right. The front's where totally shot. The rears however have clearly been replaced fairly recently so were good to go. A quick call to the local automotive parts dealer and an hour later a pair of new uprated shocks had been delivered. Now that's what I call service!
3 hours after it all began the job was done. New springs on the back, new springs and shocks on the front! The front's still looking pretty high, but hopefully should settle down a bit once all's run in.
Posted
Settled In
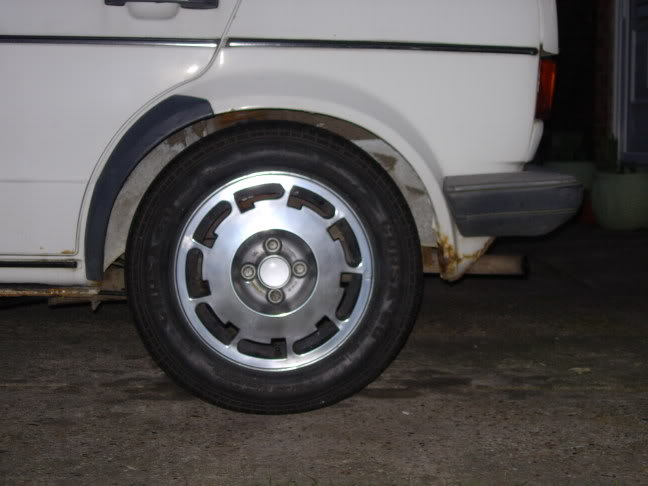
I decided to have a little bid on another set of wheels last week and to my surprise landing myself a set of polished p-slots. 4 wheels fully polished, plus a set of decent tyres, all for ?47 8O 8O 8O Now that's in keeping with the plans on making this car as cheap as possible!
Anyway, on went the wheels (albeit late in the day as I got sidetracked by working on my mate's car!). Took it for a quick spin but the front's still got a lot of settling to do.
Here's that shot of the rear again;
And here's how it's looking now;
No pics of the front as it was too dark to get a decent shot.
Tomorrow should see me driving it about to try to drop the front down. I'm still undecided about whether to lower it another 20mm though.
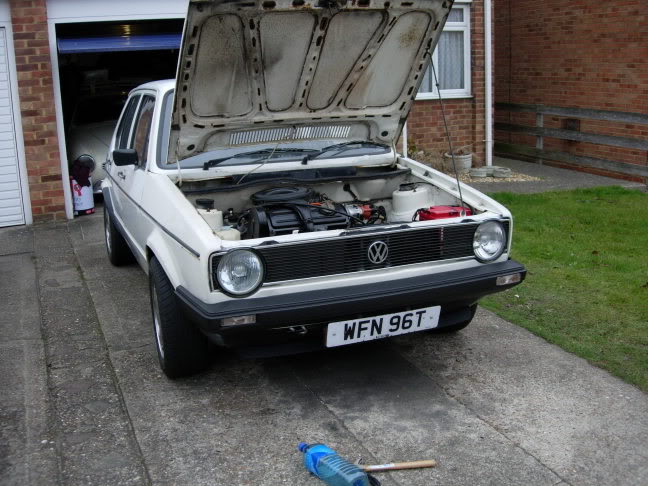
Just a couple more touches to clean up in the engine bay then I can finally start on the main body!
Posted
Settled In
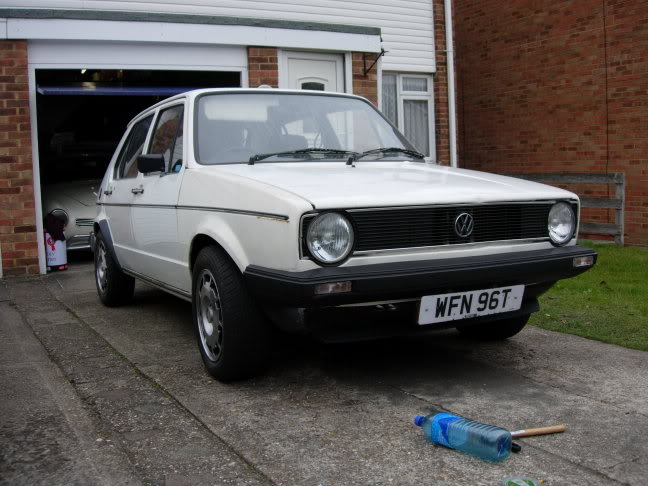
Also finished painting the slam panel now and put all of the front end back together;
Next up is the removal of the bonnet so I can give it a proper clean up without it flexing too much/falling and smacking me on the head. It's also got a couple of small dents that need sorting. Whilst it's off I'll also finish the engine clean better.
Posted

Local Hero

Drivers wing looks a little off white? going to replace it?
Posted
Settled In
PhillTMK1GTI said
Looking good! what a difference to that front end
Drivers wing looks a little off white? going to replace it?
To be honest, i don't think funds will allow. The nearest I think I'll get will be a quick blow over in the garage. Being realistic though, the whole car could do with a respray, and I dont' have the cash/time/skills to do it.
Here's hoping an Alpine White wing comes up on eBay!

Anyway, further progress this week, albeit minor. I took the tyres off the standard wheels (as they're pretty much all shot!) and started wire brushing the wheels ready for painting. I don't intend to put them back on the car, but when I sell it I'd like to include them incase the new owner wants to revert back to stock.
The only other thing I did was drop the GTI steering wheel in favour of a 78 wheel I picked up off eBay for a ?1. Top stuff.
From this;

To this;
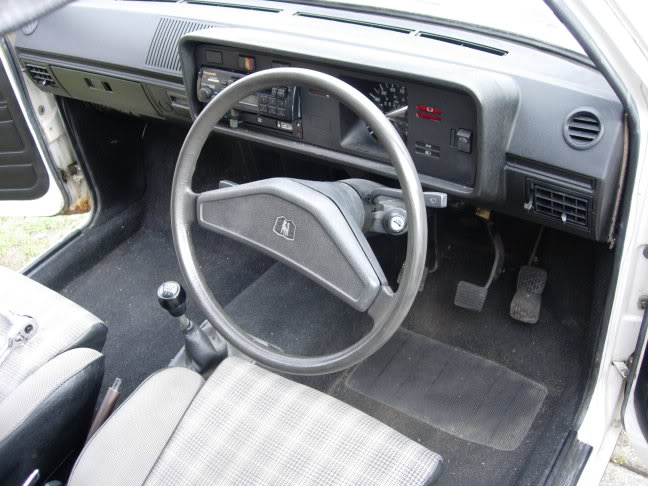
Just need a plate to get rid of that stereo hole now!
Posted

Settled In
btw you can get lowering caps that can lower the front by 15mm i think there about 20 quid…
chop the springs man, cheap as chips! :mrgreen:
ps dont chop the springs 8)
1272 driver with a magic tree!!
Posted
Local Hero
I've been reading this thread on and off over the last couple of weeks and it's made me very jealous - I really should get out there and do the same!
Keep up the good work
Rich
Posted
Old Timer

Posted
Settled In
Mr_GTI said
looking good, especially considering how cold and crappy the weathers been. Whats going on with your accelerator pedal….it looks as if its got two brake pedal covers on it joined together?
Tell me about it, I don't know what the deal is with that. It ain't pretty, but it does the job though!
Posted
Settling In


Nice work. Well done :lmao:
What ride height have you got?
My '83 1.3 CL rides at 345mm (centre wheel to wheel arch).
I've been told that standard is 360MM. Is this right? :dontknow:
You've put me to shame
 ops: Now I'll have to do MY engine bay.
Keep up the good work.
Posted
Settled In
BONDY said
Hi,
Nice work. Well done :lmao:
What ride height have you got?
My '83 1.3 CL rides at 345mm (centre wheel to wheel arch).
I've been told that standard is 360MM. Is this right? :dontknow:
You've put me to shame
Keep up the good work.
I'm not sure on ride height. I've just fitted some 40mm dropped springs, so if standard is 360mm, I guess I'm riding at 320mm :dontknow:
The front needs to come down another 20mm though and the new shocks need time to settle, then it should be looking just right. 8)
Posted
Old Timer
Posted
Settled In
watson said
could you come round and do the engine bay on my 1.1L.
Perhaps I should think about hiring out my services!"Man for hire - good with rag! Call Jabbo now!"
As for Gaydon, I very much doubt I'll be there - if I remember rightly I should be in Barcelona that week!
Posted
Settled In
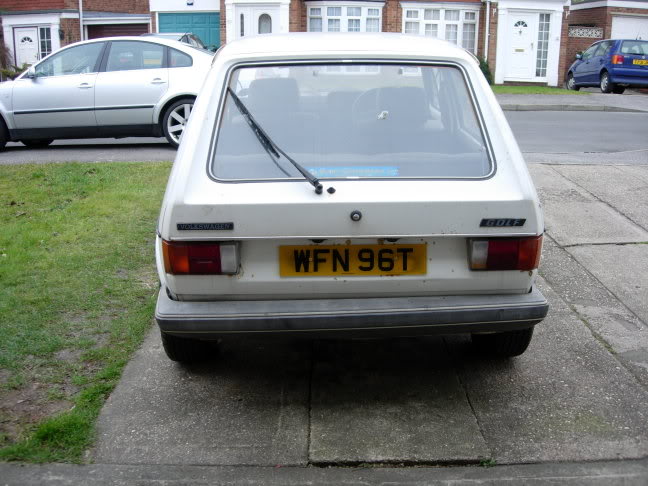
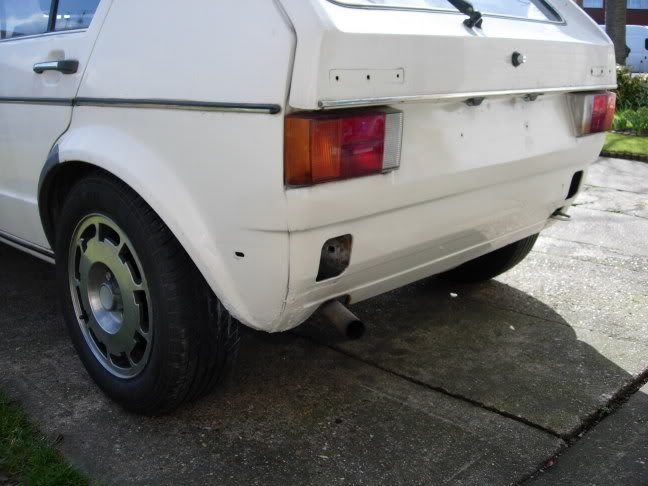
 , this time in warm weather!!! Thought I'd best take advantage of the couple of nice days we've had this week (Thursday and this morning) to steam ahead.
Seeing as over the last couple of weeks I've been concentrating on the front, I thought it was only fair to now turn my attention to the rear!
Here's the pics as of Thursday morning;
Wonky bumper;
Passenger side hole;
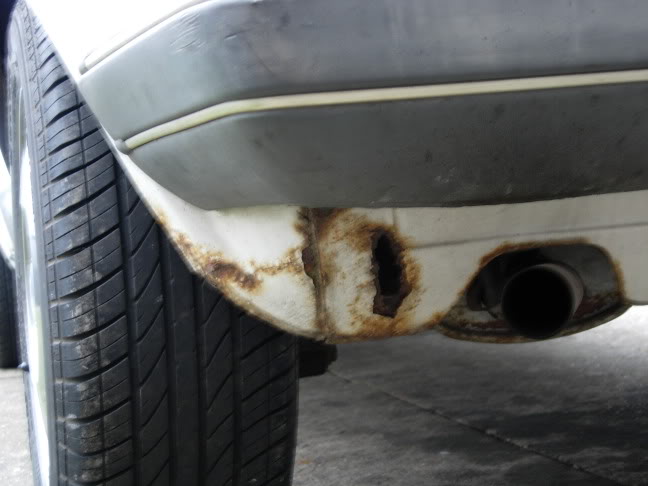
Driver's side hole;
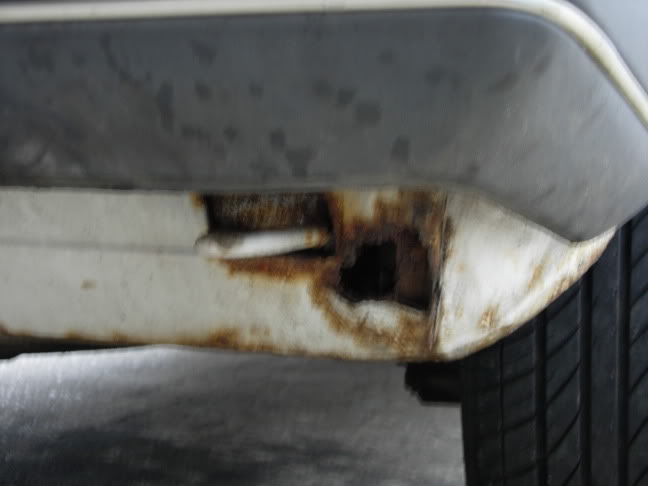
Number plate recess and no bumper;
Posted
Settled In
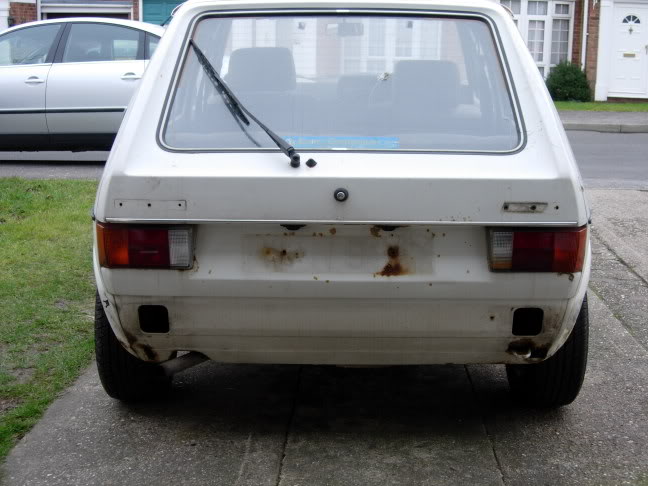
A quick bit of filling later, and it was on with the primer. Then, this morning I got around to putting a couple of coats of paint on the areas;
Passenger side;
Driver's side;
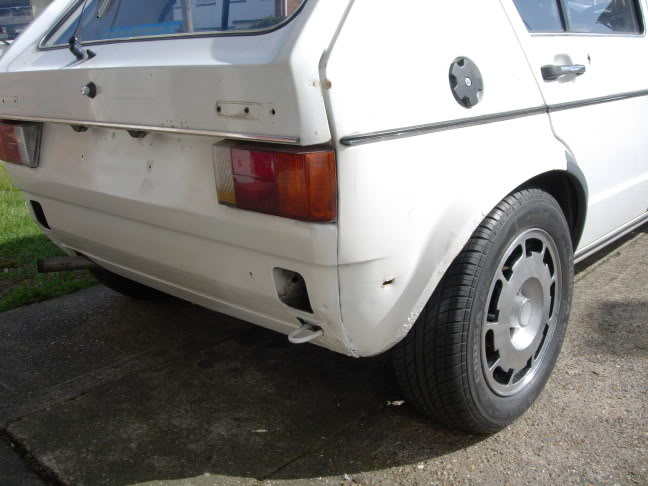
Much better!
Once again, it's not a full on perfect proffesional job, but it's certainly an improvement.I've also cleaned up the rear panel a bit (I've not touched the tailgate yet!);
The bumper's currently in the garage being cleaned up, then it's time to refit the whole thing!
Posted

Old Timer
Posted
Settled In
Phataz1 said
Great work! 8) . And your still only using aerosols? It looks very very impressive for a home job :wink: .
Yep! All the work is still being done using aerosols and on my drive
Should anything major need doing (e.g. if I decide to do the wing), I'll probably roll the Ghia out of the garage and put up a few dust sheets in there, but for now I the drive will do!
Posted
Old Timer
The best spray can in my opinion come from Holts from their minimix system, it's a fan spray and you get an excellent result right down to the last drop, unlike halfords (dare i mnetion then) spray cans which start to splutter when the can gets about half full. What cans are you using for your paintwork on this?
Mike.
1983 White cabriolet GTi
Posted
Settled In
Maniac said
Amazing what a little bit of time and effort can achieve. Reminds me of my first mk1 which was a bit like this one when I got it, paid ?175 with a years MOT on, and did a lot of paintwork on that myself with aerosols. It can give good results, it's all a question of technique!!
The best spray can in my opinion come from Holts from their minimix system, it's a fan spray and you get an excellent result right down to the last drop, unlike halfords (dare i mnetion then) spray cans which start to splutter when the can gets about half full. What cans are you using for your paintwork on this?
Mike.
I'm using Hycote aerosol primer, paint and lacquers. To be honest a couple of years ago I wouldn't have touched them as they were very similar to the 'Halfrauds' ones you mention, but recently they've gotten a lot better. Good enough for me at least
0 guests and 0 members have just viewed this: None.