


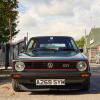
Mk1 Golf 16v - Full Body Restoration - Insta chrisqgolf

Posted
Settled In

Mk1 Golf Driver - 16V project
Yeah man, of course! and cheers  Its basically just the preload on the coil, instead of adjusting the preload to lower or raise the car, you get to keep the correct preload and move the whole strut up and down for height adjustment. I guess it's the same as using or raising the top mount tower turrets, to keep the travel in the suspension.
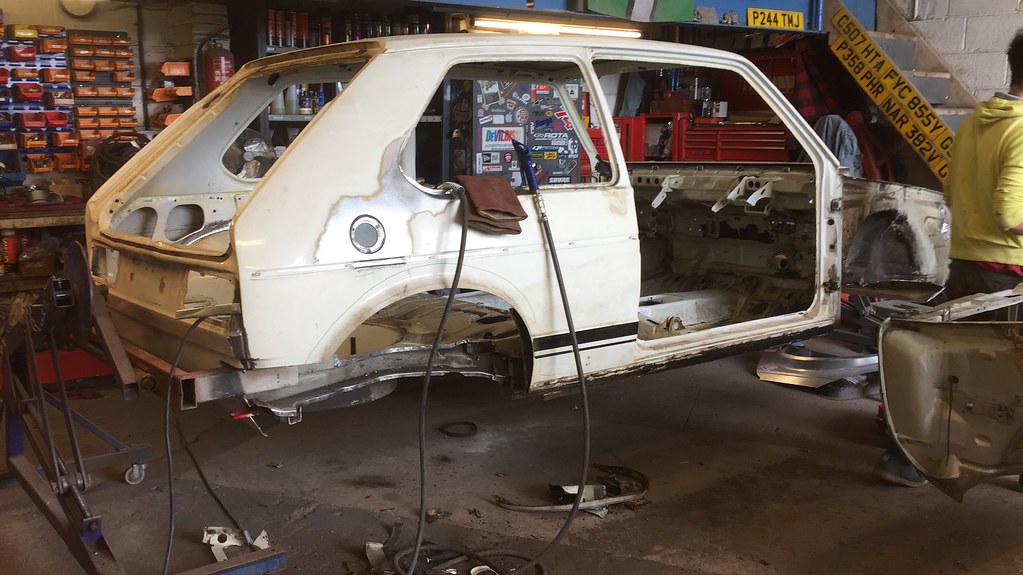
Well spent Saturday on the golf up at the shack. Stripped all the suspension, hubs, front wishbones, steering rack, rear beam, fuel tank with the filler neck off the Golf. Its literally just a bare shell now which is great. No nasty rust surprises so far so I'm happy. Forgot to take pictures, but here it is as I was about to tackle it.

I took the mounting points off the rear beam and took them home for me to sort out. I bought replacement bolts and a set of replacement washers as the original ones were all covered in thick rust so just seemed a lot easier to just buy replacement parts than refurbing the old stuff, apart from the actual mounts themselves.


Ewww -

Thats better, fresh A4 Stainless steel washers and nylon nut.

Love pressing mounts out or in, feels satisfying.


Wire brushed off all the loose rust on the mounts and chucked them in the box of parts for powder coating.
Also stripped my gear stick and replaced the ball mount. Nice easy job.


clean and regrease arm

Then back together


Also mounted my alternator back on the engine after torquing up the clutched pulley wheel. Although I think I might get a smaller belt as It's on the limit of its adjustment already and after it relaxes a lil once its in and running, its bound to start slipping.


Its basically just the preload on the coil, instead of adjusting the preload to lower or raise the car, you get to keep the correct preload and move the whole strut up and down for height adjustment. I guess it's the same as using or raising the top mount tower turrets, to keep the travel in the suspension.Well spent Saturday on the golf up at the shack. Stripped all the suspension, hubs, front wishbones, steering rack, rear beam, fuel tank with the filler neck off the Golf. Its literally just a bare shell now which is great. No nasty rust surprises so far so I'm happy. Forgot to take pictures, but here it is as I was about to tackle it.
I took the mounting points off the rear beam and took them home for me to sort out. I bought replacement bolts and a set of replacement washers as the original ones were all covered in thick rust so just seemed a lot easier to just buy replacement parts than refurbing the old stuff, apart from the actual mounts themselves.
Ewww -
Thats better, fresh A4 Stainless steel washers and nylon nut.
Love pressing mounts out or in, feels satisfying.
Wire brushed off all the loose rust on the mounts and chucked them in the box of parts for powder coating.
Also stripped my gear stick and replaced the ball mount. Nice easy job.
clean and regrease arm
Then back together
Also mounted my alternator back on the engine after torquing up the clutched pulley wheel. Although I think I might get a smaller belt as It's on the limit of its adjustment already and after it relaxes a lil once its in and running, its bound to start slipping.


Posted
Settled In
Only got to spend an hour or so up at the shack on saturday. But I was able to take off all the door locks, windows and winder mechs from the doors, bonnet and also got the boot lid off and Dave showed me how to remove the rear window. Simple when you know how.


All thats left now is the front window, steering column, a bit of dash wiring loom, drivers wing and the headlining, along with the doors but cant take them off until the cars on a trolley and off the ramp.
I've been chatting with Adam from Noath Engineering about making some threaded inserts to bolt my rose jointed TRE on to the hub. This will allow me to fit them on the underside of the hub without having to drill out the taper on the mounting point. Adam is also going to match these up with the bottom ball joint extenders he has done, so they'll be exactly the same size difference, which in return will keep the whole geometry the same, ideal! I believe hes now going to offer this as part of a kit to sell as an option along side his bottom ball joints. :thumbup: Excuse the 'kids' drawing.


Whilst I was there had a little perv on my wheels

And then decided to go ahead and braid all of my HT leads and heat shrink the ends to give it a finish I was happy with. Will probably make up a heat shield off the back of the head to protect them from the heat off the exhaust manifold, even though the braid is meant to withstand high heats.


Also this lil treat turned up in the post


Oh and just having a little perv on this

All thats left now is the front window, steering column, a bit of dash wiring loom, drivers wing and the headlining, along with the doors but cant take them off until the cars on a trolley and off the ramp.
I've been chatting with Adam from Noath Engineering about making some threaded inserts to bolt my rose jointed TRE on to the hub. This will allow me to fit them on the underside of the hub without having to drill out the taper on the mounting point. Adam is also going to match these up with the bottom ball joint extenders he has done, so they'll be exactly the same size difference, which in return will keep the whole geometry the same, ideal! I believe hes now going to offer this as part of a kit to sell as an option along side his bottom ball joints. :thumbup: Excuse the 'kids' drawing.
Whilst I was there had a little perv on my wheels
And then decided to go ahead and braid all of my HT leads and heat shrink the ends to give it a finish I was happy with. Will probably make up a heat shield off the back of the head to protect them from the heat off the exhaust manifold, even though the braid is meant to withstand high heats.
Also this lil treat turned up in the post
Oh and just having a little perv on this
Posted
Settled In
Bit more progress made on Saturday -


No nasty surprises under the windscreen, which was nice.


Pulled the rest of the wiring out, headliner and steering column.

Then Dave showed me how to remove some mounts in the engine bay, simple when you know how.


Also removed this odd mount/brace? No clue what it is or does? anyone?


Battery tray out


Then made a plan for welding up unwanted holes -

Also John has just finished welding up and smoothing my lips so they're all ding free, cheers mate :thumbup: Now to get them to the polishers.

No nasty surprises under the windscreen, which was nice.
Pulled the rest of the wiring out, headliner and steering column.
Then Dave showed me how to remove some mounts in the engine bay, simple when you know how.
Also removed this odd mount/brace? No clue what it is or does? anyone?
Battery tray out
Then made a plan for welding up unwanted holes -
Also John has just finished welding up and smoothing my lips so they're all ding free, cheers mate :thumbup: Now to get them to the polishers.
Posted

Moderator


Posted
Regional Host Wales

Well this has just distracted me from work for the last half an hour. Looking great!
Posted
Old Timer

Love the ht leads, great detail 
Matt
Matt
Posted
Moderator

Settled In
Hey guys, cheers for the feedback!
Adams been having some fun with my wheels


They're now with John getting some of the final metal work touches done, then will be all ready for powder coating.
Adam has also finished my track rod end flip pins, these look bloody brilliant :thumbup: You can now buy these from Adam at Noath Precision


Now onto abit of the shell work, spent a couple of Saturday mornings up the Shack. This picture shows the engine bay as it was. I also placed in my speedo cable to test out a new rooting which leads it straight to the pick up point on the gearbox.

Nasty weld, thats coming straight out.


Then cut square holes onto all the holes I want to make plates for


Slow but steady -

Adams been having some fun with my wheels
They're now with John getting some of the final metal work touches done, then will be all ready for powder coating.
Adam has also finished my track rod end flip pins, these look bloody brilliant :thumbup: You can now buy these from Adam at Noath Precision
Now onto abit of the shell work, spent a couple of Saturday mornings up the Shack. This picture shows the engine bay as it was. I also placed in my speedo cable to test out a new rooting which leads it straight to the pick up point on the gearbox.
Nasty weld, thats coming straight out.
Then cut square holes onto all the holes I want to make plates for
Slow but steady -
Posted
Old Timer
Great thread, there's some interesting work going on there bud!
Love those track rod end flip pins too!
Love those track rod end flip pins too!

Settled In
Fantastic thread, sat on the sofa hungover after heavy drinks at the local last night, and its perfect reading.
Take my hat off to you, will continue to follow and look forward to seeing the completed car on the 30th at the AGM…!!!!!
Well done Sir, credit to your work and passion for the MK1.
Take my hat off to you, will continue to follow and look forward to seeing the completed car on the 30th at the AGM…!!!!!
Well done Sir, credit to your work and passion for the MK1.
Posted

Settled In
By the way..... This is incredible!
1992 Pearl Green Clipper Cab - 16v (9a block, KR head, GSXR600 Carbs) 
Settled In
Cheers for taking the time to read guys, positive feedback is always welcome here
Well Dave put a welder in my hand and told me to weld up all the holes I created. I've never really welded before, but Dave showed me the way - quite happy with how I did. Welds, welds and many welds later.


Removed these two


Scrapped sealant off -


And as it is at the moment -


Also John has been working away on my wheels. Made a nice lil groove for the center caps to locate in -


Looking smart

And just sent all these inserts off to be anodised -

Well Dave put a welder in my hand and told me to weld up all the holes I created. I've never really welded before, but Dave showed me the way - quite happy with how I did. Welds, welds and many welds later.
Removed these two
Scrapped sealant off -
And as it is at the moment -
Also John has been working away on my wheels. Made a nice lil groove for the center caps to locate in -
Looking smart
And just sent all these inserts off to be anodised -
Posted
Old Timer
I'm always eager to read when I see that this thread has been updated. Such awesome work.
Posted

Old Timer
Great work!
How do you do the Instagram link you have? Would like to do that
How do you do the Instagram link you have? Would like to do that
Follow me on Instagram, scottyr_mk1golf
Posted
Settled In
Cheers, I'll try and keep it up to date as possible. In terms of the insta link, you just link a picture in your sig like you normally would, but then hyperlink it to your instagram page PM me if you're having trouble
I spent a whole day cleaning today… takes much longer than you think. Still not even done!


PM me if you're having troubleI spent a whole day cleaning today… takes much longer than you think. Still not even done!
Posted
Settled In
Sexy Stuff there Chris.Whats the latest with the Mk1 body ?.Have you become trigger happy with the old Mig Welder Yet.
Gra
Gra
Posted
Old Timer
Great progress with the shell, ''tis such a long process 
Wheels looking lovely
Matt
Wheels looking lovely
Matt
Posted
Settled In
You really do get to know your car once you start taking everything apart.
Front wings paint stripped and discovered a previous dent that had been repaired..


Aerial hole and small rust patch welded in -


Boot lid paint stripped


Wiper and badge holes welded over


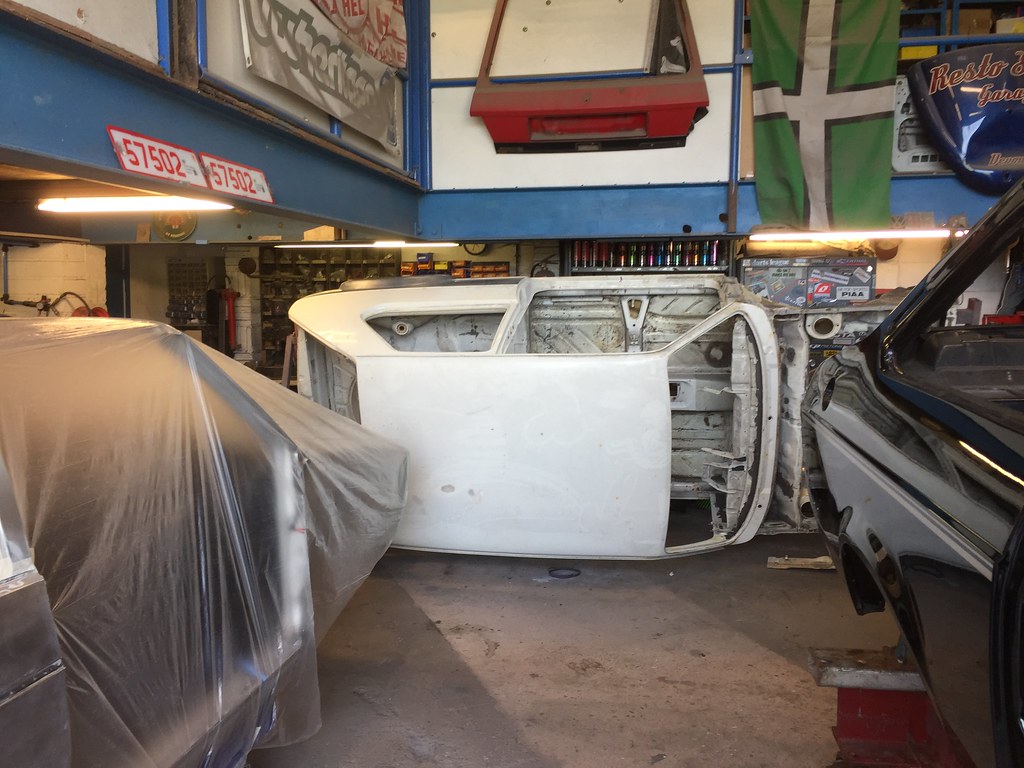
Body now up at the main shop

Panels off

Made a start on taking all this muck off :thumbdown:


And still haven't finished it!
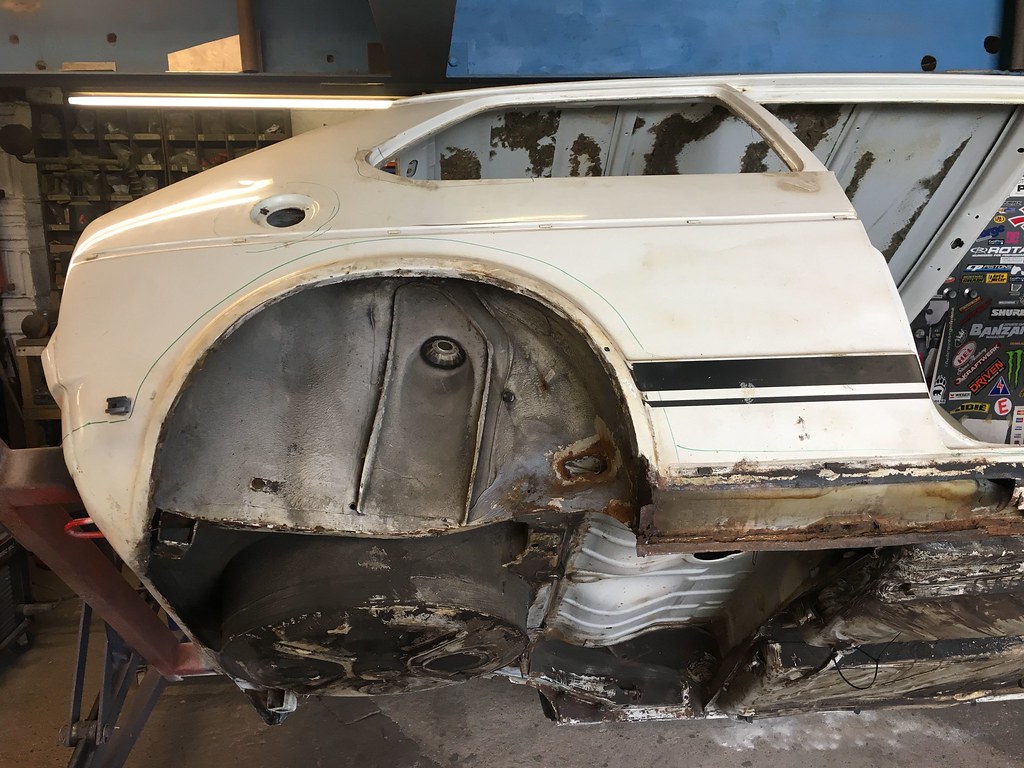
Dave aka RestoShack has spent the week working on my rear arches :thumbup:


Half rear tub on passenger side

But not before fixing up the bottom inner tub


Fixed an old dent


And new tub and arch on


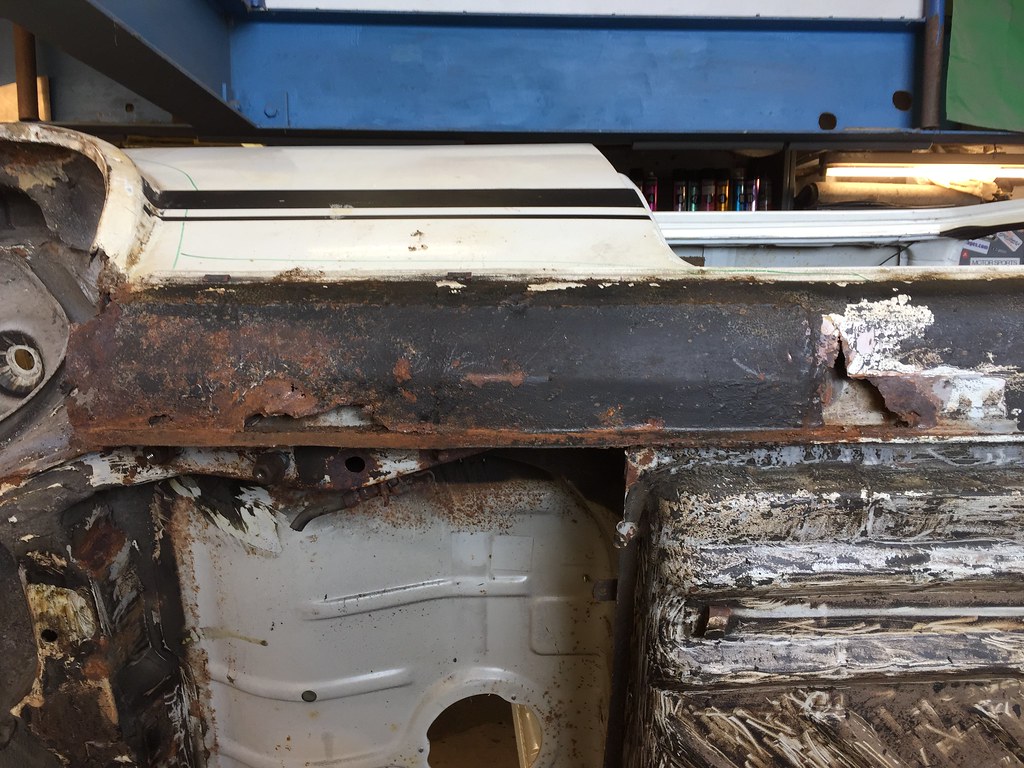
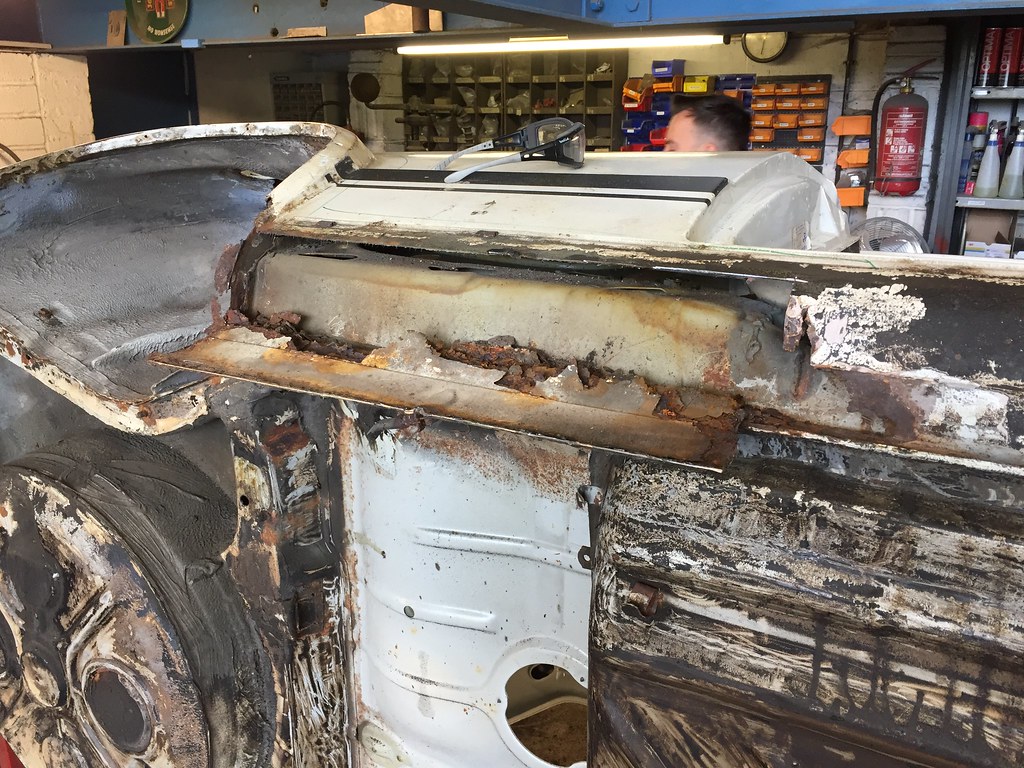
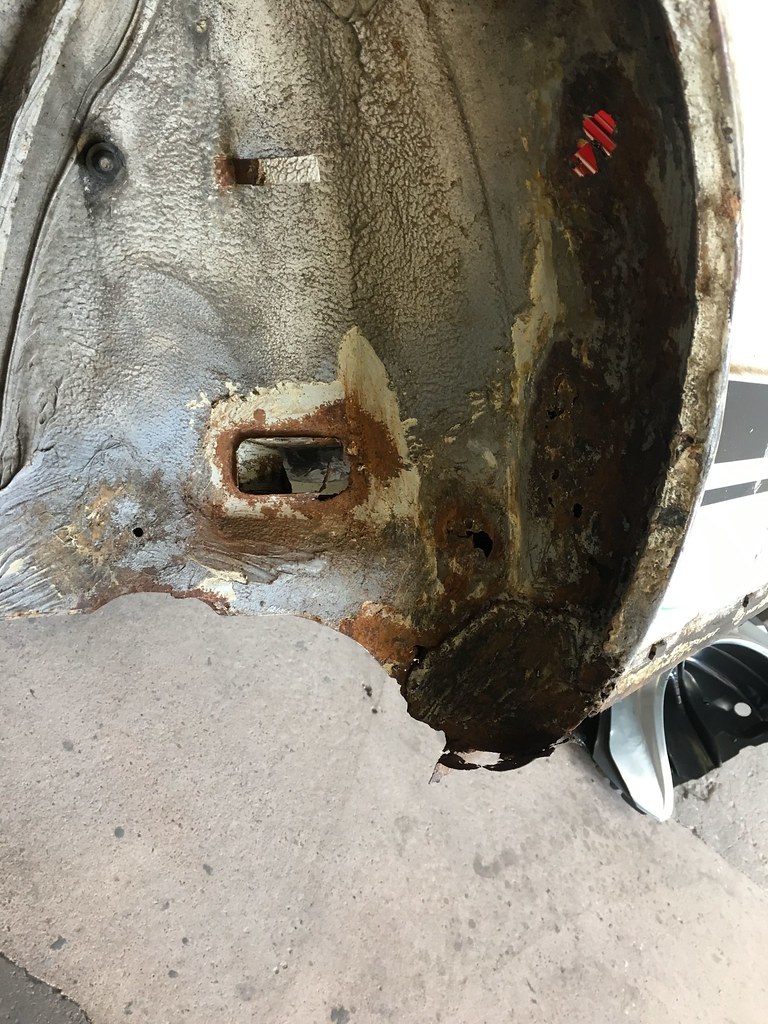
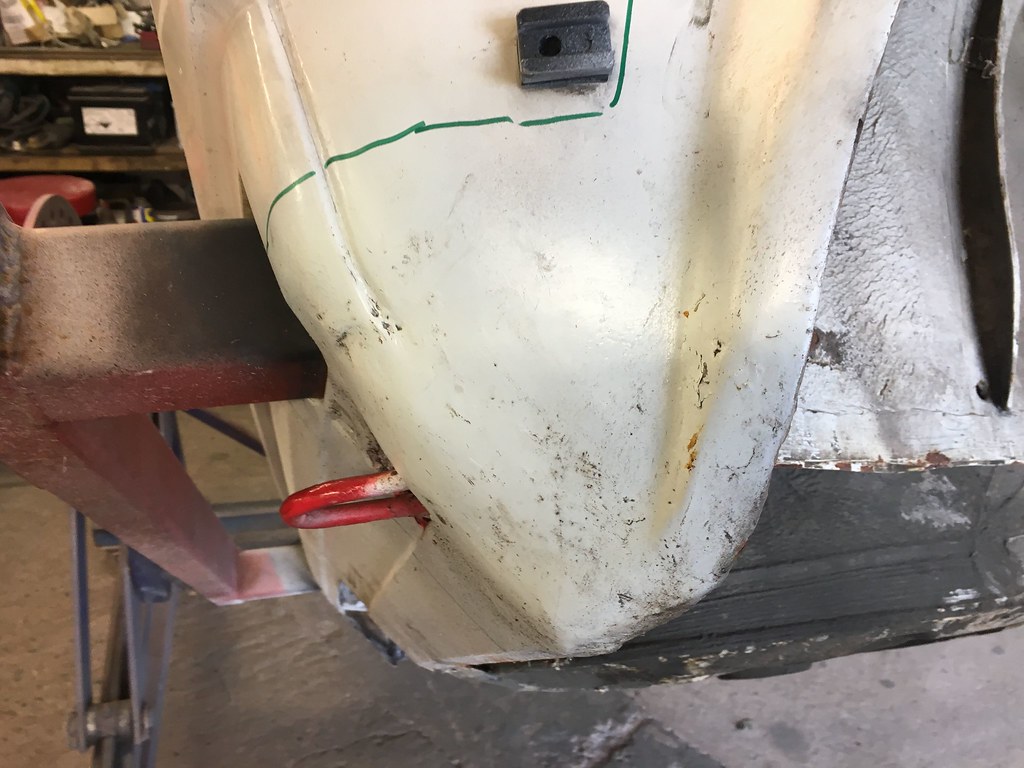
I couldnt resist to not have a look under this patch welded over rust :cry:

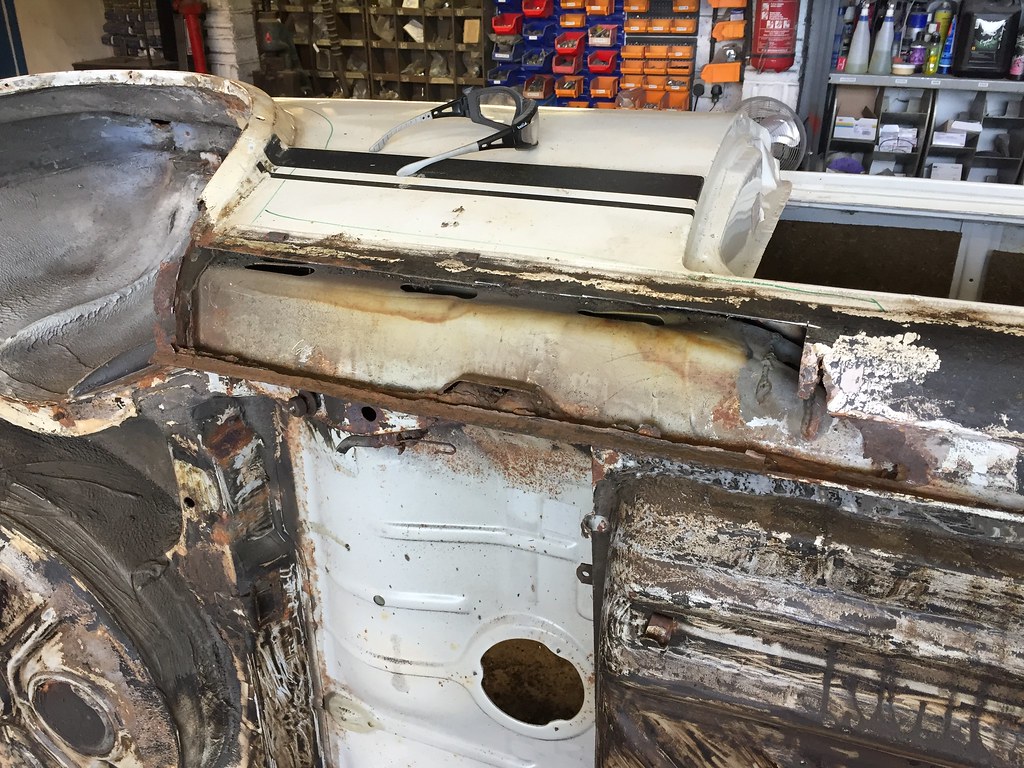
Dave then fixed this random little hole


Then he cracked on and fixed my fuel filler hole


Dave then made a start on the drivers rear tub and arch. This side was bad, needed a full rear tub


Then gave the inner quarter a good clean
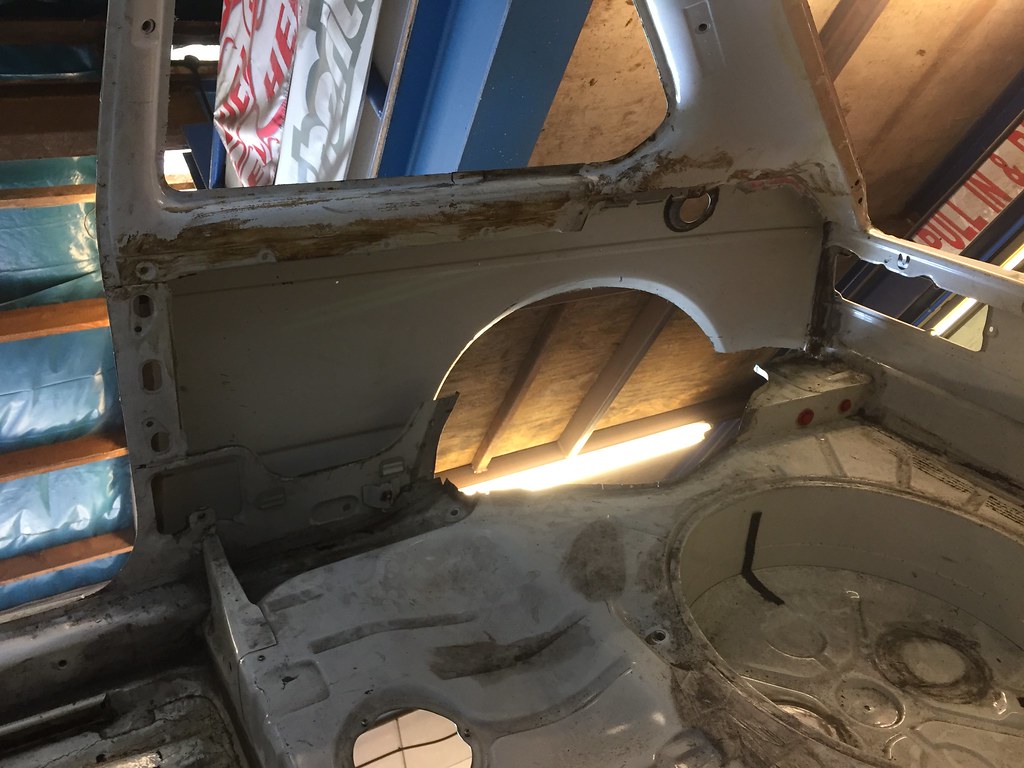
Now ready for weld

Then packed up and put away until he gets another chance to work on it.
Dave also completed the triangular rear beam modification setup.


Also Rob from Resto Shack has painted my new fuel tank, now time to swap over all the bits from my old one to the fresh new GTi tank

Also John has nearly finished with my wheels, hes welded in the missing tabs and got them all straight and pretty again.


Front wings paint stripped and discovered a previous dent that had been repaired..
Aerial hole and small rust patch welded in -
Boot lid paint stripped
Wiper and badge holes welded over
Body now up at the main shop
Panels off
Made a start on taking all this muck off :thumbdown:
And still haven't finished it!
Dave aka RestoShack has spent the week working on my rear arches :thumbup:
Half rear tub on passenger side
But not before fixing up the bottom inner tub
Fixed an old dent
And new tub and arch on
I couldnt resist to not have a look under this patch welded over rust :cry:
Dave then fixed this random little hole
Then he cracked on and fixed my fuel filler hole
Dave then made a start on the drivers rear tub and arch. This side was bad, needed a full rear tub
Then gave the inner quarter a good clean
Now ready for weld
Then packed up and put away until he gets another chance to work on it.
Dave also completed the triangular rear beam modification setup.
Also Rob from Resto Shack has painted my new fuel tank, now time to swap over all the bits from my old one to the fresh new GTi tank
Also John has nearly finished with my wheels, hes welded in the missing tabs and got them all straight and pretty again.
Posted
Settled In
Wow.Great update there chris.Fairplay to you underside chassis scraping.Any ideas on paint choice mate ?
Posted
Settled In
Wow! So much love goint into this 
Love the wheels - they will be sick!
Normally i like engines OEM an in the original color scheme, but I really like the black theme on your engine. It really blends perfectly. It will look absolutely awesome in the bay.
Biggest respect so far - look forward to see the finished build
Love the wheels - they will be sick!
Normally i like engines OEM an in the original color scheme, but I really like the black theme on your engine. It really blends perfectly. It will look absolutely awesome in the bay.
Biggest respect so far - look forward to see the finished build
1982 - Mk1 Golf 2.0 AGG 8v - 158 HP / 202 NM
_________________________________________
_________________________________________
0 guests and 0 members have just viewed this: None.