


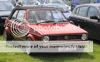
82 Cabriolet S3 TFSI TSR conversion (wide arched)

Posted
Settled In

82 Cabriolet S3 TFSI TSR conversion
Also Berg Cup Arches?
Posted

Local Hero


Andy
LINCOLNSHIRE REGION - https://www.facebook.com/groups/467122313360002/
1983 MK1 Golf GTI Campaign Model - Under (looooong) resto!
1962 Rover P4 80
2002 BMW 745i
2008 BMW Z4 2.5Si
LINCOLNSHIRE REGION - https://www.facebook.com/groups/467122313360002/
1983 MK1 Golf GTI Campaign Model - Under (looooong) resto!
1962 Rover P4 80
2002 BMW 745i
2008 BMW Z4 2.5Si
Posted
Old Timer

mike_turbo said
Coming together very well, will look so nice once finished.hope to get mine running in a few months.
Good news mike !! if you need any info from me about mine i'll try and help you out mate. Hows the caddy coming on ?
GibGTi said
Don't know if this will work, but couldn't you run a dry sump system, and then modify existing sump so that its thinner, and allow a bigger drop?
Also Berg Cup Arches?
Dry sump ? explain to me !! Was told that it will look lower once the arches are extended anyway so might not have to drop that much.
Posted
Settled In
Posted
Old Timer
utterly-dubberly said
Just stumbled on your thread dude car looks banging! checky question,what sort of money will forge knock up a custom rad for?Colour looking oh so good brother.
Hello fella !! Think the rad was about £450 + vat. Thanks for the comment

Posted

Posted
Settled In
Baggie82 said
mike_turbo said
Coming together very well, will look so nice once finished.hope to get mine running in a few months.
Good news mike !! if you need any info from me about mine i'll try and help you out mate. Hows the caddy coming on ?
GibGTi said
Don't know if this will work, but couldn't you run a dry sump system, and then modify existing sump so that its thinner, and allow a bigger drop?
Also Berg Cup Arches?
Dry sump ? explain to me !! Was told that it will look lower once the arches are extended anyway so might not have to drop that much.
http://en.wikipedia.org/wiki/Dry_sump
hope this explains, you can then have oil resevoir elsewhere, rather than in the sump, and then modify the sump accordingly. Used a lot in rallying to prevent problems when sumps get hit by rocks etc.
Posted

Old Timer
1980 Series 1 GTI (gone now .. what a mistake selling her!)
1979 Series 1 LD - the Mandarin Dragon … gone as well. oh dear.
1979 Series 1 LD - the Mandarin Dragon … gone as well. oh dear.
Posted
Settled In
Whats TSR's work like if you dont mind me asking? They worked on my car 10 years ago (before my ownership)
Really want to PD130 my cabby.
Rich.
Posted
Old Timer
RICH234GHA said
Love the build so far,
Whats TSR's work like if you dont mind me asking? They worked on my car 10 years ago (before my ownership)
Really want to PD130 my cabby.
Rich.
So far the work by Tsr seems ok. There have been a couple of petrol leaks along the fuel line which I sorted out, but will get them to re-check everything once it goes back to be fully tested. Will ask them to look at where the fuel line is positioned on the bulkhead as it is a bit too close to the turbo for my liking
 There is also a slight leak on the clutch pedal for the hydraulic clutch which needs to be looked at too.
Hopefully it will all get sorted the next time it goes down to be checked !!
Ad.
Posted
Old Timer
I used a p80 flap wheel on my drill first and then onto p120 , p240 on my b&d mouse. I then had to do the rest by hand and went p400 , p600 , p800 , p1000 , p1200 , p1500 , p2000 and p2500.
I then polished up using black , green then white compound on the correct wheels followed by some vienna lime. Finished up with some meguiars metal polish with the dremel.
Any body know any better way as to remove the faint scratches as I have to re-do the other guide.
Cheers !!
Bag.

Posted
Settling In

Baggie82 said
Had a go at polishing up the window channel guides yesterday as i bought a bench grinder with polishing kit. The guide on the left was my first attempt when i didn't have the grinder and didn't go up the grades with the sand paper properly. The guide on the right is the one i did yesterday on the grinder. There are some very faint scratches on it but not that noticeable compared to the first attempt.
I used a p80 flap wheel on my drill first and then onto p120 , p240 on my b&d mouse. I then had to do the rest by hand and went p400 , p600 , p800 , p1000 , p1200 , p1500 , p2000 and p2500.
I then polished up using black , green then white compound on the correct wheels followed by some vienna lime. Finished up with some meguiars metal polish with the dremel.
Any body know any better way as to remove the faint scratches as I have to re-do the other guide.
Cheers !!
Bag.

the car is looking good mate….keep it up….doing the same swap but been so lazy…loooool…its looks and sounds amazing
Baggie82 said
Had a go at polishing up the window channel guides yesterday as i bought a bench grinder with polishing kit. The guide on the left was my first attempt when i didn't have the grinder and didn't go up the grades with the sand paper properly. The guide on the right is the one i did yesterday on the grinder. There are some very faint scratches on it but not that noticeable compared to the first attempt.
I used a p80 flap wheel on my drill first and then onto p120 , p240 on my b&d mouse. I then had to do the rest by hand and went p400 , p600 , p800 , p1000 , p1200 , p1500 , p2000 and p2500.
I then polished up using black , green then white compound on the correct wheels followed by some vienna lime. Finished up with some meguiars metal polish with the dremel.
Any body know any better way as to remove the faint scratches as I have to re-do the other guide.
Cheers !!
Bag.
Posted
Settling In
Posted

Settled In
Beautiful colour choice!
Posted
Old Timer
Had a go at the electric window kit today that i bought from crazy quiffs last year but i don't think that its correct as the regulators are sitting virtually at the top of the door !!
 it is one of the electric life kits , so if anyone has fitted this can you give me a heads up whether it is correct or not. I presume it's wrong !!


Also had a quick go at trial fitting the rear coil overs as I still need to buy new top mounts. If you could take a look at it for me and tell me if i've fitted it right i'd be grateful !
rear beam lowered while still jacked up with no wheel fitted

Inner top mount

wheel on and dropped back to the floor

fitted and lowered


also got some bolts for the roof brackets so I can now lock the roof to the body. Don't think i should have such a big gap on the top of the window though ? I've just pushed the roof seal on and glued it yet.


Bag.
Posted

Moderator


Posted
Old Timer
just need to get new top mounts then i'll crack on with them.Bag.
Posted
Old Timer

These came in the post today
set of eibach anti roll bars . Picked them up for a bargain price too , which i was happy about Just waiting on new lower arms and all of the clamps from crazy quiffs to arrive now so I can get cracking with them.
In the mean time i've managed to get my heater blower working again with a bit of wd40 on the seized washer on the back of it. And i've just been messing around with the warning lights (indicators , full beam ) that i need to fit. will get some more photos on thurs.
Bag.
Posted
Moderator
If you haven't already don't go for the OEM style rear outer brackets as they're an absolute pi$$er to fit. There's an alternative on eBay which works much better.
Posted
Old Timer
0 guests and 0 members have just viewed this: None.