Carburettor base flange Keeps "tearing"
Posted
#1675519
(In Topic #243298)
Newbie

I'm hoping I'm making a mistake somewhere that can be pointed out by someone with experience
The base flange for my pierburg 2e has a crack on the side opposite the ait intake.
The details:
I have replaced it twice now and was assuming it was due to my overtightening or due to some weight distribution issue with the air filter but I said I would ask and see if anyone has experienced the same issues of can see my mistake.
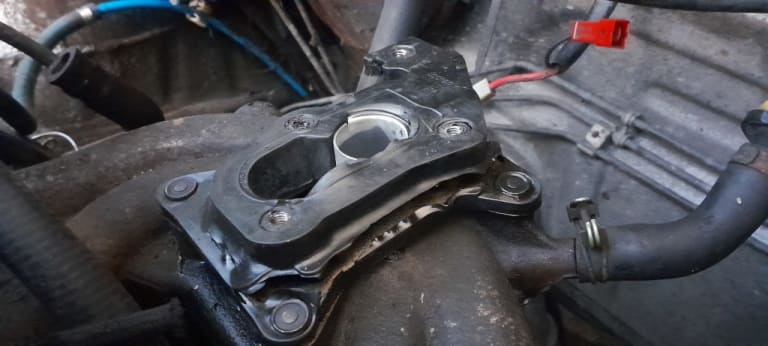
Above I attach an image of what the worst example of the base flange tearing looks like.
I have gotten about 300 miles out of it before any damage starts to show after each replacement so far.
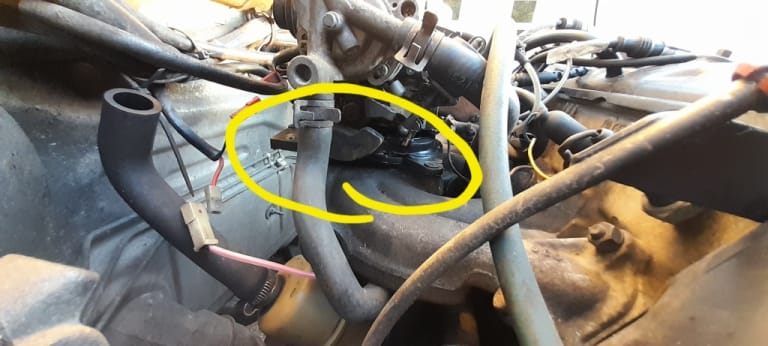
This image then shows the carburettor base flange without the air intake on top. This side does not tear at first but once the other side becomes bad enough, this one gives way also.
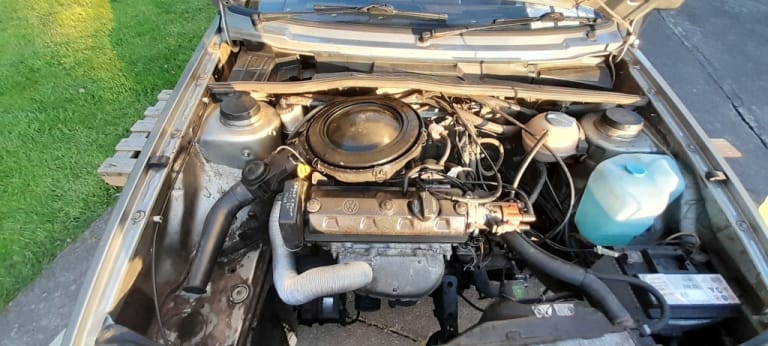
This image shows the air intake all fitted back on. My original assumption was that the lopsided nature of this was casing the issue. I have not been able to prove this so maybe if someone could provide advice from there experience.
And this video shows how much the system shakes when you start up. I don't think this is the issue but I provide it as a reference incase it is.
The base flange part I have been using is this one, incase that is my issue.
https://www.heritagepartscentre.com/uk/052129765e-carburettor-base-flange-for-1-3-engines.html
Any advice appreciated.
And the car is a 1.3 Golf Mark 2 CL registered in 1990
Thanks

 Last edit: by Beautysleep
Posted
Local Hero

as the carp sits over the exhaust, I would say to shield the intake from the Exhaust, reduces heat fatigue.
I would also ask about the base of the Carb as is it flat or curved or warped, then you may want to check the base of the carb for Square as well as the base of the intake that it too is flat, square and not warped.
I will say that I am used to SU carbs, and webbers and carter carbs on american autos or all shapes sizes and hp displacements. Once upon a tine I was asked my opinion, and I said gimmee a minute and well the base mount of his intake wasn't square or flat.
If it is curved as the design then does the Carb seat correctly without rocking before you bolt it down, annd are you using the proper torque when tightening, as VW was usually specific to torque limits of things…Can't knuckle tighten things or elbow torque.
What do Divorces, Great Coffee, and Car Electrics all have in common?
They all start with GOOD Grounds.
Where are my DIY Links?
They all start with GOOD Grounds.
Where are my DIY Links?
Posted
Newbie

I'm confident the four surfaces were flat and meeting each other well and there was no rocking but I didn't inspect it very very closely so I'll check that thanks.
And Ill ensure to use the torque next time after checking the surface is flat.
I'll update once I know more
Posted
Settled In

Posted
Newbie

I had time today to look into it.
TL;DR: I added some washers to some bolts.
I thoroughly cleaned the surfaces of the manifold and base of the carburettor with white spirits to be sure I could see it all ( as some small amounts of old rubber had melted on )
As directed, using the pane of glass as my flat surface I could identify no serious gaps or "warped-ness" between the surfaces.
I would say that the base of the carburettor and the "receiving face" (dont know the name) of the manifold are entirely flat. Or as flat as I can imagine.
*** Speculation ***
While reviewing the parts, I had been concerned before that the three bolts which run down through the carburettor into the base flange were in fact "a tad long"
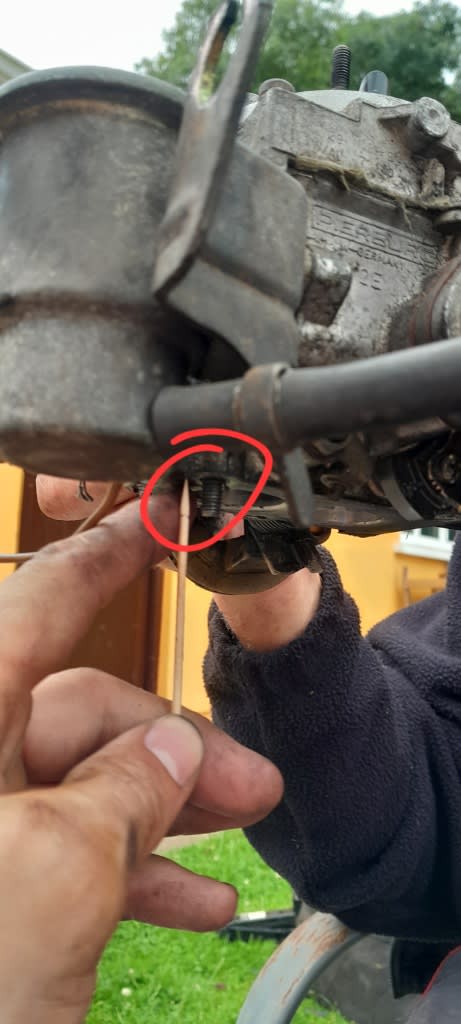
This bolt here in particular sticks out 9 to 10mm.
The other two bolts stick out 7 to 8 mm.
When I say a tad long I mean that, perhaps they run down into the base flange too much and push the lower section away from the upper section.

Here I show the "upper" and "lower" section of the base flange cut apart.
While looking for evidence of my concern.
I was able to ran the three long bolts about 15mm into this base flange (while it was still whole) and completely distort the shape (no shock there).
But even anything more than 8mm of insertion forced the "lower" and "upper" section to "start" to separate. (Based on watching the rubber move)
After this I cut the two surfaces apart to allow me to see the "upper" section on its own to be sure and measured the "max" length the upper section would accept before protruding out the other side. I found it to be 5-6mm

Having been able to see that MAYBE the bolts were a tad long I have added additional washers atop the carburettor to reduce how far in the bolt can go, into the "upper" layer of the base flange.

I used a torque wrench set to 10NM for all bolts based on the 7th and 8th last lines on the above sheet and made sure to tighten them up evenly.
I expect I won't know more for 300 plus miles so I'll have to update on the status in a month.
Any other suggestions in the meantime will be appreciated.
🤞
Posted
Settled In

Posted
Newbie

TL;DR: There is a small tear visible in the same location as previous times. I'm sad.
At this stage, we have covered 400 miles, and I was optimistic that the issue had been resolved, but there again appears to be the beginnings of the same issue as before. I will update more when I have time to investigate.
Posted
Local Hero

Beautysleep said
UPDATE STATUS: UNRESOLVED
When I say a tad long I mean that, perhaps they run down into the base flange too much and push the lower section away from the upper section.
Seen that happen before.
What do Divorces, Great Coffee, and Car Electrics all have in common?
They all start with GOOD Grounds.
Where are my DIY Links?
They all start with GOOD Grounds.
Where are my DIY Links?
Posted
Newbie

On the other hand, the problem could also be down to poor quality "rubber" or faulty manufacture on the latest production batch, but unfortunately there seem to be only a few brands still supplying this part and it's a bit of a lottery knowing which would be best.
VW Classic Parts in Germany sell an "aftermarket quality" version of this flange which you might expect to be the best available quality, but in my experience their prices for the aftermarket parts they sell are way more than charged for the same brand by other major online retailers. The photos also don't necessary match the item they currently supply:
https://www.volkswagen-classic-parts.com/catalog/en_uk/part/052129765E
1992 VW Scirocco GT II 1.8 90 PS 30k
Posted
Newbie

I will review and compare the current base flange to see if there are indentations where you have pointed them out.
I had noticed the same but couldn't tell if they were intentional or not, they seemed so perfect and even :/
Regards, the poor-quality rubber, I have ordered the part from a different manufacturer so we can see if that moves us forward.
This is the new part I chose: https://www.auto-doc.ie/aic/16109569
This one is the "AIC 51797 Flange, carburettor"
where all previous versions were the "TOPRAN Flange, carburettor"
A follow-up question for clarification:
This may show me to be an absolute idiot but,
Am I right in saying that the "Fifth" threaded hole is not utilised on the "Mark 2 Golf CL 1.3 Liter Carburettor, Registered 1990" ?
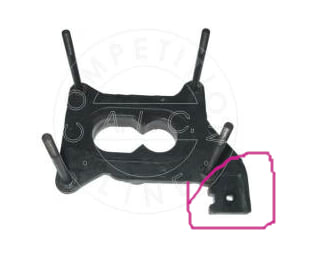
When I originally identified the issue and removed the Flange for replacing, this "Fifth" threaded hole was not in use and I couldn't see how it would be used so I imitated what had just been removed and ignored it.
Can anyone share their experience on this "extra threaded hole" to confirm or disconfirm this?
There are too many online users to list.


