


brad mole's mk1 golf project

Posted
Settled In

brad mole's mk1 golf project
mk1 golf - resto
mk3 polo breadie - daily banger
mk3 polo breadie - daily banger
Posted
Settled In
Posted
Settled In

Dave
Posted
Settled In
Posted
Local Hero

Stunning colour, looking forward to pics as you build it up! :punk:
Posted

Old Timer

Cant wait to see it when its all built up
Steff
I saw a crinkly peanut tomorrow
Posted
Settled In
 but heres a small update
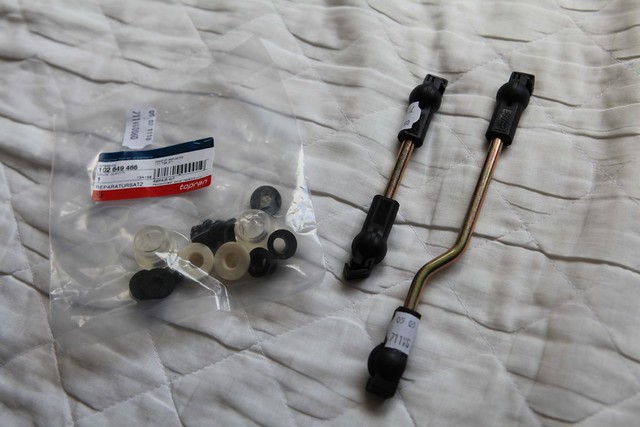
i bought some bits and pieces, splitter, dash trays and new steering rack boot, then cleaned them all up nicely
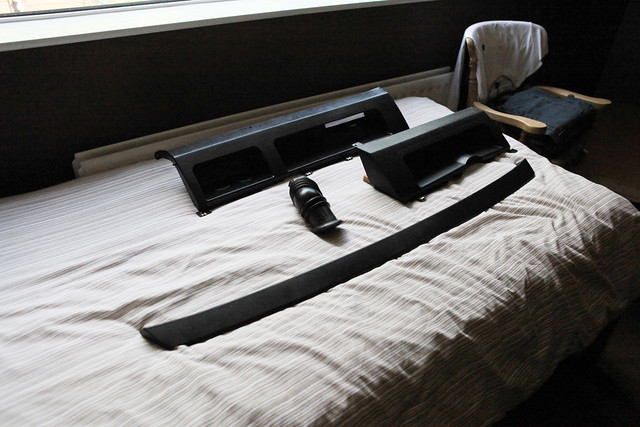
mk1 golf progress by bradmole, on Flickr
cleaned and painted my gear linkage (need a bush kit)
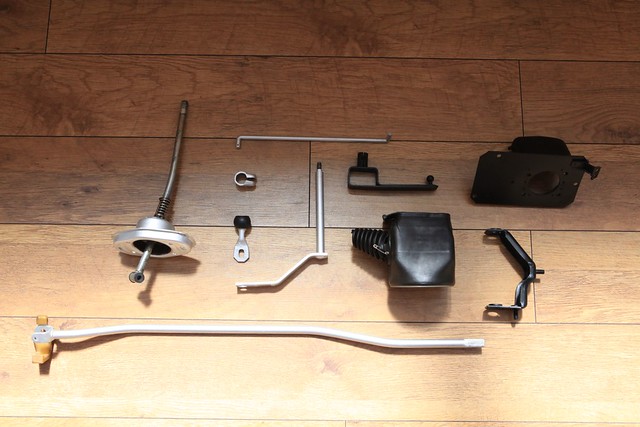
mk1 golf progress by bradmole, on Flickr
bought some new latches too as mine were broken, give these a quick polish up, they arent amazing but will have to do for now until i can try painting them
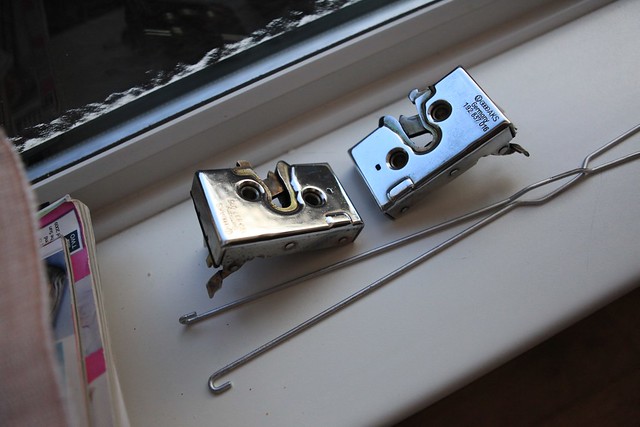
mk1 golf progress by bradmole, on Flickr
started on the block, eventually, not far from getting to paint, but its been an absolute nightmare

mk1 golf progress by bradmole, on Flickr
mk1 golf progress by bradmole, on Flickr
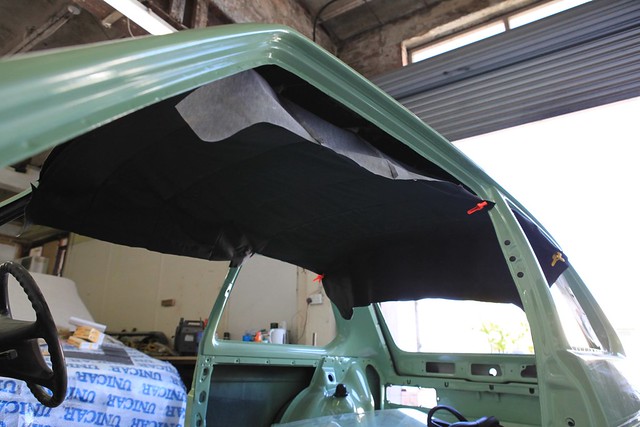
and today i started trying to fit the headlining, not fun at all, im going to do it in a few stages and not rush it so i only doen the front lip today (worst pic ever, i forgot my camera)
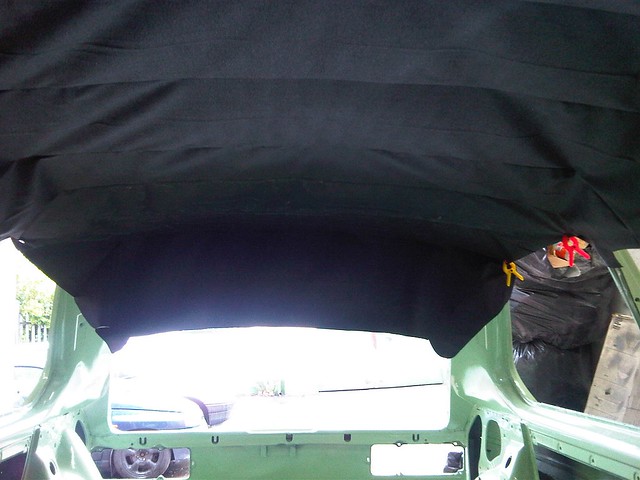
mk1 golf progress by bradmole, on Flickr
26 days left until i want it on the road
Posted
Old Timer
 im goin abroad for just over 2 weeks 2day so wen i cum back this should be nearly finished, ill be checkin it out wen im back
Posted
Old Timer
can't wait to see the next updates.
Madone with the two Cabs 82 (UK RHD) and 85 (US LHD) (92 sold)
Posted
Old Timer

GavB95 said
If you give the rear lenses a couple of coats of clear lacquer then you can flat them off and buff them up to a nice shine rather than the satin finish (they will last a bit longer too as the tint spray slowly fades in sunlight).
Stunning colour, looking forward to pics as you build it up! :punk:
I would defo agree, a coat or 2 of clear makes a huge difference. And use a good quality clear, I have some VW clear and some Halfords clear and have learnt the hard way that Halfords is useless.

Posted
Settled In
Posted
Settled In
daveformale said
Did you use the e-tech light tinting spray bud? Its the only one on ebay :dontknow:
yeah thats the one mate, it says to do light coats, but thats what i tried the first time i used it and i ended up using a full can and having pink lights, so this time i done heavier coats and ended up with red lights and a small amount spare, after 6 or so coats
Posted

Local Hero
cheers mate!

Weber,ATS,Apex,Ripspeed,Supersprint,K&N MOMO..tbc
Posted
Settled In
brucieboy said
mate, what camera you got? the pics are lush! can always tell if the good camera is being used, you look like u know what youre doing with it too! the refurbed parts are lookin epic mate really well done! i cant wait to see this coming together! do you refurb them all yourself? how long does that drill attachment last you? did you use that for removing old paint from the brake servo for example?
cheers mate!
thanks man,
the camera i use is a canon 5d mkII with 24-70 f2.8 L lens, bit of a pricey piece of kit to be throwing about getting dirty when doing a mk1 project, but i dont have a compact camera so this is getting abused fr the project, i suppose good pics make a more interesting build though so its all worth it.
yeah ive been refurbing everything myself, a bit of an OCD kinda guy, as ive stripped it and had it painted, i wanted to clean EVERYTHING up before putting it back ont he car, the job is not amazing on my refurbed bits, but its certainly good enough for me for now. but as my deadline is closing in fast, some things arent getting the attention they would have if they were done at the beggining, but the most important pieces are already done i suppose.
as for the wire wheels, ive got various ones, around 5 in total, and they have all lasted pretty well, and only cost around £5 each so well worth it, i will get a picture up of them when i think on. Basicly i use them to strip paint and grime off things, then if need be use some sandpaper too, but most of the large areas are done with the drill attatchment wheels. Just gotta be careful on certain things as they dig in and grind marks into soft metals, especially if too much pressure is applied. but yewah these attatchments ive got have lasted the whole build and are still in decent condition, i think only one has worn out
Posted
Settled In
mk1 golf progress by bradmole, on Flickr
got myself a new gear linkage kit
mk1 golf progress by bradmole, on Flickr
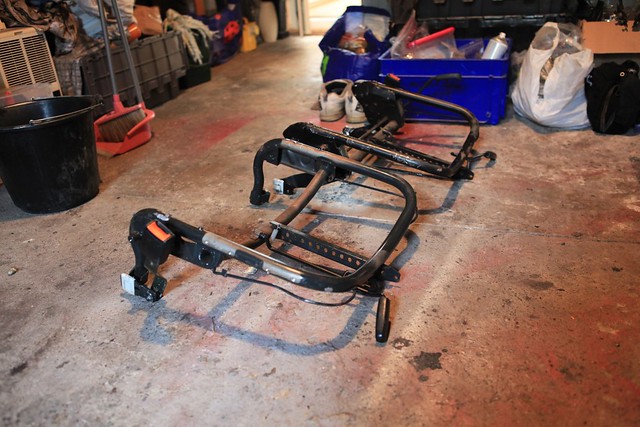
started on the subframes for the recaros, got some old mk1 seats
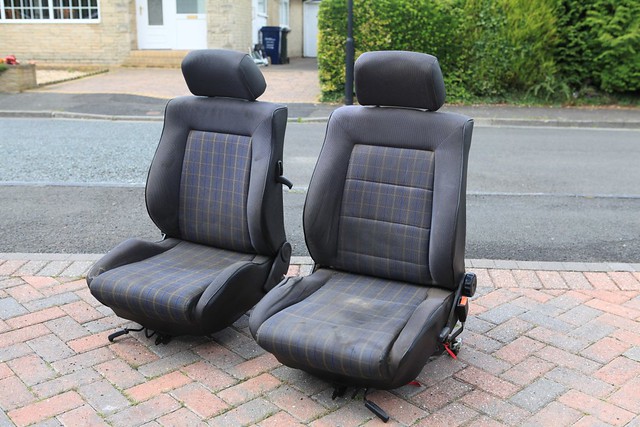
mk1 golf progress by bradmole, on Flickr
10 mins later and we have subframes

mk1 golf progress by bradmole, on Flickr
looks like they are going to take a bit of cutting and welding to fit
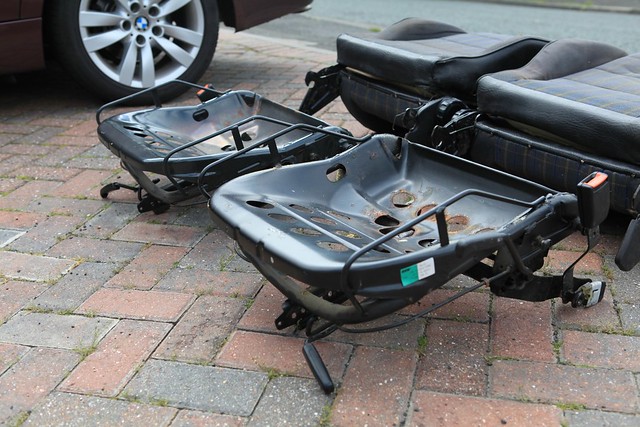
mk1 golf progress by bradmole, on Flickr
boot hatch on
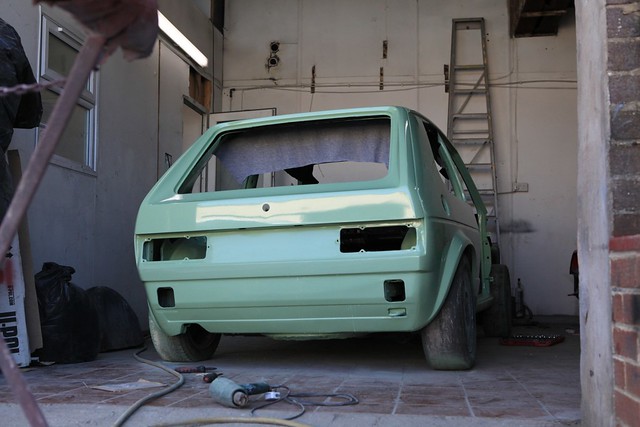
mk1 golf progress by bradmole, on Flickr
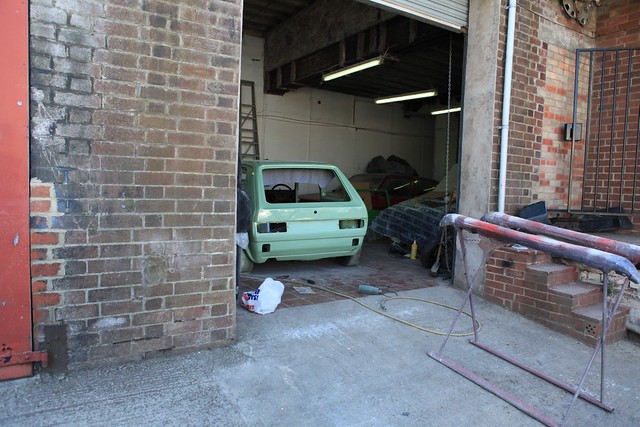
mk1 golf progress by bradmole, on Flickr
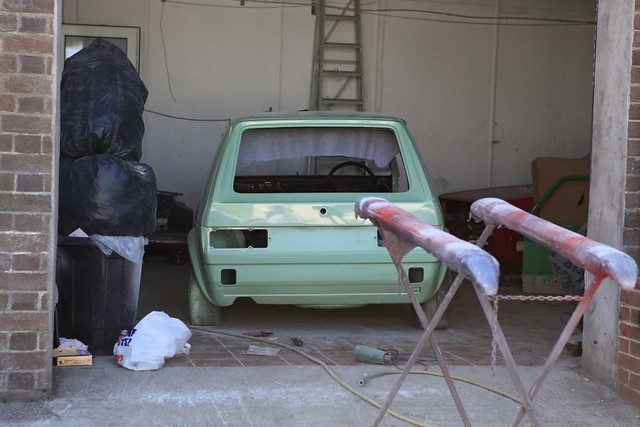
mk1 golf progress by bradmole, on Flickr
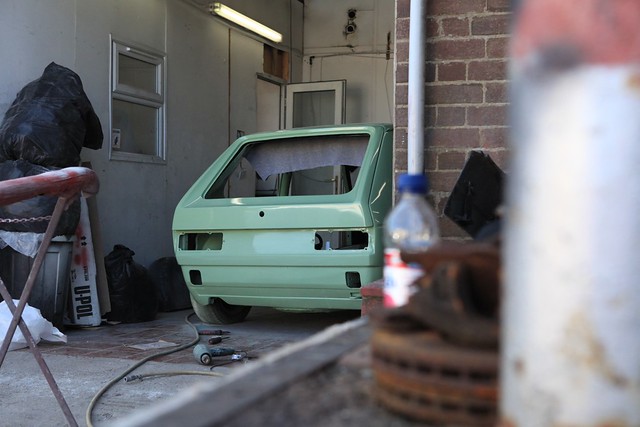
mk1 golf progress by bradmole, on Flickr
steering rack and wiper mechanism in
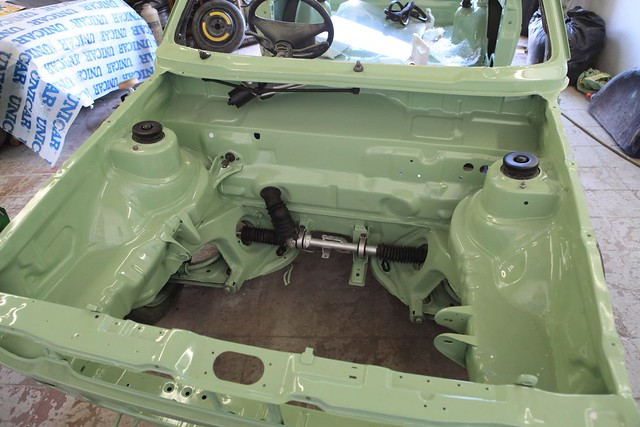
mk1 golf progress by bradmole, on Flickr
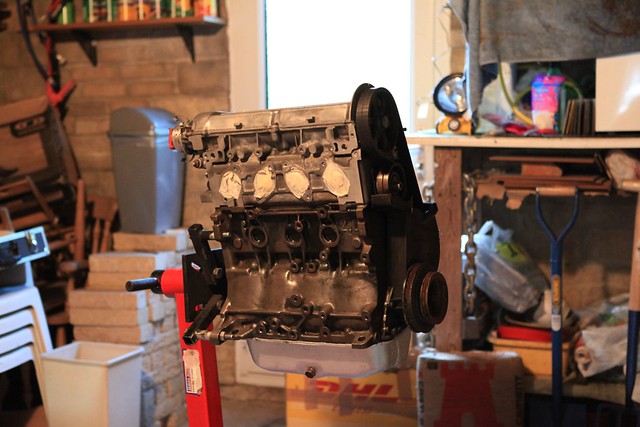
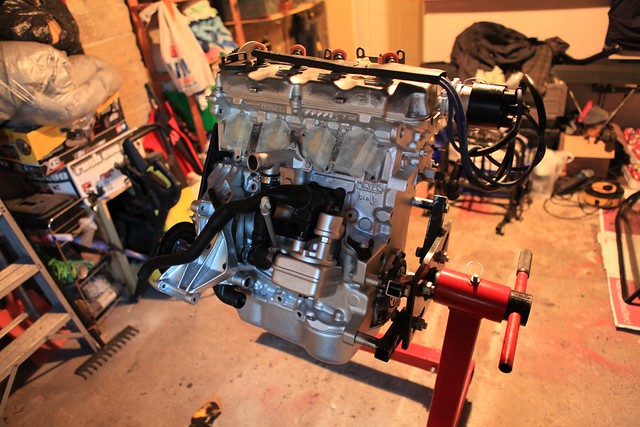
engine before
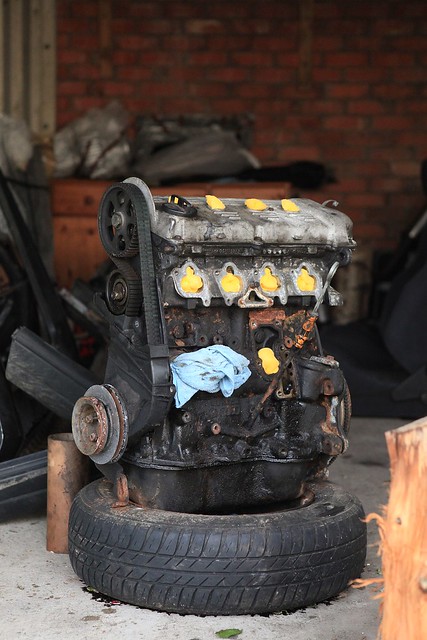
mk1 golf progress by bradmole, on Flickr
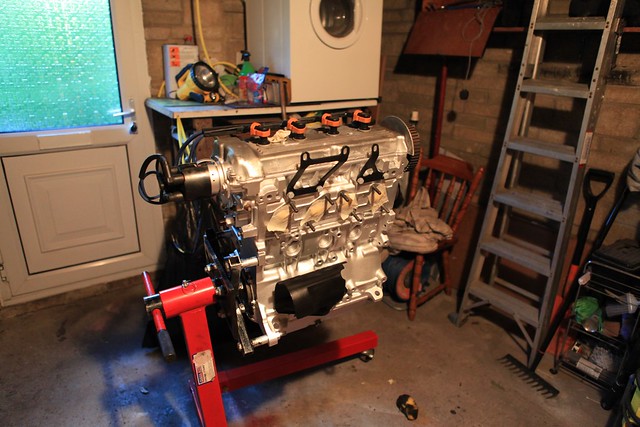
and after
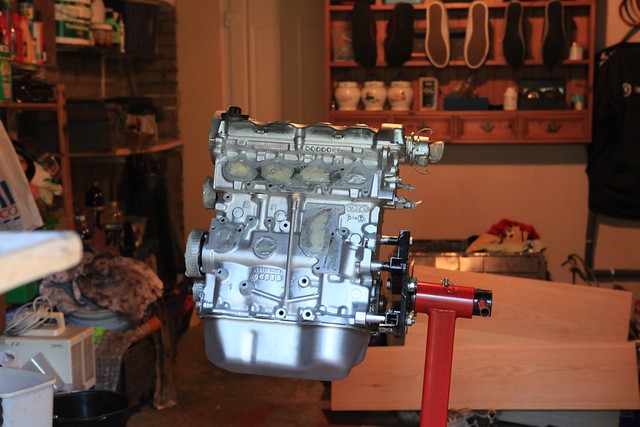
mk1 golf progress by bradmole, on Flickr
Posted
Settled In
vw a way of life
Posted
Settled In
http://www.frost.co.uk/automotive-paint/engine-enamel-paint.html
Posted

Old Timer
Posted
Settled In
car definitly wont be done for VW fest now and may only just be roadworthy by edition, but im thinking positivebought some gaskets
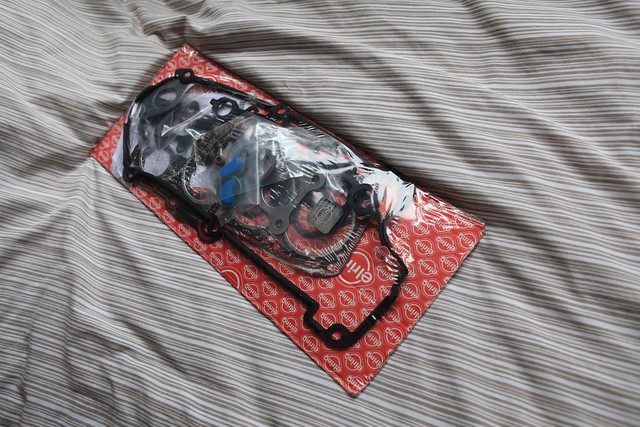
mk1 golf by bradmole, on Flickr
and more, along with some new nuts and bolts
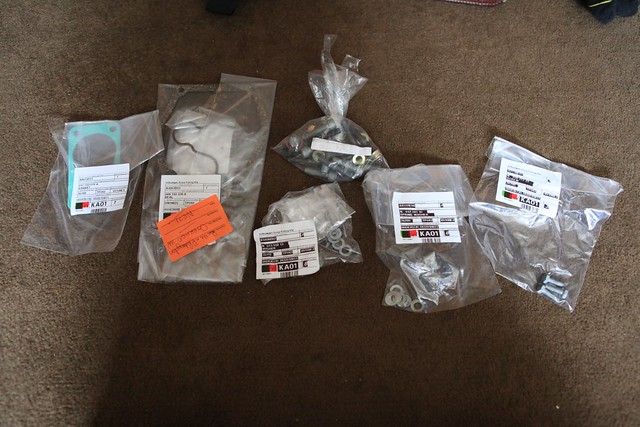
mk1 golf by bradmole, on Flickr
fitted some bits to the engine
mk1 golf by bradmole, on Flickr
mk1 golf by bradmole, on Flickr
painted my spare rocker cover satin black
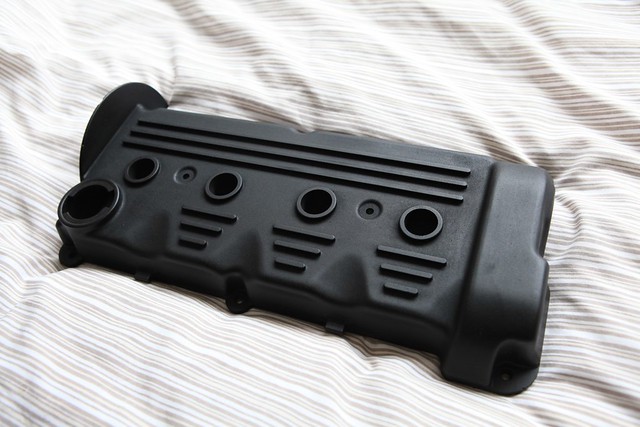
mk1 golf by bradmole, on Flickr
chopped some more off the subframes
mk1 golf by bradmole, on Flickr
fitted the MOT lights
mk1 golf by bradmole, on Flickr

mk1 golf by bradmole, on Flickr
Posted
Old Timer
0 guests and 0 members have just viewed this: None.