


Project BBQ aka Up the middle Finger! - Jins '83

Posted
Local Hero

Project BBQ aka Up the middle Finger! - Jins '83
Nice work with the corsa rack. how does it feel to drive?
My Build Thread
All My Build Photos - https://www.flickr.com/photos/pix-al/albums/72157622794406840
My other hobby - www.pix-al.co.uk
All My Build Photos - https://www.flickr.com/photos/pix-al/albums/72157622794406840
My other hobby - www.pix-al.co.uk
Posted
Settled In


PAS feels good, but only had the length of my road to play with so i'm eager to know how it handles at higher speeds too…parking on the otherhands a whizz

Mk1'83 G60
Mk1'82 2.0L 8v
Mk1'93 GTI Sportline
Mk1'82 2.0L 8v
Mk1'93 GTI Sportline
Posted

Local Hero
Do you still have the old buckets seats from olly's car, as I have a mate who might be after one for his race mk2.
Posted
Settled In
James_W said
Jinsta
Do you still have the old buckets seats from olly's car, as I have a mate who might be after one for his race mk2.
I still have them, but gonna knock up some frames and stick them in my 82 tinny when i'm done tinkering with this one - will def giv you a shout if plans change :wink:
Mk1'83 G60
Mk1'82 2.0L 8v
Mk1'93 GTI Sportline
Mk1'82 2.0L 8v
Mk1'93 GTI Sportline
Posted

Settled In
where did you get the door rubbers from they look new? im in need of a set for each door..
nige
Posted
Settled In
Dubboy402 said
u r the man with the power steering.
where did you get the door rubbers from they look new? im in need of a set for each door..
nige
Hey Nige, the inner sill/door surround ones still in decent nick so had a quick clean and a squirt of wd40 and just re-using, main door ones & boot one were bought new from the CrazyQuifs team last GTI Int - I still need to source the thin secondary outer door ones :detective:
Mk1'83 G60
Mk1'82 2.0L 8v
Mk1'93 GTI Sportline
Mk1'82 2.0L 8v
Mk1'93 GTI Sportline
Posted
Settled In
Posted
Settled In

Cut up one of those industrial sacks into a nice door liner and strapped on some newton mershy door cards - bit too nice to chop up so front speakers outa the q now:


Swapped out rear suspension and stuck in a upper brace:


Although new, really wernt feeling the plastic flags and these popped up at a decnt price and mmmmm shiney:


Cars kinda pieced well enough to move onto other areas, so decided to join the G family and gots me one of these:

Shout to Rits whos been playing self storage with this for a while, but now its home will give it a bit of TLC…


Just the start of the conversion really…so roll on the sunny days!
Mk1'83 G60
Mk1'82 2.0L 8v
Mk1'93 GTI Sportline
Mk1'82 2.0L 8v
Mk1'93 GTI Sportline
Posted
Settled In
Posted
Settled In
charliem said
really good read, nice work
Cheers Bud :wink:
Mk1'83 G60
Mk1'82 2.0L 8v
Mk1'93 GTI Sportline
Mk1'82 2.0L 8v
Mk1'93 GTI Sportline
Posted
Settled In

Seeing as i didnt have either….was a liitle stumped on how i was actually gonna secure em down, but like everything you need, eBays got the answer! Went through most the car related items and found nowt, so expanded my search to boating, winching and finally got what i wanted from somthing climbing gear related
The triangle bits fit snug over the harness end and good for 40KN so more then safe and the eyebolts are 23mm 7/16 thread so fit snug on the rear upper seatbelt points = job done!

The G60 lumps not done nowt seen the last picys, but thought best to crack on the preperations under the bay. First up was saying bye to this bad boy:


Need all this out:

175K strong and still puts a smile on me face!

Job done…..

Although the looms gonna get chopped, i labeled all wires i took off the lump to help later on and before the lump went for storage, ripped off the flywheel/clutch and stock gearbox and the all important timing belt side mount.
I didnt write this, so wont take any credit (Sure Paul H did), but found it very useful so heres how to get this far…
- Disconnect the battery and remove from the
car
- Remove radiator and all pipework
- Disconnect the pipes that connect to heater
matrix/near the bulkhead
- Disconnect all the wiring and earth straps from
the engine.there is a large earth on gearbox
mount.
- Disconnect the speedo cable and throttle
cable.
- Disconnect the gear linkage
- Disconnect the clutch cable.
- Unbolt all the 12mm fuel pipes off the metering
head and disconnect the fuel feed and return
be sure to mark which is which.
- Unbolt the oil cooler from the front panel but
leave the pipes connected.
- Unplug the pipe from the servo.
- Remove the metering head and airbox.
- Disconnect the starter motor and remove the
front engine mount.
- Get the car as high up as possible and support
it on axle stands.
- Go underneath the car and remove the
exhaust from downpipe.Remove the antiroll
bar and then unbolt the downpipe from the
manifold.you don't have to do this but I found
it easier.
- Unbolt the driveshafts and drop them down.
- Remove the rear gearbox mount.
- Support the engine on a hoist and then remove
the drivers side mount bolt and the gearbox
mount bolt
- Engine can be lifter/lowrered out
Mk1'83 G60
Mk1'82 2.0L 8v
Mk1'93 GTI Sportline
Mk1'82 2.0L 8v
Mk1'93 GTI Sportline
Posted
Local Hero
foxy
Posted
Settled In
foxymk1 said
do you want to sell your dad?
foxy
Def be worth a few bob on eBay :wink:
Mk1'83 G60
Mk1'82 2.0L 8v
Mk1'93 GTI Sportline
Mk1'82 2.0L 8v
Mk1'93 GTI Sportline
Posted
Old Timer

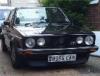
Madone with the two Cabs 82 (UK RHD) and 85 (US LHD) (92 sold)
Posted
Settled In

Posted
Settled In
There's quite a few mixed views and punch-up's on this, but I'm sticking with the good old '020' gearbox for the conversion.
Mines got a fair wad of miles on it, so I found a gearbox veteran locally and had it overhauled…were quite a few bits internally that got swapped out as seen better days and the diff rivets drilled out and swapped out in favour for some ARP bolts. Whilst off, couldn't resist a lick of Alu VHT Paint:


For the clutch side of things, managed to track down some new old stock from the states and bought a Sachs Power Clutch (Part numbers come up same as the Sporting kit mentioned here: http://www.clubgti.co.uk/forum/showthread.php?t=237089) - it should (fingers crossed) do the trick, but time will tell…bagged it for a silly low price so can def afford to give it a go!
The bay was the only thing on the car missing a new lick of colour so started on cleaning it up. I coulda woulda went fancy here and started to smooth bits, but running out of summer rapidly so wimped out and gone for a tidyup

Pulled as much of the wiring away as poss and tried some non toxic degreaser and a jet wash to get the grime off, but this did bugger…so out came the bucket, boiling water and fairy liquid! Used scourer pads to kill two birds with this one….took 30 odd years of dirt away and flattened back the old paint…few rubdowns later…ready for paint:


Luvly Jubly:

It does have a few runs here and there, but was more to do with the fact the paint had to be wasted off in one session…ended up getting a few more coats then needed, but all good…more than happy with the result!
With bay sorted, started stripping the block bit more as need to tackle the issue of surface rust
I don't know if this came from near the seaside or something, but had quite a fair bit of it on there and although i was going to just plonk it in, didn't seem right not to give it a tidy, so back to my favourite job….sanding! this took flipping hours of sanding/wirebrushing and swearing, but got it back to a nice state and gave it a lick of paint for protection/sex appeal.


The metal pipes and a few of the brackets that I removed were sandblasted down and were also given a new lease of life


With the block coming together, thought I'd lay out what was left to be fitted…..a few more bits then I thought really:

As the 020 is being used, the only mount that needs fabbing was the eng timing belt side one - with these being sold on ebay for hefty prices…I thought this was going to be tricky, but the plate removed from the side G60 block and the Mk1 bracket are already the same size and as simple as chopping off a section of the Mk1 piece and welding it st8 on top of the G60. Only thing to note with this is the rubber seal behind the G60 plate is discontinued from VW, so the orig has to be re-used…luckily it was in good order really…


I had to later grind a touch more down as was quite close to the puley, but in hindsight would just cut the bracket more….ney bother though as it was a minor to sort.

Thought I'd mention the crank pulley bolt too as this was a bitch to remove! Obviously being on a pulley the bugger will spin whilst your tryna undo it, but presumed grip pliers would surfice, but that didn't work. Prob a special tool for it, but improvised and made this….

It's a basic plate…big hole in the middle for the crank bolt and two smaller holes to bolt into pulley….this was then welded onto a pole…

Don't know why, but the G60 bolt is better replaced for a Mk1 GTI one so got it and a washer from VW (cuppa quid) and lock tighted it back in place:

Talking of bolts, on the back of the block you'll see there are some empty unused threads - thought I'd fill them up. As these haven't been before…I didn't want to risk cracking the block forcing new bolts in all the way so cut them back a touch so only needed the minimum number of turns to stay in place…


From that last pic, you can see the core plugs have been removed too…don't think these were that bad as took quite a bit of coaxing to get out, but cost nowt each so done these and the smaller side ones too…

More piecing the block together and near enough everything has had a good clean and tidyup and tried to use new bolts wherever I could. Also got a Gates PowerBelt timing kit, stuck on a vernier pulley I had lying about for the Mk1 (same fit)…cams staying stock so this wont offer any gain, but will allow a tweak on the power curve so may get a fiddled when RR'd.

VW still readily sell new timing belt covers so bought the set, but tbh….the bottom outer needed a bit of trimming to account for the new mount made…so coulda got away with using old one…still once on looks quite tidy:


You can just make out the throttle body painted up, but something I didn't know when split apart was the gasket for the left hand side is obsolete…therefore two rightys were needed with one requiring minor tweaking
Blocks pretty much sorted now and just needs the rocker finishing, gearbox and clutch bolted back on…oh and relocating the fuel lines in the bay…and then it's the fun job of getting back in without funking any of the paint up!
The other thing is sorting a new loom….

Its slowly getting there!
Mk1'83 G60
Mk1'82 2.0L 8v
Mk1'93 GTI Sportline
Mk1'82 2.0L 8v
Mk1'93 GTI Sportline
Posted
Settled In
Posted
Settled In
DanChave said
Loving the power steering write up man!
Thanks Bud! Planning on doing this again for my cabby at some point so thought best jot it down somewhere i couldnt loose it, terrible with paperwork :wink:
Mk1'83 G60
Mk1'82 2.0L 8v
Mk1'93 GTI Sportline
Mk1'82 2.0L 8v
Mk1'93 GTI Sportline
Posted
Settled In
With the lump out, thought it would be nice to fit one of those gear linkage kits, so replaced the lot and cleaned up the selector unall…

The mess on the floor is actually quite organised and thanks to Paul H, got my head round the wiring cutting and shunting, G60 sides sorted and so's the Mk1….but that's about as close to engine its got and will be getting back to it soon enough (Tell you what, being partly colour blind don't help here…shout out to Tim for being m walking colour chart)

Couple old rims and a board become the new workstation and its time to get the old GTI flywheel, Sachs Power kit and trusty 020 back together. All went quite smooth here then it was working out best way to get in bay without funking any paintwork…. went for the jacking up the car sky high, sliding lump under on a tray and hoisting back upwards/lowering car approach


Lovely Jubly, but had one casualty…the already quite frail steering column boot took a little knock and crumbled, prob bit overpriced but ebay to the rescue and who knew…its actually made of rubber LOL (old one was so hard it was like plastic)

Driveshafts were in good nick already, but gave them a little tarting and then got me some bits outa storage…285mm TSR Biggy Brakes, AP Coilovers and some Goodridge brake lines. Disks have some surface rust, but that will clear after a few mins driving, pads are Stuff of Green:


Noticed the little rubber was split/leaking on the passenger side trackrod end and seeing as I've never had to change it my ownership, thought best to just swap off both sides with new ones
So start with usual WD40 route…won't budge….hammer to loosen…won't budge…get blow torch out to heat it up….won't budge….more of all three and just about get movement. Due to the restricted space and size of the wrench (yep gone past grips as they were just slipping) I was just about getting a ¼ turn…ney bother thought it would just take bit longer then norm. After quite a bit of turning…still not seeing the thread come through! Decide to get the grinder out….end up scoring a few lines in and opening up with a chizzle….

Having done the track rod ends on my cabby last year and having the new ones sitting in front me…was baffled by this, just check the threading inside:

And er the 'thread' on the rod end…

Usual expected thread pattern (and actually on the passenger side too)

I did luckily had an old steering rack around, so ripped the gater off, undid the track rod arm section and swapped with me f'd one - driverside was a little seized but came off smooth after a bit of heat and force. New boots and ends fitted!
With the job done, was still kinda scratching my head with this really…so I stucky a post on the Mc1 forum to see if anyone else had this grief…and…erm…blush…there's a reason why most don't…turns out the wee bugger 'is' a f'ing fixed track rod end…duhhhhhhhh!

LOL - Live and learn I guess! In me defence none of me mk1s have a fixed end bar this one and they usually do get swapped out for the adjustable along their lives (Promise) :redfaced:
:mrgreen: Small things cheer me up and bought these….

One sets gone missing already as I stuck some the birds car and within a week they were gone - damn snakes and ladders enthusiasts :evil:
Next jobby was getting the stopping power working and decided whilst changing the servo out, thought might as well do the lines. Was lucky enough to borrow one of them crimping machines so set about bending me new lines:

Came out well, but schoolboy error here, bent all the lines to shape before crimping the ends…so had to straighten ends, crimp and re-bend back


Mc2 16v servo/master cylinder, mc3 Bottle (blanked off return or whatever its used for), original cap/sensor. MC had four inputs so each brake lines plumbed individually and you can just see the brake sensor off one of the rear lines on a 1male/2female connection
Few shots of the bay:


Just to the far left, the original fuel lines were gently forced to come up the left hand side…these will be trimmed shortly once fuely filters sorted
For touch more breathing, got one of these and gave it a dose of mostly shiny metal ties and heat wrap. Tried setting a piece alight, but it weren't having it…so good to know it does what it says on the tin. Have another one of these manis running on my cab and all the battle scars happen along the bottom section, so left that bit clear to take abuse and didn't wrap it


Nowt to do with me car, but saw these two on the side of the road and just had to stop to take a picy:


Thought I'd mock fit the charger on and then try and work out the piping to the cooler. Got the IC with the lump yonks back, but its off a VW LT/exact same spec/size as a Merc Sprinter one. Ubend in place and result is well er damn tight:


Couldn't join them first attempt, but been assured it will fit - Kinda in two minds with this IC, but it is about as thin as you can get and does look sweet with the top fill….but does mean battery hits the blooming exit side so that's going to have to go to the boot now….Ah well, another one for me list! :wink:
Mk1'83 G60
Mk1'82 2.0L 8v
Mk1'93 GTI Sportline
Mk1'82 2.0L 8v
Mk1'93 GTI Sportline
Posted
Old Timer
Ive gone the same route for gearbox 020 so sold me o2j box of the 1.8t but got a feeling I might need a few 020 spares lol
I changed plans and now the tintop is getting the rebuilt 1.8 gti with new kent cam and my the soft top ( my baby ) is getting the 1.8t…puts a smile on my face thinking about how those flies/bugs are going to sting on me face tearing up the a40/406 with roof down lol
Catch up with you soon mate
Regards John
85 Karmann GTI Cabby Black Edition
81 GTI Tin Top (1.8t "The Tarmac Muncher" )
81 GTI Tin Top (1.8t "The Tarmac Muncher" )
0 guests and 0 members have just viewed this: None.