


Mk1 Driver project VNT TURBO DIESEL

Posted
Settled In

Mk1 Driver project VNT TURBO DIESEL


Posted
Settled In
However yesterday was a breakthrough, the VNT controller, finally got it sorted and fully operational.
For those that dont know it's a circuit devised to control my VNT turbo using a servo motor, basically the servo motor opens and shuts the vanes on the VNT turbo, affecting it's gas flow geometry
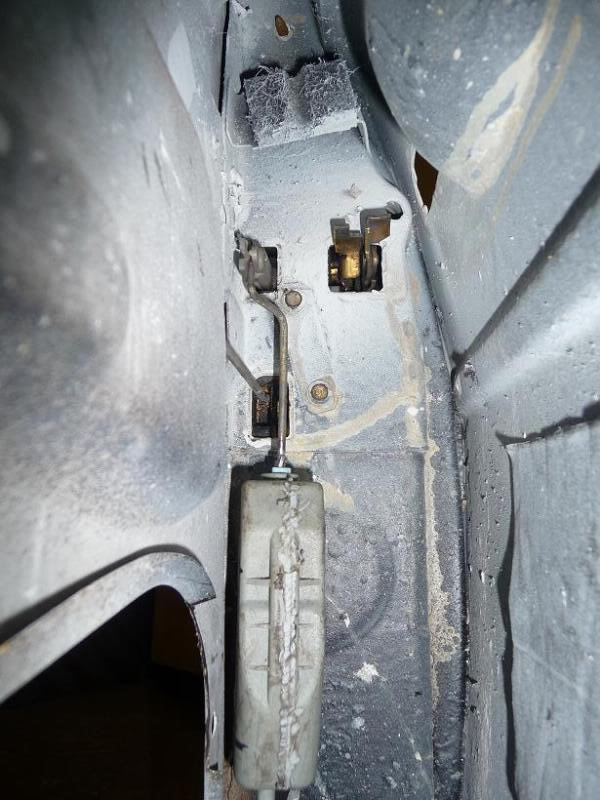
The linear pot in the forground is in effect the accelerator position and the syringe is replicating boost pressure - peaking at 28 psi
The revcounter has the boost gauge incorporated as a bank of LEDS, and also a status light (partially obscured by white wire)

So what happens in the video? I reach over and switch the power on, the servo unit cycles shut then open to check for stuck vanes, when this is complete, the status light changes to green and the unit is in it's run mode.
Any input from the accelerator is monitored and responded with respect to existing boost pressure, the nature of this response is tailored by a tuning factor entered in the program code.
Back actually in the car, I've been doing the fusebox wiring and adding an alarm, I bought a belting alarm, that comes with pukka flip keys with VW blanks - shame I wont actually need a key for the Golf….

I had a few central locking motors kicking about so it would be sensible to add central locking too.
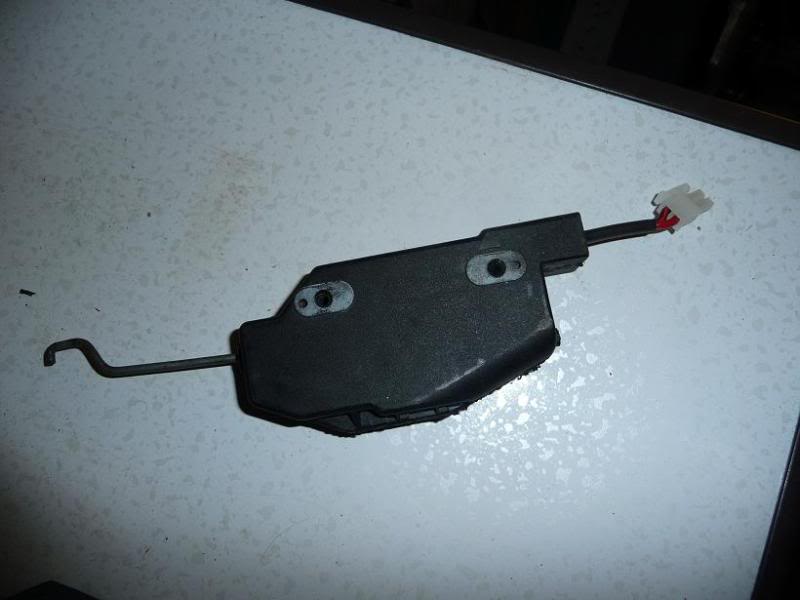
Problem was there were no electrical connections on the motors and the actuator rods were all wrong. I split the motors, swapped the rods from the mk1 in and soldered some wires direct to the motor to give a electrical connection

This shows how they fit up inside the door.
Another trick gizmo I have planned is keyless ignition, the required relays are up and working, just have to fit up the rest of the components.
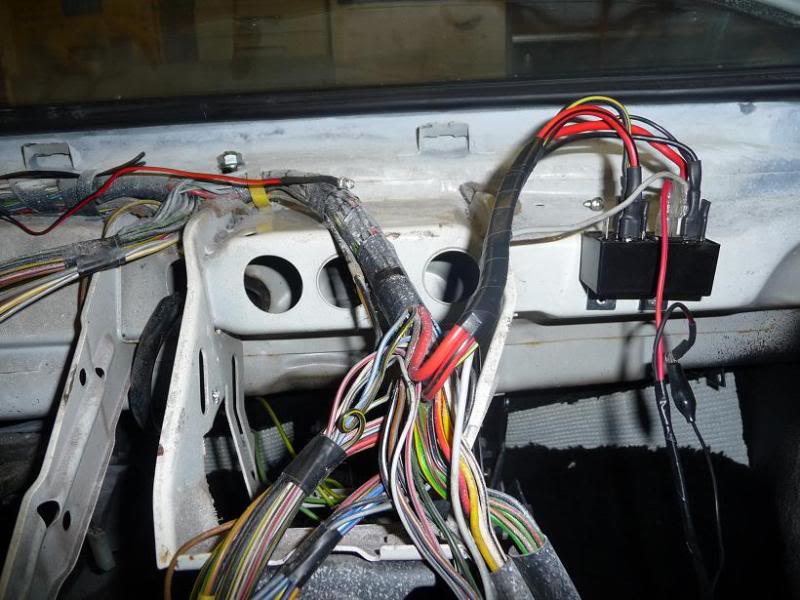
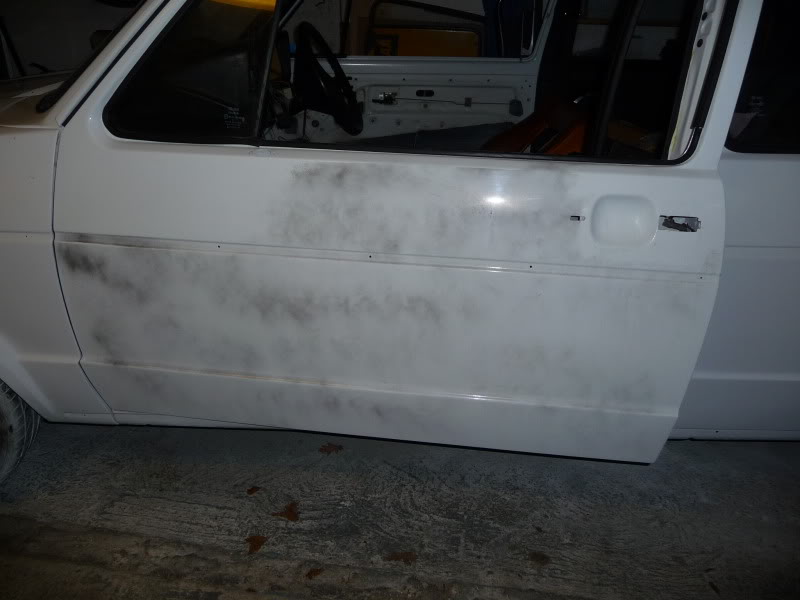
So there's a bit of an update, I've been doing loads of silly little bits mainly wiring related and have got a bit demoralised about the project to be honest. But with lights and stuff working now it's getting back on track.
Posted
Local Hero

Love the thumbs up at the end of the video too 8)
Rich
Posted
Settled In
I had a few central locking motors kicking about so it would be sensible to add central locking too.
Problem was there were no electrical connections on the motors and the actuator rods were all wrong. I split the motors, swapped the rods from the mk1 in and soldered some wires direct to the motor to give a electrical connection
This shows how they fit up inside the door.

Another trick gizmo I have planned is keyless ignition, the required relays are up and working, just have to fit up the rest of the components.

So there's a bit of an update, I've been doing loads of silly little bits mainly wiring related and have got a bit demoralised about the project to be honest. But with lights and stuff working now it's getting back on track.
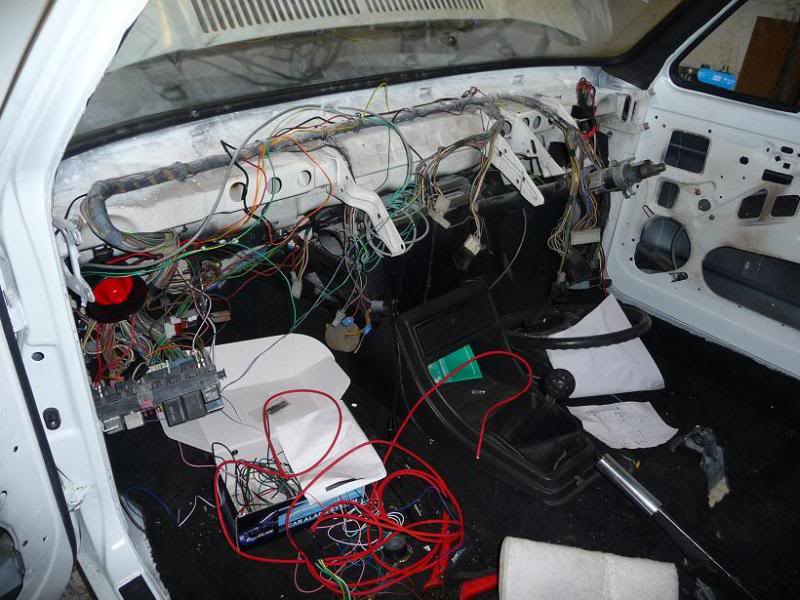
Well I've been doing 2am garage stints for a few weeks, and did a 3am this morning, even managed to remember to take some photos, not very good as the flash was reflecting off everything and without it, it was too dark
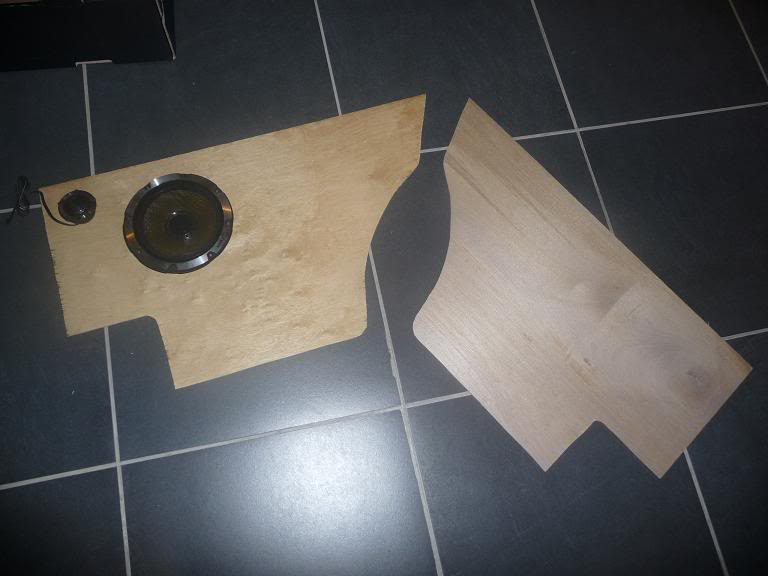
I also started some door card replacements
The missus was overjoyed to come home the other night to the smell of mr muscle and me busy in the kitchen, she was less impressed that instead of cleaning the kitchen I had a dashboard in there and had used most of her 'barry scott'
A bit of polish and it's transformed, from the manky thing I pulled out of the loft earlier, to a thing of beauty.
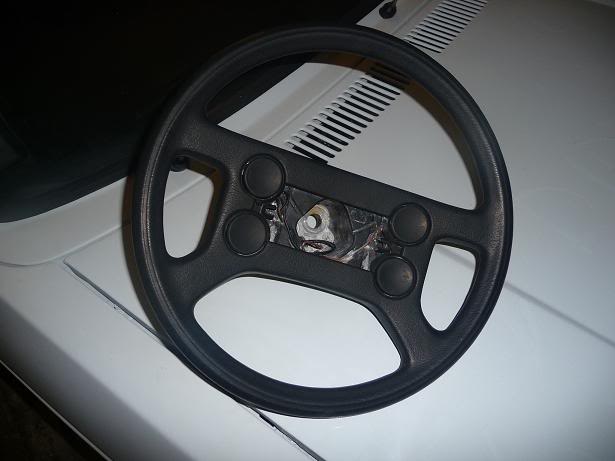
The flash on the steering column is the starter switch, I guessed at the size and it fits perfectly.

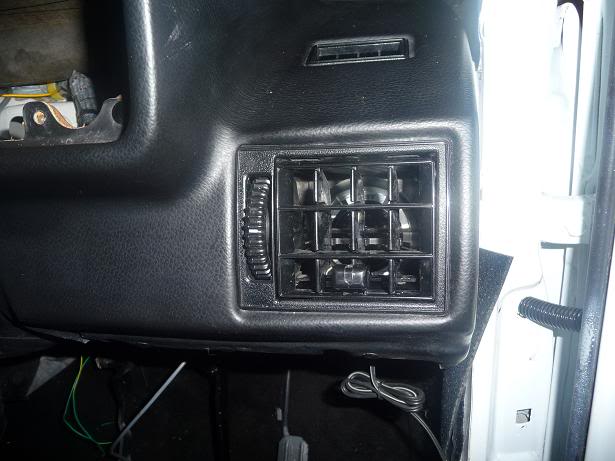
Notice that I've also installed the tweeters in the dash vents, that was simple, the tweeters were slightly smaller than the casing. I split a piece of spare silicone hosing down it's length to form a grommit strip and wrapped it around the edge of the tweeter. It was nice and snug fitting but I blobbed some rhino seal in there to be sure (exactly like tiger seal/sikaflex but doesn't set in the tube in a week)
I was thinking of running the tweeters as per the previous picture but test fitted the vent back in (with the flap gutted out)
works for me!
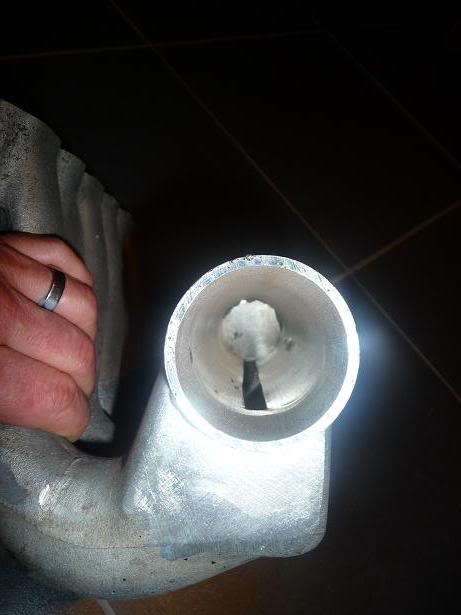
Remember the manifold I chopped up 12 months ago?
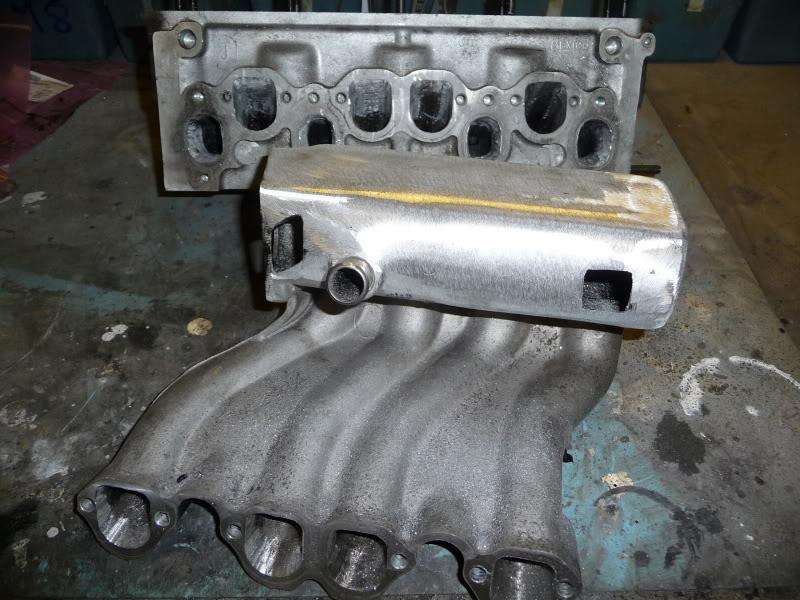
well it got dragged off the back burner, cut open and filled with various detergents and put on the wok burner!
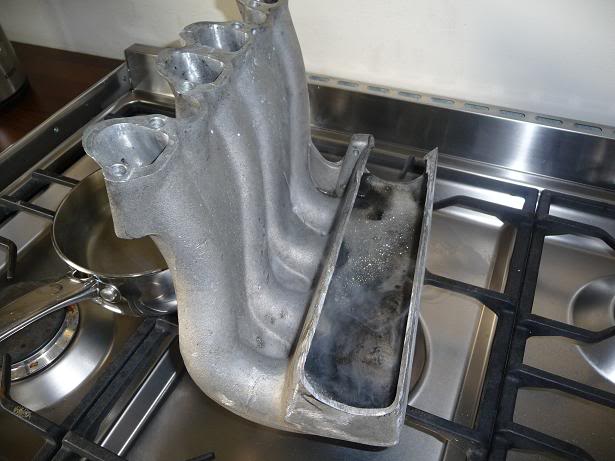
That shift all the clag out of the runners so I could get the bits welded on
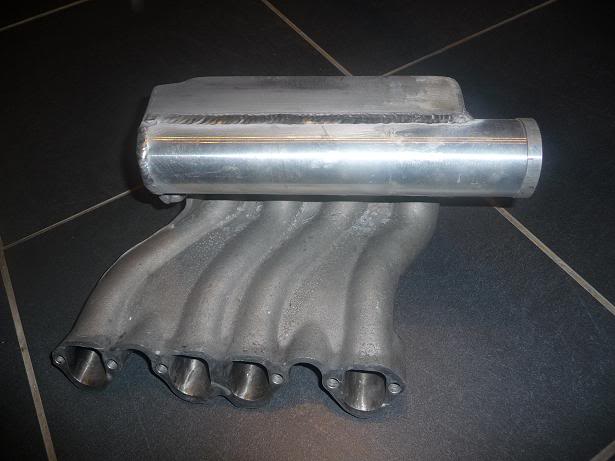
Duel plenum inlet to balance boost across the cylinders.
More card progress….

If you're a plank and believe that a carrier bag draped over the steering wheel is adequate masking and then it blows off mid-paint session but you don't notice.
Anyway my mint four button seemed ruined with white 2 pack - but a scotch pad soaked in thinner and elbow grease, a bit of work with a thinner soaked toothbrush, followed by some solvent cleaner then some plastic dye and it's pretty damn good.
While i had the camera, I just like this angle so took a pic
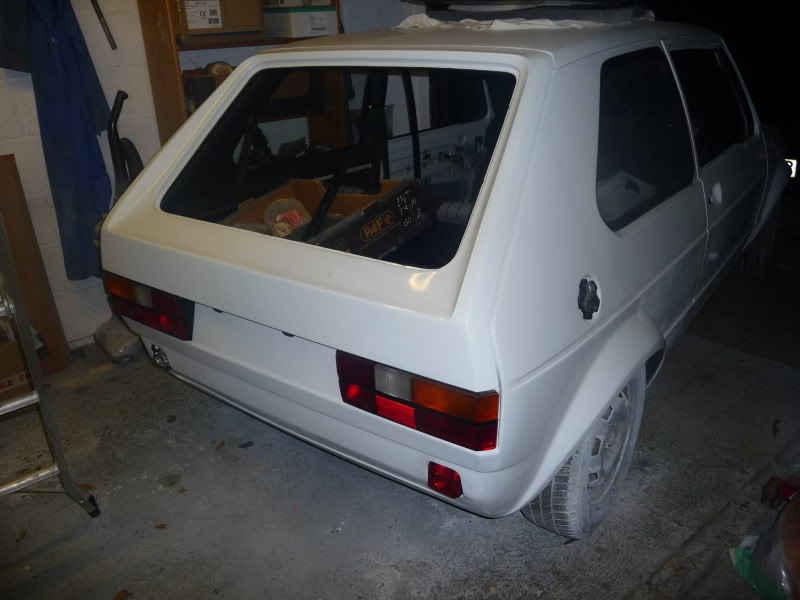
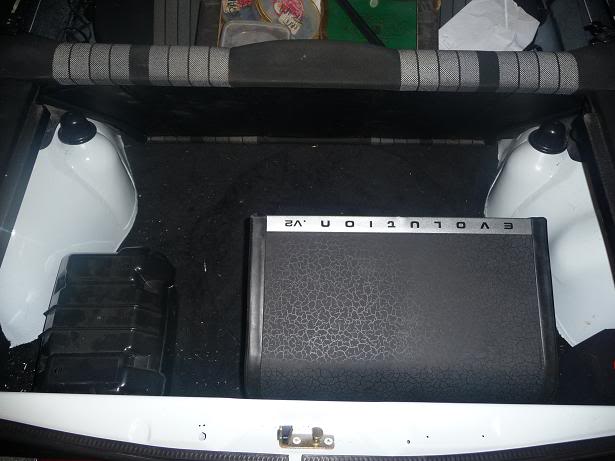
The boot is now trimmed out, took an age to get that battery fitted and not make any extra holes in the car body
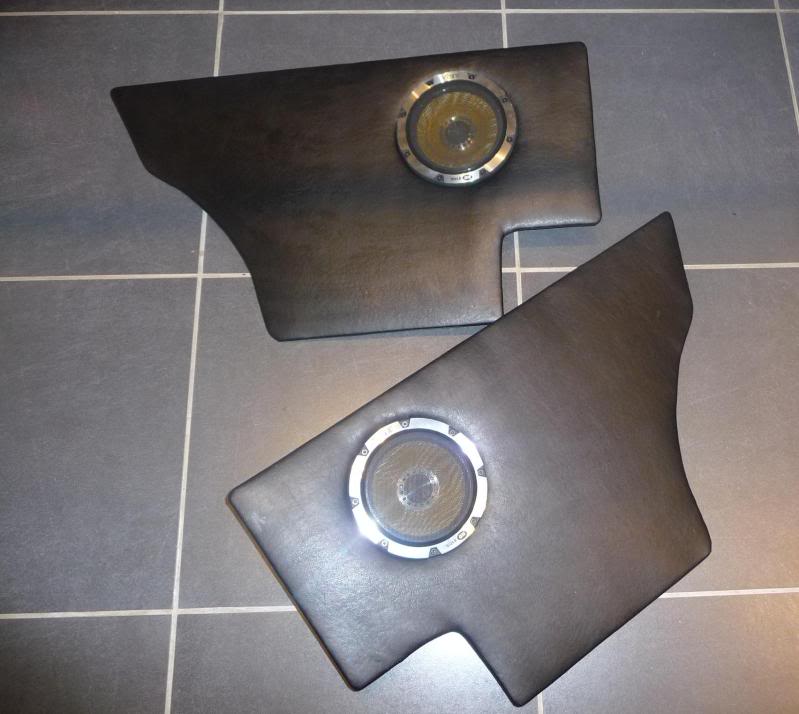
Meanwhile, covered the door cards in wadding
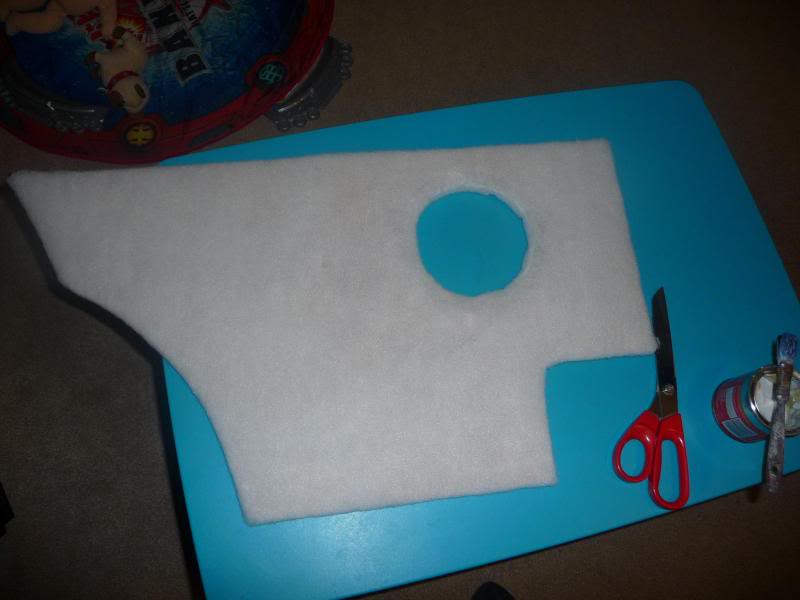
then a bit of vinyl, fitted speaker then tension up and glued the vinyl properly.
Posted
Local Hero
Very good work on the VNT controller. Must have taken ages to drill and fit all of those LED's!?!?!
Please tell me they are not all individually wired too?!?
My Build Thread
All My Build Photos - https://www.flickr.com/photos/pix-al/albums/72157622794406840
My other hobby - www.pix-al.co.uk
All My Build Photos - https://www.flickr.com/photos/pix-al/albums/72157622794406840
My other hobby - www.pix-al.co.uk
Posted
Settled In
Please tell me they are not all individually wired too?!?
It would have been quicker to wire them, but as I hope to make a few controllers in the future I went to the trouble of designing a pcb. Yes it did take hours, hundreds and hundreds of hours in that controller. :roll:
Posted
Old Timer

Posted
Settled In
thinking about wiring fog lights down there and using exisiting fog lights as a 3rd (and 4th)brakelight with lower wattage bulbs
Nope that's a rubbish idea dont do it, and don't use Ring fog lamps RL014 and a custom bracket to the old bumper mounts either. :wink:
Posted
Old Timer
regcheeseman said
thinking about wiring fog lights down there and using exisiting fog lights as a 3rd (and 4th)brakelight with lower wattage bulbs
Nope that's a rubbish idea dont do it, and don't use Ring fog lamps RL014 and a custom bracket to the old bumper mounts either. :wink:
lol cheers dude - need something to plug those holes up - bumperless is the way forward
Posted
Settled In
bumperless is the way forward
Yes of course it is. You try all you can to educate the sheep but it's all "BBS rims this, chrome bumbers that"
Your car looks sweet, a colour I'm particularly fond of, supposedly unlucky to have a green car but I've had lots of green vehicles and they were all ACE.
You got a build thread?
Posted
Old Timer
regcheeseman said
bumperless is the way forward
Yes of course it is. You try all you can to educate the sheep but it's all "BBS rims this, chrome bumbers that"
Your car looks sweet, a colour I'm particularly fond of, supposedly unlucky to have a green car but I've had lots of green vehicles and they were all ACE.
You got a build thread?
cheers dude, few rust bubbles coming throuh now, but ho hum. Nah aint got a build thread, never got round to it - bought it as a rolling shell about 2 year ago - lad I bought it off had sprayed it then ran outta cash and enthusiasm so took it off him. Its looking a bit different now, and lead and interesting life over the past 2 years including being converted to a works van for my mobile mechanic business. Back to a car now though, tidying it up as and when I get time, should really stick a thread together lol
Loving the white look - got a white GTI in for a 16v conversion at the mo, falling in love with it slightly - might have to get a white one next!
Paint is no where near what yours is - you've made a spot on job of that mate, wish I had the skills and patience for paint!
Posted
Settled In
I've been tidying bits and messing with wiring some more.
Fitted a extra small battery behind the centre console, it charge's off the main battery doesn't discharge when the main battery does.
I also had to add a circuit for the tail gate popper with a hidden switch as an emergency entry.
The auxiliary battery runs the alarm and the popper - should the main battery go flat because I left the light on then you can still get into the boot to access the battery.
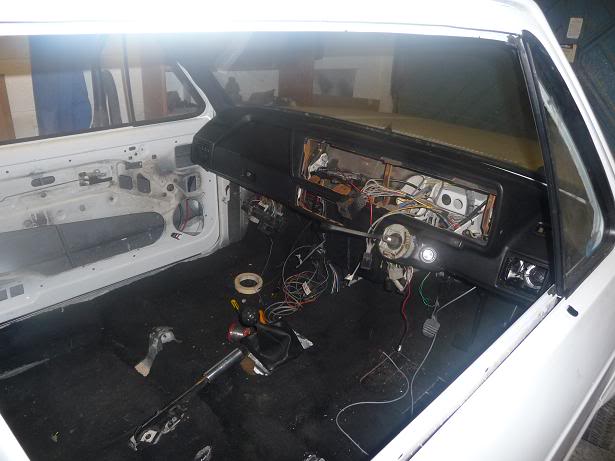
I also found the lower sections of the dash wouldn't fit because of the crossovers so I ripped the guts out of them and re-made them a little smaller.
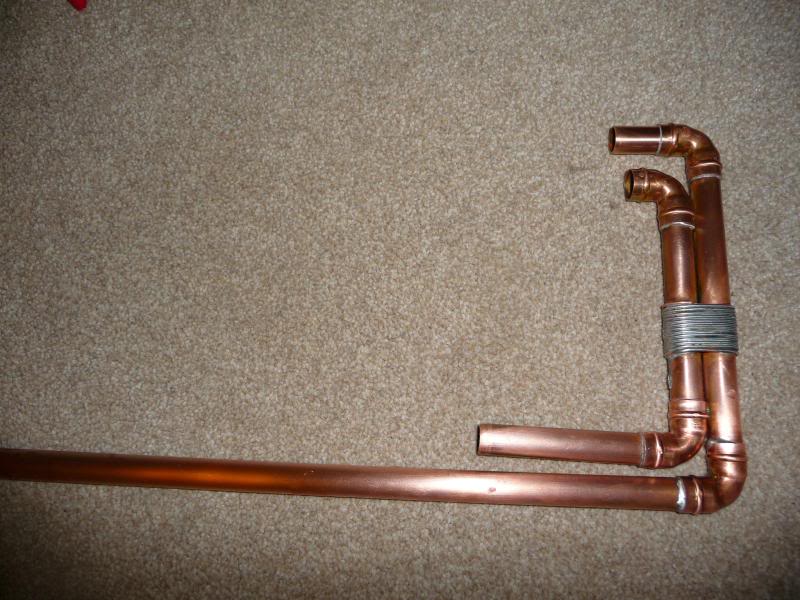
Also I had to sort some piping out for the heater matrix, the control valve is moved into the car and the pipes have been dropped down the bulkhead and out of sight. (the stupid joys of smoothing an engine bay)
It's taken three attempts to get this far.
Finally found the little plastic clip from the heater and could fit the lower dash section and centre console.
You can see the new heater pipework fitted, I wrapped it I heatshrink to hide and disguise it a bit

The red stripe of tape is there because I've wired the two gauges up with a twin core shielded cable, one core red and one blue.
I've tested everything and it seems like my heater fan setup has only one speed, but it transpires that it's a duff switch and all three speeds are available. It's not quite as powerful as the standard fan but it's quieter.
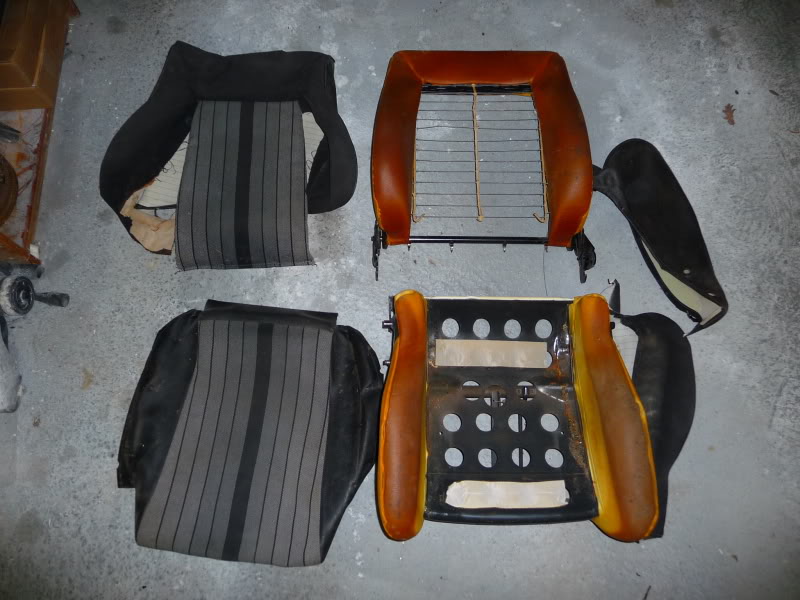
So moving on, I dragged the seats out of the loft, they were clean when they went up and because I'm a tw
 T
I never covered them up.
T
I never covered them up.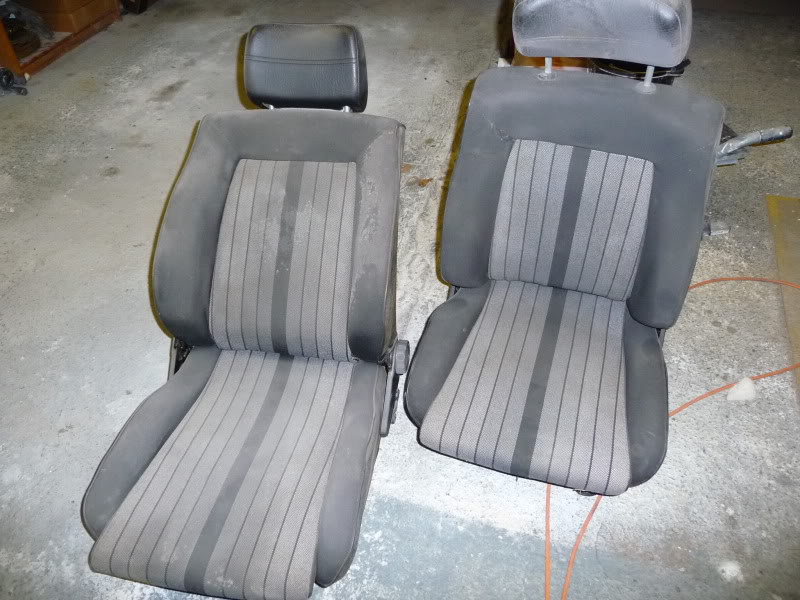
They soon looked like this.
Now where do I get hog ring pliers from and should I be looking at replacement leather covers? How much and where from?
Posted

Old Timer


looking good!!

Posted
Settled In
Posted
Old Timer
Posted
Settled In
Posted
Settling In

Posted
Settled In
return to the flatting! Deep Joy.
I still had bonnet, passenger door and tailgate to do, very light mist from a rattle can and then start with 1500 grade wetndry.
I bought three Fiat fitment wheels with brand new tyres on ebay - the wheels are unfitted too, the seller had one stolen from his drive which is why there are three.
Anyway I'll take the tyres off and probably weigh them in.
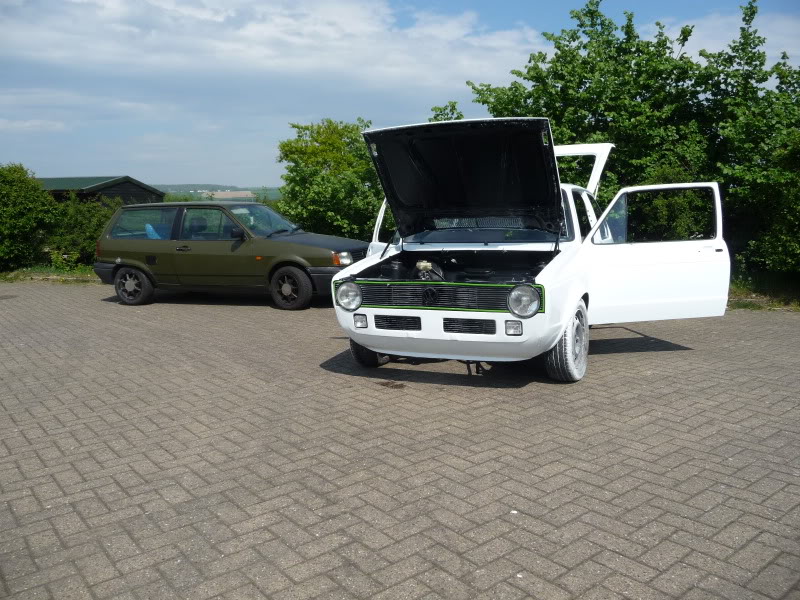
And today's fun
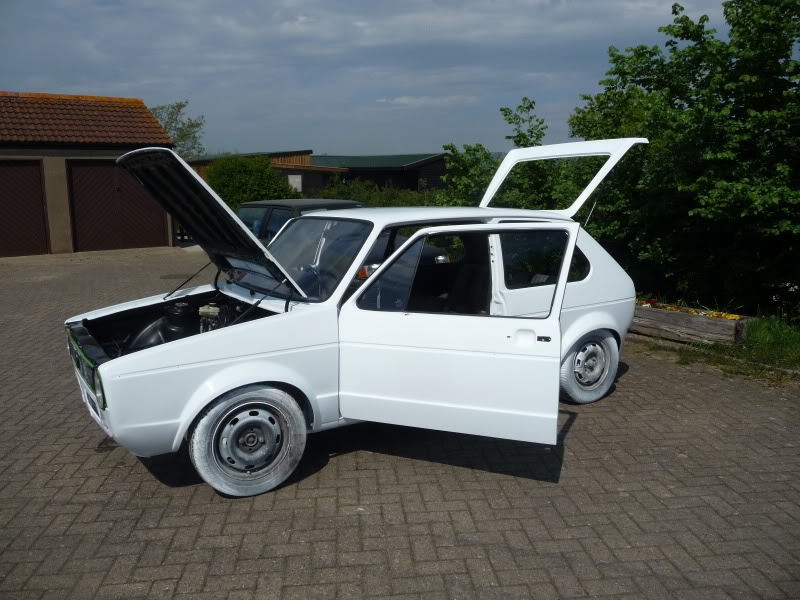
With the golf pushed out of the garage I washed it, then set about it with the G3 and various sponges on the polisher, I did the bonnet, door and tailgate. then washed it again. That means it's been washed more times in one day than the Military spec Polo has in in 9 months of ownership/daily use
wow thats all i can say, wish i had the time n guts to do all that.
Cheers, wish I had the time too, I normally work on the Golf 12-3am and go without sleep - so the bonus of a few hours in daylight when I could use power tools today saw some serious progress.
Posted
Settled In
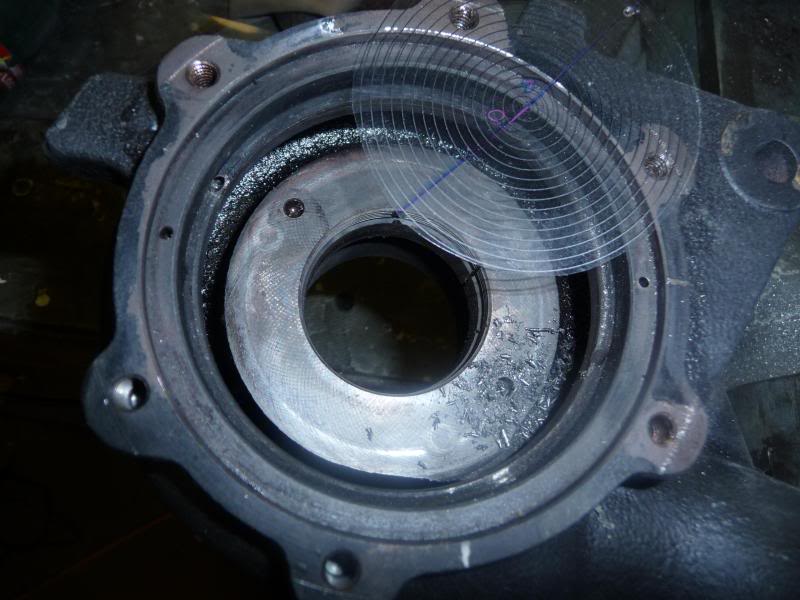
Then got to work rebuild and clocking the hot and cold side of the turbo.
I toyed with all sorts of methods then used a bit of acetate with concentric circle to mark up the new positions for the locating dowels for vane assembly and housing.
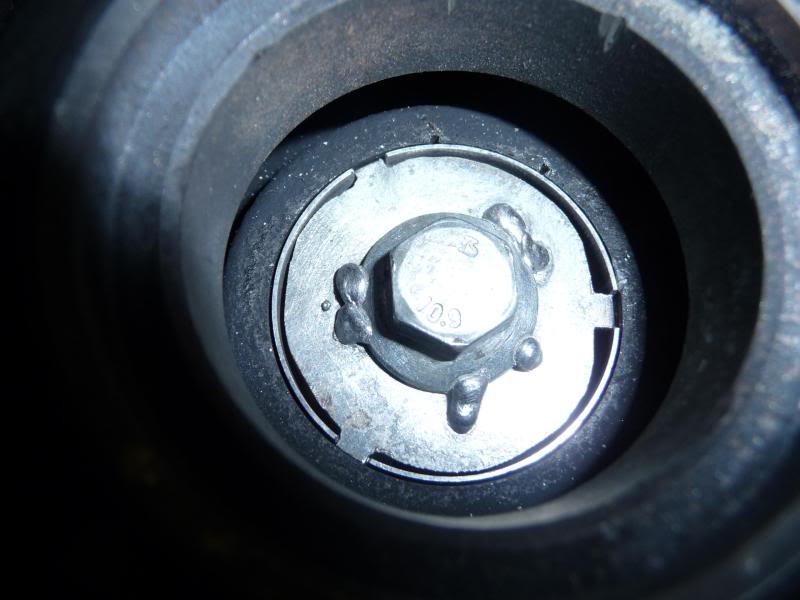
I made up a tool from a washer to tighten the nozzle
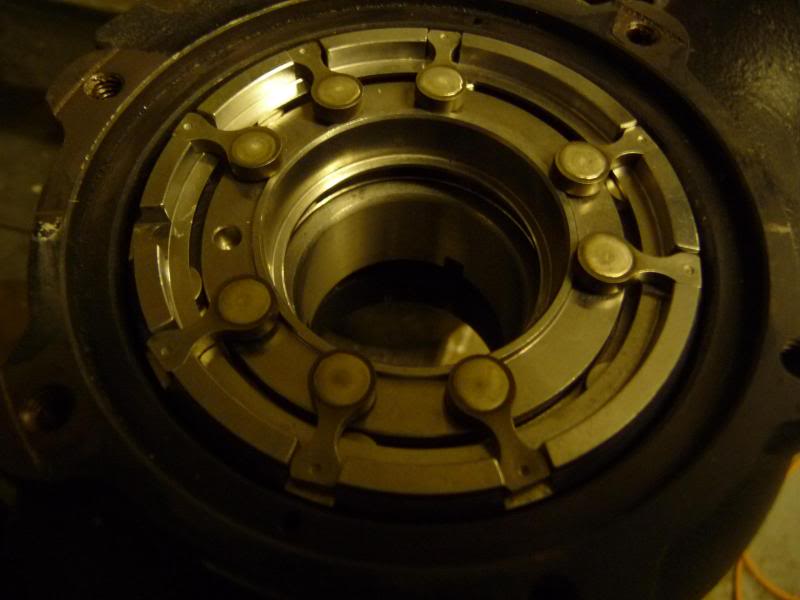
Assembled the vane assembly
And fitted the outer housing

Posted
Settled In
glad to see another rocking the mk3 breddie whilst the golfs in for resto hahaha. i got a maroon one. gets hell beaton out of it daily!!!
mk1 golf - resto
mk3 polo breadie - daily banger
mk3 polo breadie - daily banger
There are too many online users to list.