


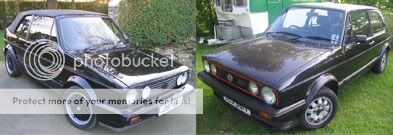
Mk1 Driver project VNT TURBO DIESEL

Posted

Local Hero


Mk1 Driver project VNT TURBO DIESEL


Posted
Local Hero
foxy
Posted
Settled In

Posted

Settled In

but how come you didnt apply the filler to the metal?
Its not so good at adhering to anything else you see.
Posted
Settled In
Time will tell if it's a good idea - apparently it's good enough for american hotrod - they use epoxy mastic before bondo.
Posted
Settled In
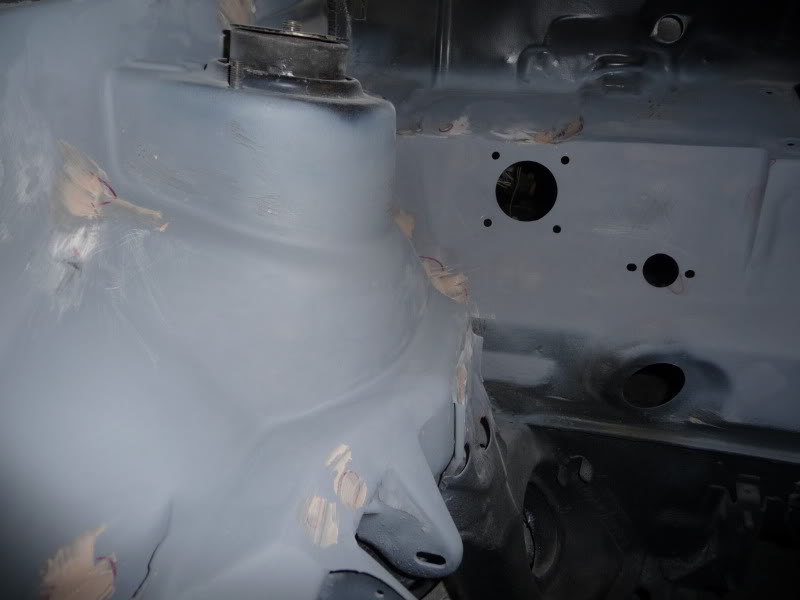
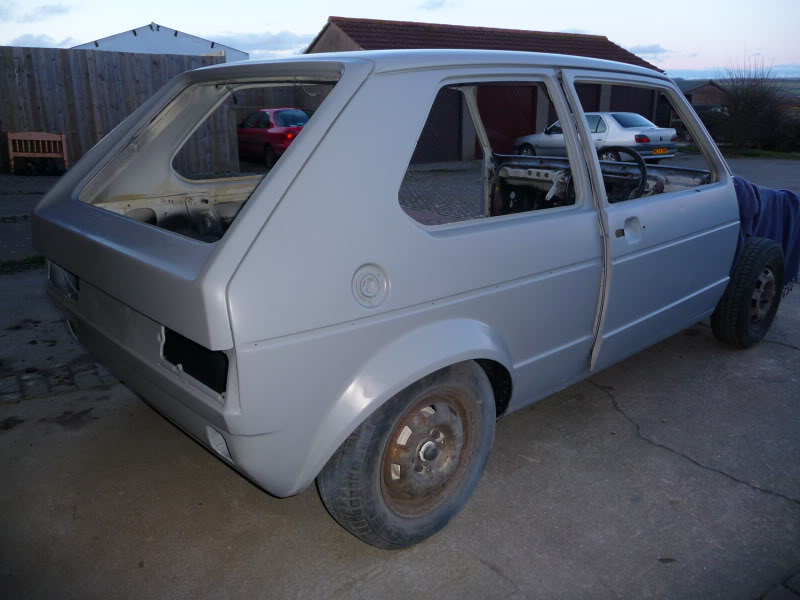
Got so bored I turned my attention to other areas of bodywork, first up I'll bag a couple of easy scene points and repair the rust hole in the windscreen surround…
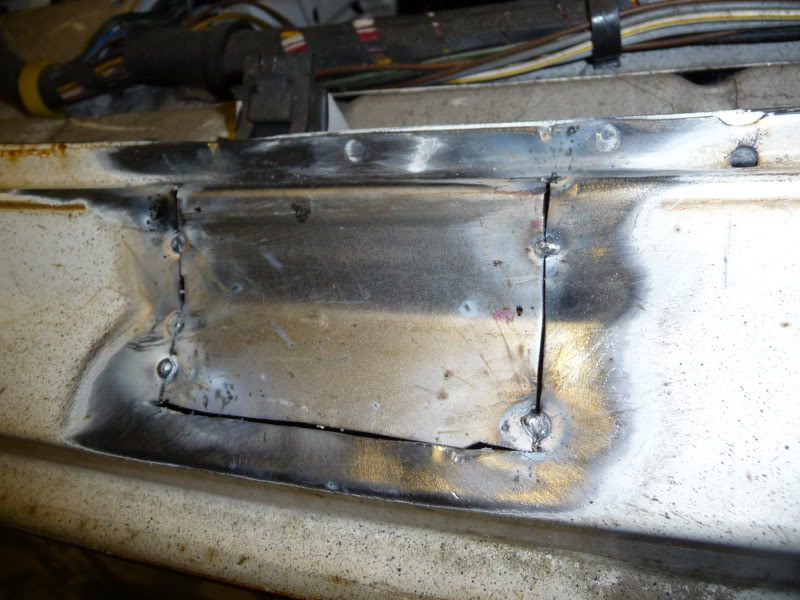
Then the not-so scene pedal box modification, case of eyeing up, chopping, fitting, choping, tacking, chopping, tacking, welding, not happy start again :bh
Chopped it up to get it to roughly fit, I've fitted a mk3 (I think- maybe passat:i_dont_kn) clutch pedal, had to chop the welds on the stop and move it around but it fits fine.
Note how the optimum pivot point for the brake pedal cleverly sits exactly where there is no metal.

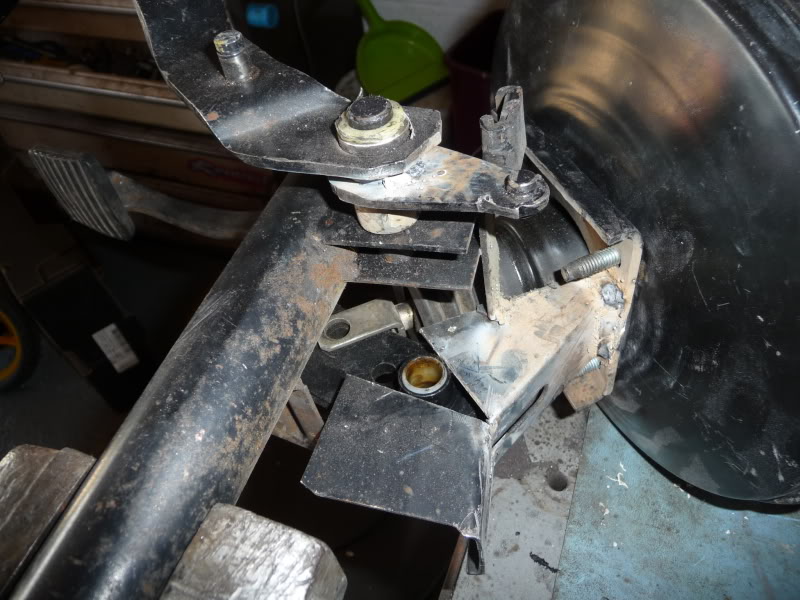
Then welded up properly and further braced, pivot made for pedal
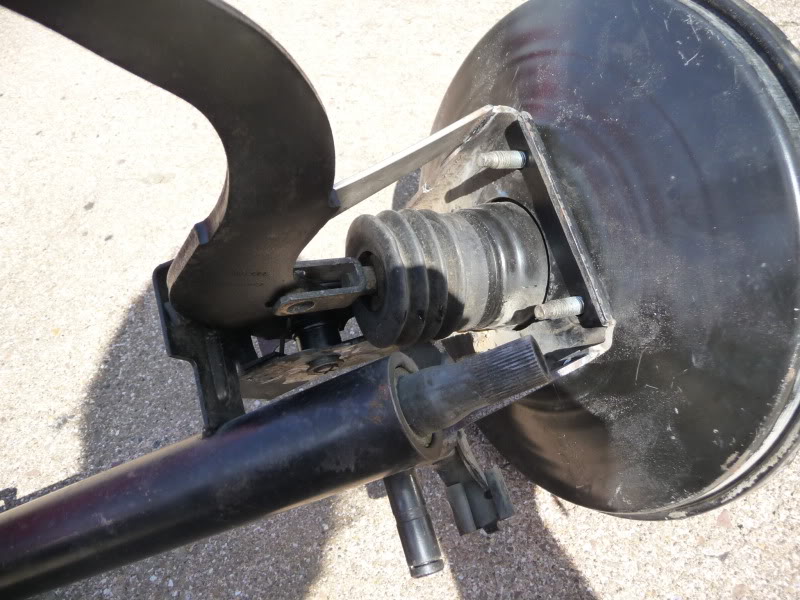
Painted it last night - well happy as the whole relocating servo looked a daunting job which I nearly abandoned before starting.
Posted
Local Hero
Thanks
Rich
Posted
Settled In
Posted
Local Hero
Still looks good though 8)
Rich
Posted
Settled In
Looks a right mess at the mo….
Posted
Settled In
fill, sand, fill, sand, fill, sand
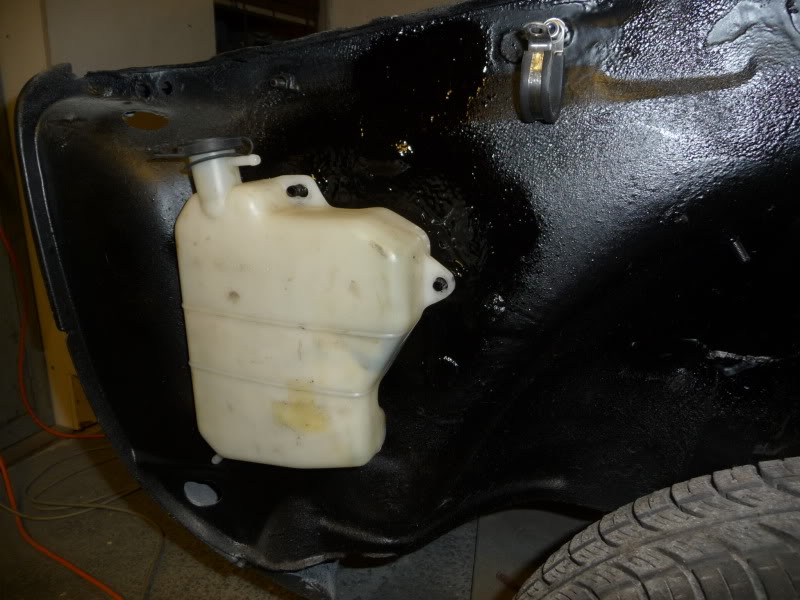
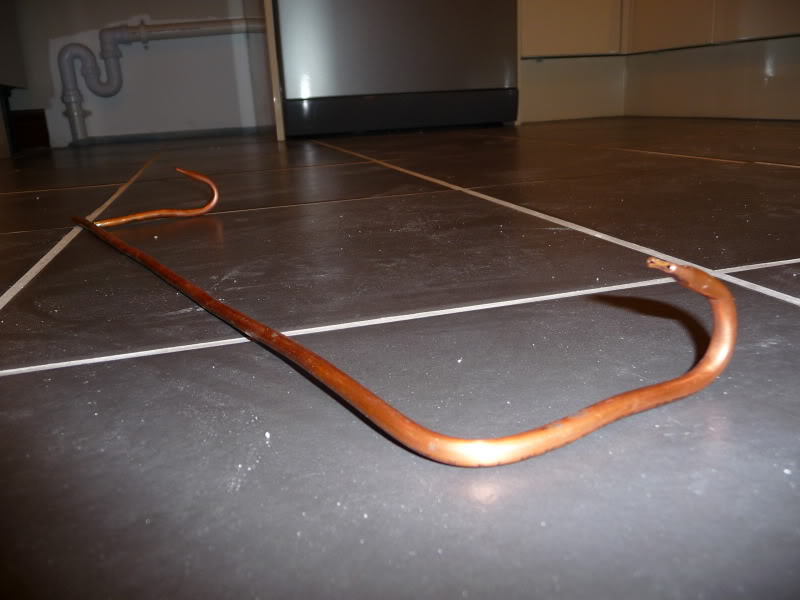
I'm going to run a caddy rad with a top fill end fitted and got this to sort out the header tank issue, took a chance and it fits perfect.
It's from a Honda VFR800i 98-2000:thumbs_up
Posted
Settled In
Few highlights though - First LLoyd from Retro-Fit sorting me out when a 1Y manifold appeared on my driveway by magic :thumbs_up hero! :thumbs_up
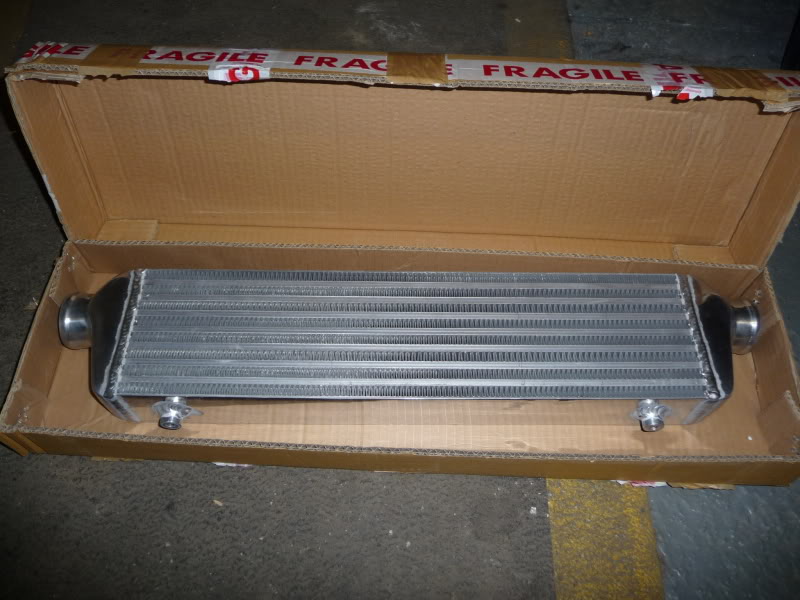
This turned up too, ?66 of niceness from ebay
I also had my first go at fibreglass moulding, first up make a mould from MDF then radius the corners with some bath sealant, finally loads of coats of furniture wax to hopefully stop it sticking..
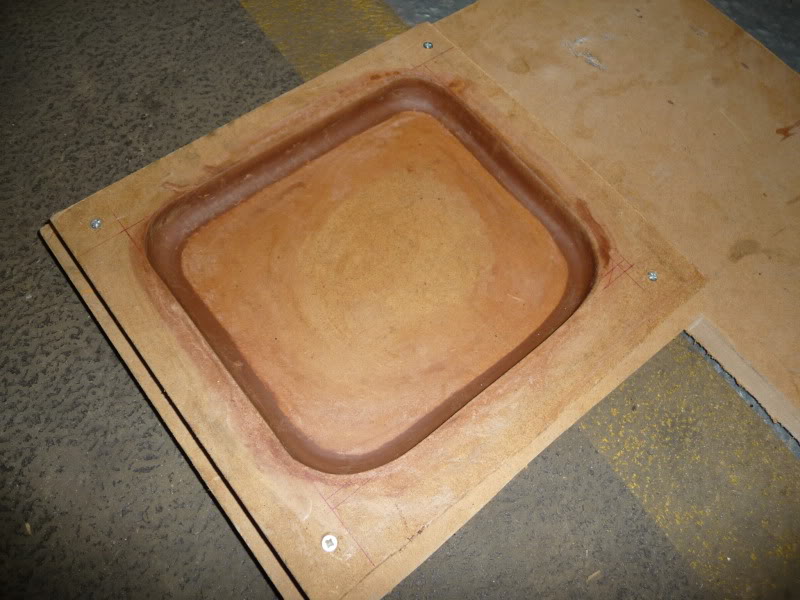
I laid in one layer of tissue then a layer of heavy cloth and worked it in with an old paintbrush trying to soak the cloth and push it into the corners.
Soon as it was dry I separated the mould and thankfully it released, when I got it out the finish was good with only one small void to fill.
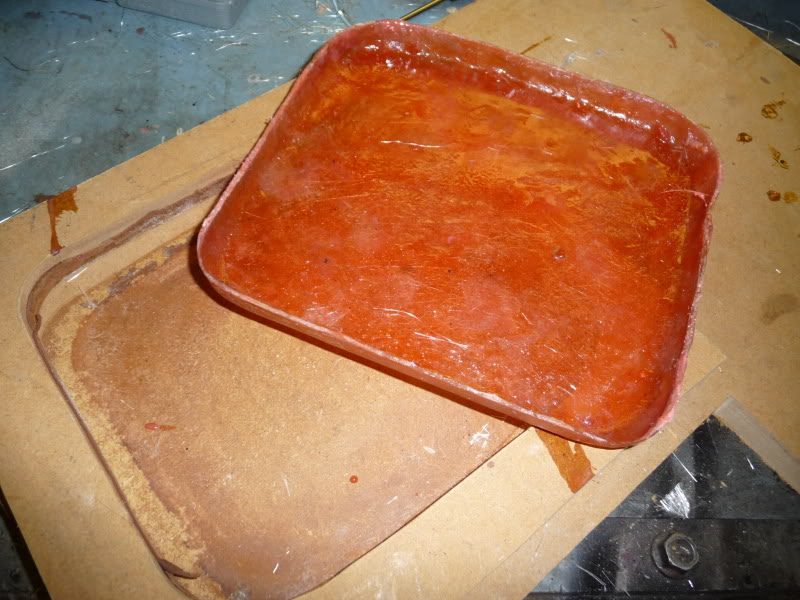
Dab of filler, a few coats of primer and some flatting it was then bonded over the heater hole and the edge tidied with yet more filler
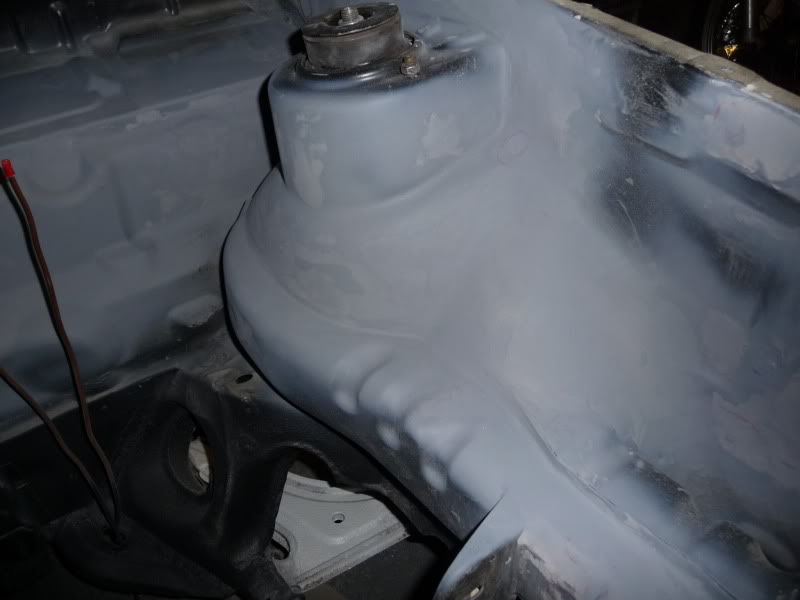
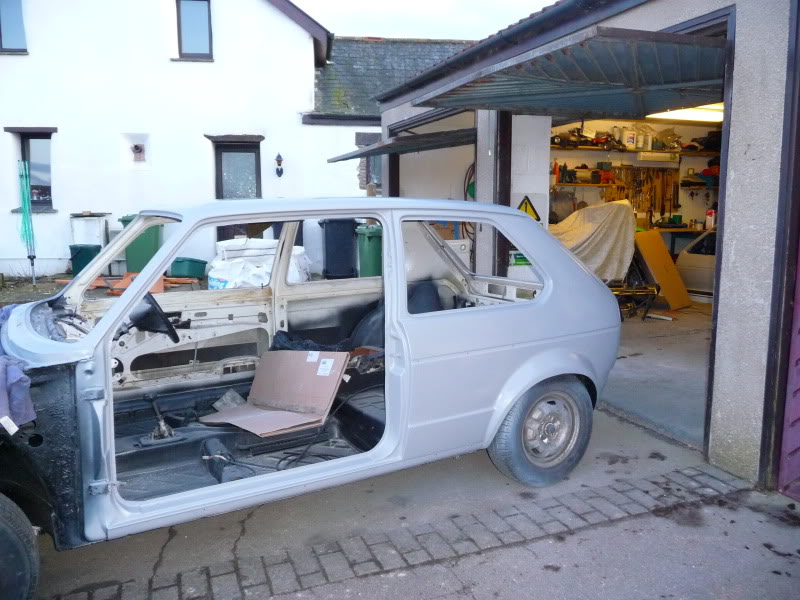
All the engine bay flatting down done! My golf got washed outside and left in the sun to dry. Whilst my two year old got some freestyling in.
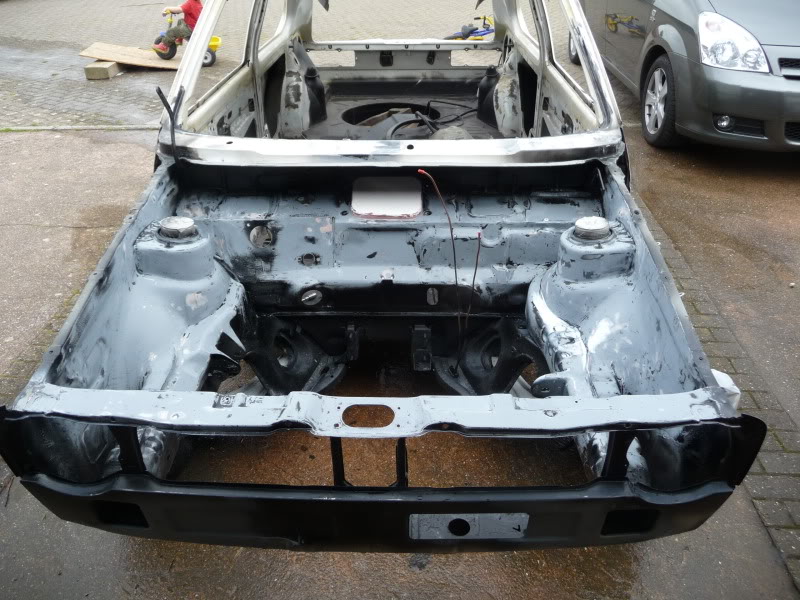
Whilst I washed down the garage, then back indoors to be sprayed…
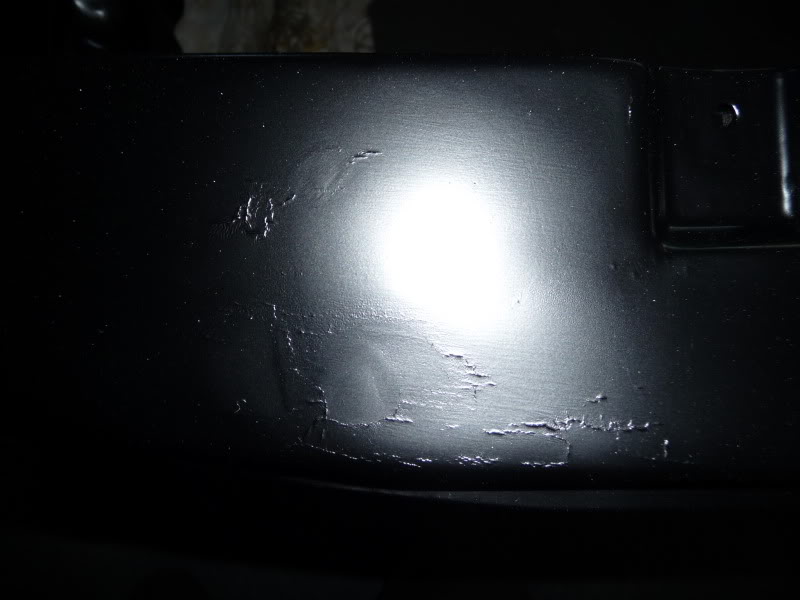
Pretty damn happy with the results couple of pinholes in the filler I need to address and the slam panel reacted - thankfully it was only a small area
Posted

Settled In
Good effort with the fibreglass 8)
76 ?
78 gls
83 gti 5v
78 gls
83 gti 5v
Posted
Old Timer

I've wussed out with DIY resto as I'm not finding any time to do any
 ops: I took my GTI to the college body workshop yesterday and they've taken it on for a full water based respray for ?800 plus panel costs if any are needed. Fingers crossed the students dont make a mess 8O The jobs I've seen come out of the place are great though and the staff seem to be into their dubs so fingers crossed. Could be a year till I see it completed.
Posted
Settled In

Pub this Friday or you gonna be giving Wayne all your love again!
Anyway, more update….
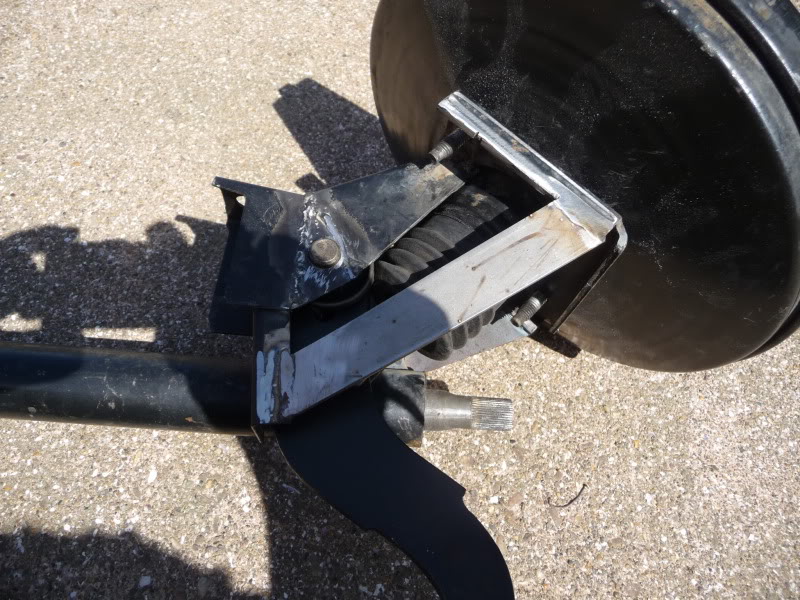
Pedal box ready to fit..
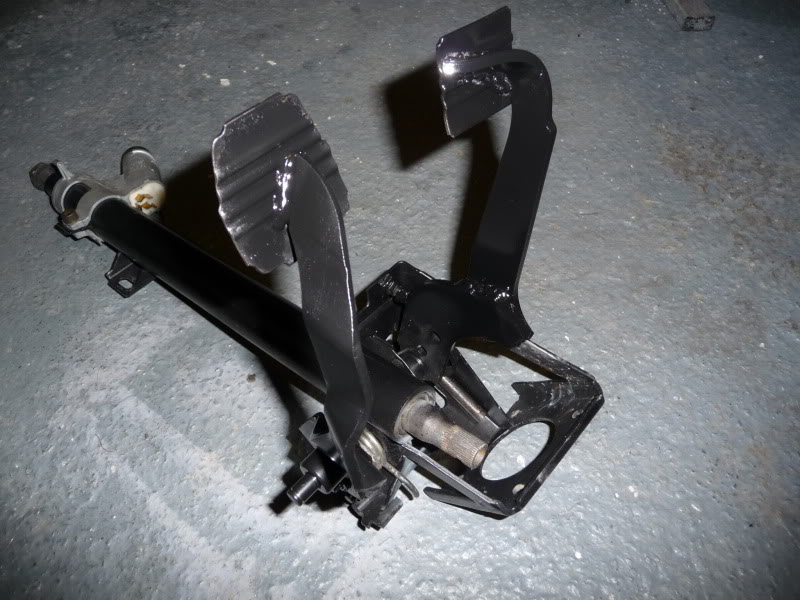
clutch pedal is (i think) a mk3 golf or passat clutch pedal with relocated and spaced pin to actuate the master cylinder
brake pedal is the original mk1 brake pedal top section, cut short, with mk1 clutch pedal bottom half section welded on, and the actual pedal section cut off and welded on in a different position.
I'll go and fit it in a bit…
Posted
Old Timer
Posted
Settled In
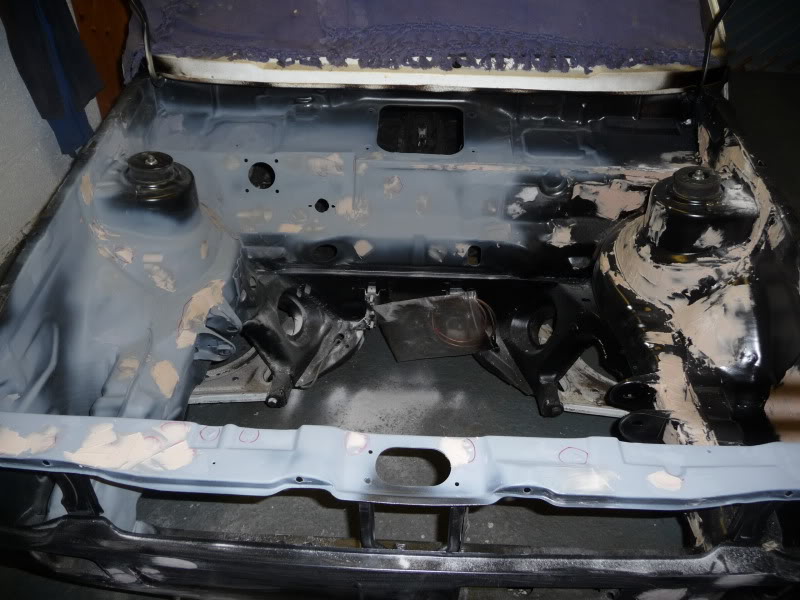
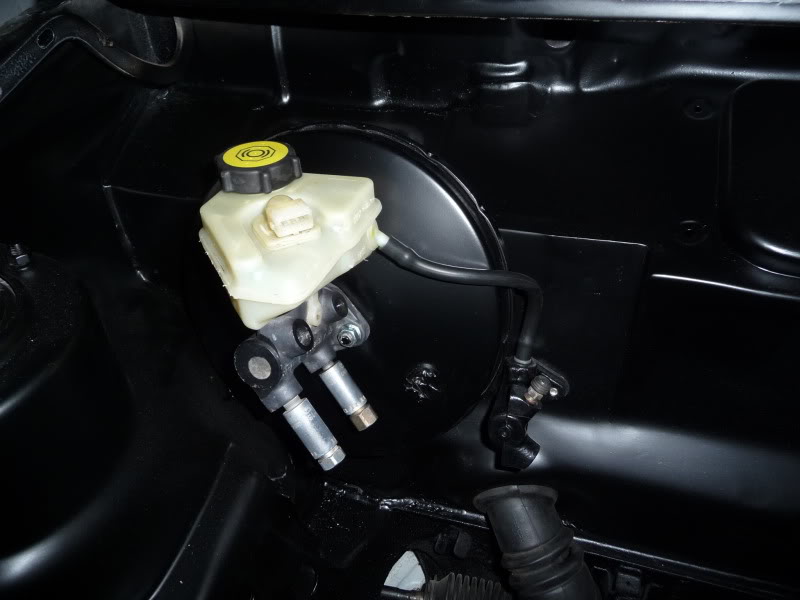
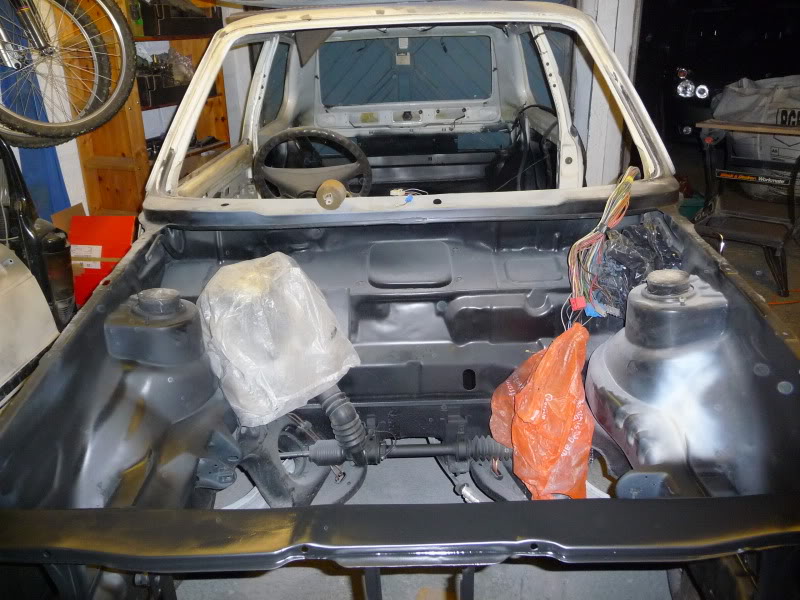
Pedal box finally in and pedals connected to cylinders, throttle not in yet as I may have to rig a potentiometer up as throttle position sensor
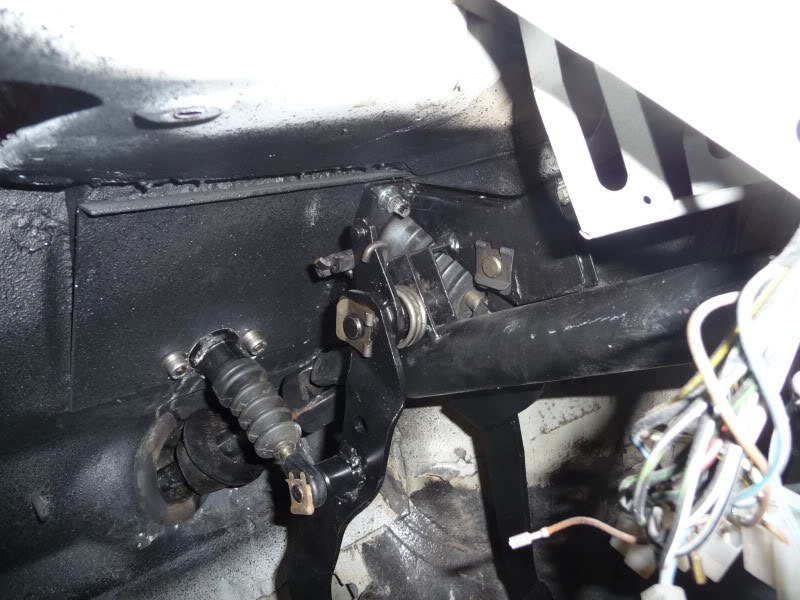
Master cylinders and servo mounted up - not a great deal of room but tucked away quite tidily. Time will tell if there is enough room for the turbo and pipework.
Posted
Settled In
Because the brake servo and filter have roughly swapped location, I've had to swap over the new brake lines I carefully installed about 4 months ago. Thankfully the brake lines weren't cut to length or terminated at the servo end and have gone in real tidy.
Also started flatting down and filling a few parts of my bay that I wasn't happy with! Including losing the bonnet catch aperture with a neat plate.
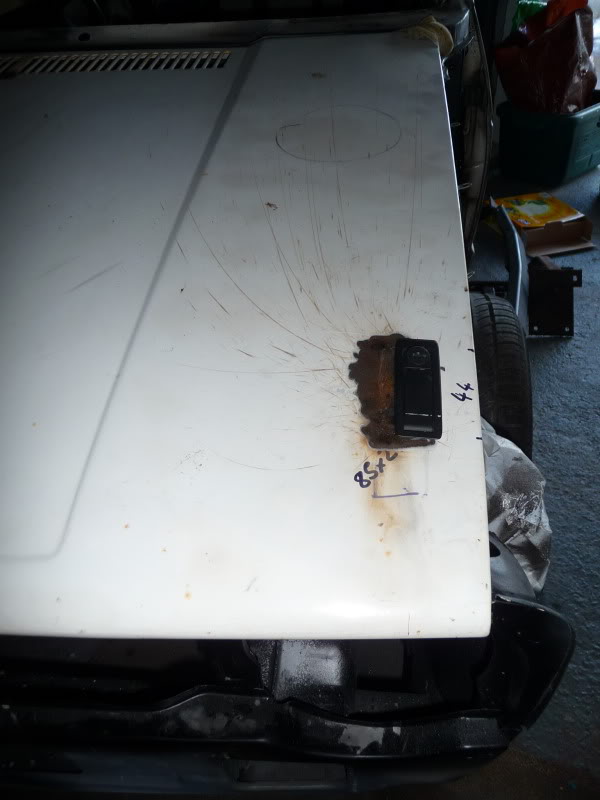
How to ruin a good bonnet, fitting bonnet catches
Measure carefully, double check measurements and carefully mark out a slot in the bonnet, then transpose the dimensions to the opposite side and mark out the same slot in the bonnet framework. Repeat for both edges of bonnet.
Cut out all the plates before noticing that you incorrectly transposed the dimensions to the other sides and that the holes dont meet up.

weld the plates back in, mark out again and cut them in the right place.
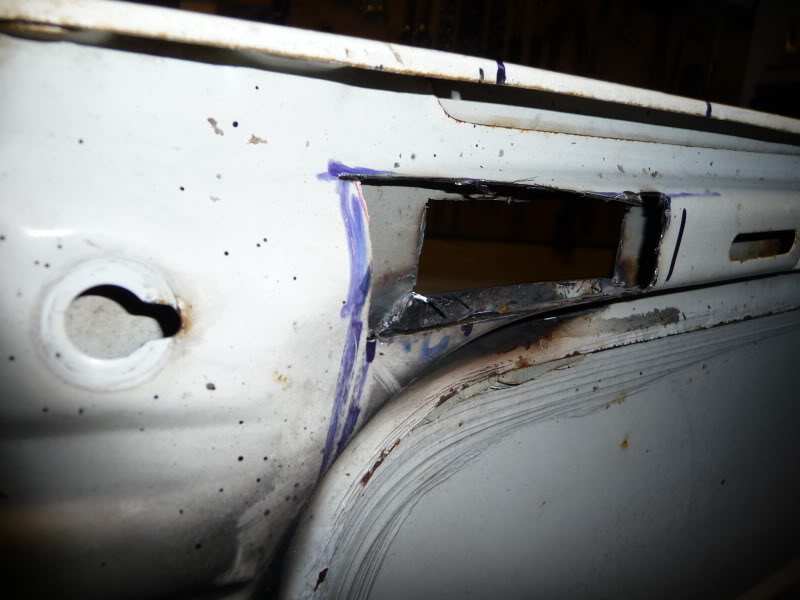
The clamps are now at least in the bonnet, bit of a mess but noting that can't be sorted.
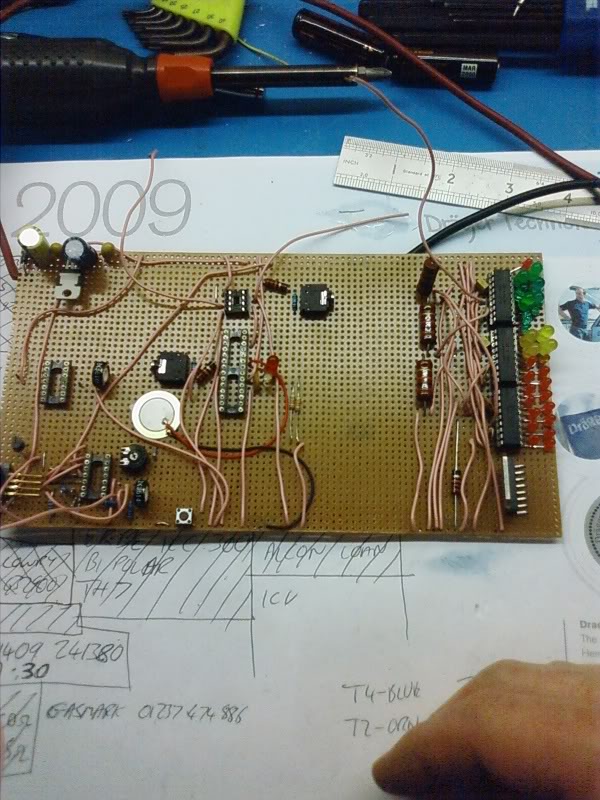
Spent a considerable amount of time spent on a PIC forum developing code for my VNT controller which will be as trick as a very trick thing. It's got this whole config/startup routine which (should) cycle the turbo vanes open-closed-open and steps the standard mk1 revcounter up and down the dial whilst running some diagnostics too.
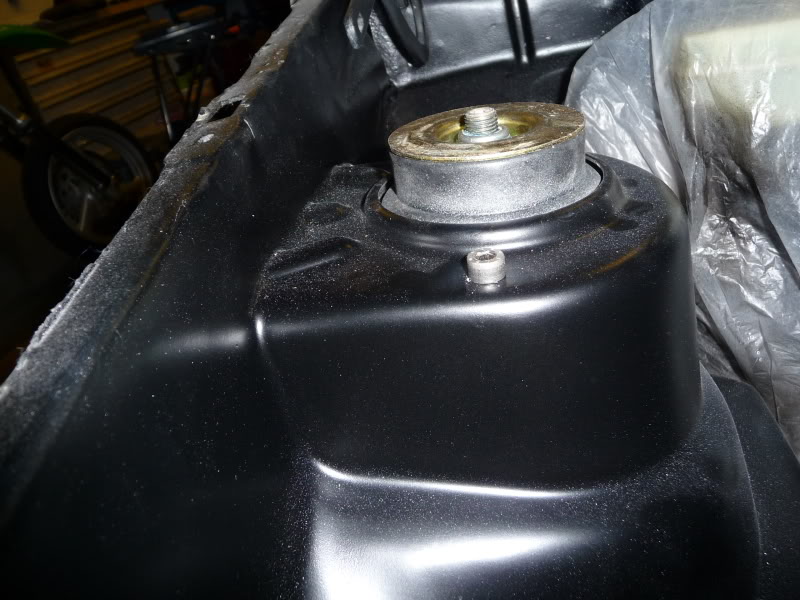
I've managed to get my heater box finished too, for those that don't know, I've blocked over the heater aperature in the engine bay but still want to run a heater, as it will be a daily driver.
The standard fan sticks up above the heater box and protrudes into the engine bay so first job was to remove the original fan, I then measured the hole in the heater box and sent a lot of questions to ebayers along the lines of 'please tell me the dimensions of the fan and it's shroud'
Eventually I bought a SRAD gixxer radiator fan, which fits with a bit of a squish to the shroud, rivetted in and refitted the 3-speed resistor.
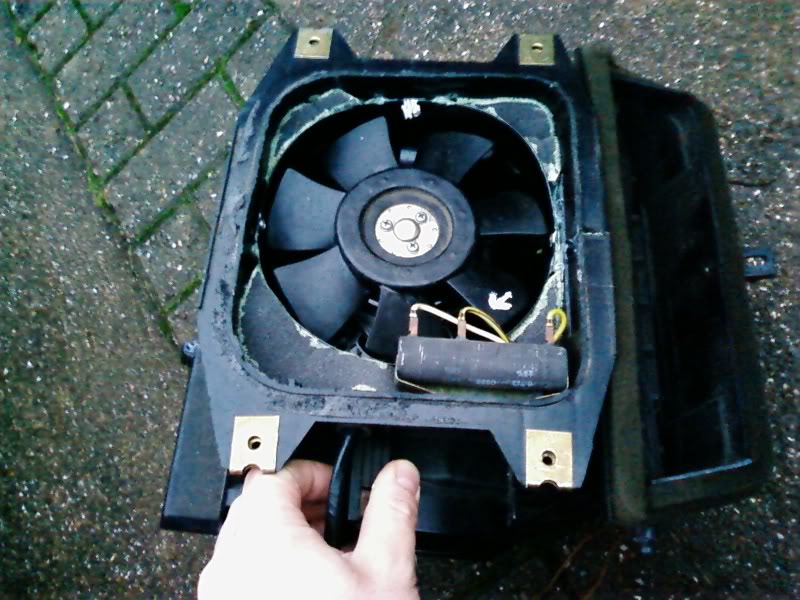
The packing around the fan is to stop the airflow shortcircuiting without passing through the heater matrix and getting to the windscreen. Seems to work quite well on the bench, time will tell.
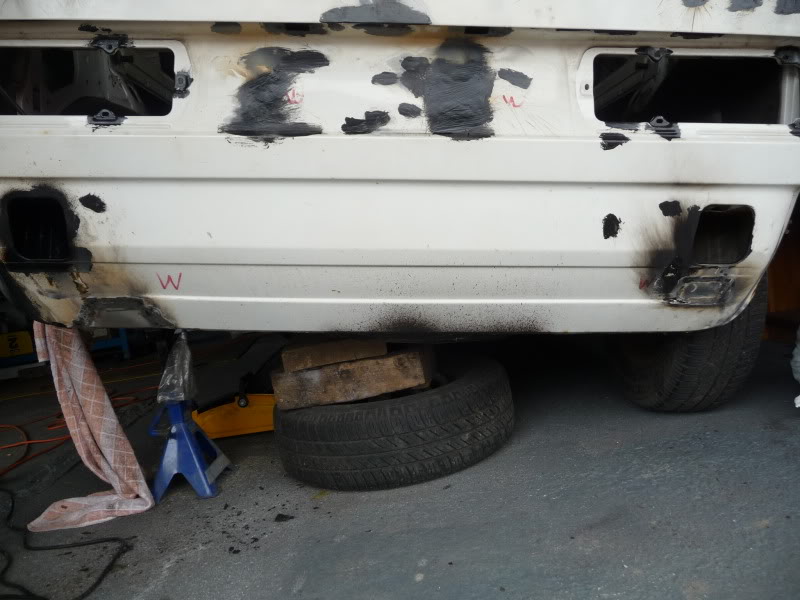
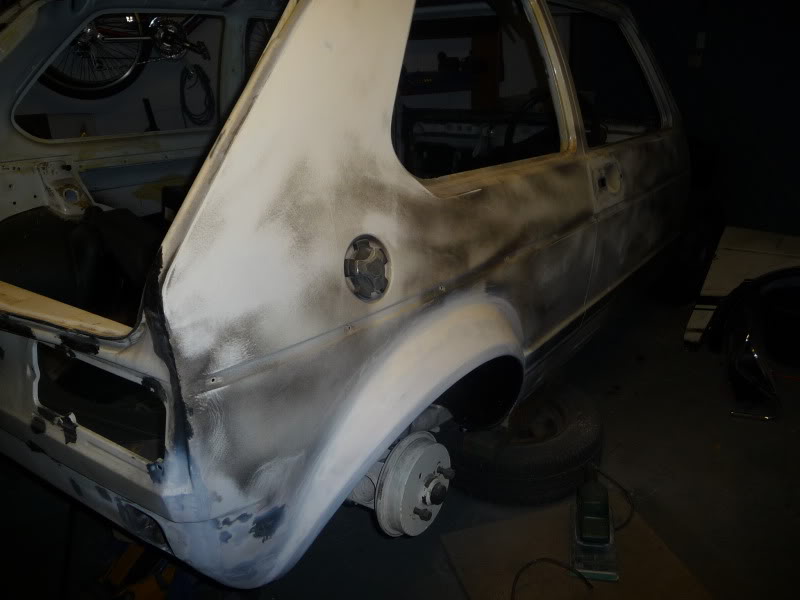
extending the front arches using rear arch repair panels…..
first up, chop the arch off and cut out any rot that also needs sorting in the process - all praise slit discs!:thumbs_up
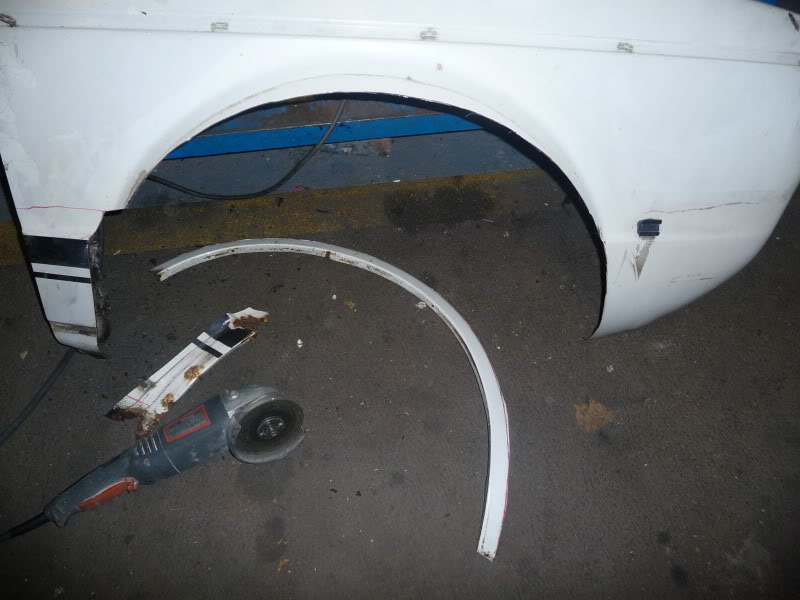
I'm using hadrians panels from carz2.co.uk - golf mk 1 two door rear arch repair panels, chop most of the repair panel away to leave just the arch section and a piece near the rear of the arch to knit the panels together tidier.

I'm choosing to painstakingly cut the two panels to butt together, you could just clamp one against (overlapping) the other and weld them like that and use some filler to cover the join but I want to try and avoid the droopy look that some extended arch mk1's suffer from.
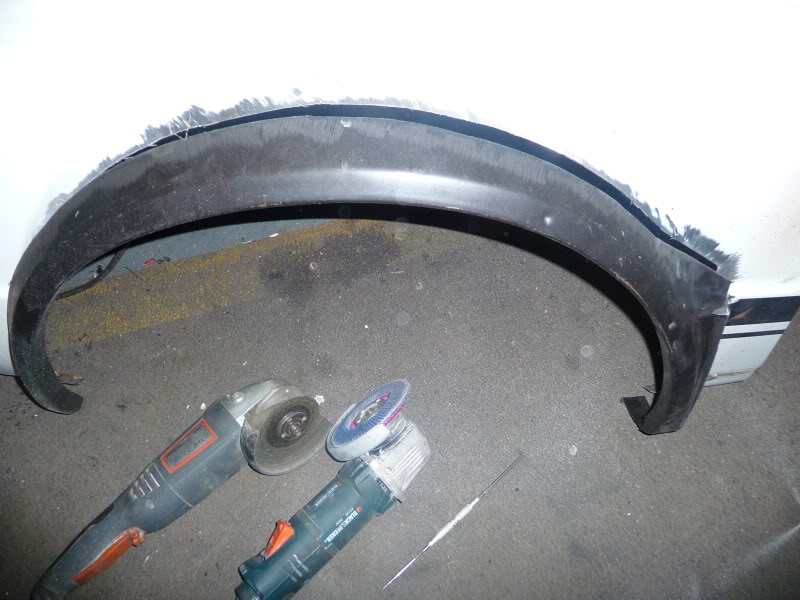
Then I start tacking them together, I do normally have to make some fine adjustments with a file or flap disc in the grinder, a G clamp or welding clamp helps a lot
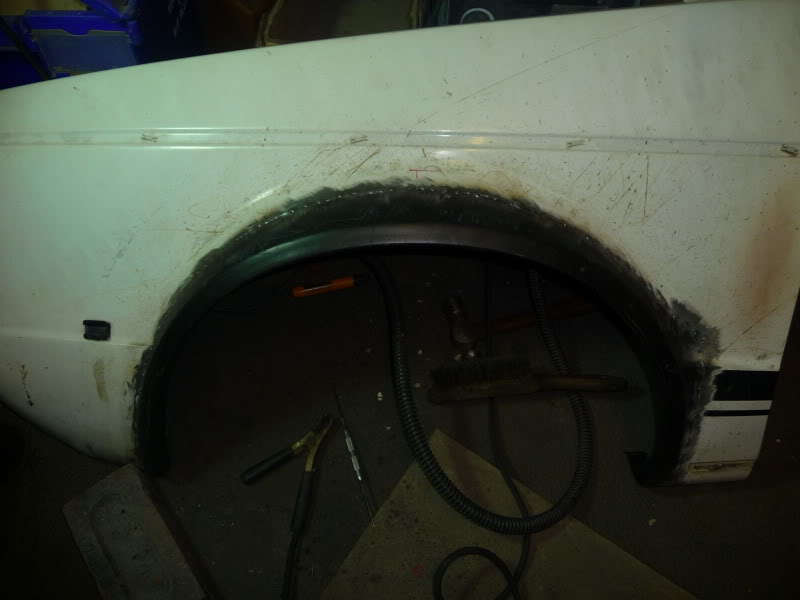
Gone about an inch wider than stock
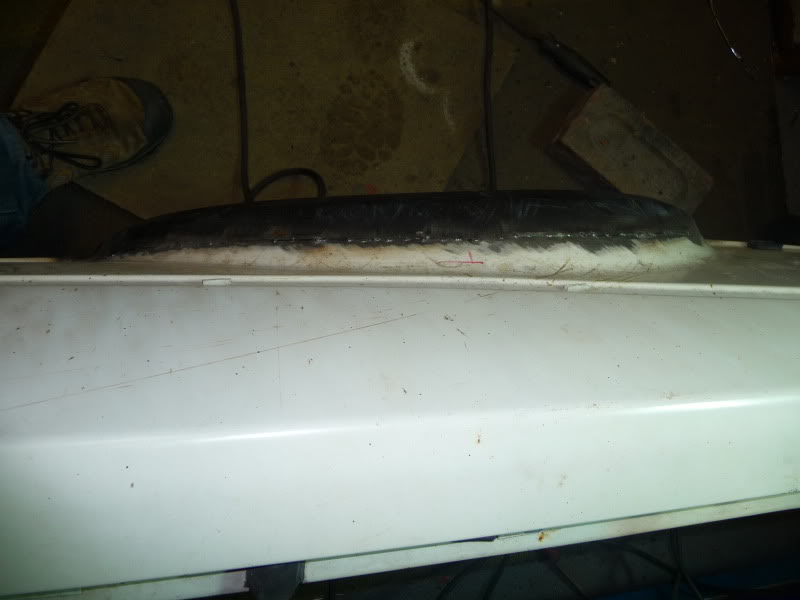
Whacked a skim of filler on the rear arch and attacked it with a sander and some primer….
Thought my bay and all the welding was finished….

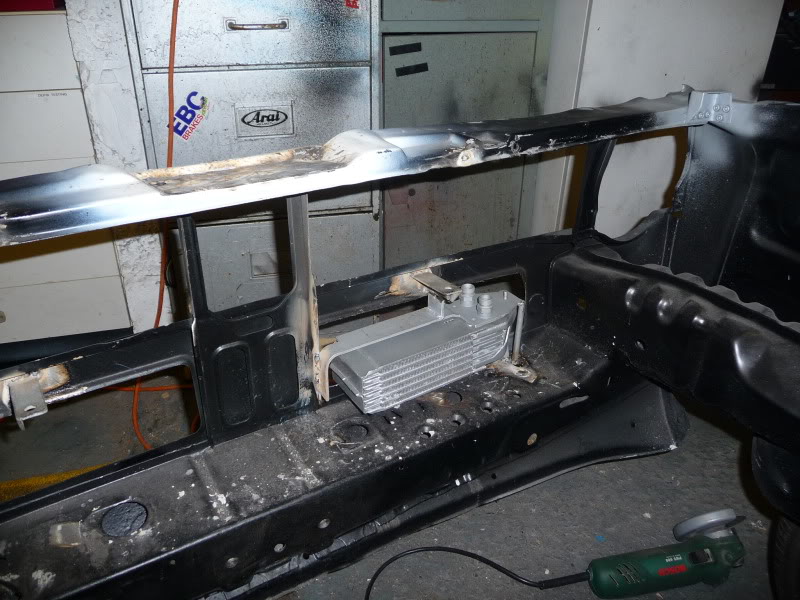
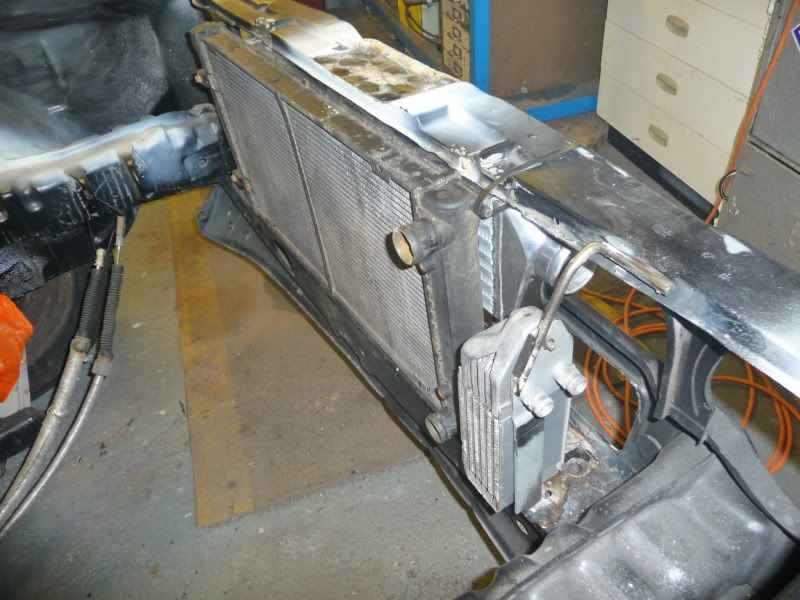
Got my intercooler mounted up, had originally mounted it lower but it wasn't ideal, happy with it now but the oil cooler will have to move further across the bay.
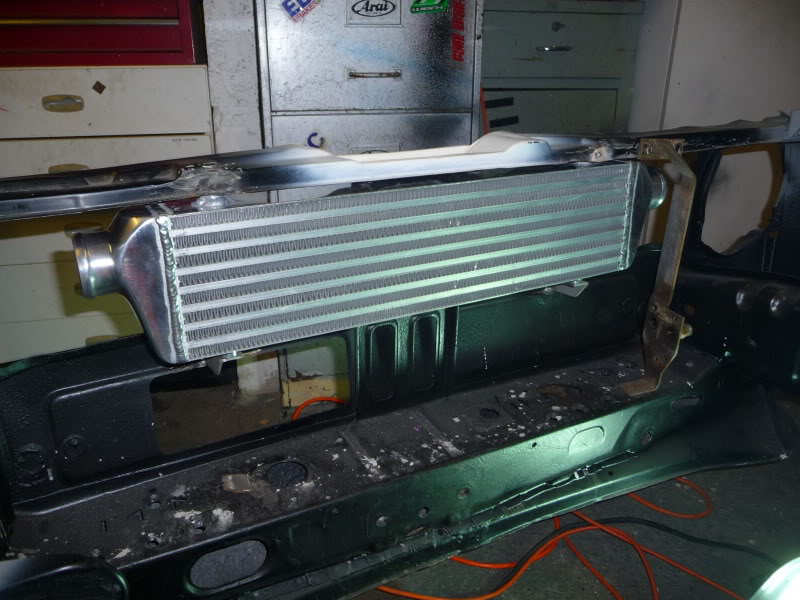
Also got the brackets fabricated for the bonnet clamps to clamp onto
I think the bonnet mech is untidy and worse it forces the cooler down and covers at least two of it's bars reducing the effectiveness, I've got all the intercooler in the grille area.
I know the scenesters will whinge but I wanted bonnet clamps, the end result should have a hint of 'bergcup' hopefully. I was hoping to go cage and fully stripped interior but the missus will moan when I do the schoolrun (the kids wont!)
Having modified my oil cooler bracket - it couldn't fit in it's original spot - I wanted to poke it out through the front panel holes. Having welded it up good and solid I discover that the rad now wont fit and I have to cut all the welds and move it a few mm.
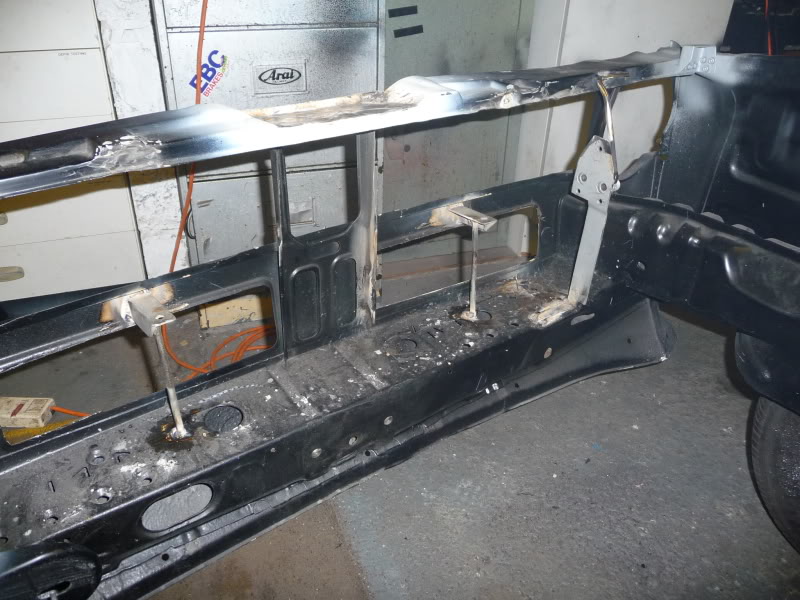
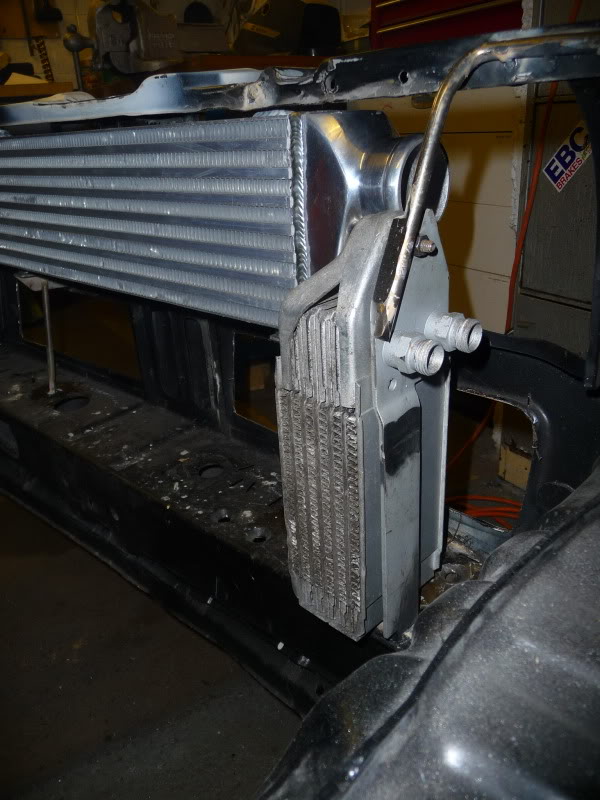
Finally the bracket is in
Ok so the cooler is not bolted up properly so it sags
What do you reckon? I'm not sure myself…. :dontknow:
Didn't like it, cut it all out and modified the bracket (again :roll:
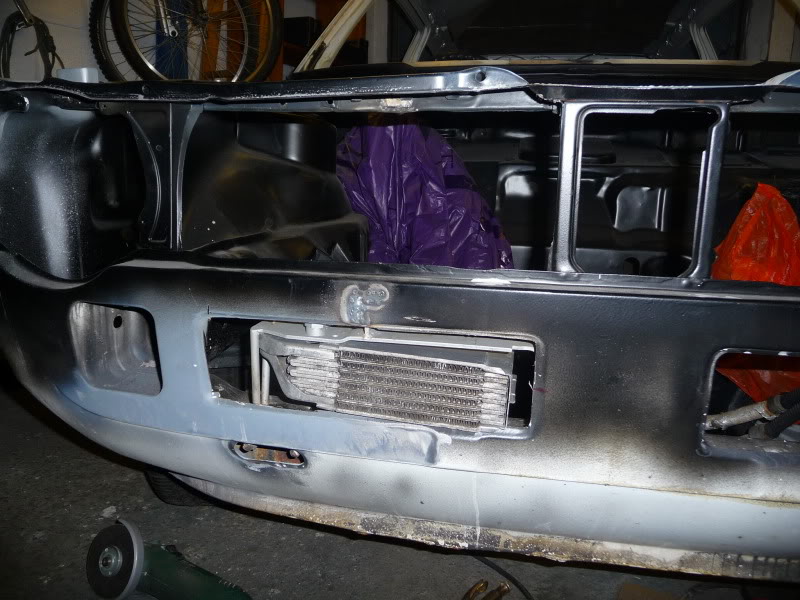
)Mounted it up vertical, and braced the intercooler mounts.
allowing enough clearance for the intercooler pipe and hopefully the alternator.
Rad fits up nice and snug too.
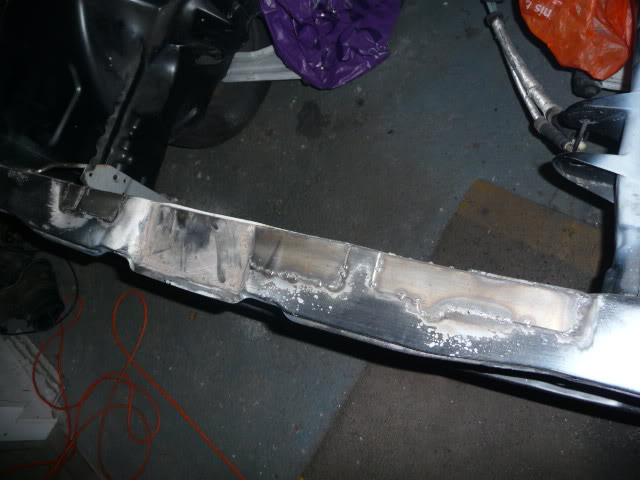
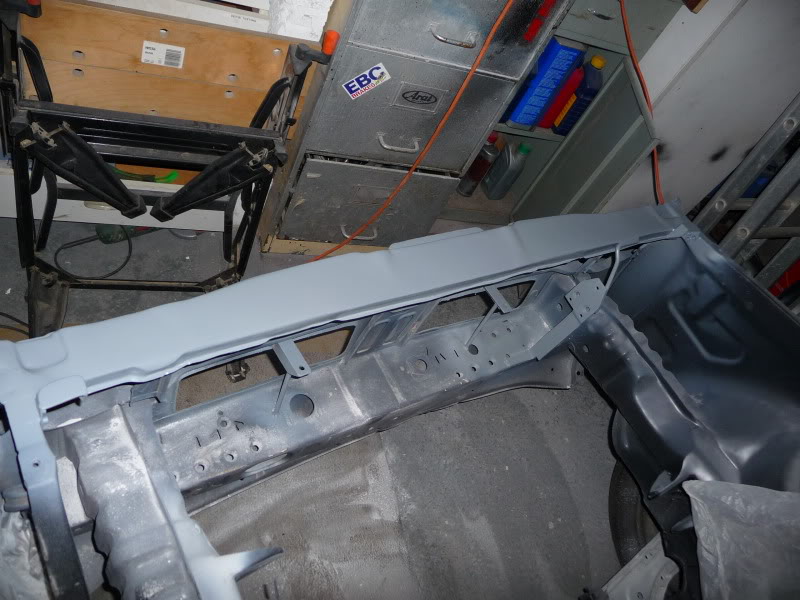
I was baited enough to weld up my slam panel some more..
Then decided to weld up the bonnet catch recess..
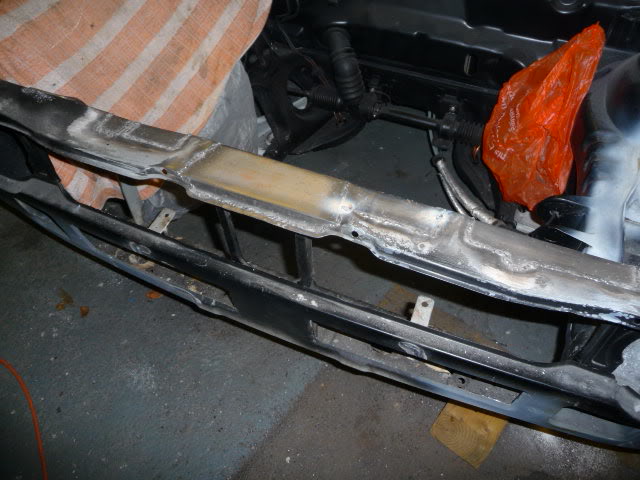
That's it, no more engine bay plates - ever……
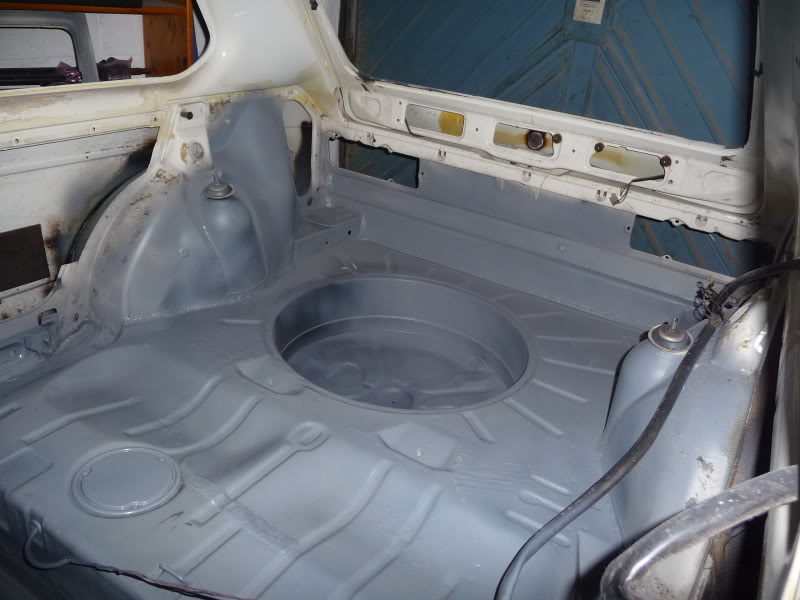
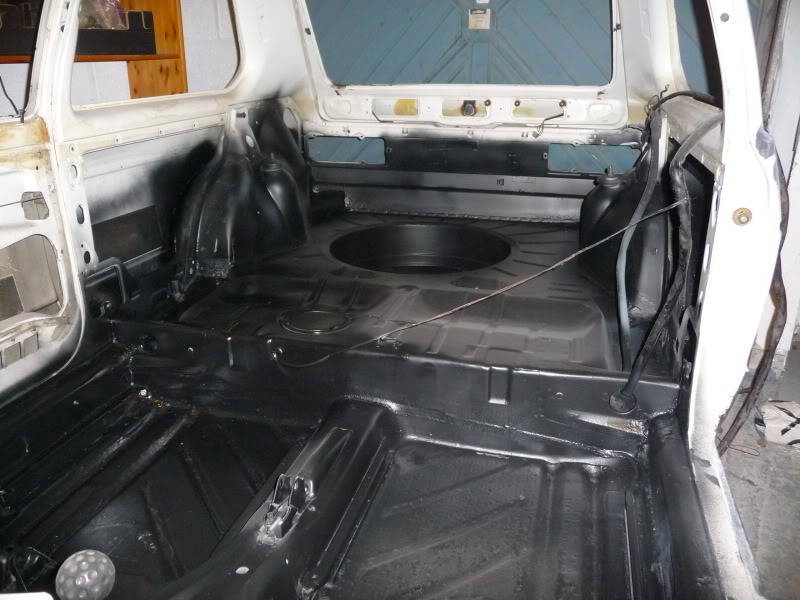
Started work on the interior, primered up to take it back to white.
Few hefty coats on the slam panel, finally got it looking right
Or black if I realise that I'm out of white paint :roll:
Doesn't matter it'll be covered in carpet and trim anyway, just had to sort out what was there and the surface rust from having it sat outside with a leaky tailgate/no rear lights.
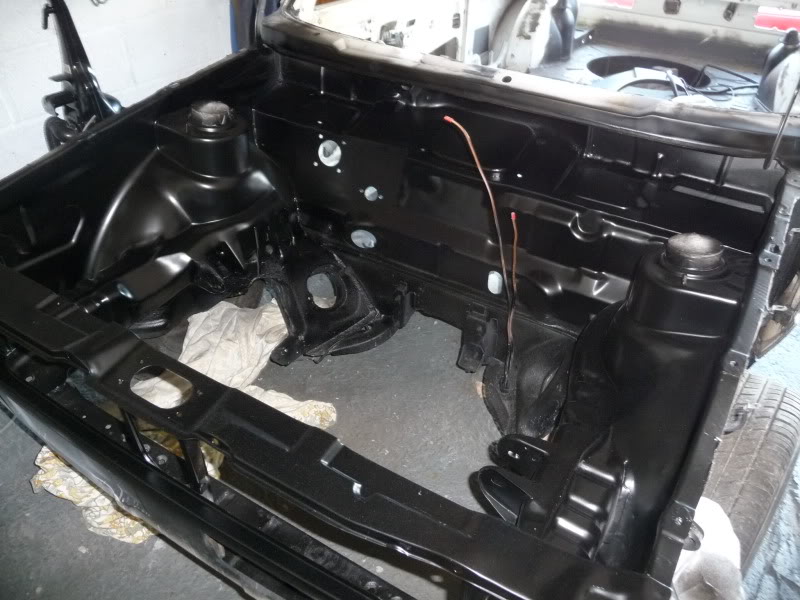
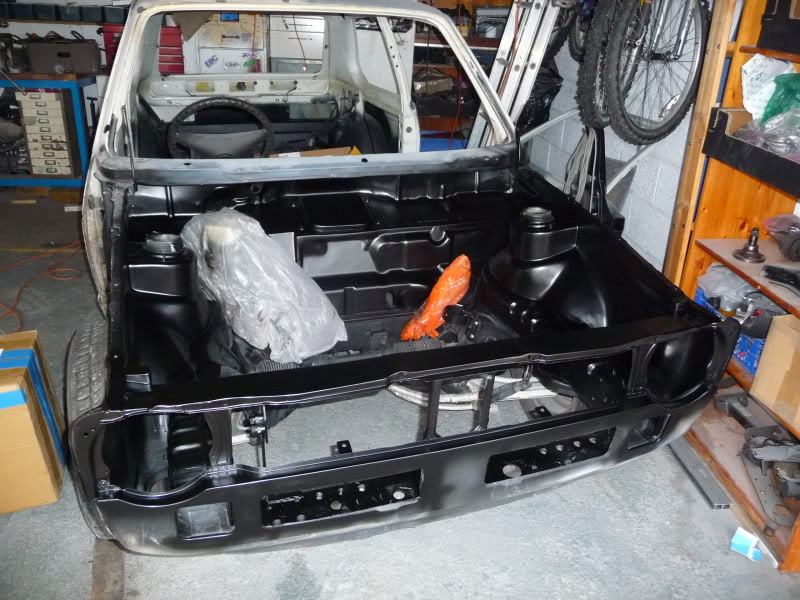
Bay needed prepping again….
Blown over.:thumbs_up
Where shall I fit the chassis plate? Can you get them remade?
Had a week off work but got nothing much done as I've been looking after my boys, but the missus said she would look after them today, kindly giving me the day to work on….
the house.

I told her I could drain the heating system down and plumb the rest of the kitchen extension.
She finally left the house at gone 2 and I whipped straight out to the garage and started flatting like my life depended on it….time was against me.
I had to push the car in and out of the garage a few times because of showers, but I was trying to keep the dust outside.
My first try with 2 pack, mixed it up and managed to get the whole 2 litres shot.
Then I whipped back inside and turned the hot water off on the stopcock and connected the feed to the kitchen with a push fitting - about 20 minutes work

Finally to add the icing on the cake - got the clutch and kickstartfixed on my bike and got her started for the first time in 12 months.
Bit more done,
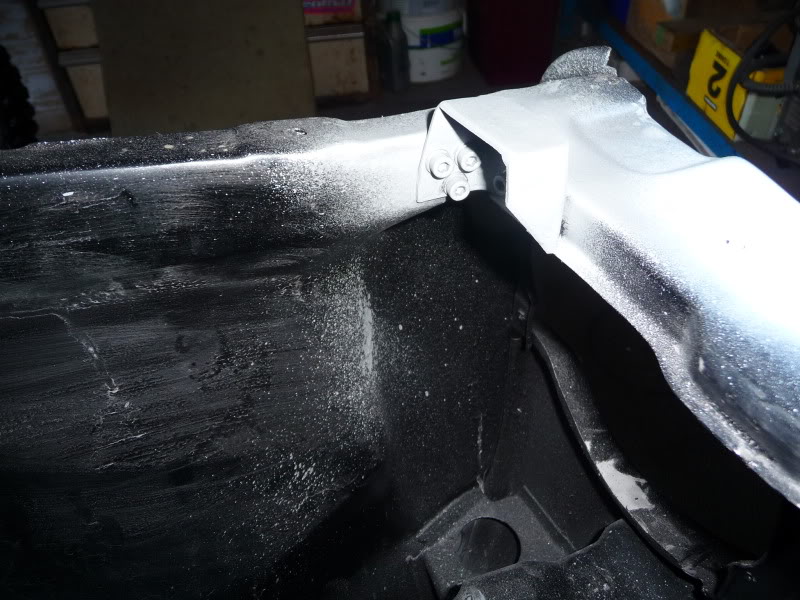
New top mounts arrived so I knocked the bolt off them with a hammer then welded nuts in their place, then painted them.
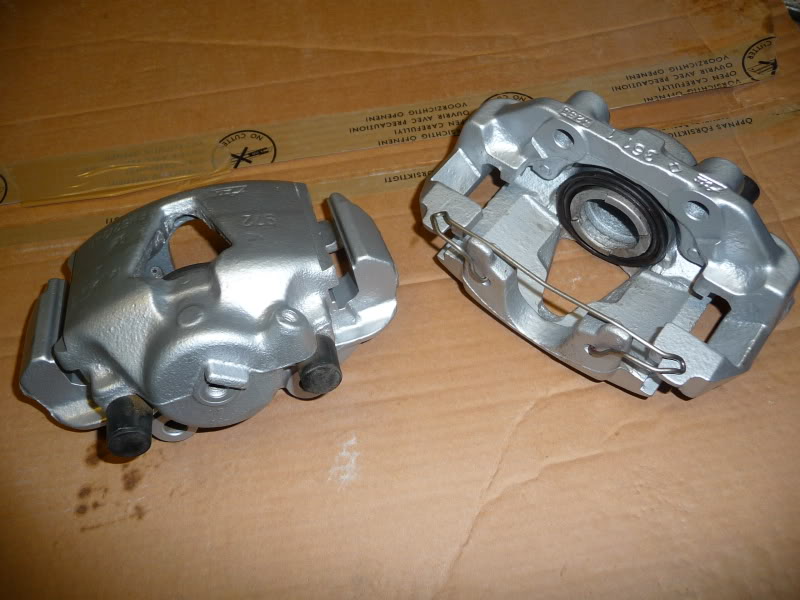
Got the water bottle bracket and the calipers out of the vinegar tank and attacked them with the grinder wire brush. Then got them sprayed up.
Dropped the front coily down, swapped the top mounts so now they can be bolted up tidy.
No, that ain't the bolts I'll use…needs dusting too!
Calipers tidied… cheers TOM9
found a little patch of rust last night below my rear lights, broke out the wire brush and eneded up with holes , so I've gotta crack the welder out again. :bh
derusted the tailgate aperture and tailgate and gave it the last dregs out of my tin of rustbuster.
lined the insides of the doors with flash tape and coated the insides with best part of 2 litres of waxoyl underbody coating.
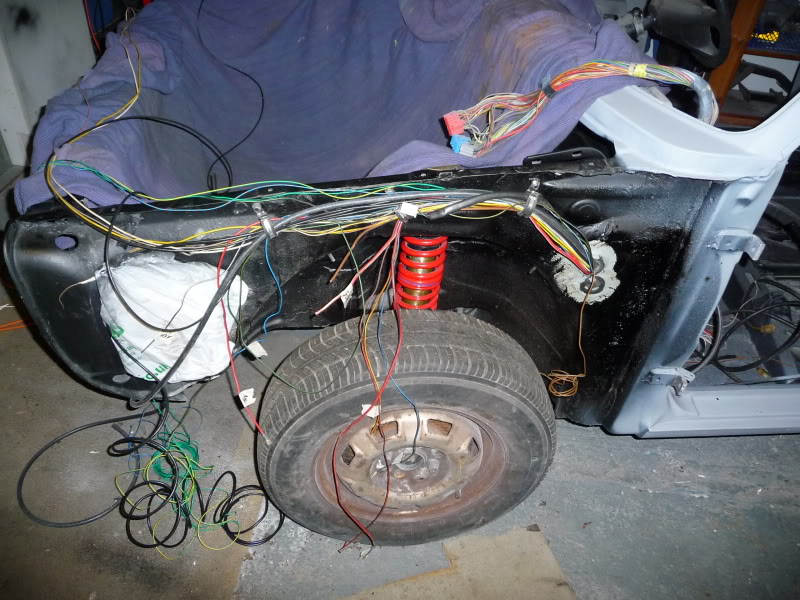
Also broke the wiring down to individual wires, removing and re-routing wires, before combining them both into a single loom. Still gotta extend the wires and a lot of tidying to do.
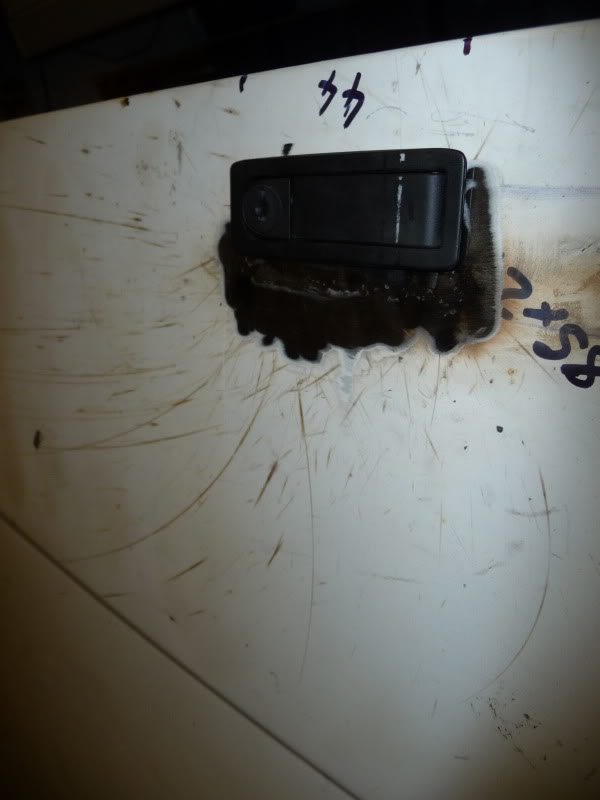
Got bored - made my concealed through bonnet vent washer jet thingy
Also been busy prototyping the VNT controller - bit of a mess at the moment but it's begining to show signs of life.
Must get cracking, summer's nearly here!
Started on the wiring. Cut a few wires out, added a fair few more. engine speed sensor, road speed sensor, relocated battery cable and doubled up the earth cable.
Posted
Local Hero
Rich
Posted

Local Hero
this is a brilliant thread, keep it going!
1983 Golf 1.3 Driver:

0 guests and 0 members have just viewed this: None.