How to remove instrument cluster and replace illumination bulbs
Submitted by Hairyarse.
Here's a 'how-to' on removing your instrument panel and changing the bulbs in on the back of your clocks for those who have never done this before. Hopefully I've not missed anything out but please use at your own discretion! (The following was carried out on my 1991 MK1 Golf Sportline Convertible.)
It's an easy enough job to do, you just need to be methodical and know where you've put all of the screws etc. It's worth using a magnetic cross-head screwdriver as it may help prevent you dropping screws down in to the dash area!
1. Disconnect the earth lead of your battery to ensure that all electrics are dead 2. You may just about cope with leaving your steering wheel in place, but it's best removed. Each wheel could be slightly different but typically the horn push button in the centre of the wheel needs removing, or centre trim. If you have more than one wire to remove from the horn push/plate, make careful note of which way around they go as re-fitting them the wrong way around could melt your loom and potentially cause a fire! 3. Undo the nut, usually 24mm, with socket and extension bar. The nut will probably be very tight so if necessary get someone to hold the wheel for you, whilst you undo the nut. 4. After removing the nut, if the wheel won't easily come off the steering column, before pulling on it hard, refit the nut a couple of turns so you don't pull the wheel off in to your face! 5. With the wheel out of the way, next remove the stereo from the dash if one is fitted. Hopefully you'll have the two metal removal arms to pull it out of the dash. Then disconnect the plug(s) and aerial from the back of the stereo. 6. With the stereo removed, you must also remove the stereo single-DIN metal cage as this will be covering one of the screws holding the dash trim in place. 7. Now remove the heater control knob and the three sliders - all remove with a firm tug! 8. Now, reaching through the stereo slot, gently push out from behind the heater control panel. On the right hand side at the rear will be a connector to the illumination bulb. Unplug this. 9. Around the switches to the left of the instrument cluster and around the headlight switch on the right are trim panels covering more securing screws. These are secured with spring tabs at the sides. With a small, flat-blade screwdriver, gently prise up the outer edge of each trim panel (i.e. left edge of left trim and right edge of right trim.) Use the outer edges as the tabs are shorter here, making removal easier. Once you've prised one side out the panels should just pop-off. Be gentle, the tabs can be fragile!
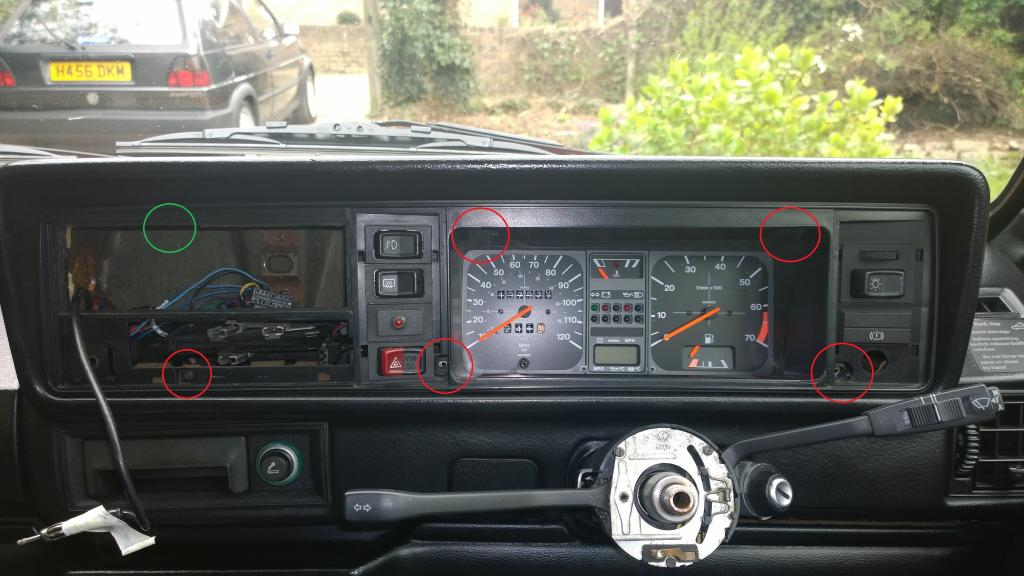
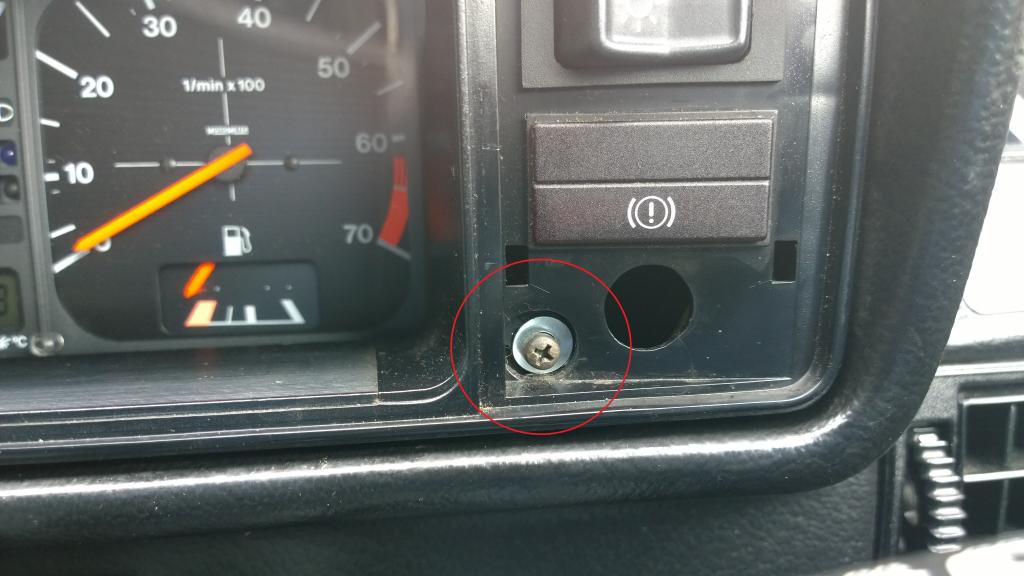
11. The circles show all screws that now need to be undone. Three screws facing you at the bottom, two under the top edge of the instrument cluster (you'll need a stubby cross-head screwdriver for these) and circled green, one final screw above the stereo slot. This one circled green may be hard to get even a stubby screwdriver on. If that's the case, undo the two screws holding the heater controls in place, shown below.
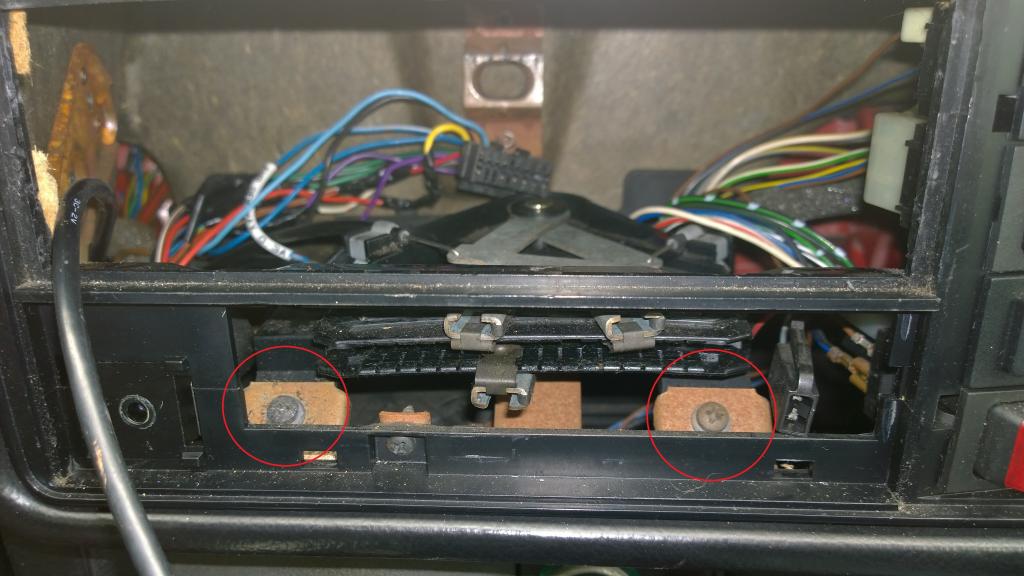
With these screws removed you can move the heater controls slightly - enough to make room for the screwdriver and remove the last screw.
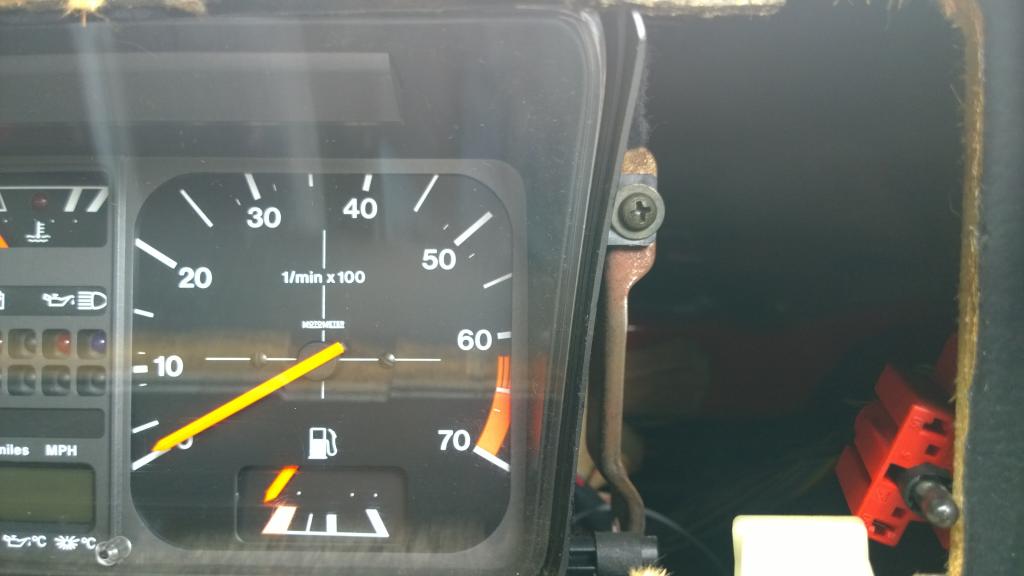
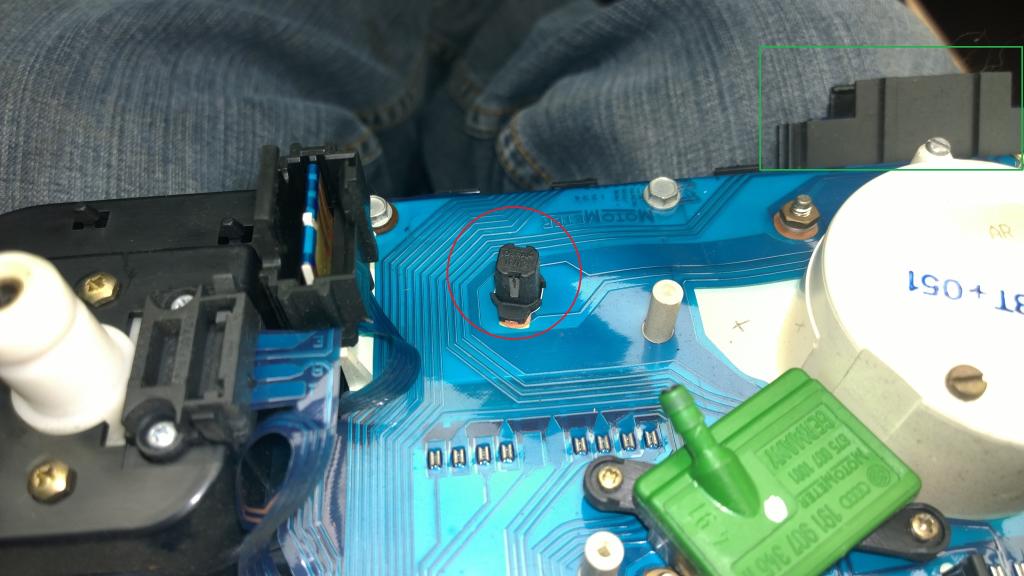
12. The trim panel is now free to come off the main dashboard. However, all of the power cables to the switches will be stopping it from coming all the way out. First remove the connector on the back of the heater blower switch as that's usually the shortest, then remove the connectors from the back of all the other switches. They may be stiff - so go gently but you may need to prise them off with a small flat-blade screwdriver. A couple of the switches have small spade connectors to them too. Every connector is different so you can't mix them up when you put all of this back together! 13. With all the connectors removed you can put the trim panel to one side and remove the clocks. To do this, there's two screws - one top left and one top right as shown below (right side)
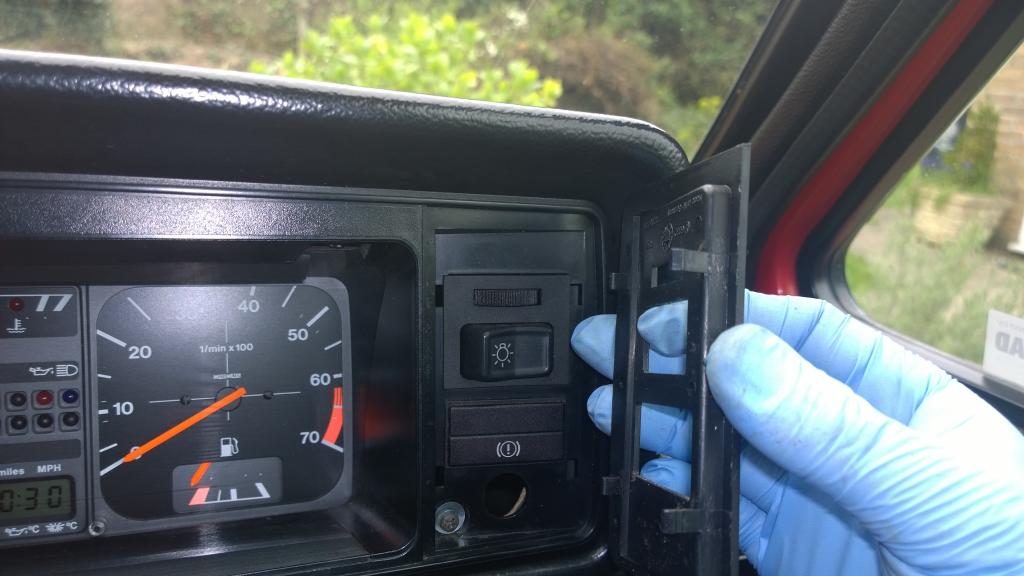
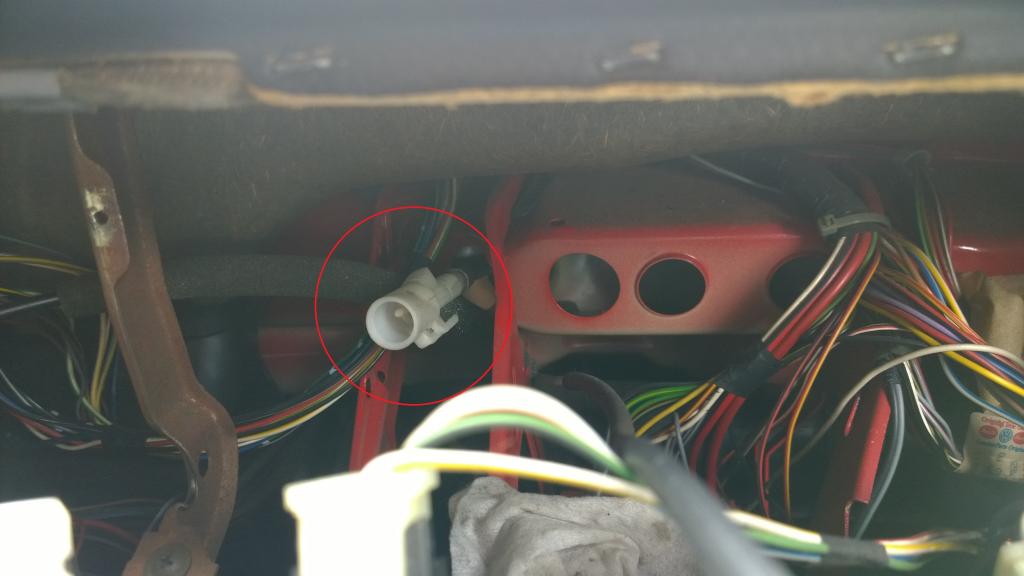
Remove the screws and then before you can remove the clocks, you need to remove the speedo cable. Reach behind the speedo and you'll feel the cable. Gently squeeze the plastic tabs and pull it off the back of the speedo. Below you can see the cable head circled so you know what it is you're aiming for blind!
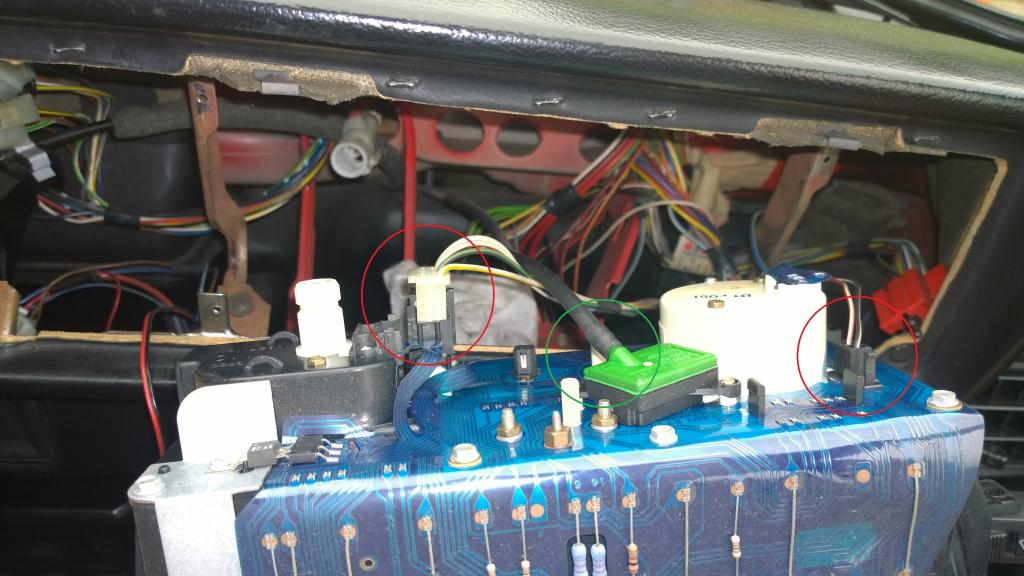
14. With the speedo cable removed, gently pull forward the top of the clocks to pivot them downwards - the top edge should just clear the underside of the dashboard but it's a close fit. You'll then be able to move them out of the dash - but carefully as there's more to undo! 15. There's typically three plugs to remove, two of which are circled below in red and the third is a flat, wide connector on the bottom right corner of the clocks. All simply pull out. Circled in green is the vacuum hose to the back of the clocks (location or its presence may vary pending model type.) If you have this hose, pull it free. If it's very hard to remove, tease the edge of it off with a small flat-bladed screwdriver
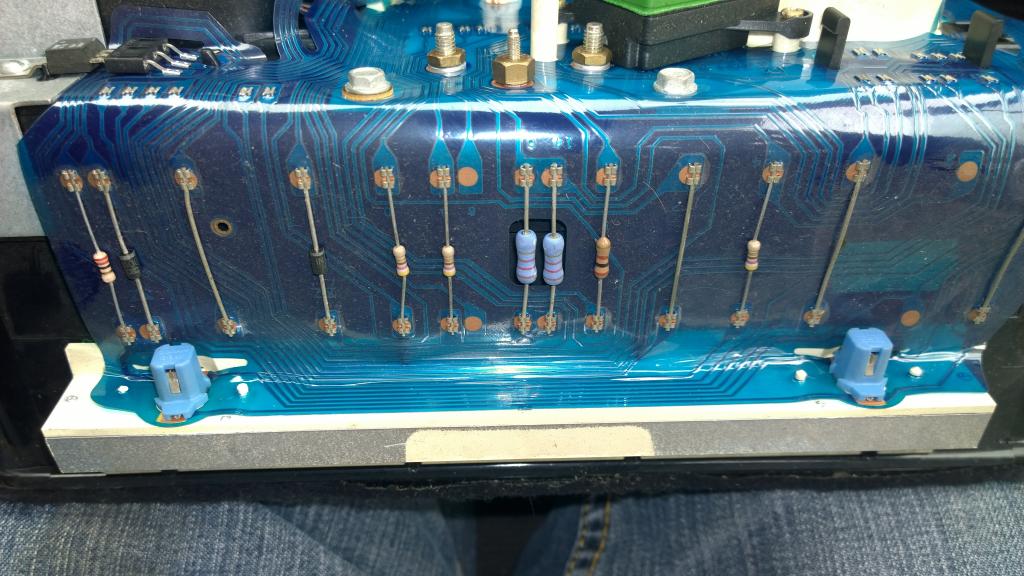
17. To remove the bulbs, simply twist them 90 degrees in either direction and pull them free. The two at the top edge of the clocks may be hard to grip and turn, in which case use some pliers or grips to gently turn them. Fit new bulbs in the same manner - you can use the slightly brighter 2 watt bulbs (they have a white holder) for a little more illumination at night over the original 1.2 watt bulbs. 18. Whilst the clocks are out, give them a good check over to see if there's any breaks in the metal tracks on the blue circuit board. If there is, that could explain if you have something not working right on your dials. These aren't the easiest things to repair so you can always try some second hand clocks. 19. That's it, job done! Well half of it, now you just have to put it all back together! It's a simple reversal of the above steps. You may find that the lower right screw of the dash trim pulls through the plastic trim and breaks it - this seems to be a common problem. If this happens, fear not, simply fit an oversized washer which will sort the problem as long as there is some of the plastic remaining to purchase against.
20. Once everything is back together, re-attach the negative lead of the battery and check that all lights and switches are functioning correctly - including the horn. Oh and set the time on your clock!