


83 Gti set to get full resto

Posted

Local Hero


My 83 Gti set to get full restoration
Posted
Local Hero
Well worth taking your time.
Posted

Moderator


My arch panel should be here tomorrow so I'll make a start and get it lined up ready for the weekend, then spend a day welding it up.
Once again, thanks for your help, Yomp

Andy.

Posted
Local Hero
When I finished mine last year I vowed never again but now I'm starting to get itchy tools again!
 Seeing and helping folk like yourself sort of keeps me sane and reminds me just how much work, effort and money is involved in restoring a car properly!
 Saying that I'm tempted to do another project again for when the club organises the Worthersee 2014 trip.
Posted
Moderator
I will also be taking on another project sometime soon, I've got a low miler 20V T engine, so will go custom with this one.
Posted

Local Hero

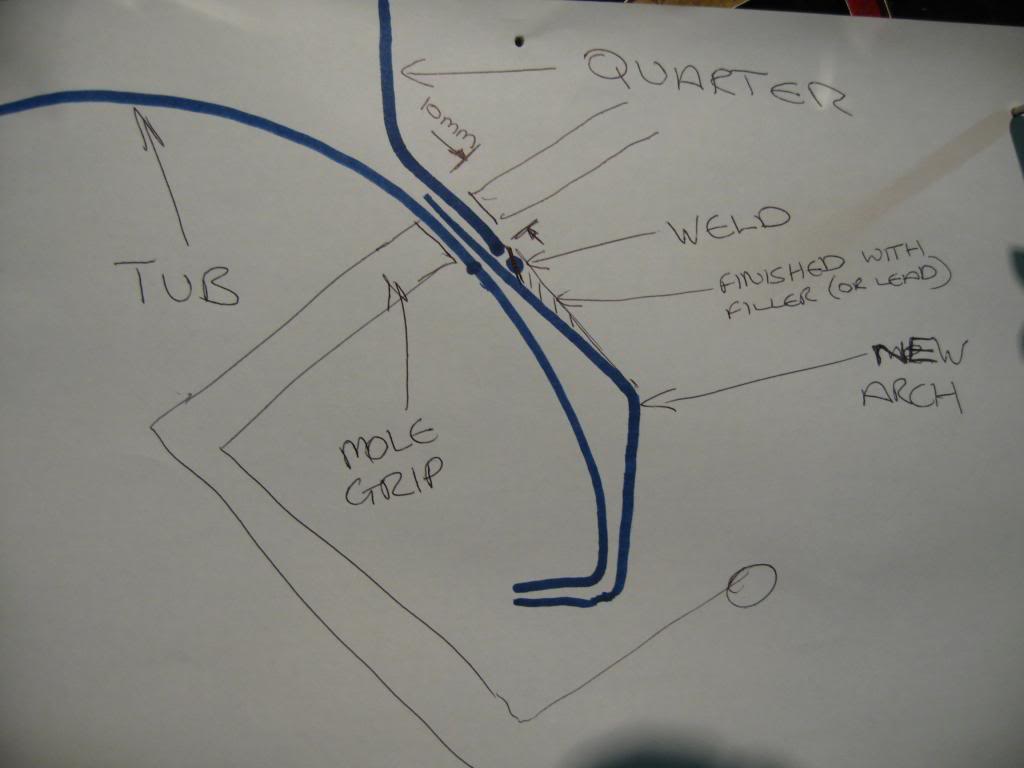
A picture is worth a thousand words and that looks a spot on method, thanks again!

Andy
LINCOLNSHIRE REGION -�https://www.facebook.com/groups/467122313360002/
1983 MK1 Golf GTI Campaign Model - Under (looooong) resto!
1962 Rover P4 80
2002 BMW 745i
2008 BMW Z4 2.5Si
LINCOLNSHIRE REGION -�https://www.facebook.com/groups/467122313360002/
1983 MK1 Golf GTI Campaign Model - Under (looooong) resto!
1962 Rover P4 80
2002 BMW 745i
2008 BMW Z4 2.5Si
Posted
Local Hero
However the tub is literally just behind the arch you are cutting and it can be easy to go through both skins. You then have to repair it from the inside before fitting the new arch which then leaves weld bumps on the outside of the tub and makes the new arch more difficulty to fit.
Patience, patience patience!!
Posted
Local Hero
http://www.ebay.co.uk/itm/Golf-mk1-a-pillar-drivers-side-o-s-/200906383241?pt=UK_CarsParts_Vehicles_CarParts_SM&hash=item2ec6f41f89
or
http://www.ebay.co.uk/itm/Golf-mk1-a-pillar-passengers-side-n-s-/200906383870?pt=UK_CarsParts_Vehicles_CarParts_SM&hash=item2ec6f421fe
Also regards your pattern wings - check your front bumper fits without rubbing them before you get it painted. Just seen that issu on another car where the pattern wings had more "bulge" in that area and caused the gap to close down the bumper side.
 Last edit: by Yomp
Posted
Moderator
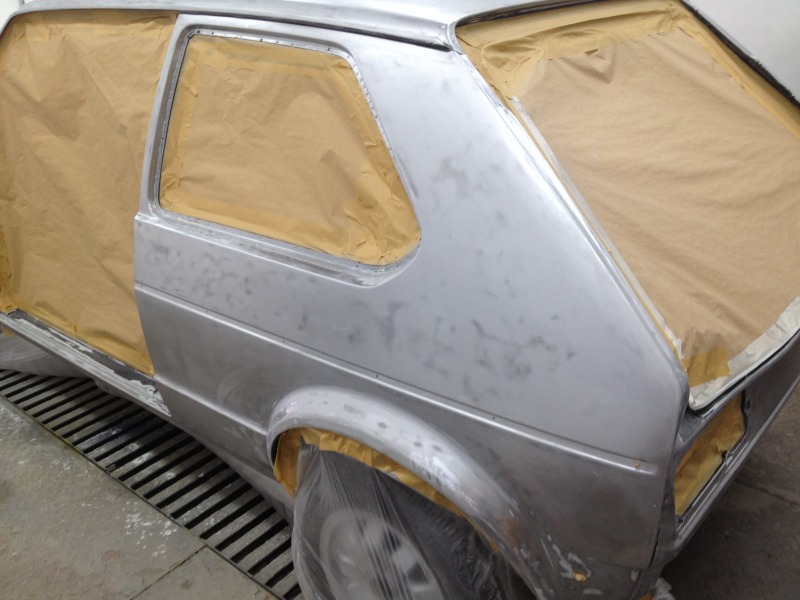
Yeah the wing on the n/s has a bit of bulge, I'm hoping I can flex it back in to shape a bit. The line where the wing meets the front panel is tighter at the bottom because of the bulge in the arch area. I should be able to get it back though I reckon.
My main concern at the minute is which way to tackle the sill to rear arch area. I got ahead of myself and cut away some rot (maybe too much) at the front of the arch before I fitted the sill.
I now have, the original panel underneath, the new sill coming in over the top and then I'll have the new arch coming in from above lol, so I'll have three pieces of metal coming together to make one. Not sure which piece to cut away
 My thought was to cut away the arch part of the sill and continue the new outer arch to the bottom if you know what I mean. Here is the new arch..
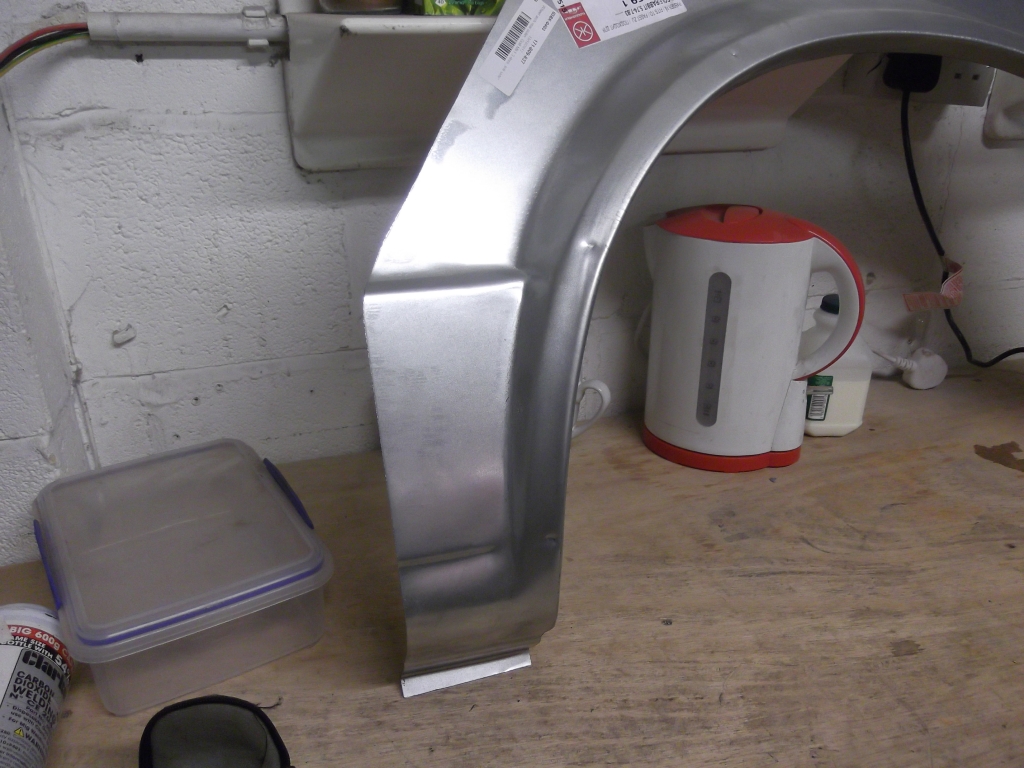
I also have a new bottom corner at the back to do


What would you do in this situation Yomp? Sorry in advance for the questions mate, I just don't want to get ahead of myself again
Thanks in advance,
Andy.
Posted
Local Hero
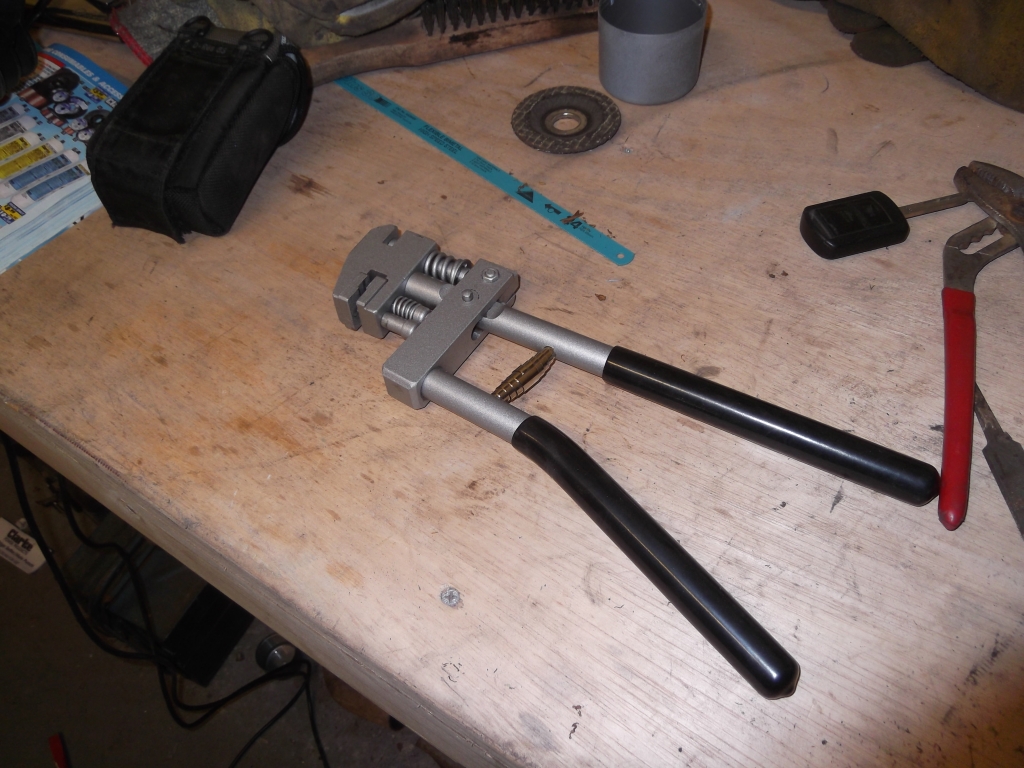
However you should ideally� joggle the joins so they fit flush to each other on the outside edge. Again keeps a better shape without requiring as much filler.
A tool like this produces a small step on the edge of the panel.
http://www.youtube.com/watch?v=Rvx6lCLS5CM
Posted
Local Hero
Posted
Moderator
Yomp said
If it were me I'd keep the arch panel hole and cut the sill/rear corner to suit. Your arch curve will be right all the way round then.
However you should ideally� joggle the joins so they fit flush to each other on the outside edge. Again keeps a better shape without requiring as much filler.
A tool like this produces a small step on the edge of the panel.
http://www.youtube.com/watch?v=Rvx6lCLS5CM
Cheers man, that's what I thought. Already bought a joggler/hole punch, it's a great tool. It's saves a lot of work drilling too!
Posted
Moderator
Small update. Made a start on the n/s rear wheel arch. Having never done this before, I'm taking my time. Today started off with me cleaning odd the rust treatment I applied last night and then on to marking up the repair panel and the rear corner. I took my time and made sure I didn't remove to much using the 'measure 3 times, cut twice' method
Here's a few pics….
Rust treatment before I removed it

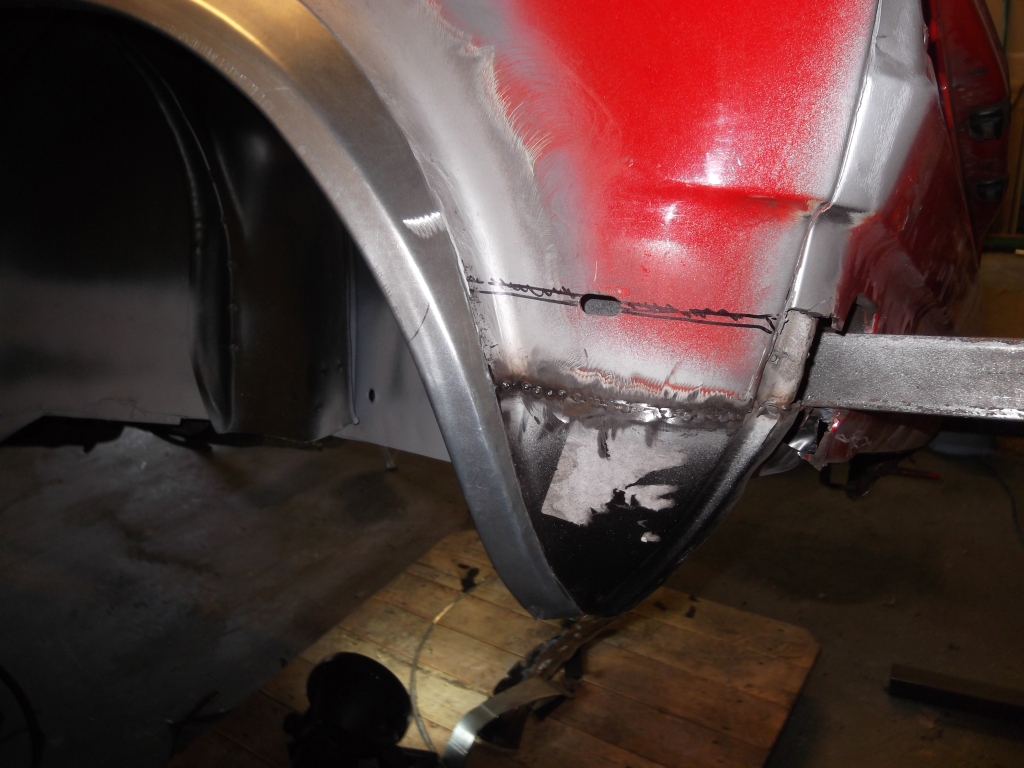
I then removed the last return edge of the arch and taking Yomps advice on being careful not to cut in to the arch tub, I put a piece of the old arch between the two so as not to damage the tub


New panel marked up

Also had a repair at the rear corner to do
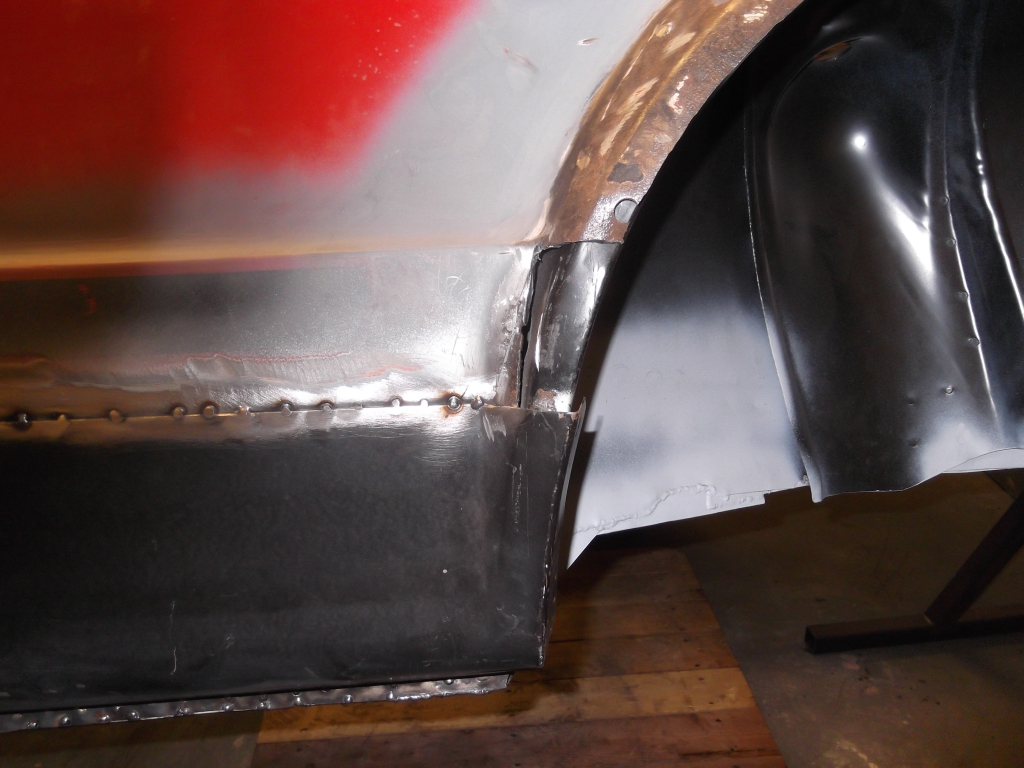
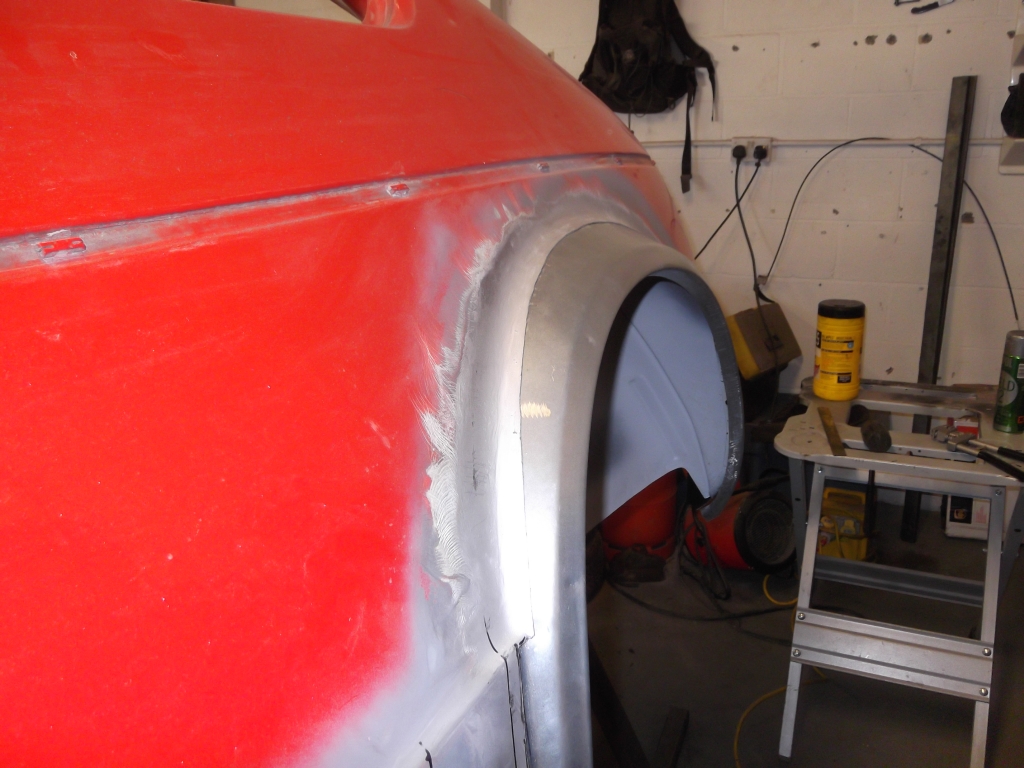
Arch panel cut to size and trial fitted, still haven't welded it in yet, I'll get that started in the morning before Band practice and crack on again in the afternoon

Back corner from inside
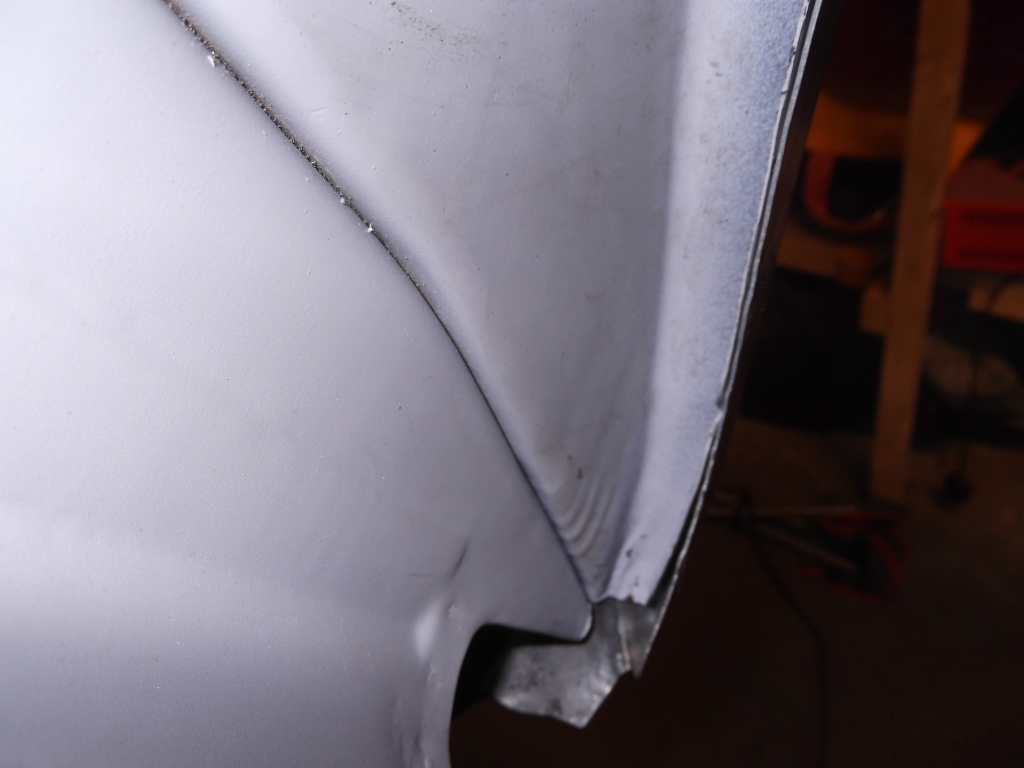
It seems to be a good fit all the way round so very pleased so far.
That's it for now, I know the progress is slow but what's the hurry
Cheers, Andy.


Old Timer

Posted
Moderator
Cero said
If you can afford the luxury the air joggler is a great tool to have & use.
Yeah been looking at them too, Cero, unfortunately I don't have a compressor at the minute though.
Local Hero
Might be too late but……..
Can you still take out the new arch panel as you need to drill or punch (using your joggler-if it has one) a series of small holes (about 5mm dia every 50mmish) around the lip of the arch so you can plug weld it to your tub and then grind the welds back. If your not sure what I mean I'll draw another diagram but it wont be until later as I have to work today!
Posted
Moderator
I'm also looking into getting a leading kit to finish these bits off once welded
Thanks again for your advice Yomp.

Moderator


Posted
Moderator
There certainly is some talented welders on here. It's really good how we can all help each other out too! Love this place man!
Posted
Moderator


0 guests and 0 members have just viewed this: None.