


LB's Mk1 cabby rebuild - Starting of a 16vG60!

Posted
#1181523
(In Topic #141176)
Settled In

LB's Mk1 cabby rebuild - Starting of a 16vG60!
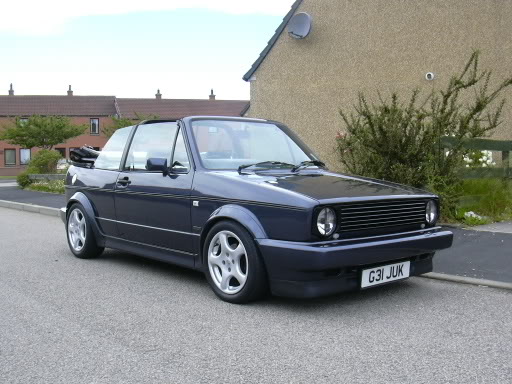
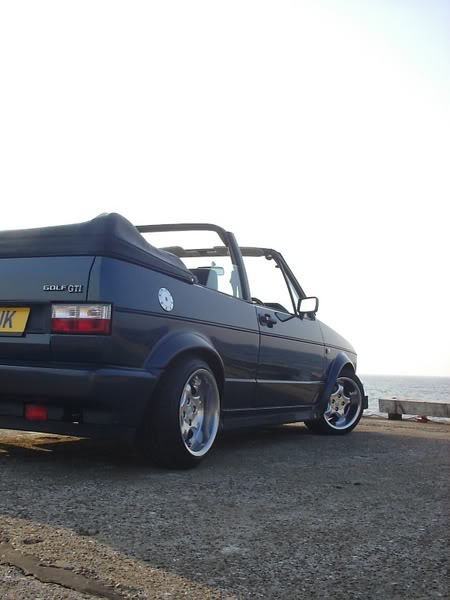
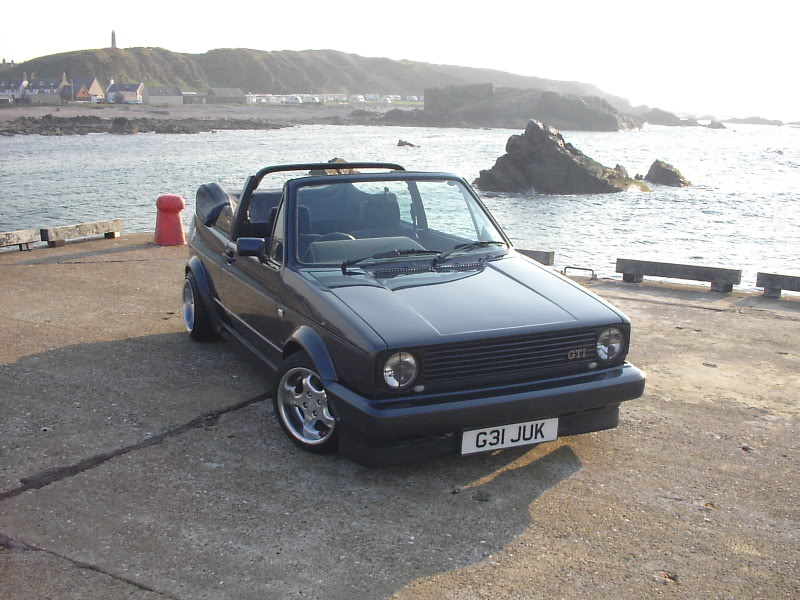
This is how it all started, bought a mk1 Cabby as I've loved them since I was wee. I added some wheels smoothed the front bumper added a vr6 chin spoiler etc.
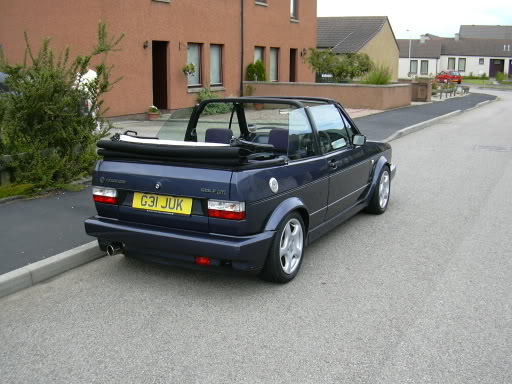
Was using it daily for work so just kept it ticking along. Then I started to get a bit more serious with it adding coilovers, supersprint exhaust and some 8" and 9" x 14" polished rh cups.
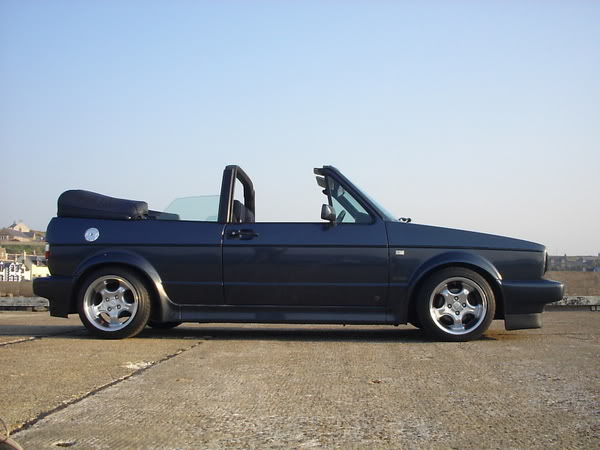
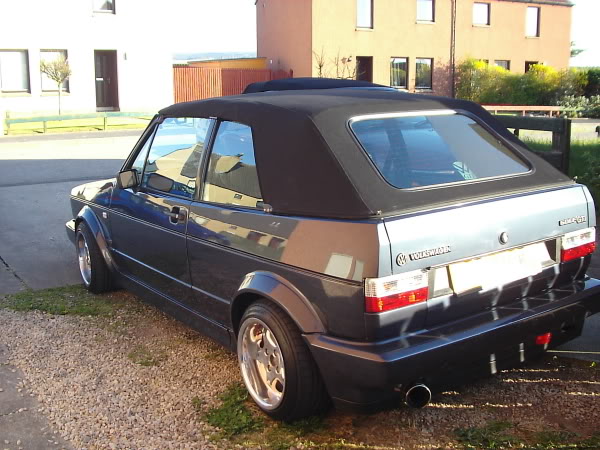
But the niggles got bigger! Looked at rolling the arches as the wheels were rubbing and found there were in a bad way! and the more I dug the more the rust scabs kept showing their face so decided it was strip down and rebuild time.
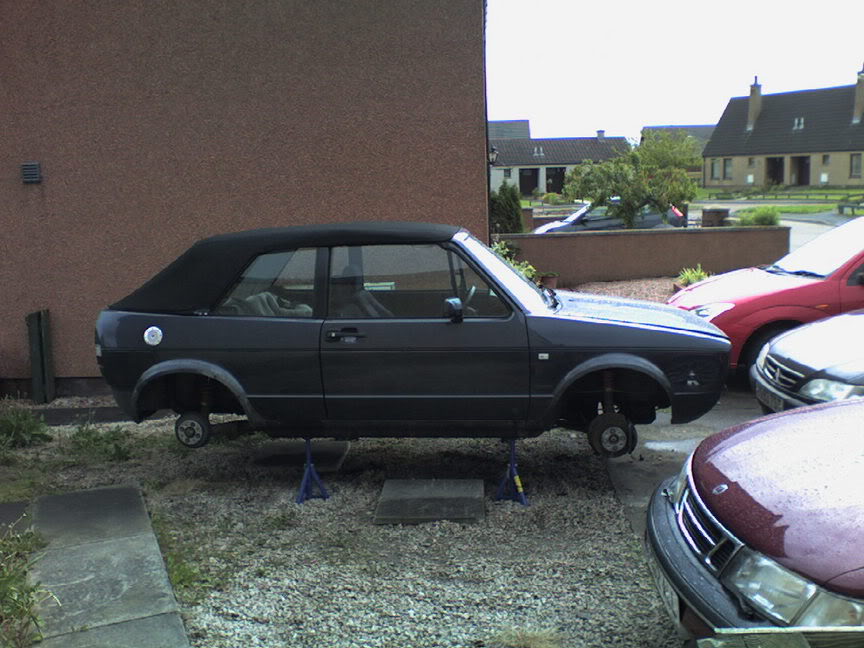
First job was up on the stands, bumpers and bodykit off
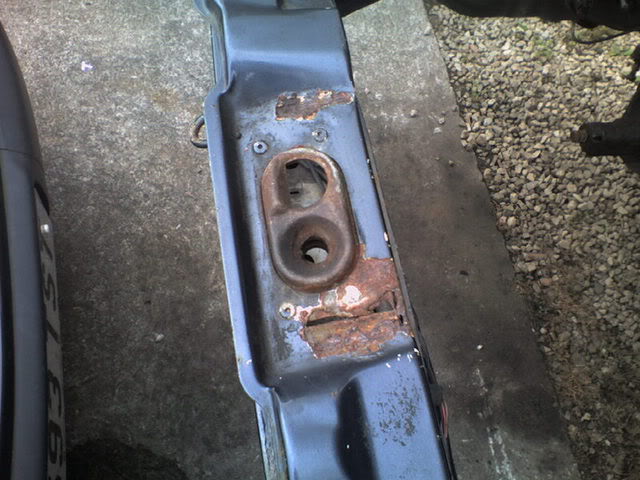
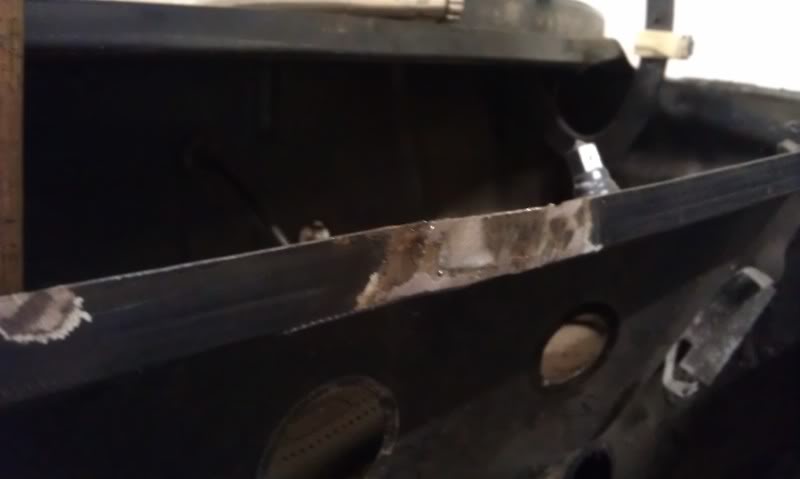
First of the scabs, it doesn't look so bad but its rotten underneth!
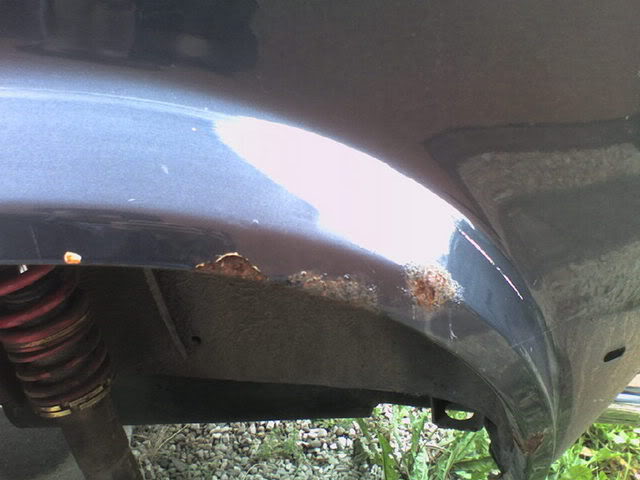
And again!
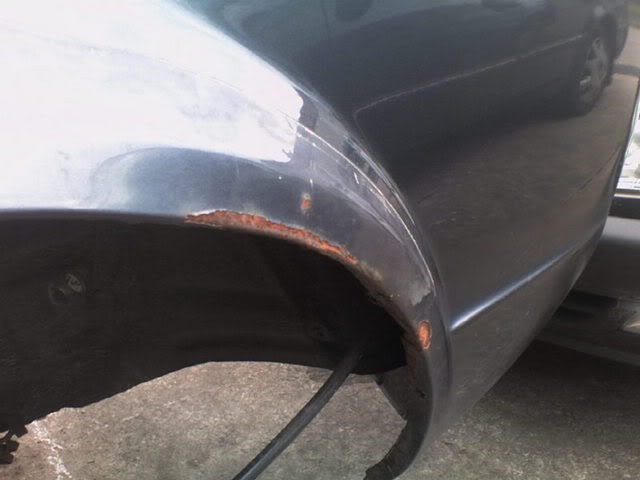
Uglier then a ginger stepchild!
Hard to see but the front panel is shot!
This was stage one, living at home and plodding along then along came one my now wife and everything went up in the air at that point!
Moved house, started working on wind turbines and spent months at a time travelling around europe working so my poor mk1 remained where she was for 4 years! during holidays etc I got a chance to do a little but never much.
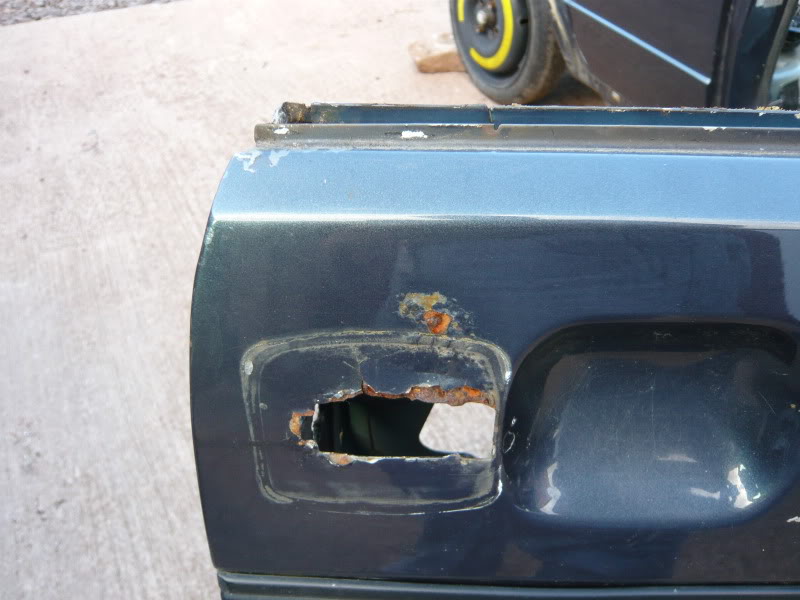
The strip continues!

That'll be the door in the bin then!
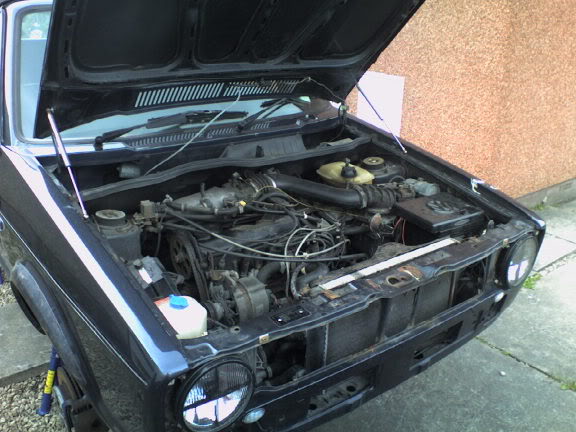
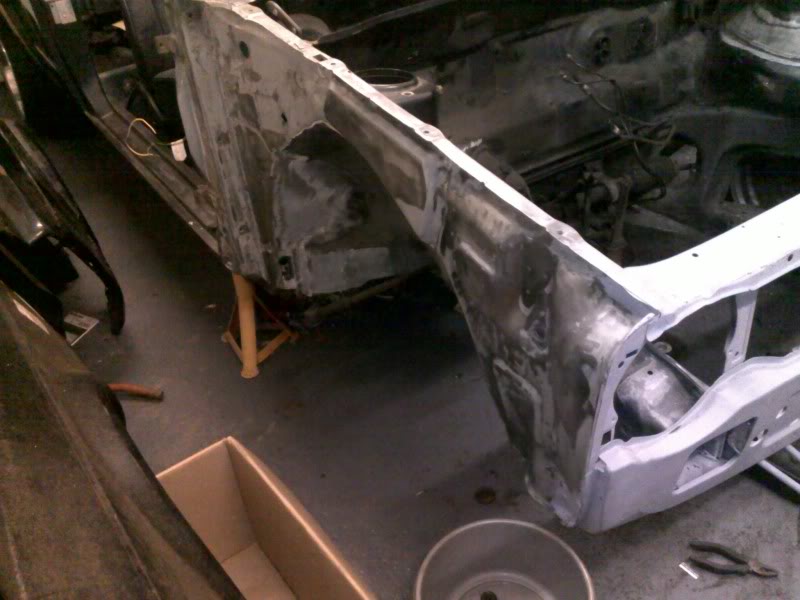
Which brings us to the present day. Got a job on a local windfarm so it was time to get stuck in proper!
One brand new genuine front panel fitted
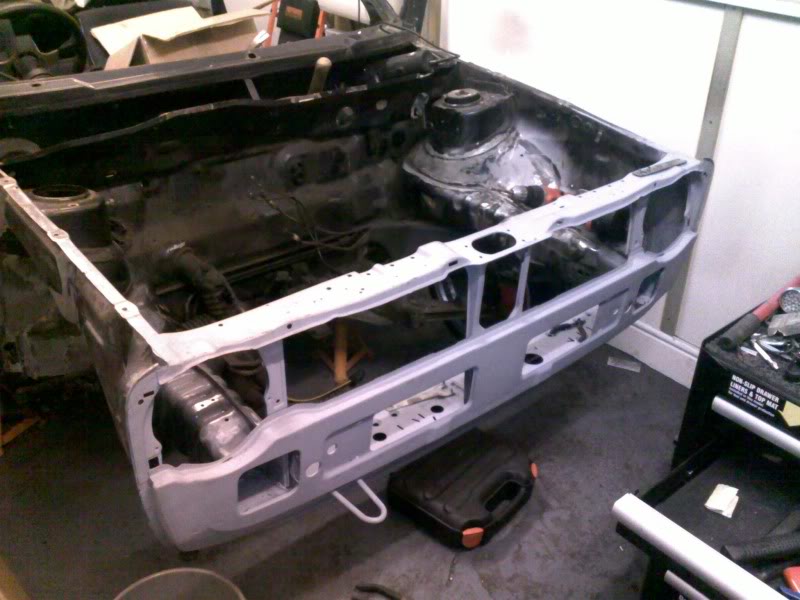
Some slightly dodgy plug welding… but then this is my first time with a mig welder!
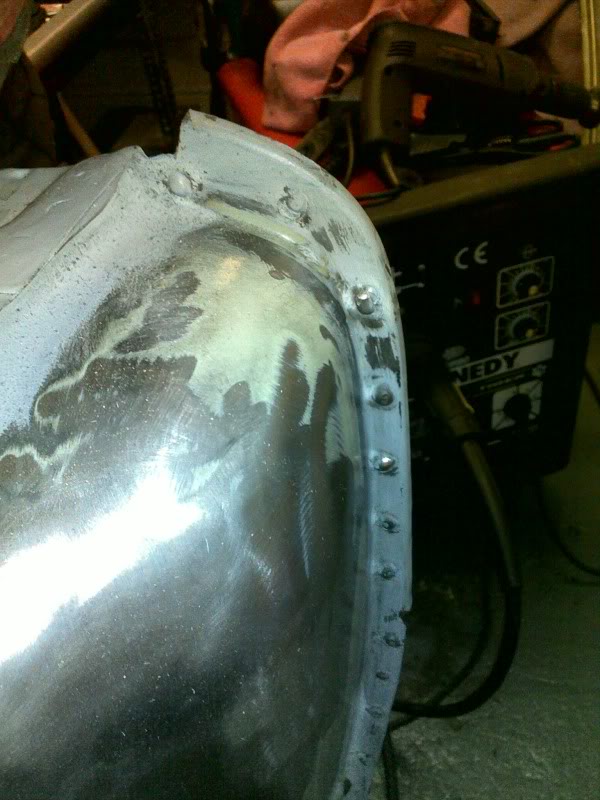
Battery tray out
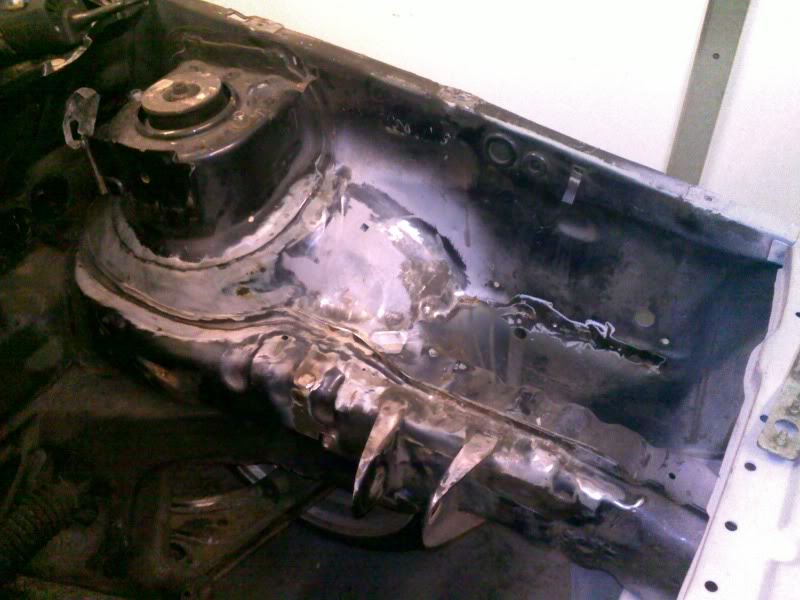
And made a start stripping the underseal out of the inner wing
So next bit…
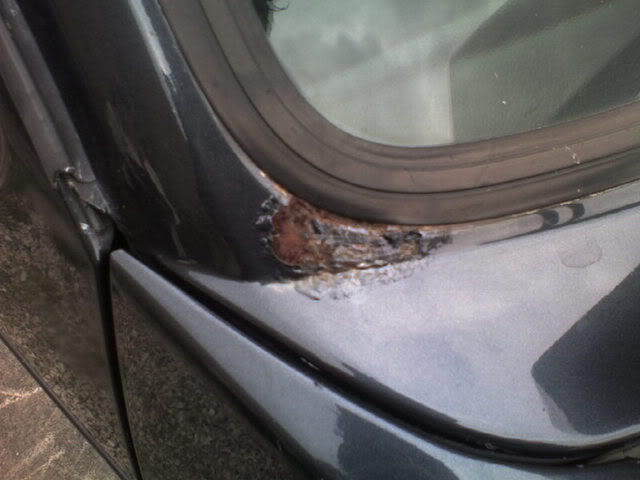
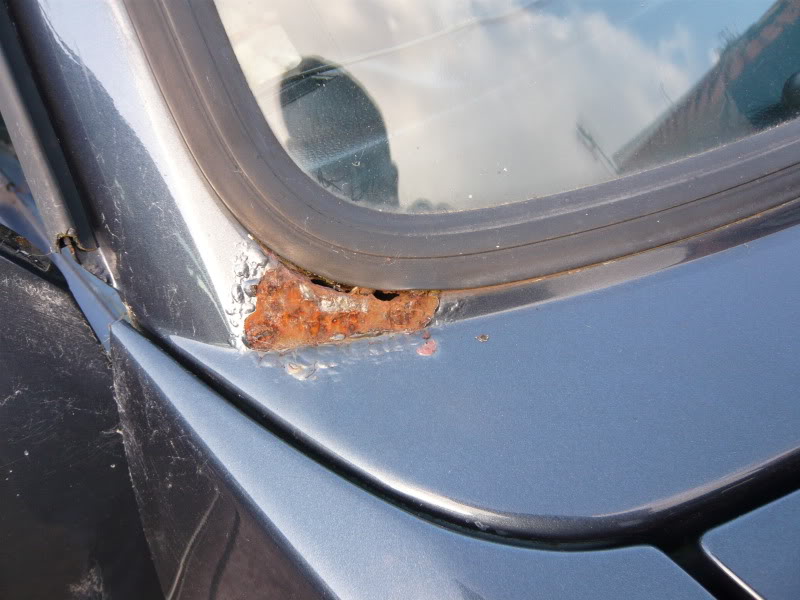
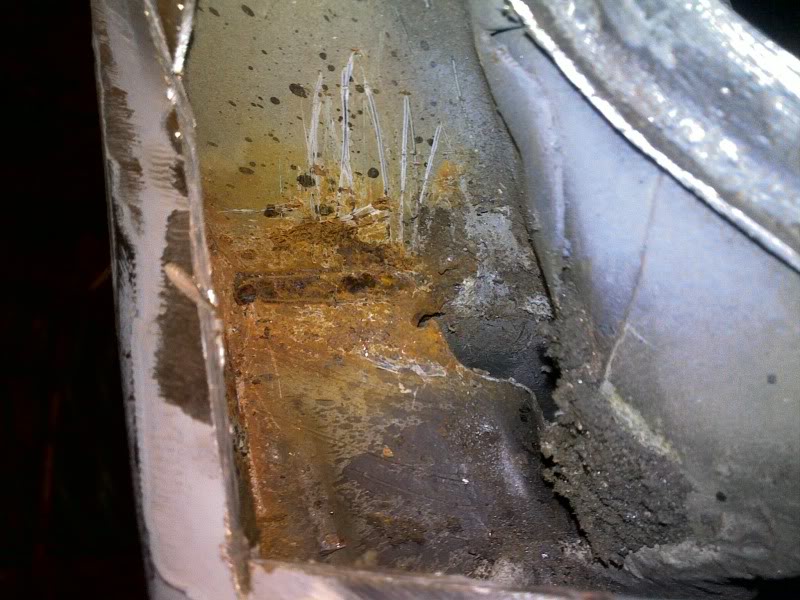
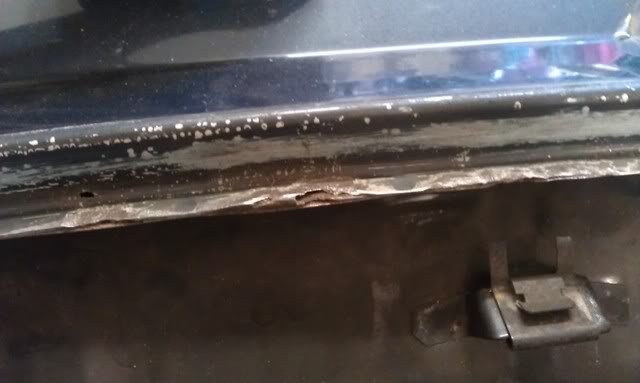
With the front panel done it was time to get stuck in with the windscreen scabs!
After 4 years it looked like this
After 4 mins with the flap wheel it looked like this
And after 4 mins with the grinder and super fine cutting disc it looked like this!
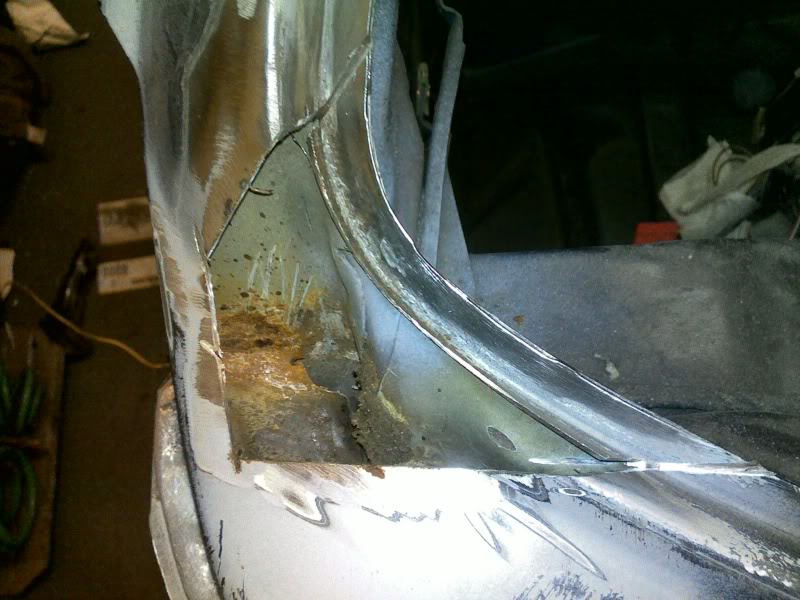
Bugger, more rust… thankfully just a rub down and rust cure should sort this
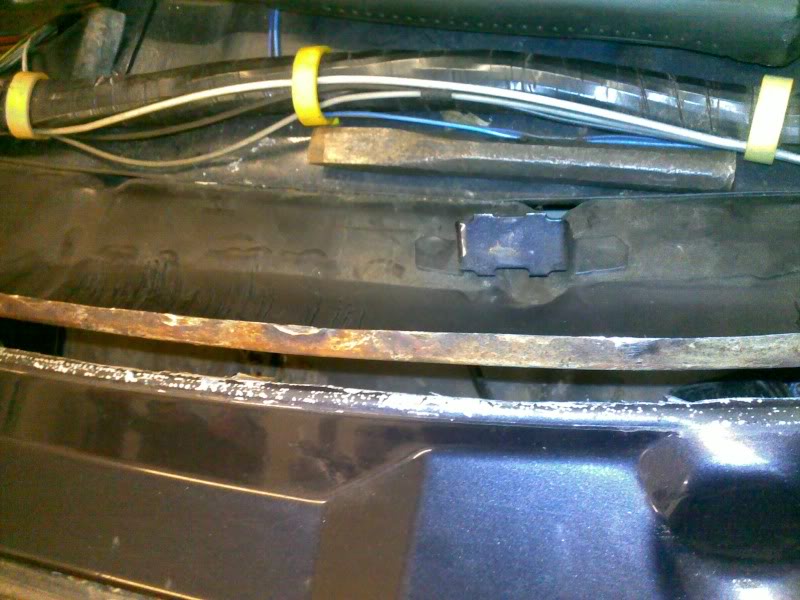
Also been cutting out the rust on the top of the scuttle, had thought about deleting it but its been done to death in my mind so it shall remain
Rust cut out
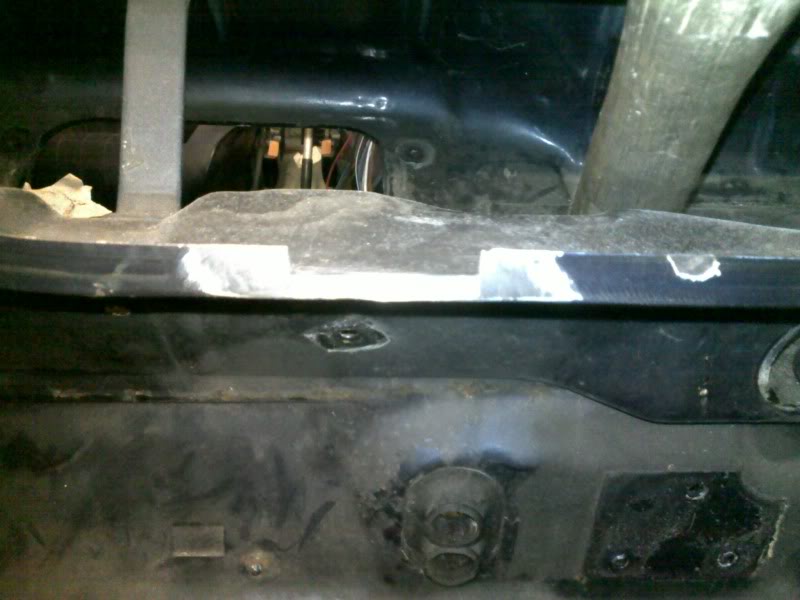
New bits welding in
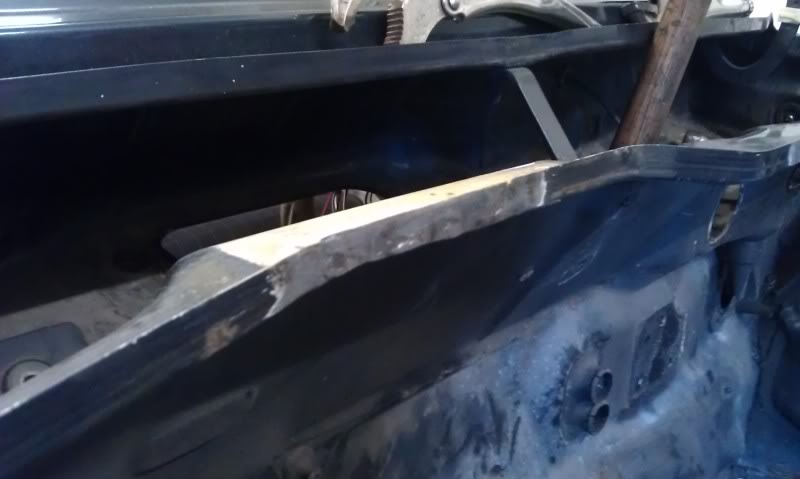
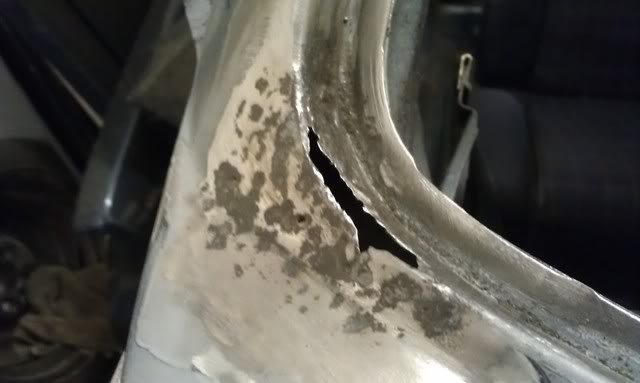
Noticed a bit more rust at the windscreen base so started to find out what was happening…
So cut back the panel to see how bad it was… in the words of Blackadder "Damn!!"
So welded in some fresh metal from the stash
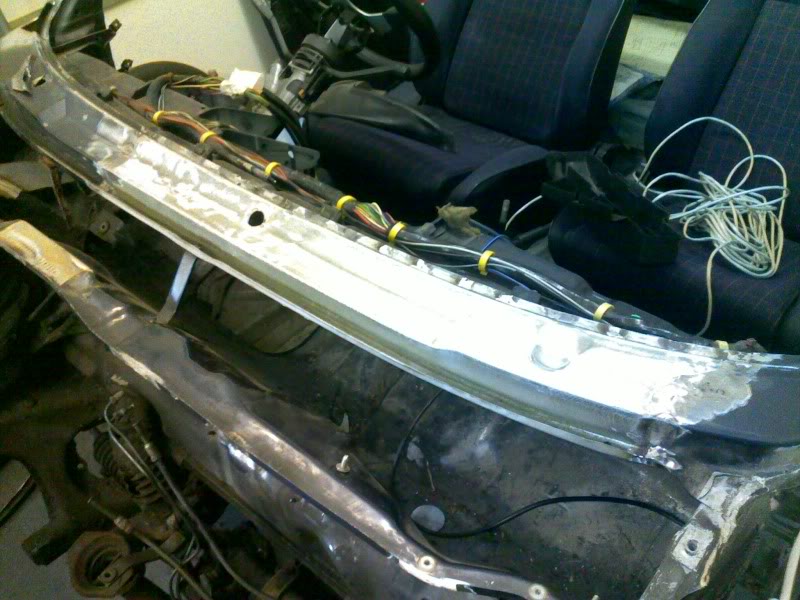
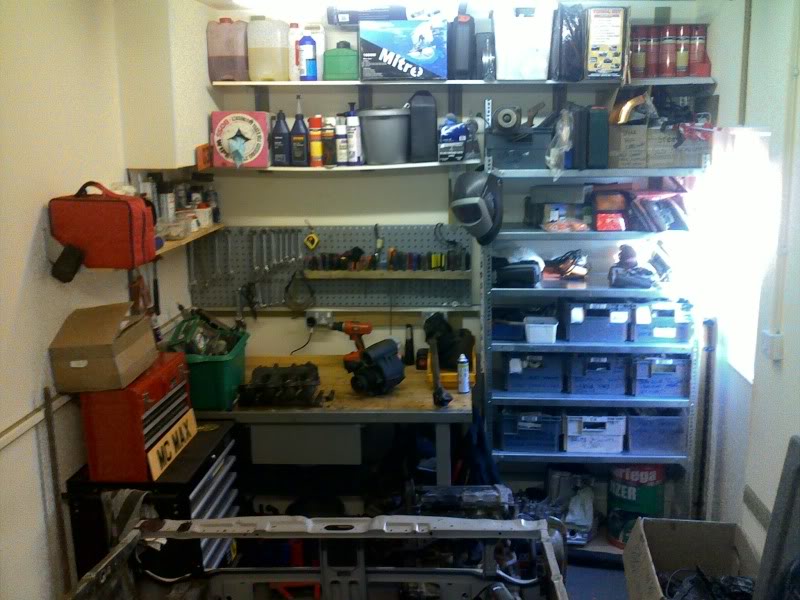
The stash in case you were wondering
And finally the man den where the magic happens!

Posted
Settled In
mk1 golf - resto
mk3 polo breadie - daily banger
mk3 polo breadie - daily banger
Posted
Settled In
______________________________
Golf mk1 1.8 gti cab (Still Working on it)
Merc E220
.jpg")
Golf mk1 1.8 gti cab (Still Working on it)
Merc E220
Posted
Settled In

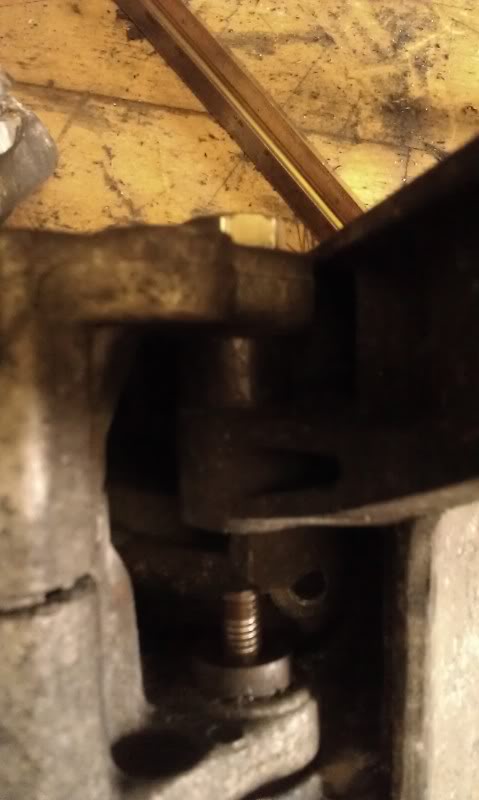
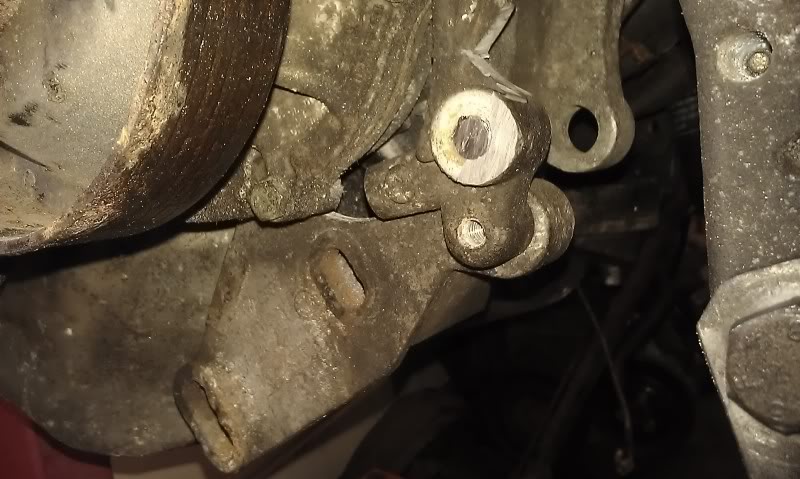
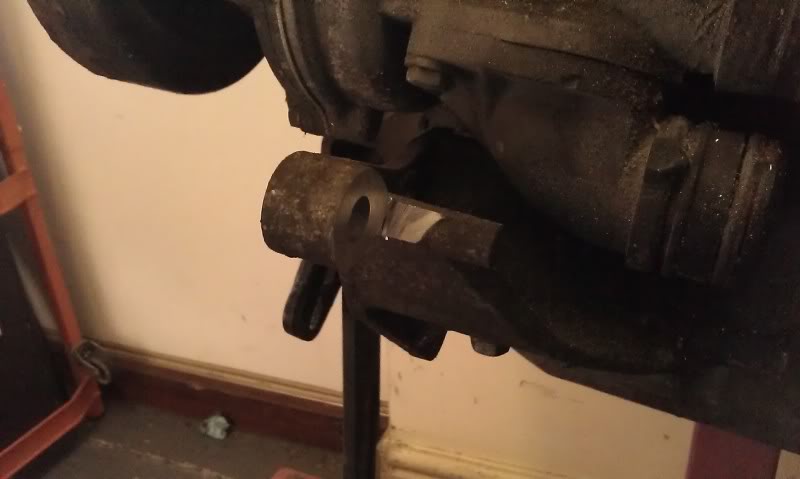
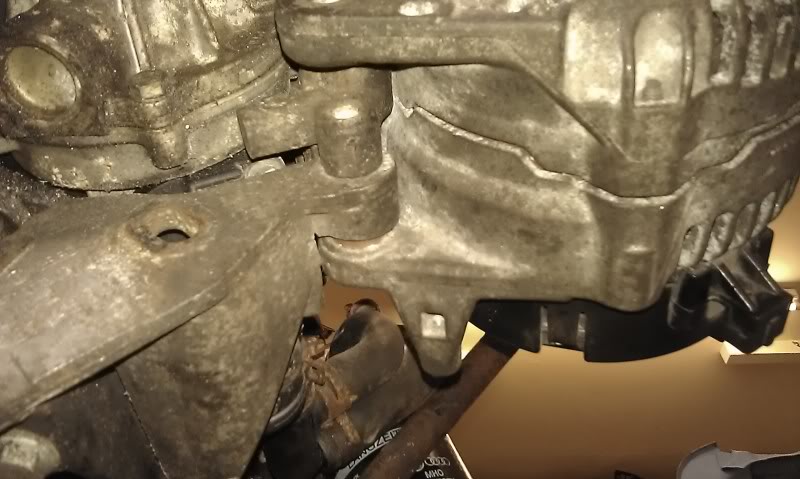
Plenty more to be done, have to figure out now if I mount the alternator under the charger or go with a bracket at the back of the block. Seen short block 16vG60's with the alt at the back but not with a tall block. On a postive I'm guessing the extra height will help clear the brake mechanism but I could end up fouling the scuttle! :uhm:
Guess I'll have to get reading… Wish me luck!
Posted
Settled In
mk1 golf - resto
mk3 polo breadie - daily banger
mk3 polo breadie - daily banger
Posted
Settled In
Posted

Website Manager


I think you will struggle to get the G60 throttle body to fit in that position - you will need the rarer 16V Scirocco one.
Cheers,
Ade

Ade
Posted
Settled In
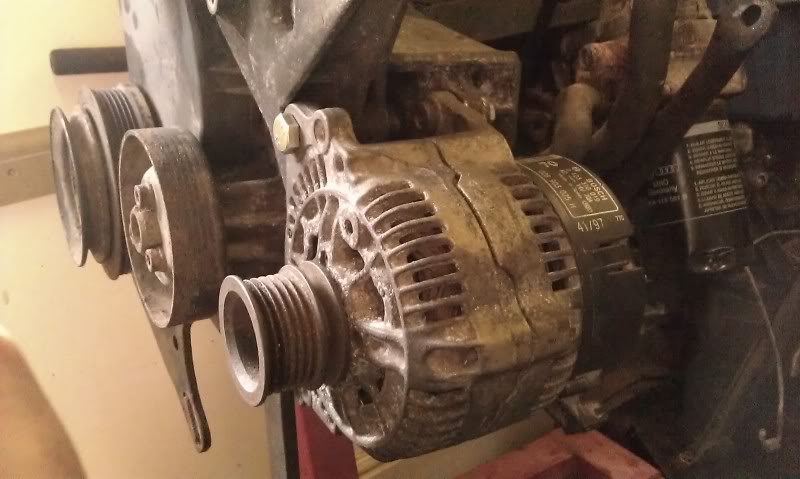
I was really suprised at how easy its been so far, the ABF is just the perfect base for this as the pulleys are all correct for the ribbed belt and I'm almost done mounting the alternator under the charger using the AC bracket from the ABF and the tensioner bracket from an old KR I had lying about.
Going to go pikey and stacks gaskets to get the compression down. I've seen these engines turbo'd with silly horsepower running stacked gaskets so if its good enough for them its good enough for me!
Posted
Settled In
Need to measure it for a belt now and get my block up on the engine stand so I can get a proper look at the belt alignment and tweek it if needs be
Once I've find tuned this system I'll get some more pics up
Posted
Settled In
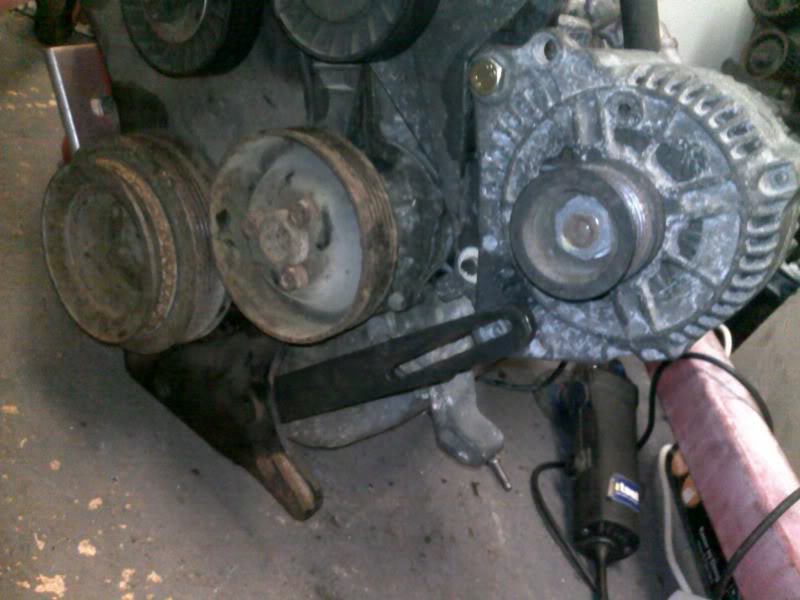
Set about finalising my alternator mounting. Decided to take plenty of photos to help anyone else out who wanted to do this engine conversion… I may even write a how to ABF 16vg60 if theres enough interest. Whole engine looks nice and scabby now but this is just the dry build stage. once everything fits and works I'll tear it back down and get everything looking ship shape and bristol fashion.
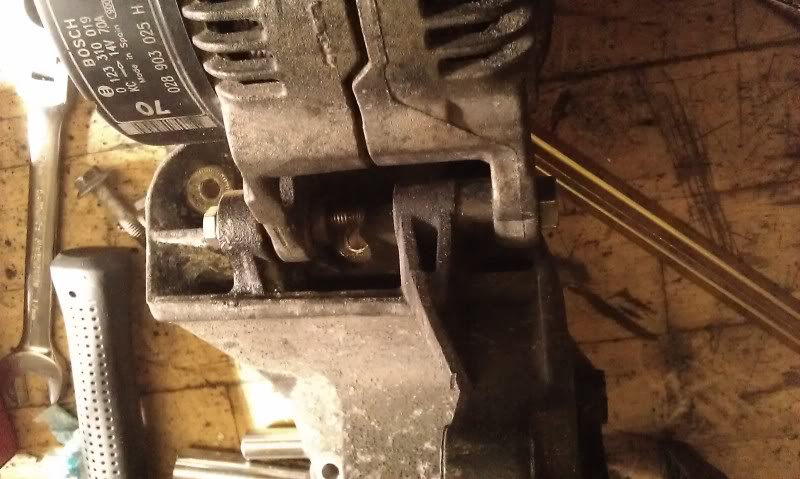
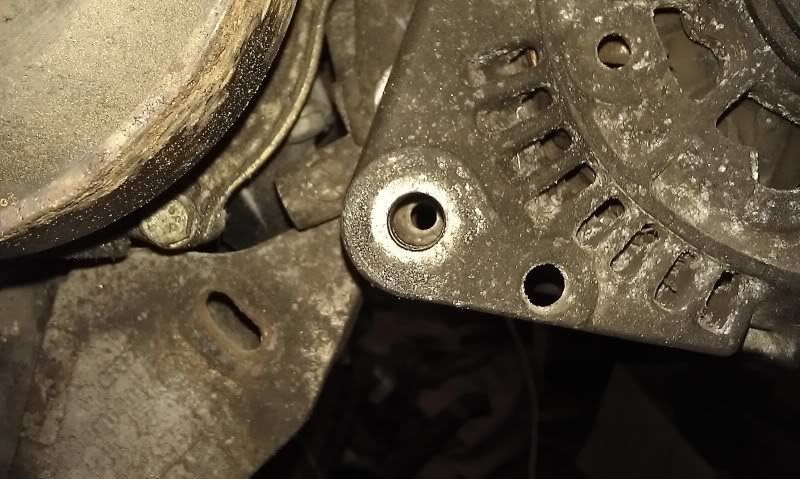
First thing was to source a collar to fit into the charger bracket to make a good solid mounting point for the alternator.
Raided one of the old abf brackets from the AC with a perfect m8 thread
And mounted it into the supercharger bracket
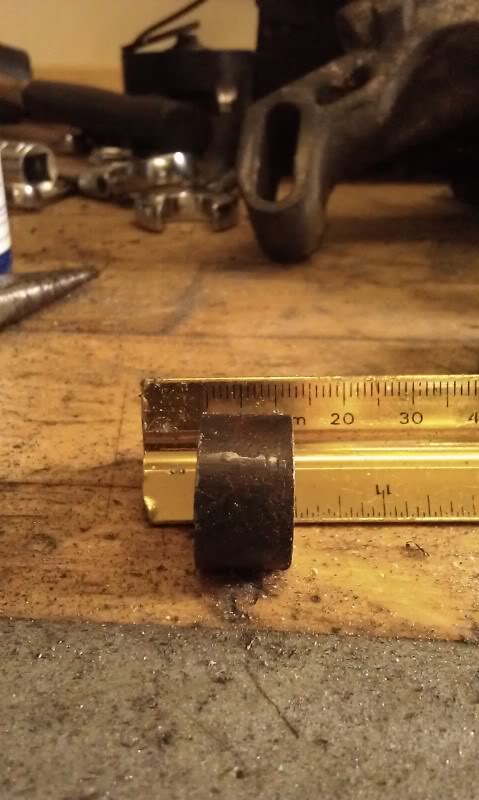
Next I had to break out the measuring tools and sort out the offset of the charger
Then sort out a spacer

These must be harded steel as I spent ruddy hours grinding it down to the right size!
Next I had to cut a relif into the charger bracket and shorten the collar so the alternator would mount flush
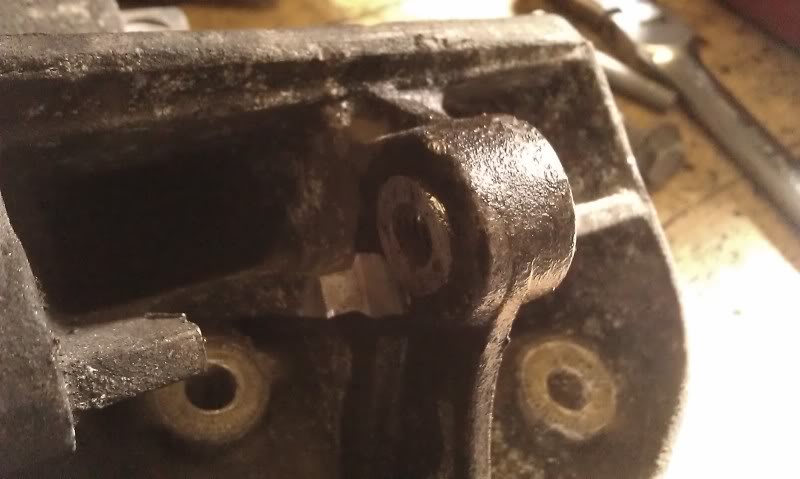
Perfect!!
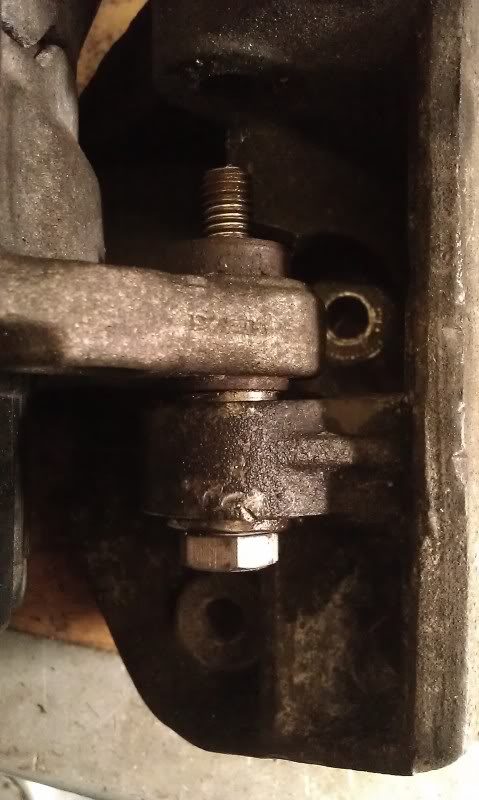
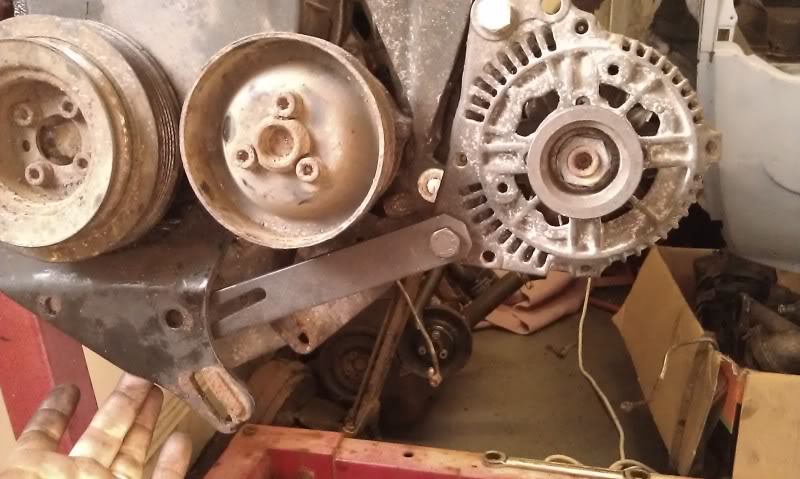
Now for the bottom mount, had a plan to use the old aternator tensioner bracket to give me the choice of either tensioning the serp belt with it or fix it into postion and use the damper to tension it all instead
To this end I dug out the power steering bracket from the KR engine I have loitering in the garage and tried the alt, as expected its going to need a trim! On a plus side it'll also help to strengthen the bottom of the charger bracket as well!
Measured and marked with the grinder!

Cut out and ready for a trial fit
Perfect fit!
As you can see I also have the option to just bolt it in at the bottom
but I had this idea…
This should allow me plenty of options and an easy way to swap belts.
Carried on dry building the engine and came across a few more problems to try and work out but its slowly coming together, I'll post up some more as it takes shape.
Posted
Old Timer

Posted
Settled In
Posted
Settled In
Since last time I wrote on here I've changed the complete shell and got me another ABF engine but this time with a nicely ported head and scat rods etc…
I'll get some piccies posted pronto!
Posted
Settled In
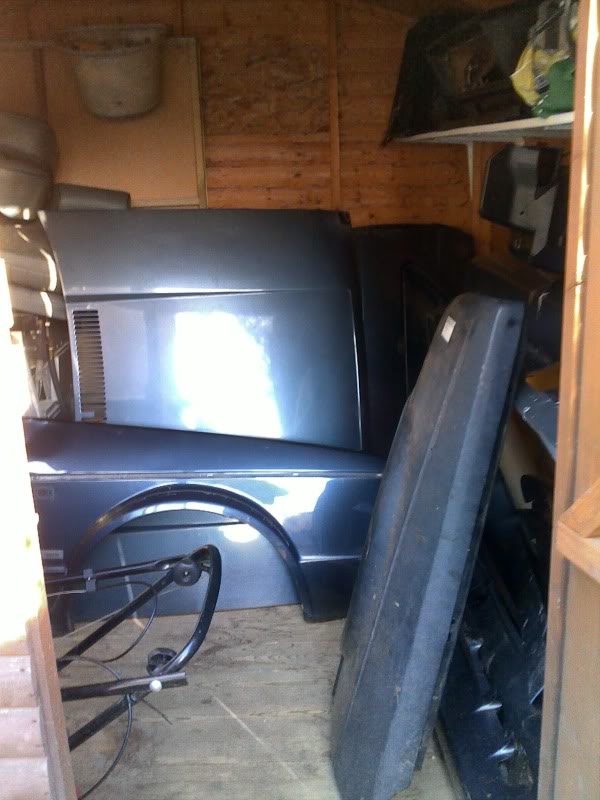
Since I was last on here a lot has changed… I lost my decent garage due to moving. The new man cave is currently a work in progress as its basically a large shed with a dirt floor and no power… it'll do just now but plans are afoot!
Firstly my old cabby shell now looks like this…
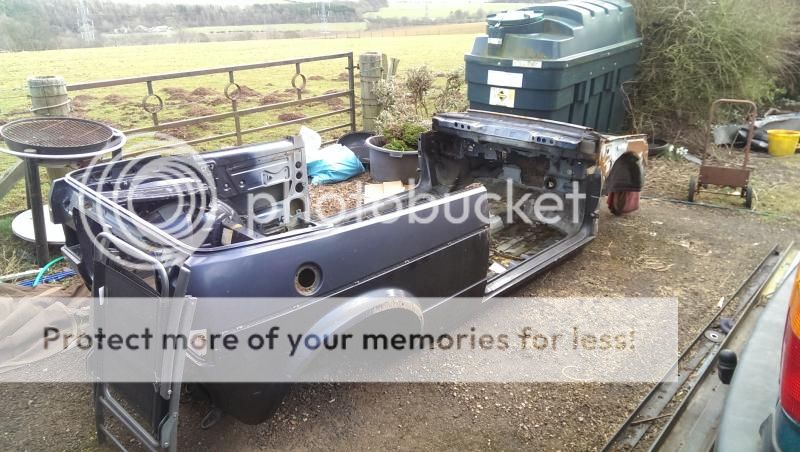
Sadly, half way through I found even more terminal rot then my skills could handle but luckily I found a new shell to play with.
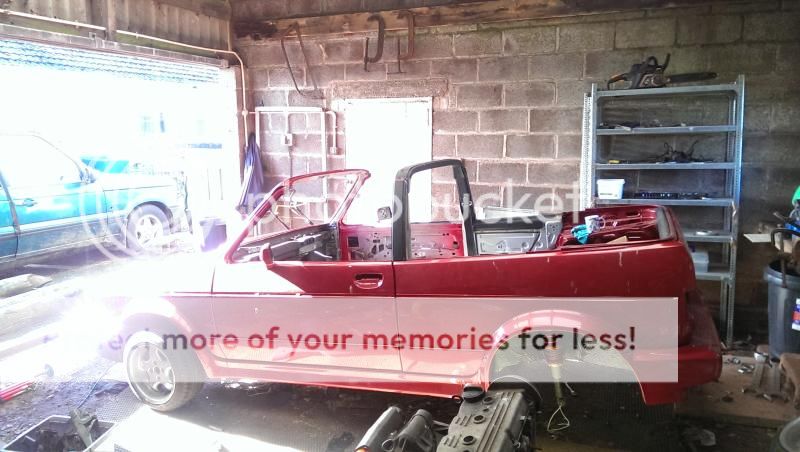
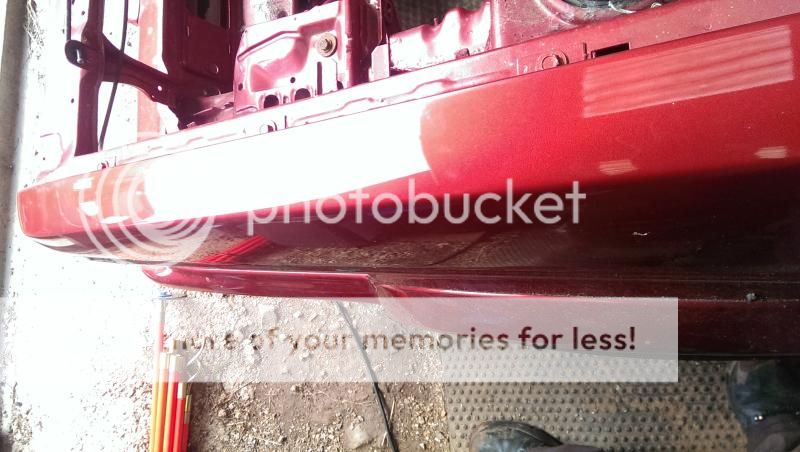
Its nice and straight and a lovely colour (canyon red apparently) but does need some touch ups done, need a bonnet too as the last one had a bit of a mishap on the trailer ride home! Forget to tie it down hard enough and on the way home and it had a coming together with the windscreen… Whoops…
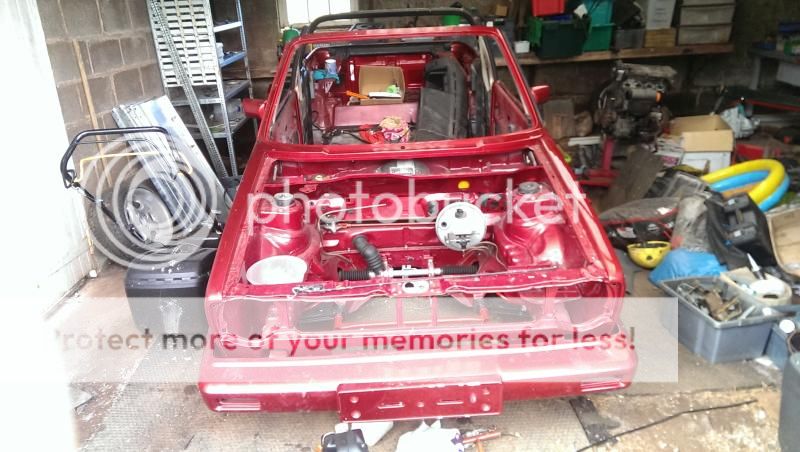
Got lots to do to it as its had some…hmmm, shall we say "Interesting" modifications, some will stay and some will most definitely go! I'll post up some more details when I've time.
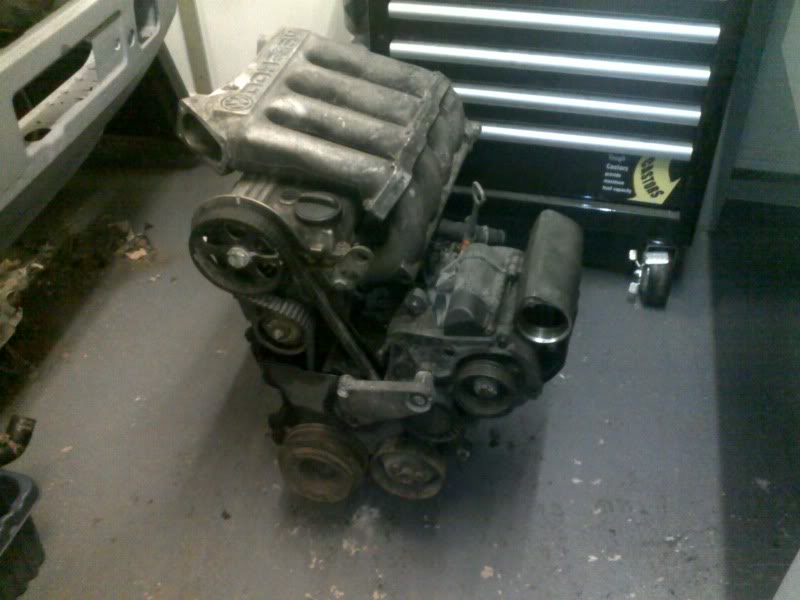
Engine wise, progress has been made. Took a shortcut with my current ABF by purchasing this.
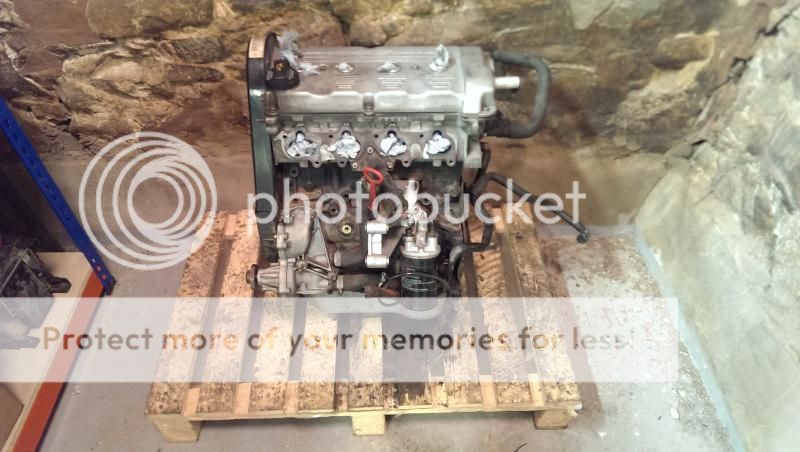
Eagle eyed readers might recognise it, it used to belong to Jezzag60 and it ran over 300bhp in his corrado. It's a properly nice bit of kit and has saved me porting my original head or sourcing updated con rods.
I'll post up some specs when I get round to cracking on with it.
lots to do but I'll endeavour to keep this up to date.
Posted
Settled In
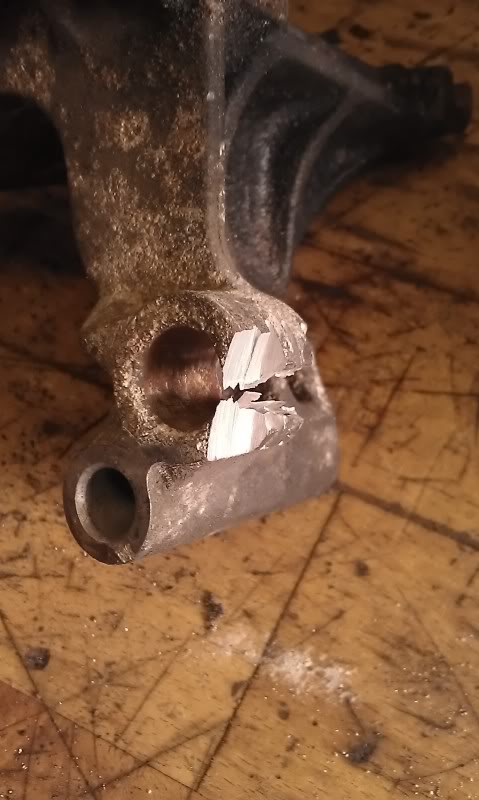
Planning to get the shell away soon to get it sorted out so have started to crack on sorting some of the more annoying bits and bobs. The shell came fitted with a full R32 interior which the guy I bought it from kept to sell on, I've just purchased a slightly tatty but saveable rivage interior to go in its place but before anything gets trial fitted I need to sort out this
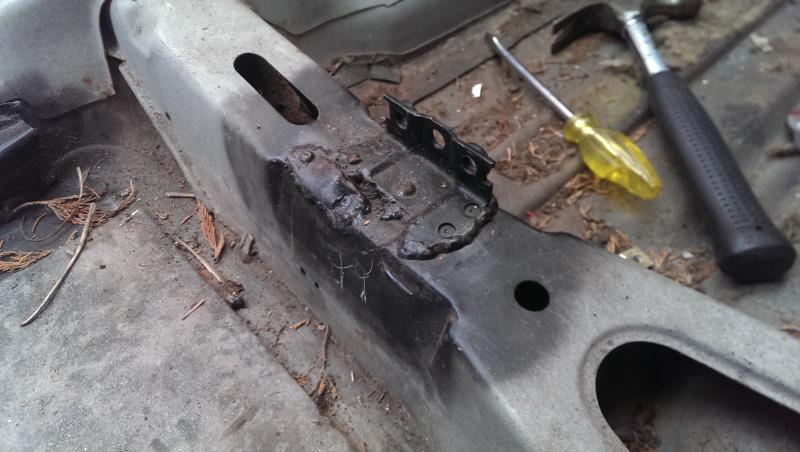
Some, what can only be described as… very keen welding has been going on!
Had to firstly chop that muck out of there
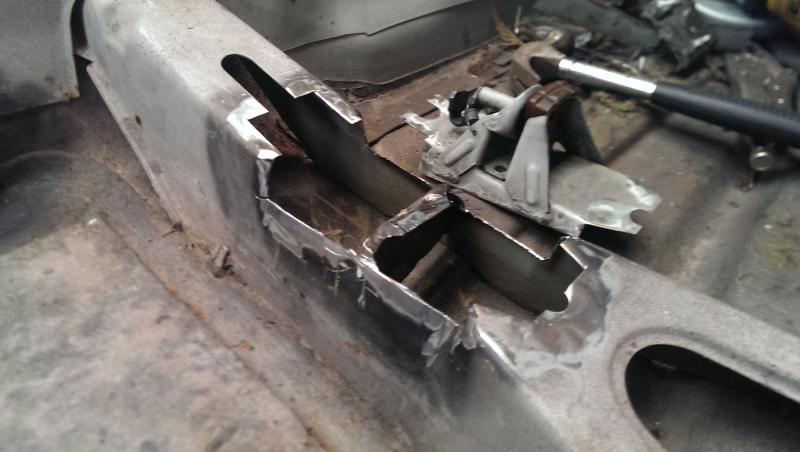
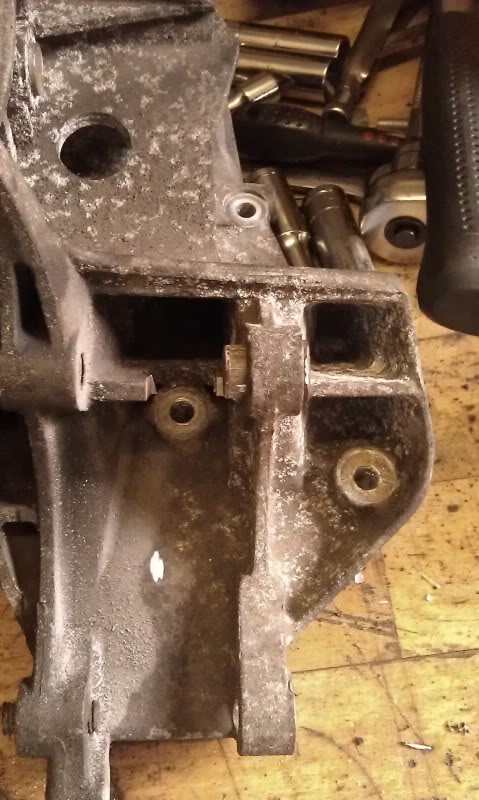
quick trial fit
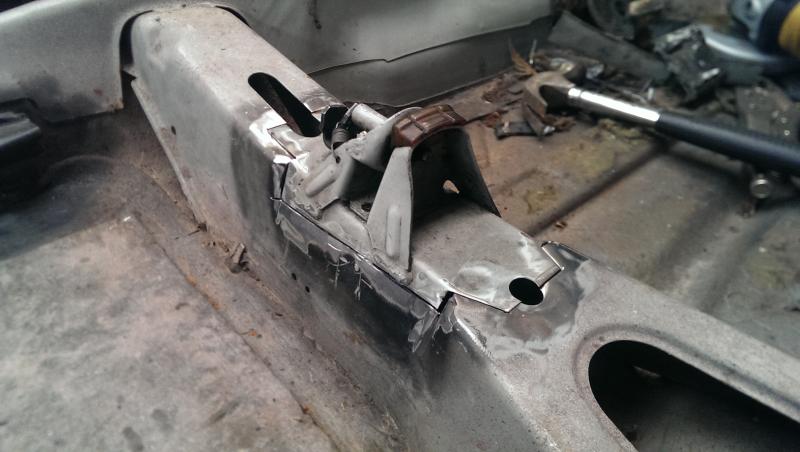
And welded into place, and it was a nightmare! The metal is so thin I struggled to get it to weld without blowing through but its good and solid now but its not going to win any awards!

Going to tackle the next side when I've finished cutting the mounting off my old shell.
Turned my attention to the filler cap. Its had an audi TT one installed by its previous owner but only cosmetically. The fit is pretty good but I've hummed and harred about wether to keep it or not… I'm hoping once the hoods on and side trim etc it'll tone it down a bit. I'm going to try and make it work but I'm goiong to cut a panal out of the old shell just in case and I might return it to stock.
Whats everyone elses thoughts?

It looks ok to me, just a bit… well big! And you can see where someone was a bit enthusiastic removing the side trims… who bonds them on!!!
And as you can see, nothing behind…

So started trying to figure out how to get this to work, I remembered I had an old repro panal for repairing the fuel neck in the shed so had an idea, I was going to have to make a plate to sit behind the filler to mount the fuel filler neck


After some trimming…

It fits the fuel cap perfectly

The tabs should allow me to use longer bolts in the audi cap to strap it on.
Onto the filler neck now and as expected its not even close! the fuel filler sits serveral inches higher then standard and doesn't likne up even slightly! Time for some drastic chopping!


I've had to cut the straight section off and finally had to notch cut the neck but it now clears. I'll need to source some new pipe work to fill in the gaps and weld everything up. Forgot to take some pics of the final mounting but will add some later. Hopefully once its all done and nicely painted up it'll look spot on as its look bloody terrible just now!
I'll need to get some bits before finishing that part so turned my attention to the dash… It had a polo dashboard when I picked it up. I'll be honest, it looked terrible! The Mk1 is a square car and it suits its nice square dashboard so its back to original
More lovely welding…

And plenty missing!

Was running out of light so rescued the top dash mounts off the old shell and transfered them over

Need to clean up the welds and paint them but progress is being made then I'll have to turn my attention to the rest of the dash mounts, the steering column etc which have been horrible butchered as well!

I'll also have to figure out how to make these work too… I think they are audi A6 door handles but I only have a hole and a metel finger plate to go by! Time to hit the scrap yards me thinks!

Need to make my mind up if they are going to stay as well… I'll see how they look once the dry build is complete.
Thats it for now, hopefully post up some more progress over the weekend.
�
Posted
Settled In
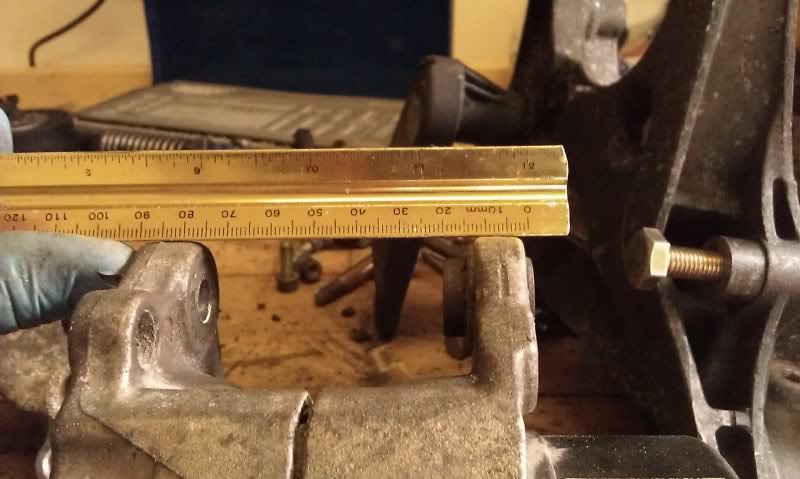
First job was to continue with the dash board mounts and steering rack. Firstly, the bit I've been dreading! The two dashboard side mounts…
I cut out the stumps left by the previous owner and refitted the ones from my old shell. All I can say is I wouldn't wish this job on my worst enermy! Its an absolute pig to get into. The angle grinder doesn't fit, the drill doesn't fit… To remove them from the old shell I had to cut most of the A pillars out! Then I sliced off the unwanted metal on the bench and welded them back into place being careful to keep checking the fit of the dash to make sure they are in the right place.


Happy with them, weldings not the best but I'm improving which is a good sign! On another note, I'd recommend anyone to wear a hat when welding upside down in the footwell… I didn't and got a red hot bit of weld splatter in the ear! That was enough to make me go get one! And some cold water too!
Also re attached the other two centre mounts which were a cinch after the last bit!

And as can also be seen, the steering column


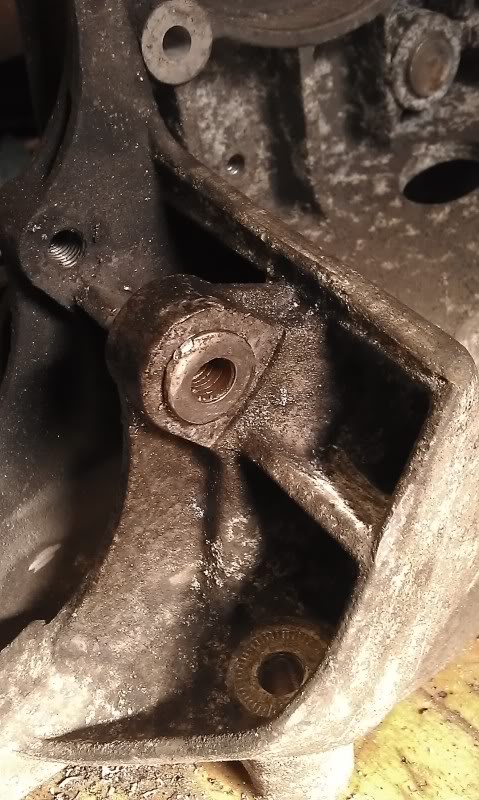
Next job was the last seat mount on the passengers side, which was another pig of a job!

Sadly bust the rubber mount that sits here…

I'll need to source one before I reinstall the interior, pretty sure VW heritage do them so time to slash a little cash!
Next, I went and grabbed my drivers seat to see if it fitted ok… cheeky wee preview of the interior I picked up…

Like a glove! Had to grease the living daylights out of the guides as they haven't seen seats in a very long time!
Refitted the dashboard as a dry run to check everything is sitting where it should and after some minor tweeking its back to how it should be!

I know they are boxy compared to modern cars but I love the look of the Mk1's dash, suits the car perfectly
Couldn't resist throwing a cover on the seat to check the moevement and to make broom broom noises at the wheel!

Sadly it's shown up some issues with the drivers seat… loose would be the word of choice! And creaky! But I've got to completely repaint and rebuild them so we'll find all the problems then.
Quick slap of primer to protected the raw welds

And thats the interior dry fit done for today, need to let the primer dry before giving it a slap of paint. As for the rest of the interior, I'm going to crack on with that tomorrow and dry fit the rear bench and see if something can't be done about the door mechs
Next, I thought I'd try and finish the fuel filler neck. Firstly I attached the backing plate I made

Really chuffed with the fit on this, took bloody ages to cut it down!

Attached the neck to trial fit


Like a glove…

And with the bolts tightened to make it flush it looks pretty good. Still might have a play with some plastidip to see how painting it black looks. Maybe just the door and the bolt heads… but thats a job for later

Just need to join these two now… might buy another fuel filler neck to reduce the amount of joins…

Next, the fuel cap itself and the first headache, its too ruddy big! Not to sad as I bloody hated the way it looked. Time to cut its fakeness into touch!

Nothing the trusty old angle grinder won't sort!

Quick check for fit

And lastly, about 30mins of buffing on the bench grinder and it looks bob on to me!

Decided thats was enough for today, need to let my fingers rest as alloy gets mighty hot when you hack the hell out of it!
And just to make you giggle, I'm a man who believes in getting his moneys worth out of his grinding discs!!

Reckon I'll get a few more cuts out of that!

Posted
Settled In
So, been cracking on a bit more over the past few day or so, but being held up by the dreaded waiting for parts game!
Decided to sort the brake bar, servo and master cylinder.
Firstly the servo needed modifying, I got one years ago out of a Mk3 TDi but its not blessed with a threaded rod so it was into the vice with it and out with the tap and die set!


Jobs a good 'un! Checked and dry fitted and all is well.
So onward to the next bit, the mechanisn itself. Despite being rebuilt and painted by the previous owner the dreaded rust was starting to show through so it was time to strip it off and start again. After a quick rub down and a paint… well, thats where the problems started! Hammerite has really gone down the toilet since I last used it!
A quick blast of silver from the old stock I have gathering dust for the crossbar etc, went on perfect, exactly as I remember it. But sitting next to it was a newer can of black hammerite… unfortunatly Two coats onto the cross bar and servo and days later it hasn't dried, its run everywhere and the coverage is like water! All I can say is dam my impatience and lesson learned! Ordered some POR 15 to trial as I've heard good things. Its now waiting in a pile to be stripped and redone.
So, to cheer me up I went and dug out my rear beam from storage… mistake! I rebuilt it 3 years ago and the paint has suffered from the damp so it's going to need redoing and better this time!


Photo isn't really clear but its chipped, rust is coming through the paint… really annoyed that the paints done naff all at stopping the rust! So much for its claims! But… the POR 15 turned up so it would be rude not to trial it on the rear and see how it holds up.
So, Stripped it down to its bare bones

As you can see I've converted it to discs using mk2 golf bits. I know it may have been ok on drums but I plan on hopefully getting 250bhp plus out of the engine (its previous owner had over 300bhp out of it!) so every little helps! Not sure yet but I may change the calipers for Mk3 items as its early Mk2 I'm using and all I hear is horror stories of them ceasing up. Does anyone know if the Mk3 ones will work ok with the Scirocco 16v handbrake cables I have?
And then the weather decided to stop play, more tomorrow when the painting starts!
0 guests and 0 members have just viewed this: None.