


GUIDE: Setting your cam and ignition timing (and fitting a t

Posted
Settled In

GUIDE: Setting your cam and ignition timing (and fitting a t
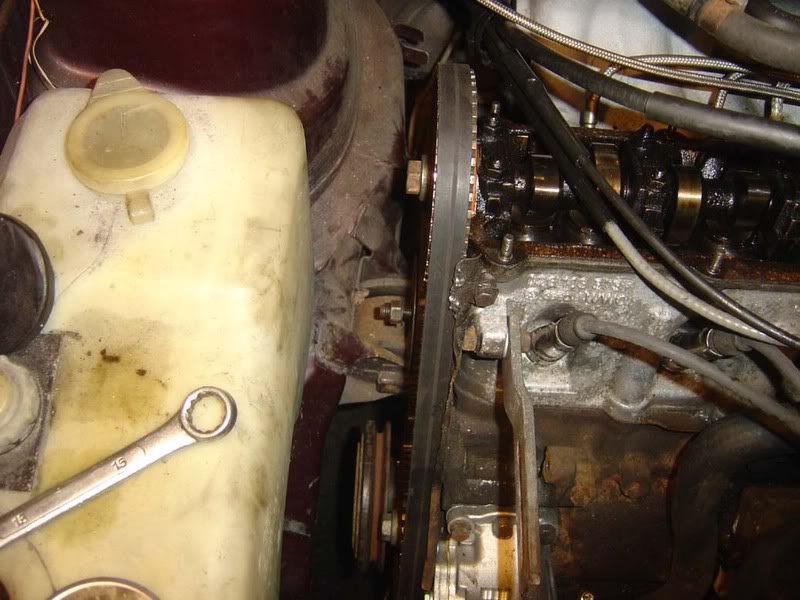
Step 54 - When you're sure everything looks good, use an allen key to rotate the idler/tensioner wheel forward as shown (there are a couple of holes in the tensioner to help with this - you need to be on the back one as shown in the picture). Lever this hard and tighten the 15mm nut
Note: Change the cam belt and tensioner at this stage unless you've got a good reason not to
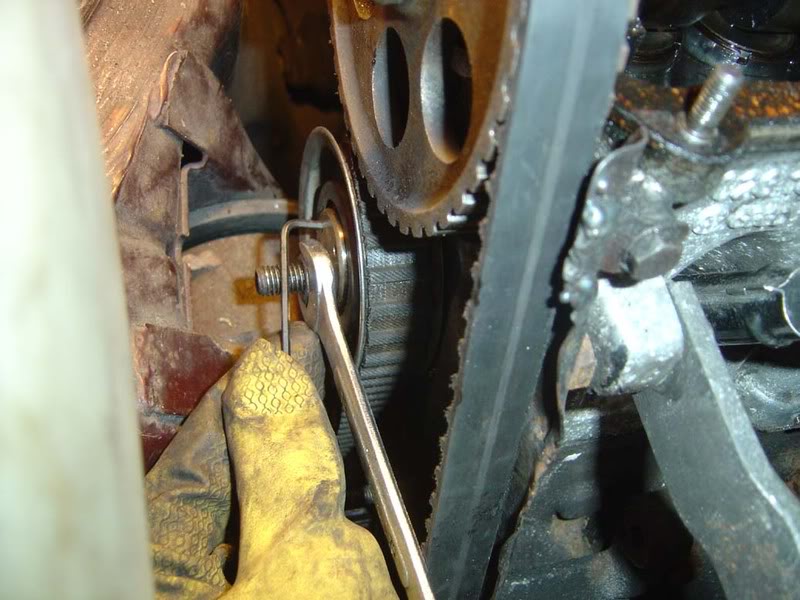
Step 55 - Test the tension on the belt - it should turn through 90 degrees, don't make it too tight or too loose, it should turn through 90.

Posted
Settled In
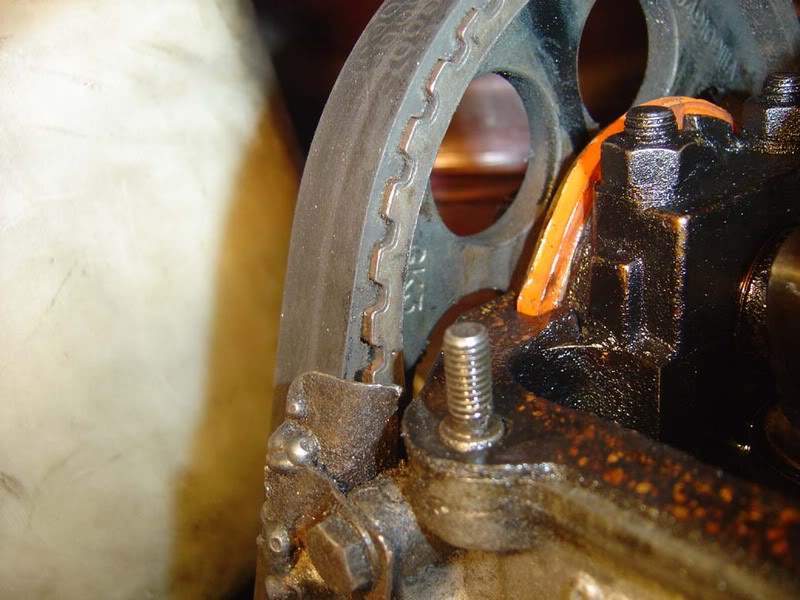
Step 57 - After 2 full revolutions, make sure :
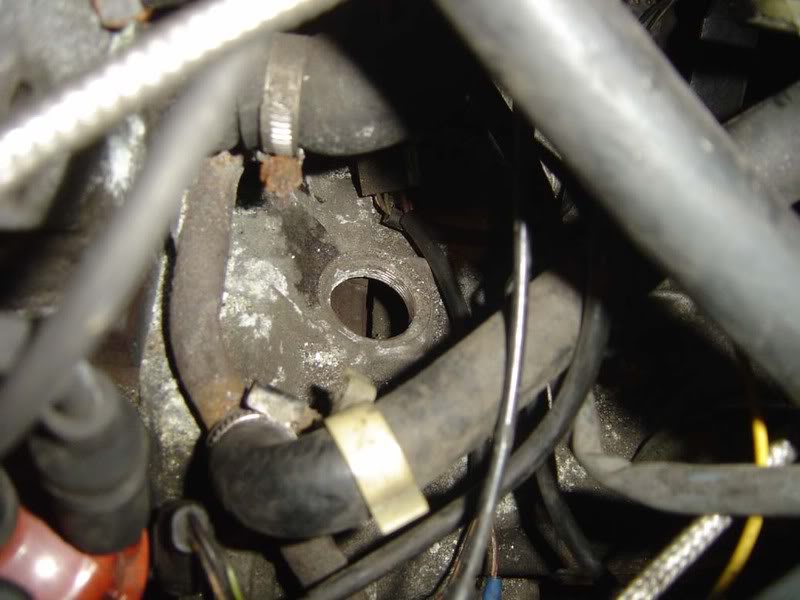
- the mark in the gearbox is in the centre of the hole (picture 1)
- the dot on the cam pulley is in line with the cam cover flange (picture 2)
- the cam pulley line is facing upwards (picture 3 - without the lower cover fitted you can't see if it is exactly in line with the timing mark but it should be pretty obvious)
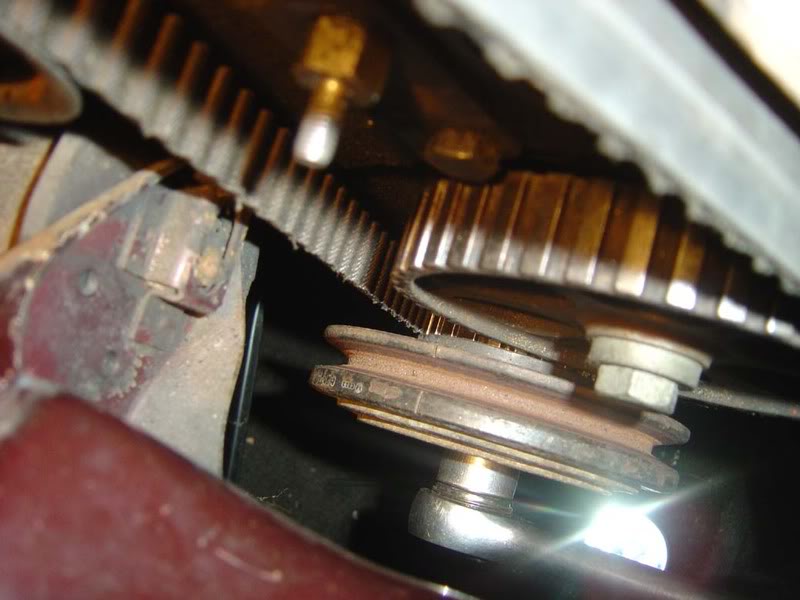
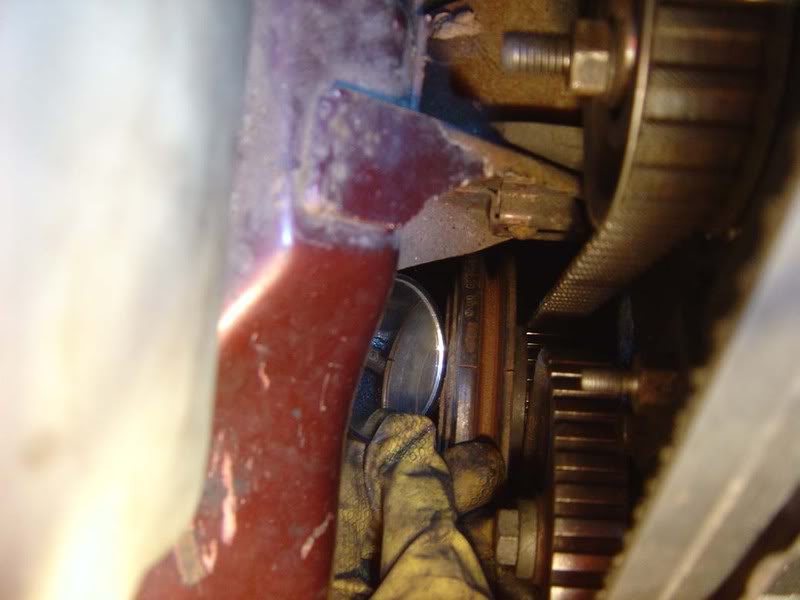
- the intermediate's marking lines up with the crank pulley's (picture 4)
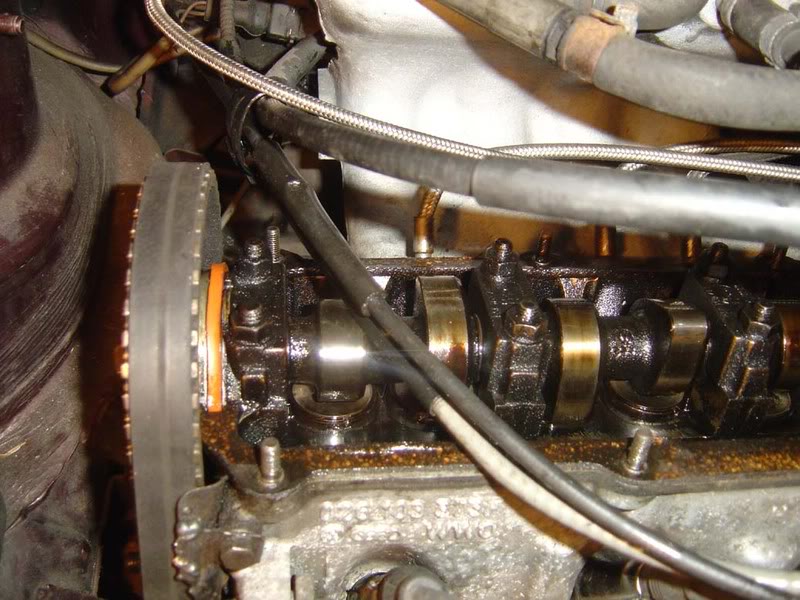
- the valves are pointing in the right direction (picture 5)
- the distrbutor mark and rotor arm face #1 HT lead (in hindsight you might want to refrain from putting the dizzy cap on until after you've done this) as shown in picture 6
If all those conditinos are met you're sorted. For me, the intermediate shaft was out by 1 tooth so the belt came off, I rotate the cog and then refit everything and it was perfect. Now is not the time to cut corners, one tooth out DOES make a difference and it is wrong!
Posted
Settled In
Step 59 - Go round the car and double check everything is in the right place, no loose spanners, sockets etc and that all plugs, leads, dizzy cap are secured properly
Step 60 - Fire it up. That's right, in it's current state start the car. Run it for a couple of seconds then turn it off. All being well it should run fine (might be a little lumpy because we haven't touched ignition timing yet but as long as it runs at all you haven't broken anything!)
The reason for this is an additional check, turning the car over by hand should tell us all we need to know but running it will give you maney revolutions and point out any mistakes. Go round and do all the checks in step 57 again
I got a good picture of the intermediate shaft marks this time so included it here
Posted
Settled In

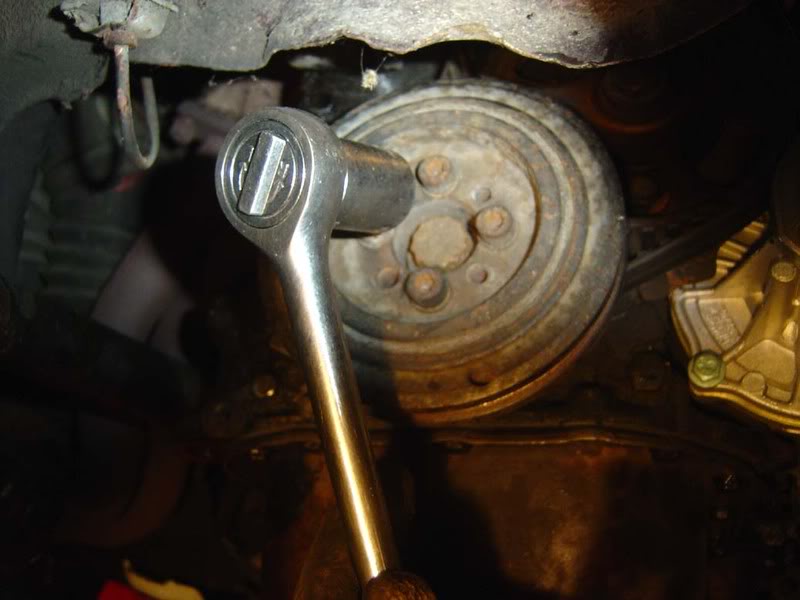
Step 62 - NOW we can fit the crank pulley, hold the pulley bolt at the centre to allow you to torque the allen key bolts up properly

Posted
Settled In

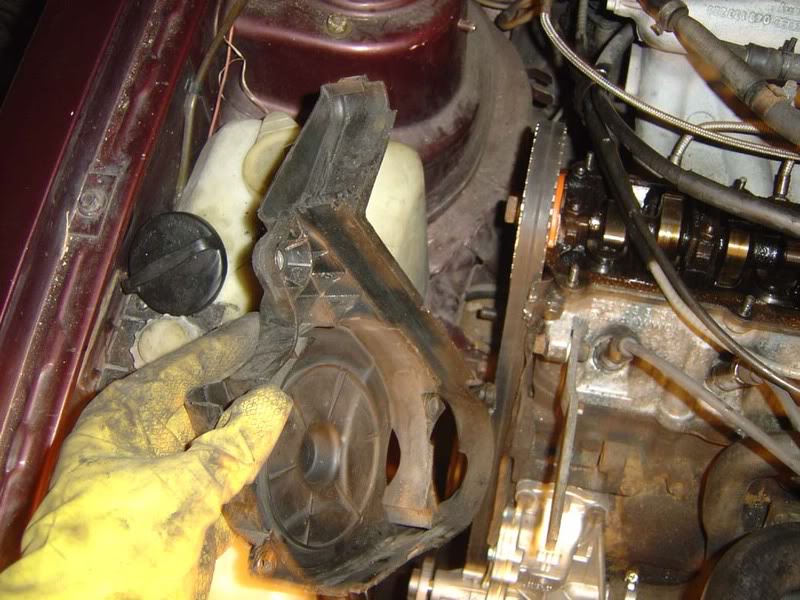
Step 64 - Fit the upper timing belt cover back on with its grommet and 10mm nuts

Step 65 - Now is the time to refit the cam cover nuts and sprung retainers (don't forget anny wires you removed)
Posted
Settled In
I know that seems like it was a bit involved if it is your first time but it really isn't a hard job on these cars. Trust me when I tell you it's a lot easier than doing dual overhead cam V engines where you've got 4 cam pulleys, numerous tensioners and idlers and have to set belt tensions at various points! This really is a good car to start on for jobs like this because it gives you all the principles you need when faced with a more complex set up.
Step 67 - You should have a rebuilt car now but check over everything again to make sure you haven't forgotten to tighten any nuts etc. The next stage is the ignition timing so pop the timing light positive and negative terminals of your battery
Perform step 15 as well to slacken off the dizzy clamp bolt so we can rotate the unit (note it only needs a turn or two to loosen, don't remove it completely!)

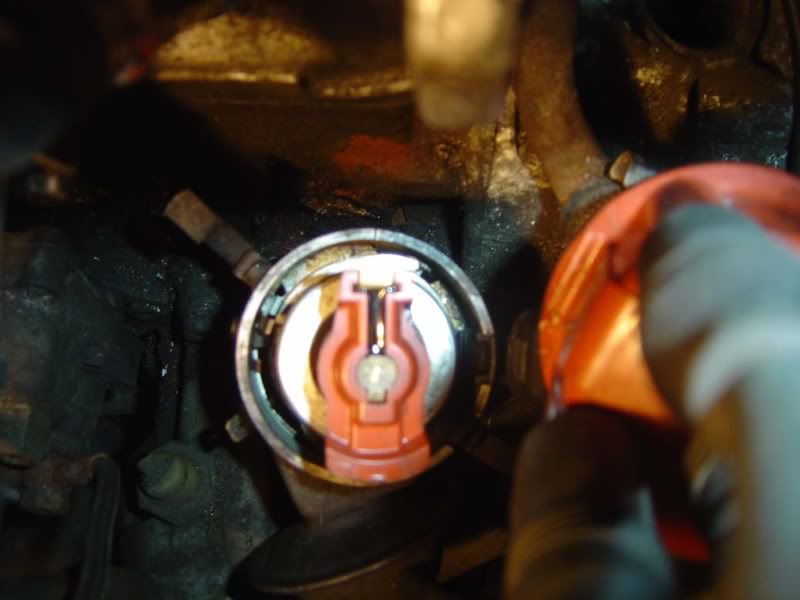
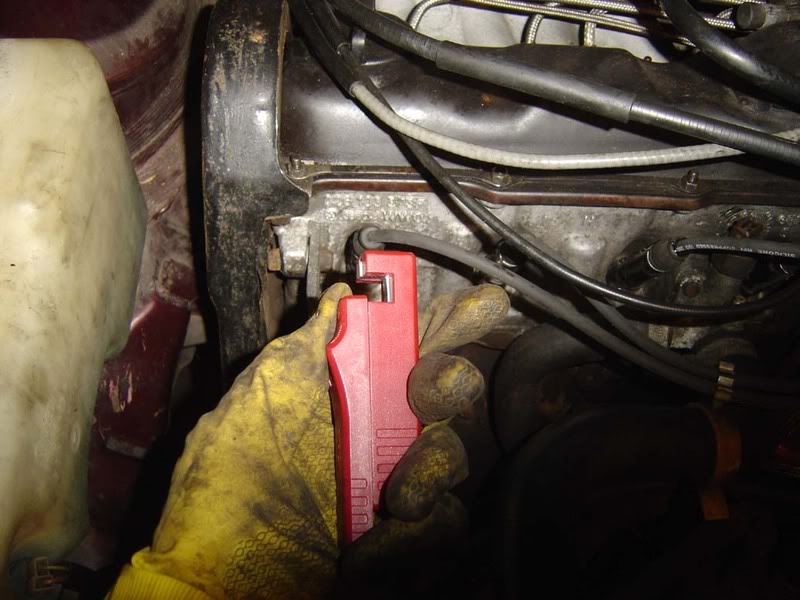
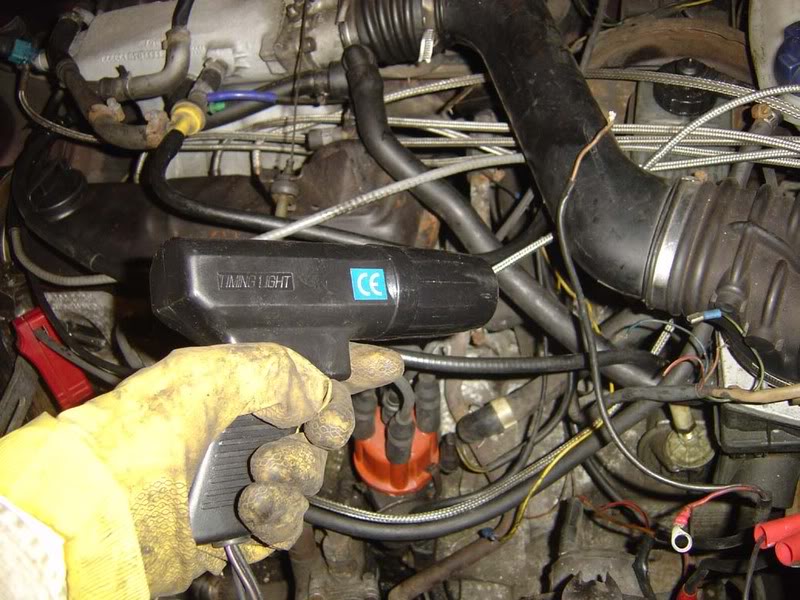
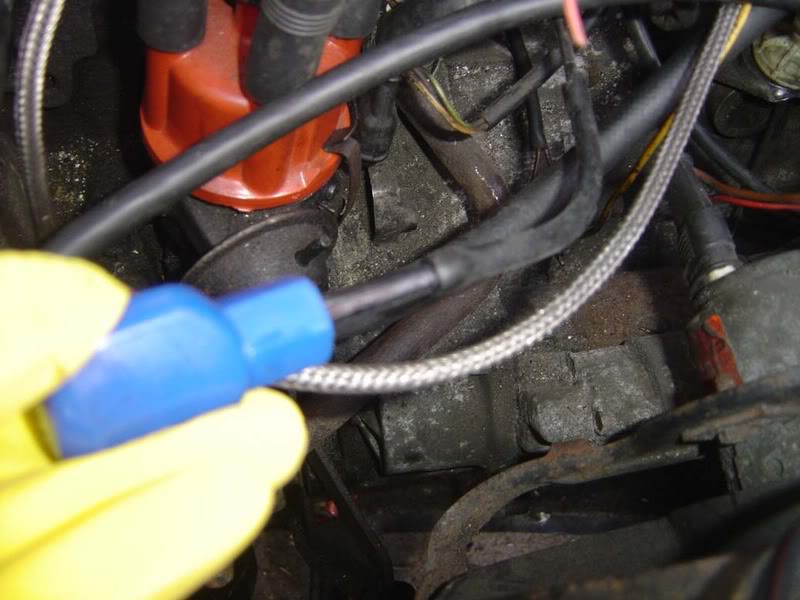
Step 68 - There are two main types of timing light, your bog standard in-series where you remove an HT lead and put the timing light between the lead and the distributor or what is called inductive pickup. The inductive pickup units are much quicker and easier to use and work on the magnetic field that occurs when an HT lead is firing a spark plug. These units mean you don't have to bother rmeoving any leads and they simply clip on as shown in the pictures - needless to say I recommend this type
Note you are putting the timing light on cylinder #1 which is nearest the crank pulley side of the car not the gearbox end.
Posted
Settled In
Step 70 - Your timing light (shown) will fire a strobe of light each time cylinder #1 'fires' i.e. a spark occurs. This bright flash will only last for a very small amount of time but due to the fact the engine will be running at about 800 rpm this will make a lot of flashes. The effect is similar to strobe lights in night clubs in that you only see movement when the light fires. This makes it very easy to see exactly where the markings are on the flywheel because they are highlighted every time cylinder 1 fires.
The effect is quite impressive the first time you see it, the timing mark appears static in the gearbox and if you advance or retard the timing the marks simply move as you adjust the ditributor.
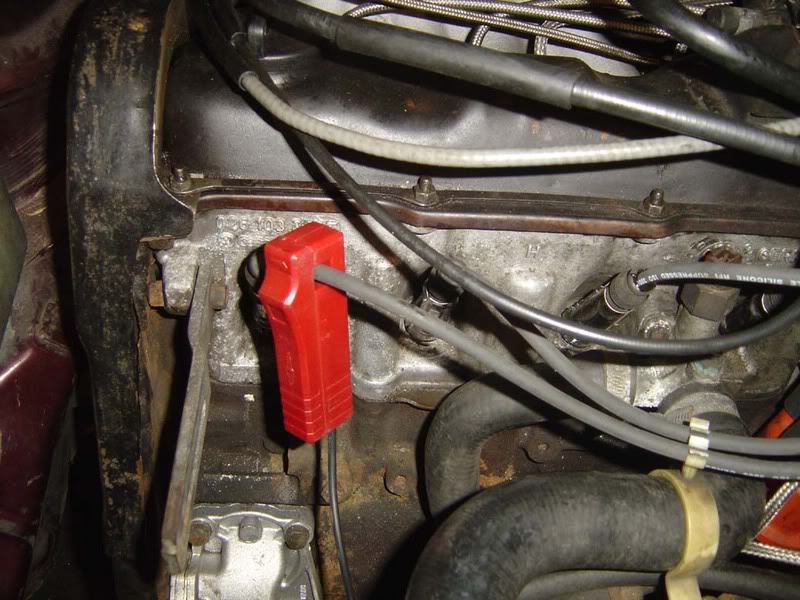
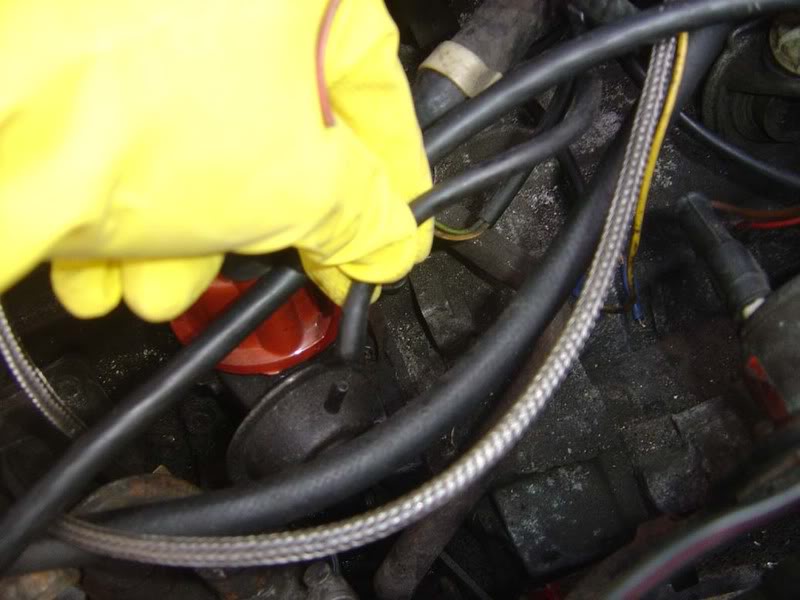
Step 71 - Last thing to do is remove the vacuum lead from the distrubtor body and block it off with something (I used a screwdriver) to prevent an air leak. This basically means that the vauum in the inlet manifold (this is a by-product of running the car at idle with the throttle shut) doesn't get to the distributor so it won't interfere with the readings - the car would normally alter the timing under these continues using 'vacuum advance'.
Posted
Settled In
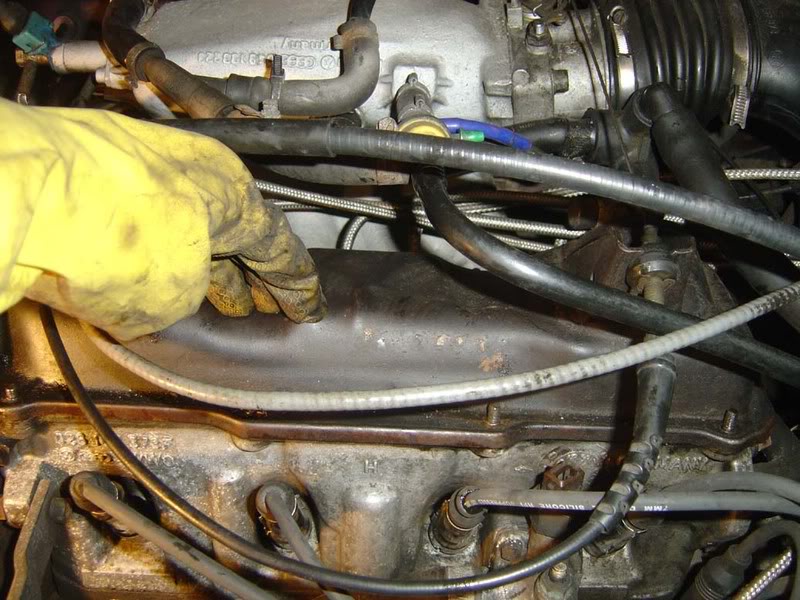
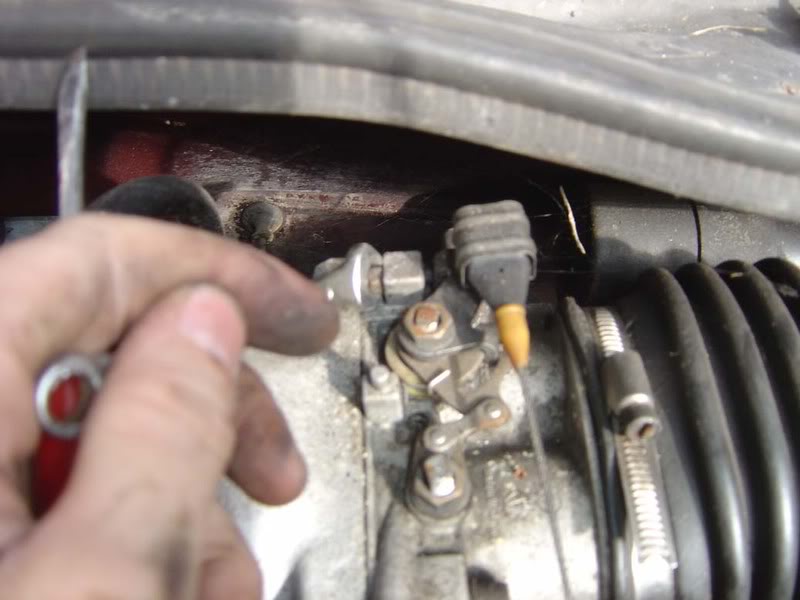
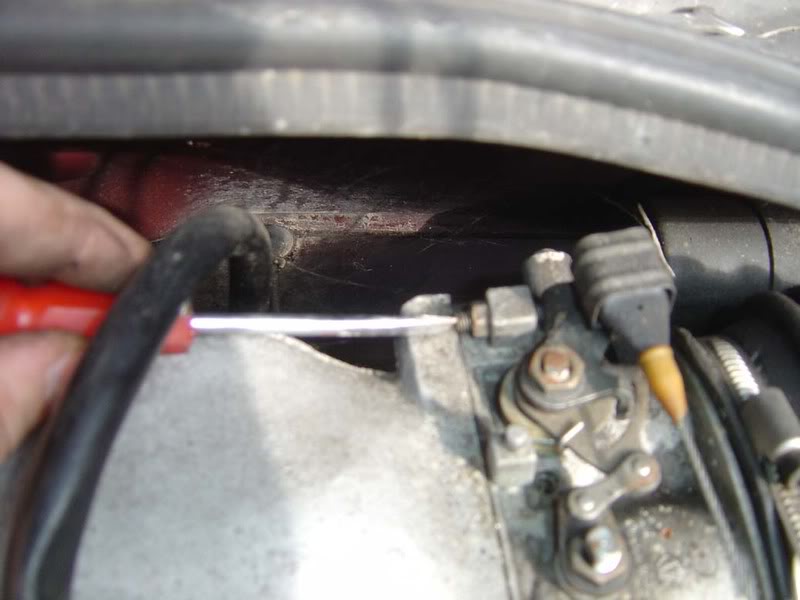
Basically, the started has one big feed wire from the battery that takes the high current delivery and a smaller wire which is a trigger to start cranking the engine. This small wire is red and black and is a simple spade terminal which you can pull off as shown in the picture. Then you just short the big wire to this small terminal with another piece of wire and your engine will crank over and start (you'll need the key in the accessory position on two clicks first obviously). Then remove the small wire (otherwise it's like holding the key turned all the time which makes that annoying noise of the starter hitting a flywheel at speed!) and you're ready to time

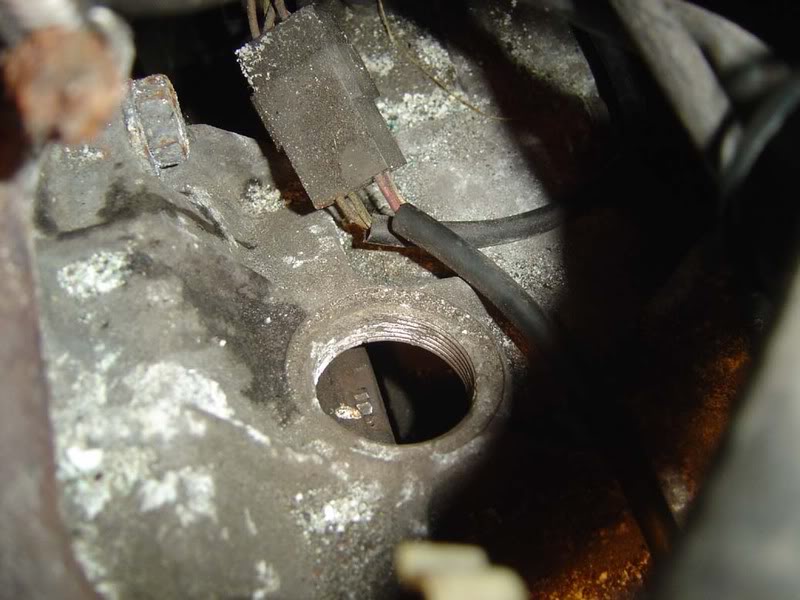
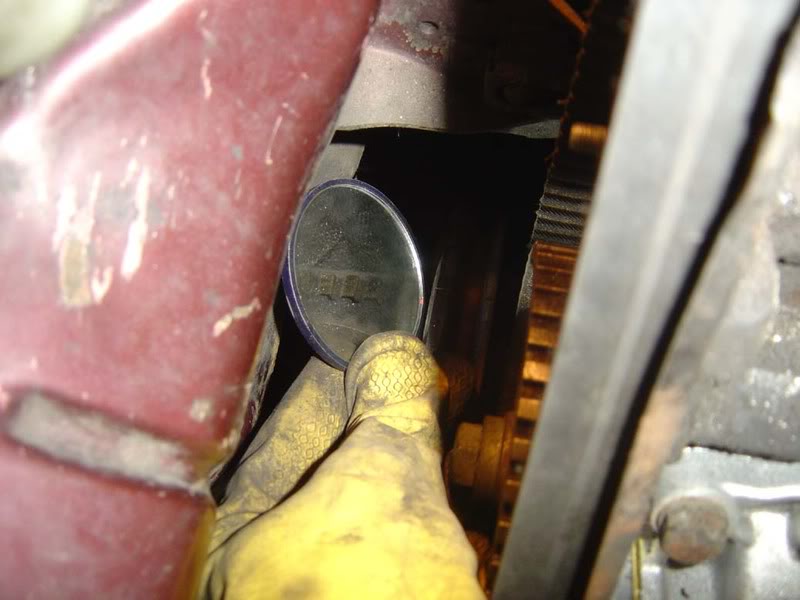
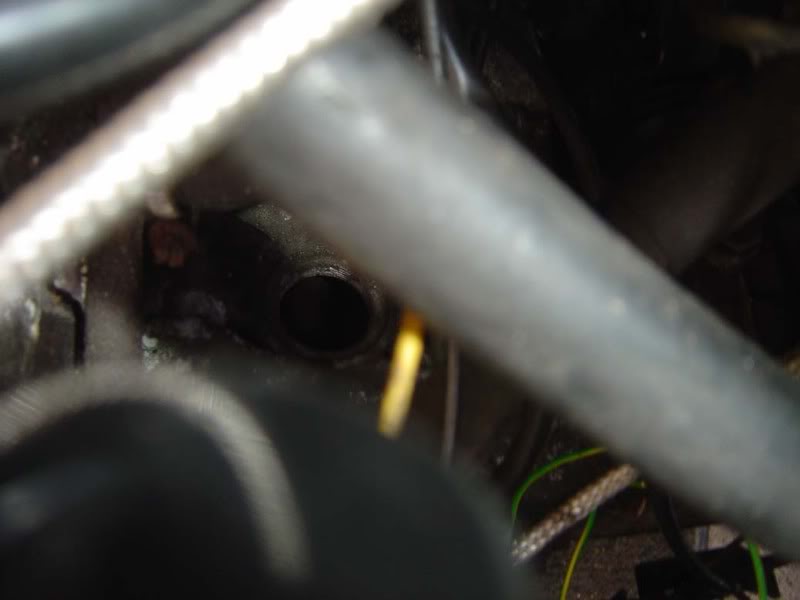
Step 73 - I did try to catch the timing flash but not all that hard to be honest, needless to say fire the timing light down the gearbox inspection hole and then rotate the distributor accordingly. As you rotate the distributor the timing mark will move clockwise or anticlockwise (depending on which direction you rotate the dizzy), and you should aim to get the 6 degree mark in the middle of the inspection hole.
One thing to note, if your timing marks in the gearbox don't already have tip-ex or something similar (white paint will do) highlighting them then it's worth giving them a quick paint job to make them show up clearly
Step 74 - Refit the vacuum line and tighten up the clamp bolt on the dizzy (make sure you don't move it when you tighten it and it is be worth checking the timing again after you've done this to make sure it didn't move)

Step 75 - You might need to adjust your idle speed as part of this process, to do this you need to loosen the 8mm nut (picture 1) and then tighten or loosen the screw (picture 2) near the throttle cable
Remove your connectinos to the battery, plug the gearbox hole and take it for a test drive. Depending on the state of tune of the car and modifications done (and to a degree the fuel you run) you might want to tweak the timing so it is different to the standard 6 degrees btdc but suffice to say if you're doing that you probably don't need this guide. Hope it helps some of you
Posted

Local Hero


A couple or 3 points I noticed;
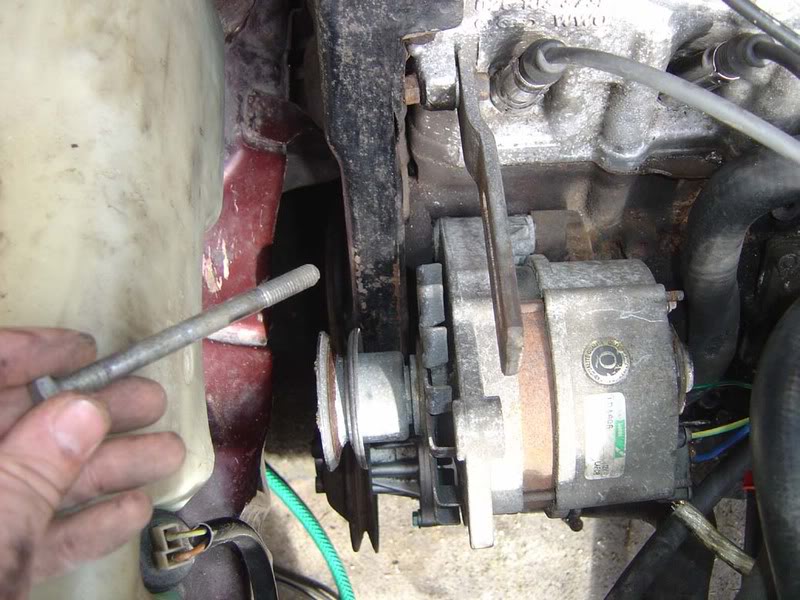
in 2 the alternator bolt should be a 7 or 6 mm Allen head bolt, someone prob chewed up the original and replaced with the 13mm bolt.
in 26 there should be a 10mm bolt buried down the hole near to timing arrow. Most 10mm sockets are too fat to fit down the hole, not sure how they got it out but that might be why they didn't replace it? I've used a filed down socket from a cheap T-Handle socket set to do mine.
in 75 the screw you adjusted is set by the factory to stop the butterfly valves hitting the inside of the throttle body and wearing a groove. To adjust the idle speed there is a 7mm brass bleed screw at the back of the throttle body. You prob really need to measure the CO too by fiddling with the 3mm Allen adjuster on the meterhead.
One my GTI the flywheel mark doesn't line up, not sure how I managed to refit it wrong as I think it only fits one way?
1983 Mars Red 1.8 Golf GTI
1987 Alpine White 1.8 Clipper Cabriolet
The trouble with doing nothing is that you never know when you are finished.
1987 Alpine White 1.8 Clipper Cabriolet
The trouble with doing nothing is that you never know when you are finished.
Posted
Settled In
Thanks for your comments, in reply to them
1. Step 2 now updated, thanks. The problem with not knowing the Golfs is that I don't know when people have screwed around with stuff
2. An angled spanner or remove the crank pulley would be my guess, I had to just say 'remove all bolts' because none of mine were present!
3. Bugger! OK I'll update that, what's the clearance for the butterfly valves? Haven't got the kit to measure CO sadly but more info would be good
4. Flywheel marks - can't help there I'm afraid, hopefully someone else will chip in bu afaik they should only fit one way and they should line up-you sure your timing's right

Nice attention to detail - glad someone's looking at these!!
Posted
Settling In

timing and shite running
I have started sorting it out after not being on the road for 4 years however the engine was run at least 5 times a month around his garden and private road.
Just before i bought it the fuel pump stoppped working this was changed and the car wouldnt run properly. After going through the haynes manual thousands of times i have it running just, but it seems to need almost full throttle all the time and sounds like its missing all over the place. Although i grant that without seeing it or hearing it your shooting in dark blindfolded but you seem to know your stuff you got any ideas whats going on as im about to give up and accept the garage fees.
Sorry for long winded message but if i give you all the details i might help your advise!!
Thanks again
Dave
Posted

Settling In
<img src="http://www.sirgeekalot.com/piccys/forum_sig.png">
Posted

Old Timer

 would this mean that a :the flywheel has been replaced 180 out,B:the rings have gone and i bought a car that has been messed with timing to stop the clouds of blue smoke,i am really stuck,also the firing order as it sparks around the dizzy cap,the guide you have written sys that the dizzy should line up with the mark on the dizzy housing and point to plug one lead.
please help me
Posted
Settling In
hi
Posted
Settled In
Upon inspection of the Flywheel timing
There is what appears to be a V type wedge out of the flywheel.
Is this the timming mark or is this 6 Degree BTDC?? I thionk the bolt is TDC.
with reference to the intermediate pulley. Mine appears to be at 5o'clock when I think it needs to be 7 o'clock. ( with 12 being Stright up towards bonnet. ) Also on my 1.8GTi there appears to be no Marking LINE. I think there is a DOT. is this right anyone else got this??
Any help?
get the bigger hammer. it always makes things better…..
Highland Regional host
Highland Regional host
0 guests and 0 members have just viewed this: None.