new to me 1992 golf Cabriolet
Posted
Local Hero


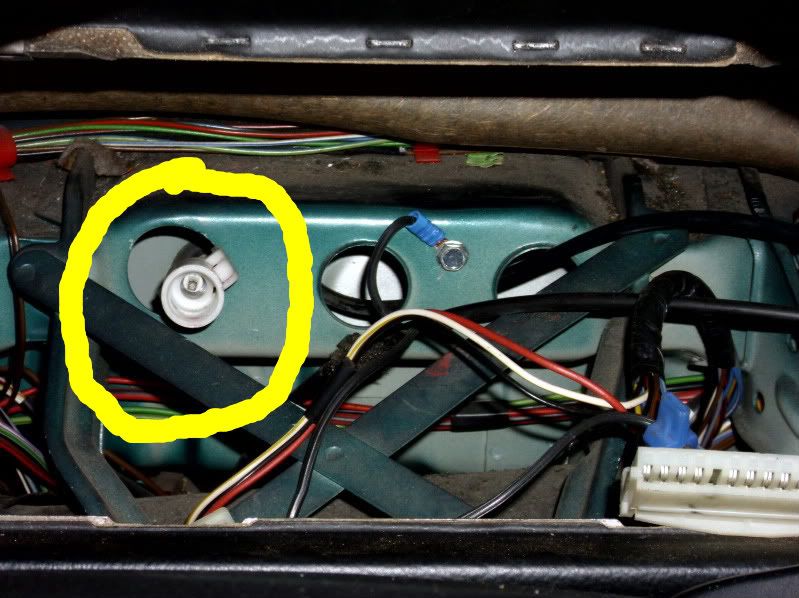
Here is what the speedo side should look like.

If your speedo side is broken then a new clock may be in order.
What do Divorces, Great Coffee, and Car Electrics all have in common?
They all start with GOOD Grounds.
Where are my DIY Links?
They all start with GOOD Grounds.
Where are my DIY Links?
Posted
Settled In

Posted
Local Hero

What do Divorces, Great Coffee, and Car Electrics all have in common?
They all start with GOOD Grounds.
Where are my DIY Links?
They all start with GOOD Grounds.
Where are my DIY Links?
Posted
Settled In

Posted
Local Hero

What do Divorces, Great Coffee, and Car Electrics all have in common?
They all start with GOOD Grounds.
Where are my DIY Links?
They all start with GOOD Grounds.
Where are my DIY Links?
Posted
Settled In

Posted
Local Hero

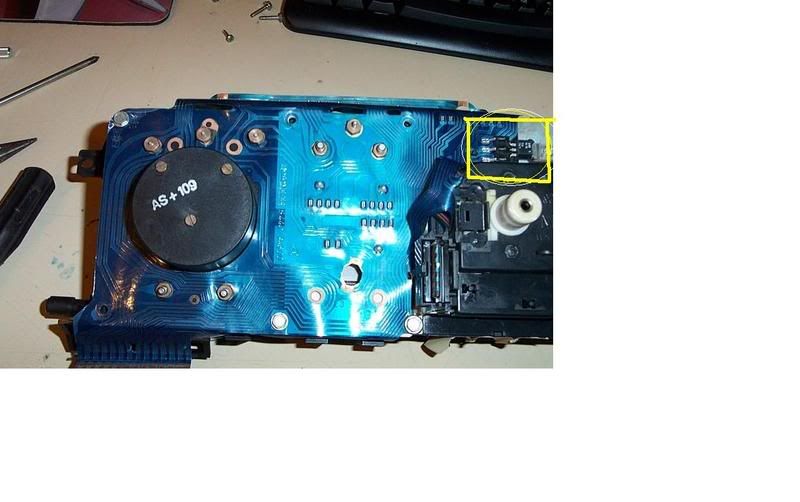
Sorry for the blurry pic but here is what a MMO speedo looks like internally.


It would be easier and less chance of breakage to replace it.
IIRC as it has been a while since I have one stripped that far because the reset button (trip) broke on mine that I replaced the Clocks. The speed assembly is held in place by a couple of screws so it is possible that you could remove your spare and place it on yours….
But (always a but) you also risk breaking your spare in taking it apart. The MMO Reset button is one piece and easily breaks. Different design than the VDO speedo where the VDO reset button is 2 piece and easily replaced.
What do Divorces, Great Coffee, and Car Electrics all have in common?
They all start with GOOD Grounds.
Where are my DIY Links?
They all start with GOOD Grounds.
Where are my DIY Links?
Posted
Settled In

Posted
Local Hero

Wow you respond to my post faster than I can have my morning cup of Joe and a Smoke.
Getting the cluster apart is a good exercise in Patience, Perserverance, and a steady hand.
In the where are my links tag in my signature I have a how do I get this apart thread.
Take great care in manhandleing the mylar, it is old, fragile and doesn't take kindly to rough handling.
What do Divorces, Great Coffee, and Car Electrics all have in common?
They all start with GOOD Grounds.
Where are my DIY Links?
They all start with GOOD Grounds.
Where are my DIY Links?
Posted
Settled In

I also need to get to fix the convertible top. Thats probably going to be a big PIA
Posted
Local Hero

If you don't want to tackle the top, which is a right of passage for folks give Chortle a shout if you are in the UK.
What do Divorces, Great Coffee, and Car Electrics all have in common?
They all start with GOOD Grounds.
Where are my DIY Links?
They all start with GOOD Grounds.
Where are my DIY Links?
Posted
Settled In

Posted
Local Hero

Be aware that there is an adjustment so the butterfly doesn't fully close it is partially opened a RCH or so.
It could also be a Throttle cable that needs lubing as well.
It the Idle bypass screw (back of the throttle body next to firewall) is easy to turn with your fingers the o-ring is bad and that is a vacuum leak.
Count the turns to remove it and run to your local good hardware store and get a replacement o-ring. Wrap the Threads and Threads only of the screw with Yellow Teflon Tape and return it to the count it took to remove it.
What do Divorces, Great Coffee, and Car Electrics all have in common?
They all start with GOOD Grounds.
Where are my DIY Links?
They all start with GOOD Grounds.
Where are my DIY Links?
Posted
Settled In

When the Idle RPM is too high I can push back on this little bar and it will lower the RPM. If I spray it and exercise the lever it will go down by itself, but that works only for a little while,. Then it starts to stick again.


 Last edit: by AllMacs
Posted
Local Hero

It is probably gummed up, and you may have to remove the entire assembly to get it free.
The Bentley on section 5-54 through 5-56 describe the Throttle body, and the setting of the throttlebody stop.
It could be that it is all gummy or that some one has moved the Idle stop screw and repositioned the idle position switch. The idle position switch is set so that when the butterfly is not at rest the switch picks to tell the ECU that the butterfly is open. The idle position switch clicks when you barely move the accel cable, you hear it. if you don't hear the click or it comes to late you can hear/feel it.
Folks confuse the Idle stop screw as an idle adjust which it isn't. the Idles Stop is just that it stops the butterfly from fully closing Sealing the throttlebody
This isn't supposed to happen the Throttle body can stick closed Choking the car.
Unlike carbed cars on EFI you don't mash the gas 3 times prior to start to set the choke. You turn the key, wait 4-5 seconds, then start the car.
If a EFI gets flooded which can happen if you don't wait the 4-5 seconds prior to start they are a bear to get started…..
If you go the Dissasemble and clean mode, take pictures of everything.
What do Divorces, Great Coffee, and Car Electrics all have in common?
They all start with GOOD Grounds.
Where are my DIY Links?
They all start with GOOD Grounds.
Where are my DIY Links?
Posted
Settled In

Ill get it out today and aee whats up . Clean and lube with grease.
Posted
Settled In

thanks for the help, as always
Posted
Local Hero

May I suggest that you plan on doing the following when you replace the right side mount.
The rear two Allens that you have to remove can be replaced with grade10 hex bolts the same pitch and length. They are easier to install and remove than fussing with the Allen.
You will need to have the new one pressed in (easiest),
Or you can beat it in with the appropriate wheel bearing adapters, whether you press or Hammer it in it is best to Freeze it in the Fridge for a couple of days and only remove it when you are ready for it not when you are taking the old one out.
I would also suggest that at the same time you replace the waterpump, and the timing belt, and tensioner if you don't know the age as you have to take all the stuff off to replace the timing belt. so might as well get it all done at one time. Figure 3-5 hours on the motormount and water pump the first time. I have a how to on the waterpump…. That is only like an hour and a half…
Timing belt and all total a good weekender project, and for gods sake get the car in time prior to doing the belt.
Don't use the Pulley marks follow the guide in Cabby-info.com….
I have done timing belts in about 1 hour, but then I have put in a few.
Motor mounts are about 1.5 to two hours for me, but then I have a press and a variety of wheel bearing adapters and can beat it in almost quicker than I can press it in.
What do Divorces, Great Coffee, and Car Electrics all have in common?
They all start with GOOD Grounds.
Where are my DIY Links?
They all start with GOOD Grounds.
Where are my DIY Links?
Posted
Settled In

My waterpump has a slight leak, I noticed. So I think, changing it is a good idea. Timing belt prolly , too.
Its just such a convoluted PIA, doing it all at once.
Good advise on the hex bolts and ill give that sawsall a whirl, too.
Ill call the jumk yard. They got 3 cabbys witj k-jet injection. The motor mount brackets should be the same, right?
Posted
Local Hero

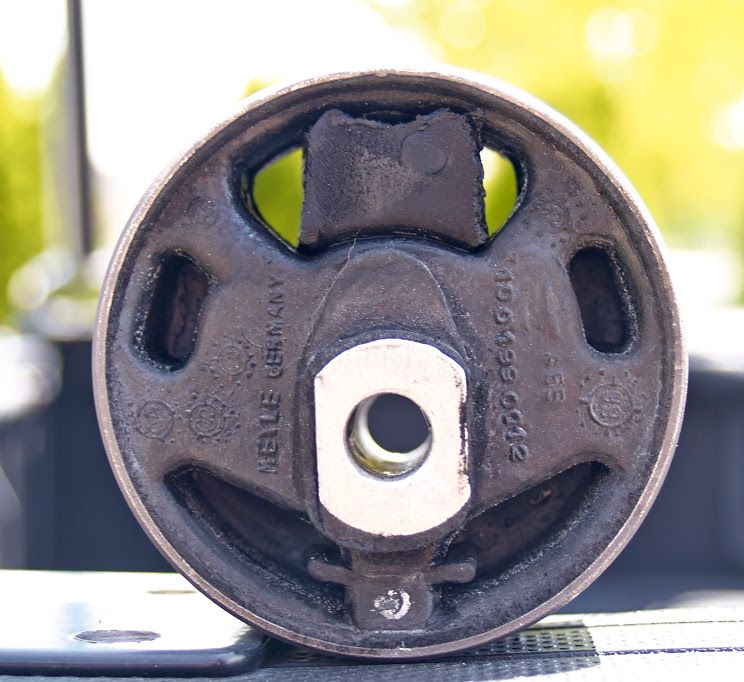
To add a little more time to your right side motor mount cut a section of rubber off of the one you take out.
Add it to the top of the mount.
If you notice the mount center as a pointed end and a rounded end. The point goes up.

What do Divorces, Great Coffee, and Car Electrics all have in common?
They all start with GOOD Grounds.
Where are my DIY Links?
They all start with GOOD Grounds.
Where are my DIY Links?
0 guests and 0 members have just viewed this: None.


