


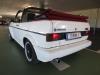
My first Golf - 82' gti Black


Moderator


Bought my first golf and going to keep track of what I'm doing on this :)

Sent from my Smartphone
Sent by a smartphone and not a smartperson!
Play Guess the Asking Price 'SEASON 4' as of Sunday the 29th of October 2017.
https://vwgolfmk1.org.uk/forum/index.php?page=topicview&id=chat%2Fmk1-golf-chat_2%2Fguess-the-asking-price_2
OLD.
https://vwgolfmk1.org.uk/forum/index.php?page=topicview&id=chat%2Fmk1-golf-chat_2%2Fold-guess-the-asking
Ever wondered who's behind the scenes of this forum?
https://vwgolfmk1.org.uk/index.php?page=committee
Mike
There's me building mine 28 years ago, almost finished!

Be proud of your VW Golf Mk1, it's very special!
Play Guess the Asking Price 'SEASON 4' as of Sunday the 29th of October 2017.
https://vwgolfmk1.org.uk/forum/index.php?page=topicview&id=chat%2Fmk1-golf-chat_2%2Fguess-the-asking-price_2
OLD.
https://vwgolfmk1.org.uk/forum/index.php?page=topicview&id=chat%2Fmk1-golf-chat_2%2Fold-guess-the-asking
Ever wondered who's behind the scenes of this forum?
https://vwgolfmk1.org.uk/index.php?page=committee
Mike
There's me building mine 28 years ago, almost finished!
Be proud of your VW Golf Mk1, it's very special!

Settled In


 Last edit: by MarkkGardner
Posted

Moderator

Settled In
�I ended up going for some BC Racing BR series coil overs for the golf. I was struggling to decide what kit to go for between this and the Bilstein B12 kit. I will update once i get my car back from the detailing shop.


Last edit: by MarkkGardner
Posted
Settled In
The Red overspray from the last shop it was at has been removed from the car.
The car should be ready to pick up by the end of the tomorrow.


�
Last edit: by MarkkGardner
Settled In

Last edit: by MarkkGardner
Old Timer

Posted
Settled In

Started the strip down today all I have to do is drain all fluids, disconnect oil lines and drive shafts. when rebuilding the engine I'm going to send alot of bits away to got plated i did this with my sump bolts and oil pump bolts to see what the finish would be. Here is what the Gold zinc nickle looks like.

Think I'm going to try the silver zinc-nickel coating on the alternator bracket to see what that looks like so I can decide what bolts i want plated either gold or silver.
I also picked up a set of bbs RM 012's there in pretty rough condition but I'm planning on building these up over the winter and get new mirror polished dishes for them. I was thinking on going 1" lips on the front and 2" on the back depending on the fitment. Does anyone have any experience with RM's? Mine are ET. 33 with 1" lips on them just now. I test fitted them when I first got them and have plenty room in the arches for them.

Last edit: by MarkkGardner
Moderator
Old Timer
Good luck with the plating work, I'm going through them same process myself but I've got a home plating kit. The finished results are really dependant on the original finish of the parts being close to perfect, which can be tricky at times.
Nut & Bolt Resto Complete (Mars Red GTi original):��https://vwgolfmk1.org.uk/forum/index.php?page=topicview&type=misc&id=projects%2Fyour-mk1-golfs_2%2Fpistolpete-s-mars-red&start__keyed=
Nut & Bolt Resto in Progress (Lhasa 16v):� https://vwgolfmk1.org.uk/forum/index.php?page=topicview&type=misc&id=projects%2Fyour-mk1-golfs_2%2Fpistolpete-s-lhasa&redirected=1
Nut & Bolt Resto in Progress (Lhasa 16v):� https://vwgolfmk1.org.uk/forum/index.php?page=topicview&type=misc&id=projects%2Fyour-mk1-golfs_2%2Fpistolpete-s-lhasa&redirected=1
Posted
Settled In
borednow said
Very nice work on the bodywork.
Good luck with the strip down and re-build of the engine. Just take lots of pics and note of where stuff goes.
Ian
thanks! And I have done got all the bolts for each part in different bags, I managed to snap 4 bolts which were the 4 that hold the anti roll bar to the wishbones but luckly they came out no problem
Posted
Settled In


Last edit: by MarkkGardner
Posted
Settled In
Moderator
When it comes to painting the block any enamel or 2 pack paint will be good for the block as it doesn't get too hot
If you're using spray cans then it doesn't matter but if you have access to a spray gun then you get a better choice of colour
Ian
Settled In
I started with masking the block and then gave it a good going over with a few different wire wheels on my drill to take off all the rust from the block before painting it after this i have the block one final clean out.
Then I re-applied all the masking tape and put bolts and washers down each hole on the block to make sure no paint got in the threads, I put the taps down a few of the holes as The bolts wouldn't go down them as some of the holes on the block had not been used.
After that I applied 4 light coats of stove paint. I tested this paint on a scrap bit of metal a week prior to doing the engine and I was happy with the finish/colour of the paint. I also cleaned out the grooves and oil holes on each piston with a hacksaw blade making sure I wasn't applying any pressure to it what so ever so it would only scrape the oil off of the surfaces safe to say this was a time consuming job.
Next on the to-do list is to find a suitable clear coat for the block then install the new core plugs then after that i can send all my bolts away to get sand blasted and plated.


Last edit: by MarkkGardner
Settling In

My first Golf - 82' gti Black
Settled In
I started by giving it a good wash to see what i was working with. I then ordered some wire wheels to put on my drill to remove the paint thinking it would be easy but boy was I wrong �
 I started with a section to see how i would get on. I Stuck at it for 4 hours and this is how far I got
I then moved onto the bulkhead area and the paint was having a hard time getting the paint off as the exhaust had cooked it
 I then decided to get the job done right by getting it sandblasted.
The sandblasting turned out great But alot of prep work was required to stop the good paint from getting destroyed. I bought stripping tape from 3M and did a layer of that over part of the doors, scuttle panel, front panel and I also covered up any cables that were still in the engine bay after the tape was on I went over it with some gorilla tape just to be on the safe side. The tape worked a treat but it lifted the paint when I was removing it from the front panel and scuttle tray although its only small bits of paint (just bigger than a stone chip) it will be getting resprayed again Other than that all went smooth. I never found any huge holes that would be a problem either they were a few wee holes here and there but nothing a small patch and a welder won't sort.
here are some photos from the blasting:


Straight after the blasting I Blew down the car a put a coat of u-pol acid etch down to protect the bare metal from moisture in the air.
Next task is to get it all seam sealed and send it away for painting. I'm going to use por15 on the inner wings before I send all car away for paint.
Blasting was carried out by billy brown @ fife restoration and refurbishment. If your looking for any blasting, paint or welding work I would highly recommend using billy.
hes got a facebook page set up so check out some of his work!
Last edit: by MarkkGardner

Old Timer
Settled In
I used 2 coats of POR15 Rust preventative paint
Then 2 coats of POR15 top coat in chassis black.
I researched many different paints/underseals to use and ended up going with the POR15 kit as I've not heard a bad thing about them and also that many reputable Body shops use this too. I used tigerseal for my seam sealer because its printable. I also put waxoil into all the open box sections too!


Now to let the top coat harden fully then will get my suspension etc. back on
I also took out my heater box as there's a small patch that needs welded just on the lip where the blower motor goes. I decided to take my heater box apart to inspect it. once the box was opened i noticed that all the foam was so far gone as soon as you touched it it would just turn into dust �
so i'll be re-foaming that at some point. Ill be buying single sided foam tape and super gluing it all down so when the heaters on it dose not melt the adhesive thats on the tape But this can wait.��


Car goes away to get the engine bay painted on Sunday �
Only need to seam seal the engine bay and attach everything so it can roll onto a trailer. ill be using tape this time for the seam sealer so it looks neat. I never bothered doing that with the wheel wells as it would be covered up with lots of layers of thick paint.When the cars away getting painted i will start to rebuild the engine fingers crossed everything goes smoothly, Bolts are at the platers just now so will post a photo of them when they get back.
�
Last edit: by MarkkGardner
Posted
Settled In
Finished off the seam sealer in the engine bay its not the neatest job in the world but far better than it came from factory, I'm sure after a coat of paint you will hardly notice the seam sealer.
Got a few holes that will be getting patched before paint.
�more updates later.


Last edit: by MarkkGardner
0 guests and 0 members have just viewed this: None.