Mk1 Campaign rebuild
Posted
Settling In

jakethepeg007 said
When restoring a couple of motorbikes I've used bicarbonate of soda in a Schultz gun for cleaning up aluminium and blasting the brown rust out of steel, is really gentle on the surface and doesn't cause any damage
Keep up the good work
Thanks
Posted
Settling In


Abit of mucking about on the homemade dolly to get the shell sitting nice and safe and eventually the rear beam is off with studs still in place bonus!!
Posted
Settling In


Only picture I seem to have to of the wooden frame but gets the car up nice and high and lets me move it about VERY HANDY!
Posted
Old Timer


Posted
Settling In

paceman said
Lovely pile of rust you've got there! Must admit, I'm glad I'm well past the rusty parts stage. Keep at it!
I know mate, good thing is this is the most equipped and driest place its been so allows me to just pick away which is good
Posted
Settling In


Deciding against the full tub replacement so cut the strut housing out today to see how bad it was behind
Posted
Settled In


Mk1 Campaign rebuild
Watching with interest how you manage to repair the wheel tubs. If I can help with photos of the nos tubs i have for mine just let me know mate!
Ah a fellow Celt then up in Scotland, great stuff, keep it going matey, thumbs up
Sent from my iPhone using Tapatalk
Posted
Settling In

Hef355 said
Well done again Dave and great work to date. Ordered 5kg tub of the Bilt Hamber Deox gel off your recommendation in prep for my next project.
Watching with interest how you manage to repair the wheel tubs. If I can help with photos of the nos tubs i have for mine just let me know mate!
Ah a fellow Celt then up in Scotland, great stuff, keep it going matey, thumbs up
Sent from my iPhone using Tapatalk
The gel is good but you need to work with it, you should order the crystals they are amazing, make a bath and just leave stuff soaking in it ill get a pic when i go back out to the garage
Posted
Settled In


Mk1 Campaign rebuild

Sent from my iPhone using Tapatalk
Posted
Settled In


000dave000 said
Hef355 said
Well done again Dave and great work to date. Ordered 5kg tub of the Bilt Hamber Deox gel off your recommendation in prep for my next project.
Watching with interest how you manage to repair the wheel tubs. If I can help with photos of the nos tubs i have for mine just let me know mate!
Ah a fellow Celt then up in Scotland, great stuff, keep it going matey, thumbs up
Sent from my iPhone using Tapatalk
The gel is good but you need to work with it, you should order the crystals they are amazing, make a bath and just leave stuff soaking in it ill get a pic when i go back out to the garage
Yeah, I used the gel on rust behind my VW badge on the mk2 but it took quite a few goes to get it all out even after grinding/sanding out as much as I could..
Posted
Settling In


Posted
Settling In


000dave000 said
A spare few hours tonight took some stuff out the crystal bath and started on cleaning them up


Wow well impressed with that!! I've used the Bilt Hamber gel before but never got on with it. Took a number of attempts to get the results I was looking for.
Crystals you say? Need to get myself some 😁
Posted
Settling In

Posted
Settling In


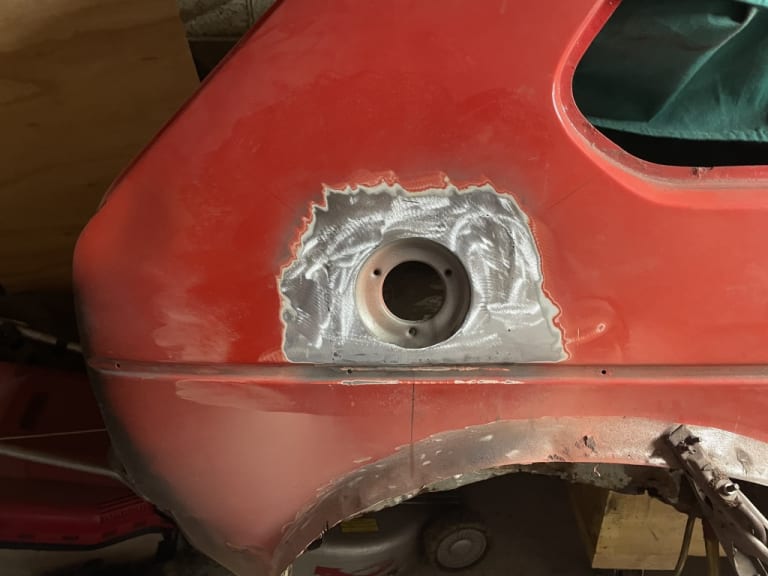
Fuel filler surround in place while I have covid, bit of a nightmare but its done now at least, skim it once the weather starts to get better
Posted
Settling In


Starter and alternator off , any hints got getting those flathead screws out
Posted
Old Timer


Posted
Settling In

paceman said
To what end? They hold the magnets in place, unless you really want it down to its individual parts, I'd leave them be. You can get to all the bits you need to refurb (brushes and commutator ring, brass bush) without taking them out. I got mine to a very tidy state with out taking them out. If you do decide to remove them, I'd take everything else out first or the magnet will stick the coil and you'll likely get the whole thing stuck.
Now that answers my question didn't know if these needed to be removed or not
0 guests and 0 members have just viewed this: None.


