83 GTi - now MOT'd!
Posted
Old Timer


just can't see what the clips that are on the loom attach to - they look like they should push into some holes somewhere. I'll have a good look later.
J
Posted
Old Timer


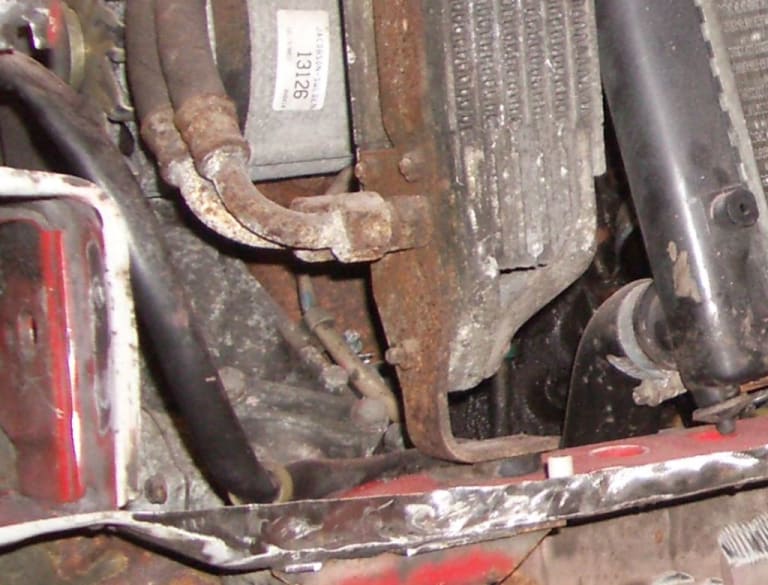
Nut & Bolt Resto Complete (Mars Red GTi original): https://vwgolfmk1.org.uk/forum/index.php?page=topicview&type=misc&id=projects%2Fyour-mk1-golfs_2%2Fpistolpete-s-mars-red&start__keyed=
Nut & Bolt Resto in Progress (Lhasa 16v): https://vwgolfmk1.org.uk/forum/index.php?page=topicview&type=misc&id=projects%2Fyour-mk1-golfs_2%2Fpistolpete-s-lhasa&redirected=1
Nut & Bolt Resto in Progress (Lhasa 16v): https://vwgolfmk1.org.uk/forum/index.php?page=topicview&type=misc&id=projects%2Fyour-mk1-golfs_2%2Fpistolpete-s-lhasa&redirected=1
Posted
Old Timer


Ta!
Posted
Old Timer


So, I'll have to remove the manifold (engine in car!!) to investigate and likely get them helicoiled.
And it was all going sooooo well!
Posted
Old Timer


Following on…. After chatting to one of my mates I've decided to leave the manifold alone for now - if it leaks/blows then I shall take it off and sort it - but it might be fine.
Not a lot of pics in this post, but I have got my lower strut brace fitted, front arb fitted, all the wheel arch splash guards in, rear lights fitted, headlights fitted, outer grill trims on (with newly sprayed red trim), and fitted 2 new bumpers.
The bumpers were ECP ones, which I'd read some good comments about on the FB group. They seem to fit pretty well, but some modification was required to get the holes in the mounting irons to line up with the holes in the bumper iron – nothing major, just widening out some holes with a file. They will need a tidy up with a sharp knife to remove bits of plastic from the molding process, but for my standards I'm happy with them - a pair cost me a shade over £100!
Currently working on the inner grill painting up the red trim. They had been sprayed black in a past life which surprised me as I could have sworn they were red when I last had the car on the road - funny how your memory works. Once I get that fitted I can start getting the interior in!
Down side is that the car is now living outside (under a cover) so I have to contend with rain and midges to get work done. I had to give the garage over to a '71 MGB roadster that I've been storing in a friends garage for a few years - it's not a resto project, it's all done and running so it won't divert my time from the golf.
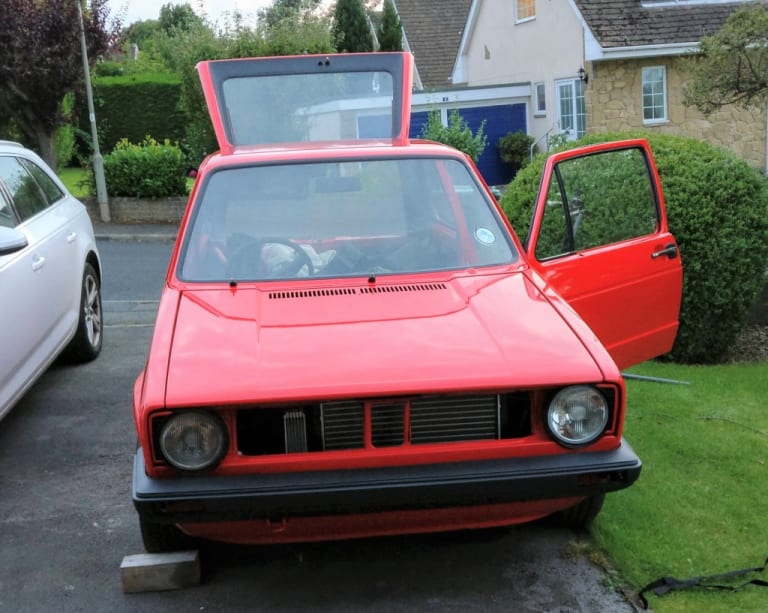
One cheeky pic of how it looks currently…
Posted
Old Timer


paceman said
Down side is that the car is now living outside (under a cover) so I have to contend with rain and midges to get work done. I had to give the garage over to a '71 MGB roadster that I've been storing in a friends garage for a few years - it's not a resto project, it's all done and running so it won't divert my time from the golf.
Good progress, car is looking great.
I'm sure I read that wrong though and you meant you have to walk past the MGB under cover to get into the garage to finish the Mk1!
🤔
Nut & Bolt Resto Complete (Mars Red GTi original): https://vwgolfmk1.org.uk/forum/index.php?page=topicview&type=misc&id=projects%2Fyour-mk1-golfs_2%2Fpistolpete-s-mars-red&start__keyed=
Nut & Bolt Resto in Progress (Lhasa 16v): https://vwgolfmk1.org.uk/forum/index.php?page=topicview&type=misc&id=projects%2Fyour-mk1-golfs_2%2Fpistolpete-s-lhasa&redirected=1
Nut & Bolt Resto in Progress (Lhasa 16v): https://vwgolfmk1.org.uk/forum/index.php?page=topicview&type=misc&id=projects%2Fyour-mk1-golfs_2%2Fpistolpete-s-lhasa&redirected=1
Posted
Old Timer


Yep, that's how it should be, but seemingly as the MG is older it takes priority!
got yours MOT'd yet?
J
Posted
Old Timer


I bought a 6 relay mouting box, relays, fuses and wire and drew up some diagrams.
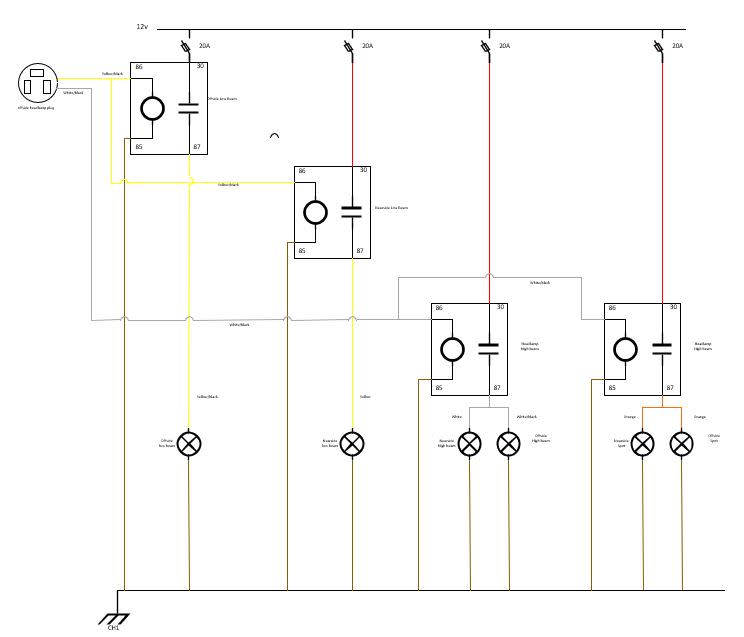
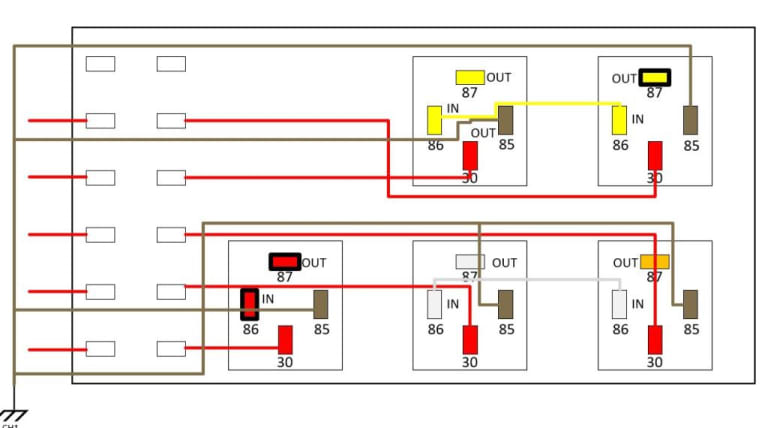
I've used seperate relays for left and righ dipped, one for main beam, and one for the spots, the 5th relay is for the starter solenoid.
I couldn't find enough space on the nearside to fit everything, so decided to go offside and use the bracket just behind the washer bottle - it's not used on a GTi.
Made up a metal plate to mount the relay box to, which I could then mount to the bracket, and sprayed it up.
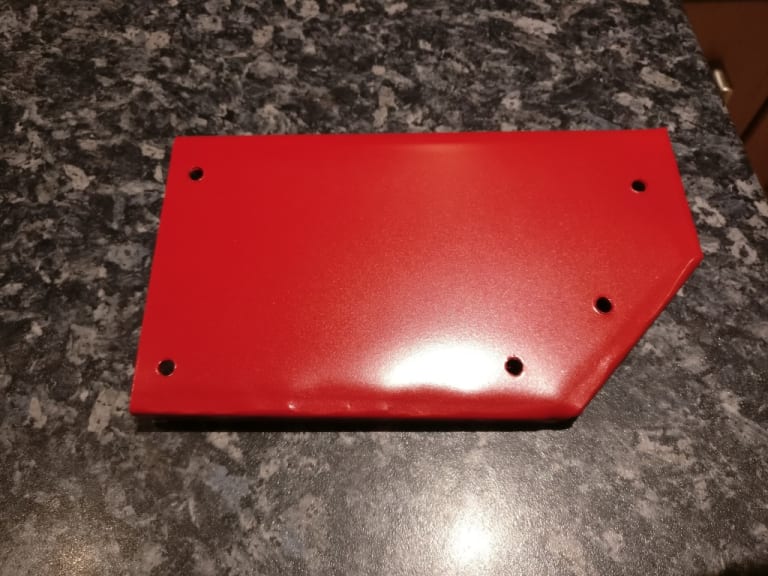
Then wired it all up to the box…
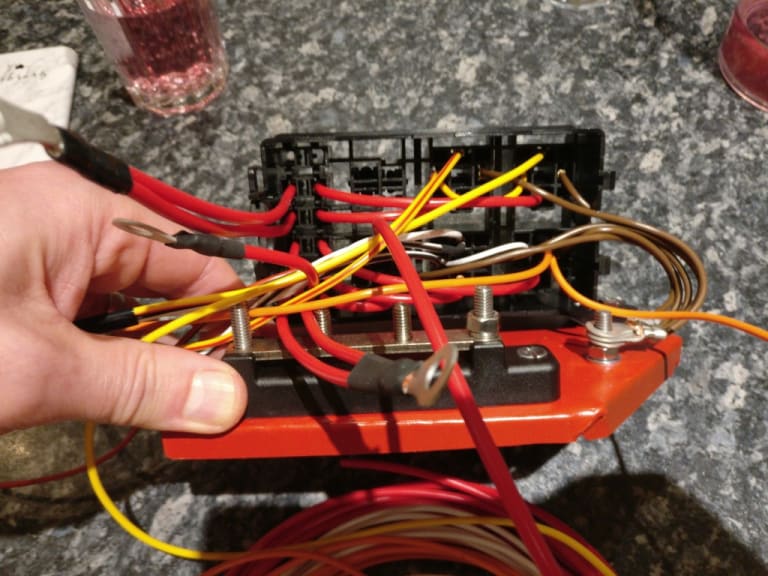
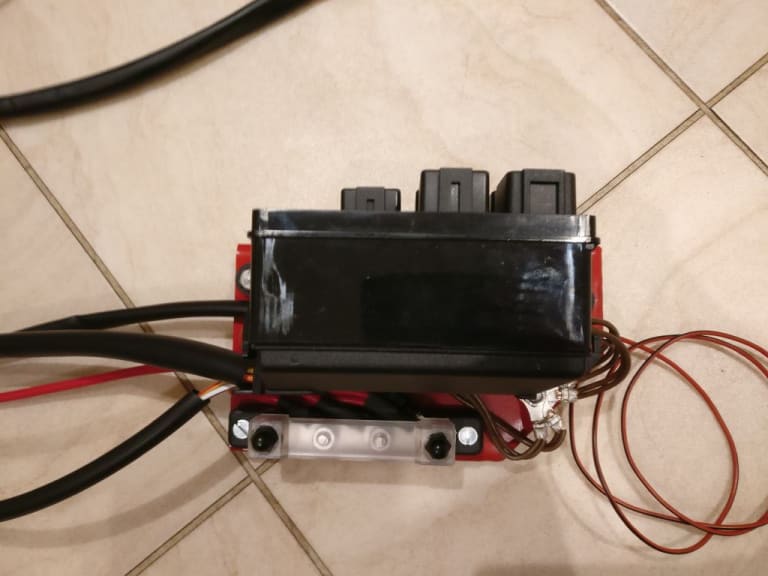
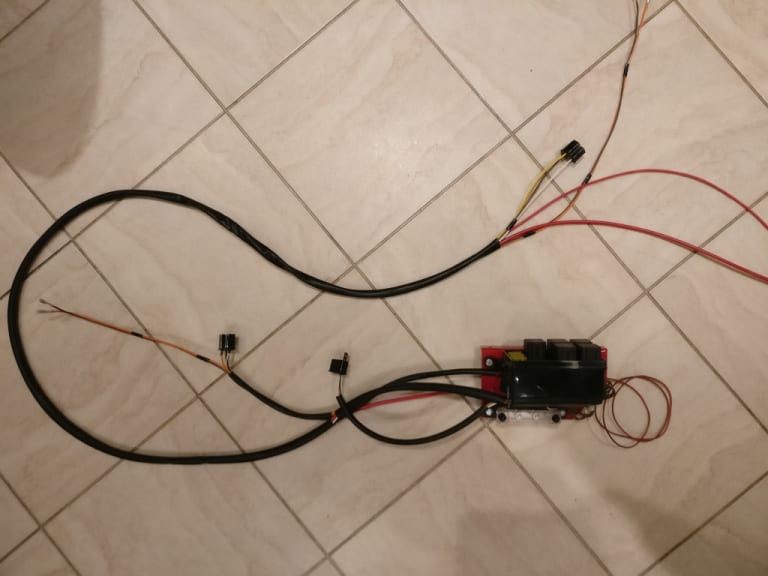
Had some fun and games getting the wires through the sleeving - talc works wonders. I've got a nice fat power feed and an inline fuse just off the connection to the battery - safety first and all that - so I don't think voltage drop will be an issue. Each relay has it's own dedicated 12v feed connected to the bus bar, same for the earths. There is a fat earth connection to the body as well, but that's not on the pictures.
Fitted it all in, I think it looks pretty tidy. The main element of the loom is fixed next to the existing loom that runs behind the front valance.
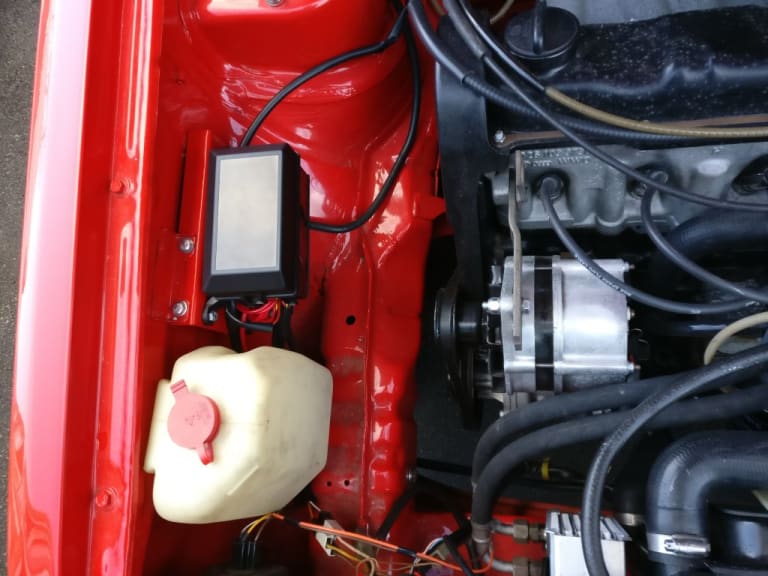
I've not tested it yet as I've not got any of the switches connected in the car - but I have every faith!
Thanks for reading!
 Last edit: by paceman
Posted
Local Hero

The closer the Relays are to the battery will lessen the voltage drop at the lamps.
I chose the left side of the headlight to become the switch as the right side (as you are looking at it) was too busy on my 90's what with the After fan run relay and things as well as the Power Steering Res, and the a/c on the left which is why I chose the right side to mount the relays.
What do Divorces, Great Coffee, and Car Electrics all have in common?
They all start with GOOD Grounds.
Where are my DIY Links?
They all start with GOOD Grounds.
Where are my DIY Links?
Posted
Old Timer


Posted
Old Timer


The car looks like it's coming along nicely
Mars red 1.8 GTI tintop now MOT'd and on the road!
http://vwgolfmk1.org.uk/forum/index.php?page=topicview&id=projects%2Fyour-mk1-golfs_2%2Fwent-to-look-at-a-golf&kfs79=150
http://vwgolfmk1.org.uk/forum/index.php?page=topicview&id=projects%2Fyour-mk1-golfs_2%2Fwent-to-look-at-a-golf&kfs79=150
Posted
Old Timer


Relay box and the bus bar were from ebay.
https://www.ebay.co.uk/itm/Universal-12-Way-Relay-Box-Fuse-Block-Holder-Dustproof-ATC-ATO-fit-All-Vehicles/402303045657
https://www.ebay.co.uk/itm/2-Way-Stud-Bus-Bar-with-Cover-150A-48V-Marine-Tinned-Boat-Caravan-Motorhome/264509766830
All the realys, fuses, cable, sleeving and H4 headlamp connectors (one male to plug into one existing headlamp, and 2 female to connect to the headlamps) were from Vehicle Wiring Products.
I'll dig out some details if I can find the original order.
Posted
Old Timer


Finally managed to get the original carpet cleaned and back in - looks pretty decent for it's age!
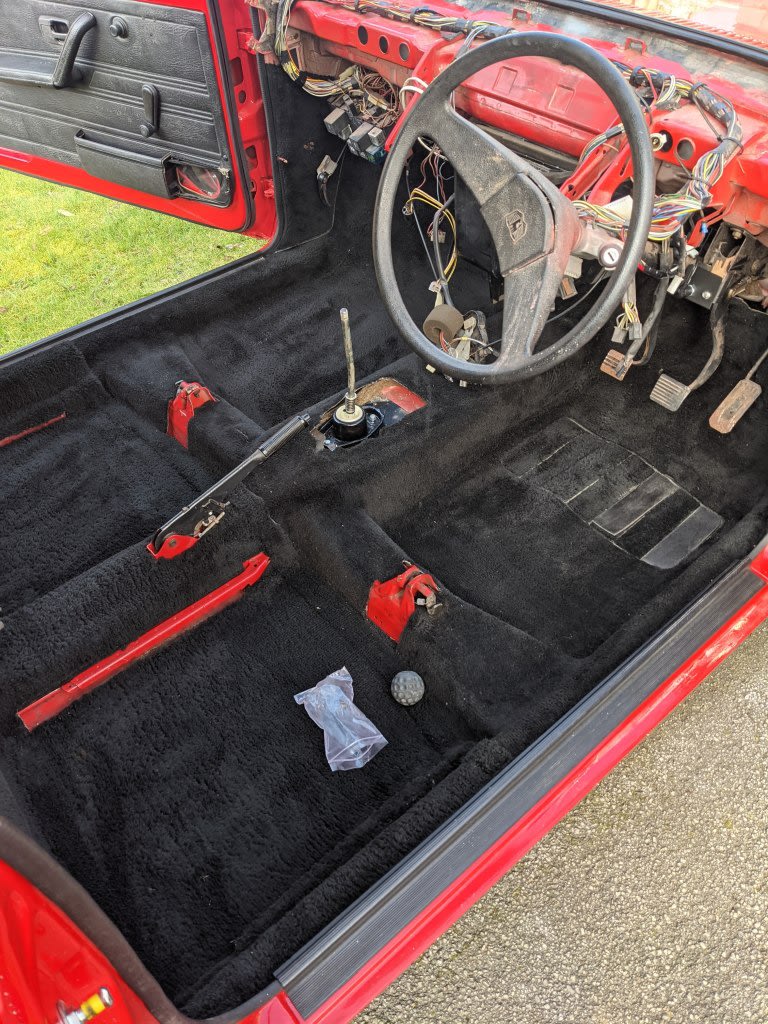
Steering wheel is only temporary - have the orginal to go on eventually.
Also managed to get the rear seat cleaned up and in.
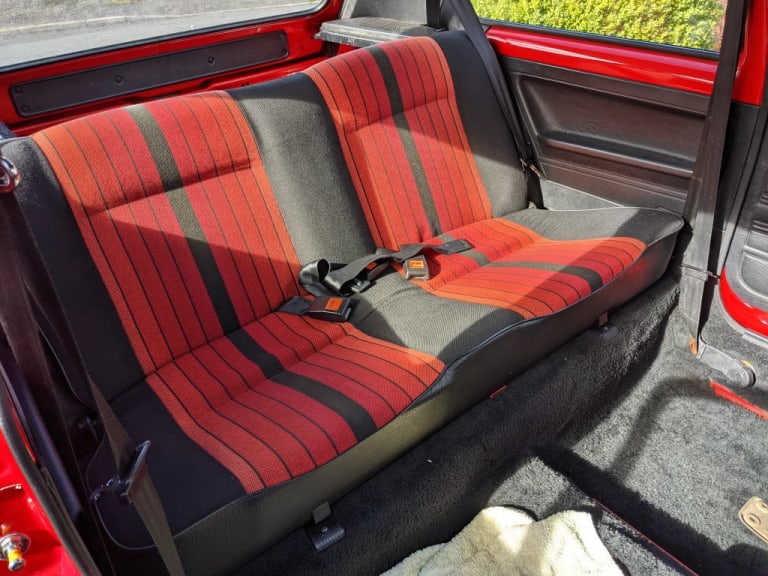
Front and rear and boot interior trim also fitted, wing mirrors on, ddor open from the inside and the out, and the windows go up and down. Result.
Scrubbed all the seat-belts, gave them a wipe over with some furniture polish, go them in. Discovered that one of the belt brackets had gone rather scabby - which is odd as the have been dry stored. Looked like this:
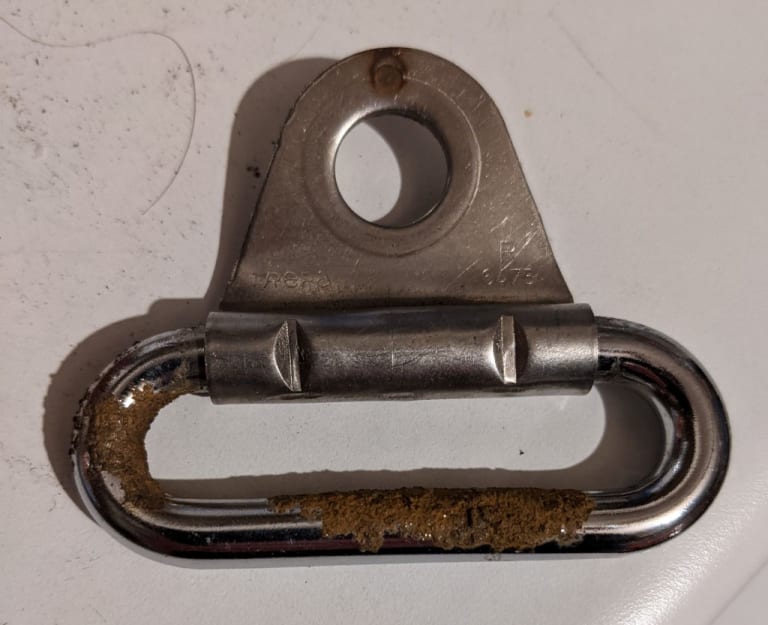
took a wire brush to it, and then repurposed some cable sleeving to cover the offending area so it didn't get on my nice clean belt - the result:
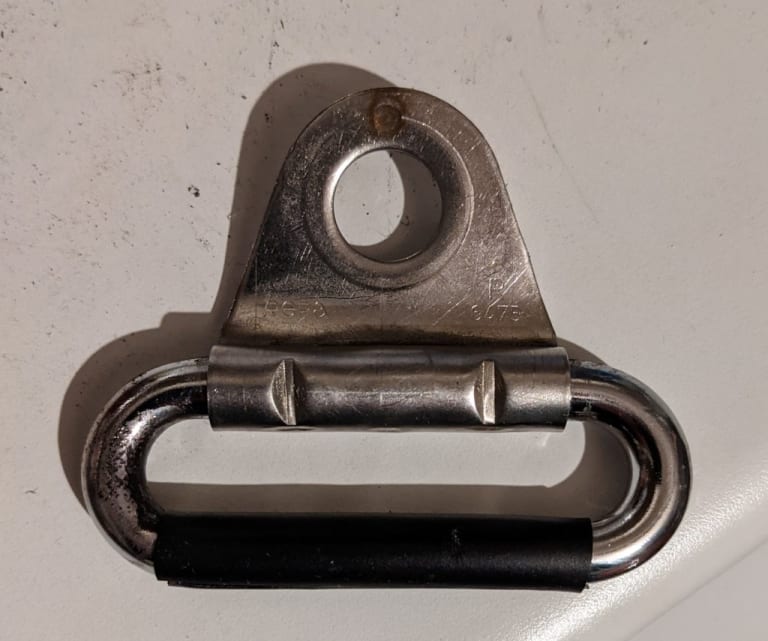
Not perfect, but until I can track down another one - no joy so far - it will do!
Passenger seat to clean up next with the wet and dry vac, and then I can get that in.
Sloooooowly getting there….
J
Posted
Old Timer


Turned my attention to the drivers seat which needs some repair to the lower and side bolster foam and fabric.
Strip down commenced!
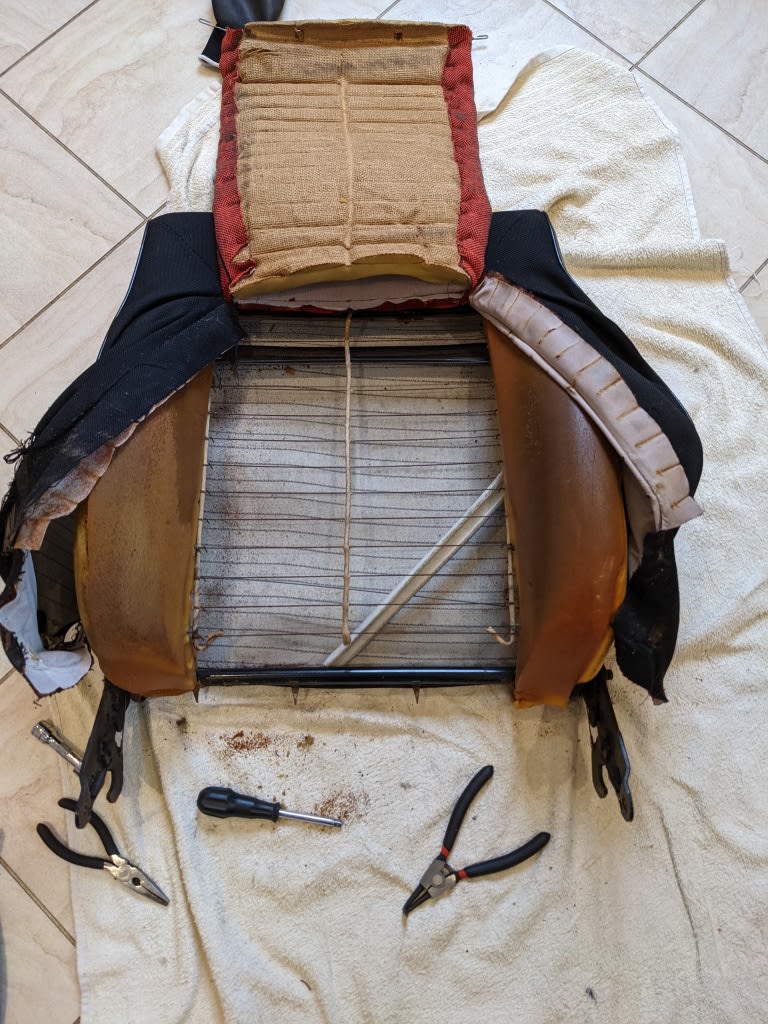
I read a great tip - probably on here - about using circlip pliers to remove the hog rings - works a treat.
On the seat base you can see where they've used left over trim fabric to prevent the lower cushion rubbing.
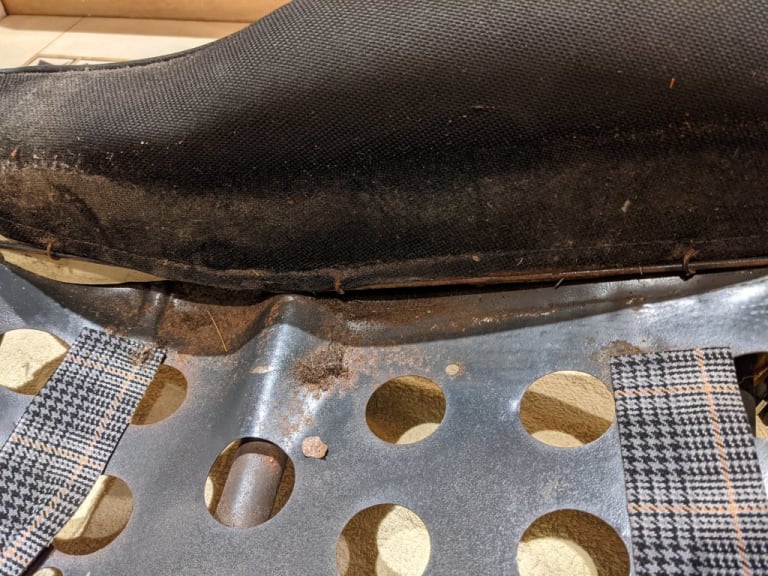
I'll be putting it back once I've cleaned up the base. Not sure what model it is off. Any ideas?
I put the covers through the machine on a cool wash. They've come up pretty well. I've just about talked my neighbour (who is a seamstress) into replacing the worn out bolster fabric - original spec material on order from Heritage. After watching a load of YouTube vids, I'm aslo going to repair the bolster foam instead of shelling out for new bits. More on that process when I get round to it.
I've also started stripping the external side trims back to bare metal ready for re-finishing. That powder coat/vinyl takes some removing!
Thanks for reading!
J
Posted
Old Timer


Had to take the Halfords cover back to Halfords (it has a 2 year guarantee). Not that it leaked, but it had started to split at the front. They've honoured the guarantee and a new one will be on the way. Gave me the opportunity to take a couple of pictures.
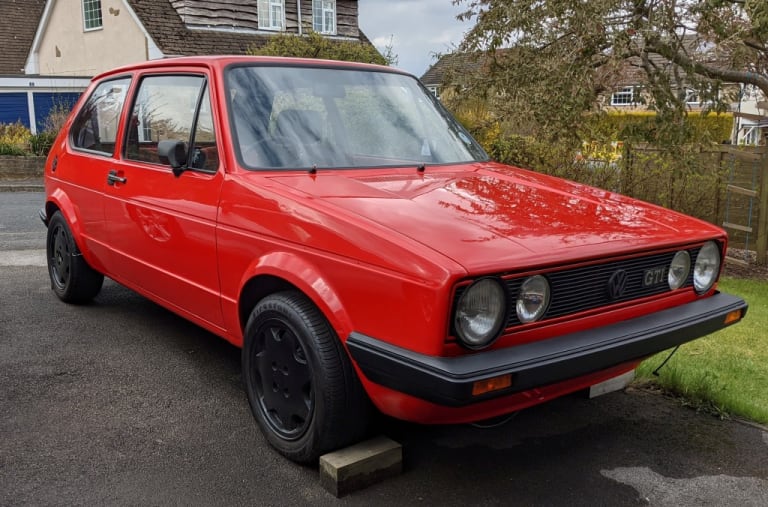
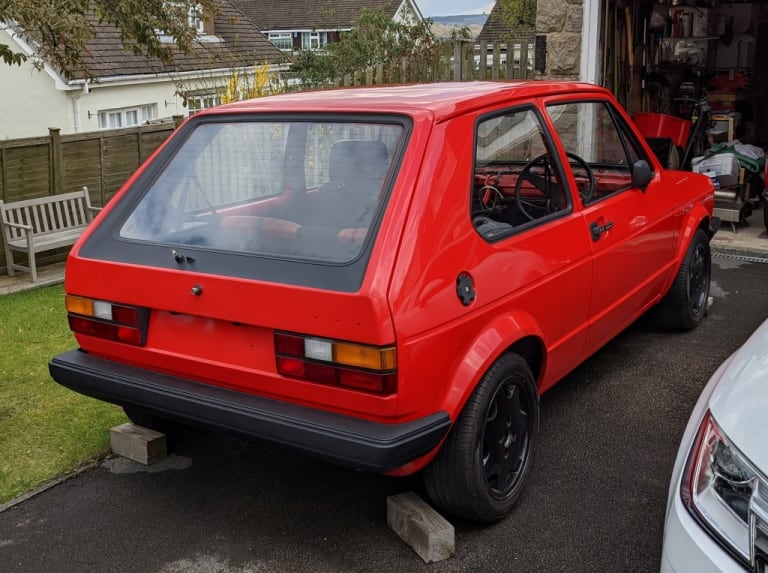
I keep sitting in the passenger seat and getting overly excited!
Posted
Old Timer


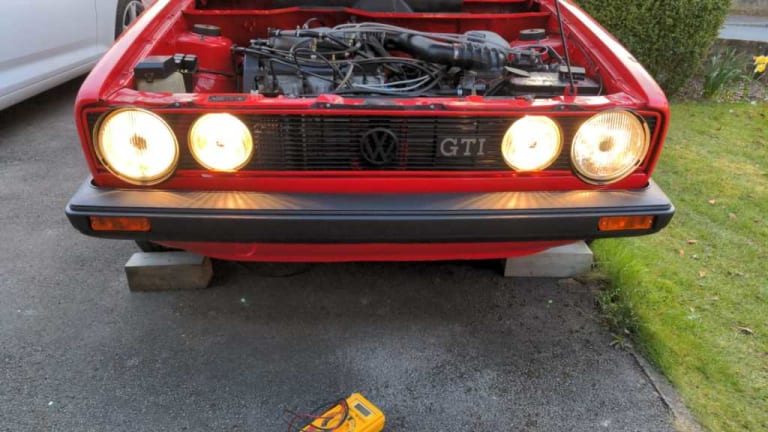
So my new relay box works and I have headlights.
Indicators, sidelights, rear fogs, brakelights (running off a relocated switch), interior light, front and rear wipers all working. Unfortunately I have no number plate lights, hazards don't work, no dash lights (on the switches or heater controls). I think the horn has had it as well, I can hear the relay clicking, and I heard a very slight squeak, but nothing more - bit annoyed by that as I didn't think they could breakdown.
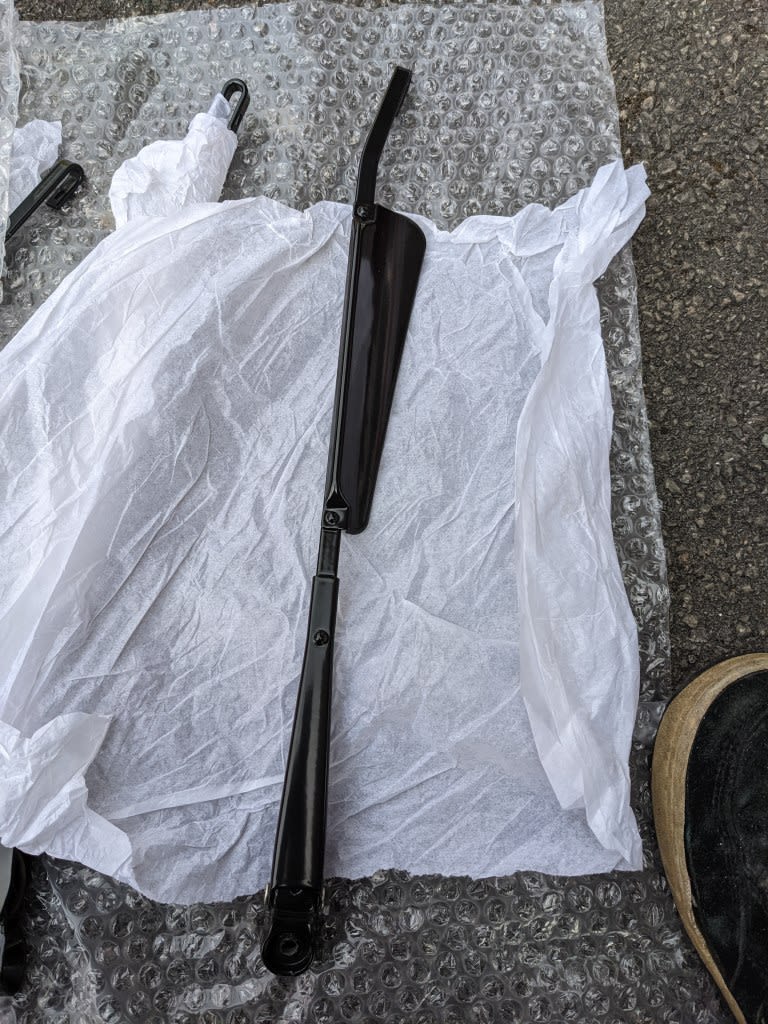
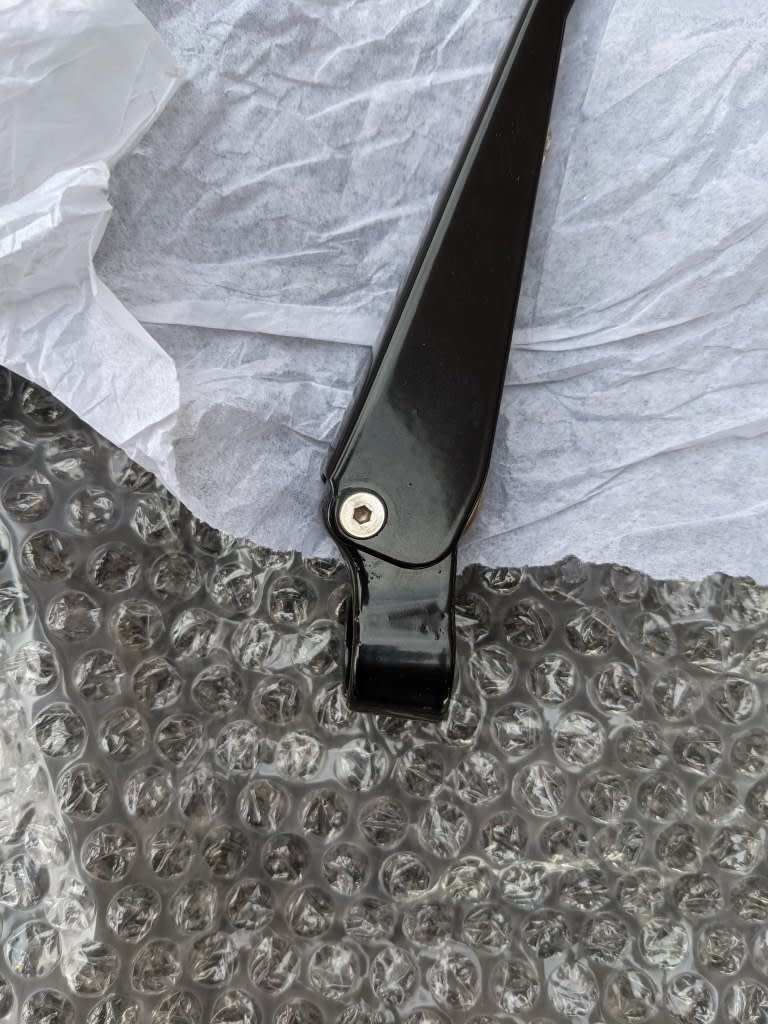
Fitted my rebuilt wiper arms. I couldn't find the right rivets (unless I wanted 1000 of them), so I used some M4 internal threaded rod, and some low profile stainless M4 screws instead.
Posted
Local Hero


1983 Mars Red 1.8 Golf GTI
1987 Alpine White 1.8 Clipper Cabriolet
The trouble with doing nothing is that you never know when you are finished.
1987 Alpine White 1.8 Clipper Cabriolet
The trouble with doing nothing is that you never know when you are finished.
Posted
Old Timer


Posted
Local Hero


Also if you've had everyting in bits make sure the little earth wire at the bottom of the steering column in the engine bay is connected.paceman said
Cheers chap - will give that a whirl.
1983 Mars Red 1.8 Golf GTI
1987 Alpine White 1.8 Clipper Cabriolet
The trouble with doing nothing is that you never know when you are finished.
1987 Alpine White 1.8 Clipper Cabriolet
The trouble with doing nothing is that you never know when you are finished.
Posted
Old Timer


Thought I'd test the horn again before removing it - and it works!
Got the dvm out to sort the hazards out - power where it should be, so I unpluged the switch and the relay, put them back in and hey presto - now working. The automotive equivalent of turning it off and on again. Bet they don;t work when it comes to MOT time!
Still no rear number plate lights though. Got power through the switch and on both sides of the fuse. I suspect a break in the wire that runs to the rear so I'll continuity check that later….
0 guests and 0 members have just viewed this: None.


