


1986 BMW E30 316 (2.8)

Posted
Settled In

1986 BMW E30 316 (2.5)
Posted
Settled In
Anyway, the engine is now stripped down. It's suspected the noises I could hear were some heavily work eccentrics adjusters on the rockers so now a set of those are on their way. The only other thing that's been found is some light scoring to the piston skirts, most likely a combination of poor oil a debris in the oil, these have been measured up and are still ok to use which is good news as it feels like I'm bring the country out of recession on my own at the moment

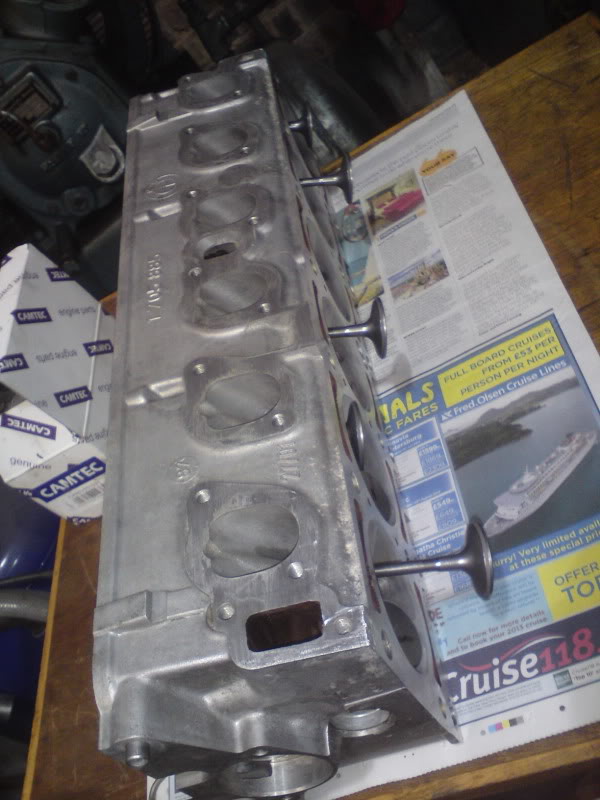
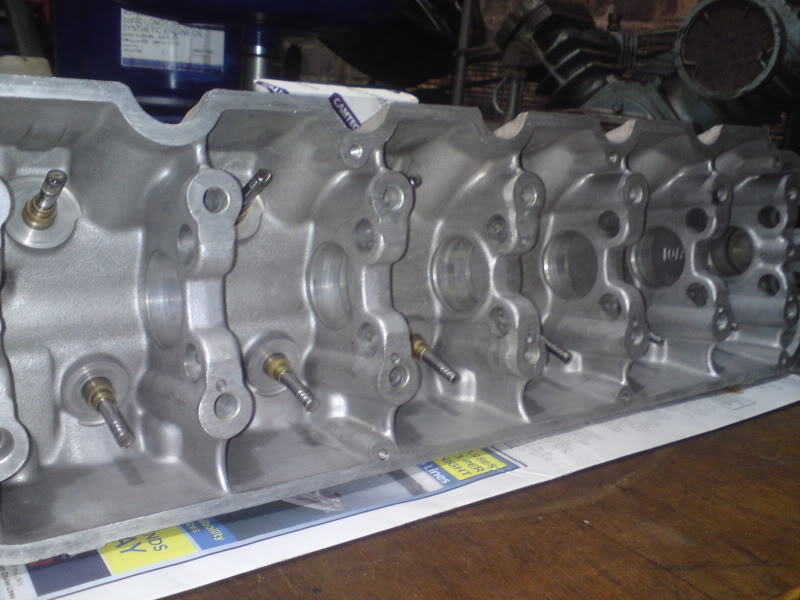
The head has been tested and is all good which is always a huge relief with these things as they like a good crack. Pressure tested, re-faced, chemical cleaned, exhaust guides done, re-seated the valves and a vac test. Headwork is being kept to a minimum for the sake of reliability, all that is going to be done is get the the gaskets, head and manifold ports matched up to each other so there's no steps to improve the gas flow. If I feel the need I can get another head done to a lairy spec at a later date.
Time for some pictures;


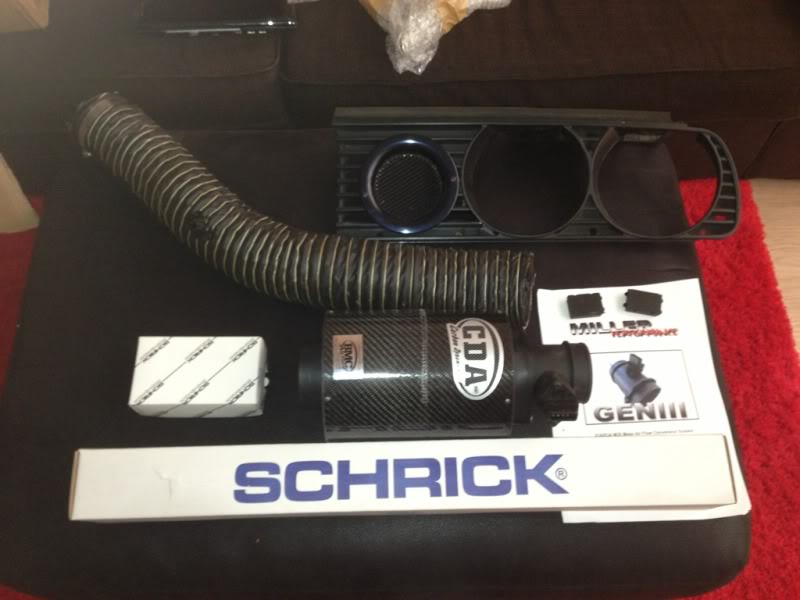
I'm also going to be going down the MAF conversion route, probably stick to the standard AFM until it goes for a proper mapping session though. A MAF conversion gives a much better throttle response, at low speed and part throttle these engines often have a little hiccup, the AFM does away with this. They are also known with proper mapping to give good power and torque improvement 8)
Posted

Moderator


Posted
Settled In
Posted
Settled In
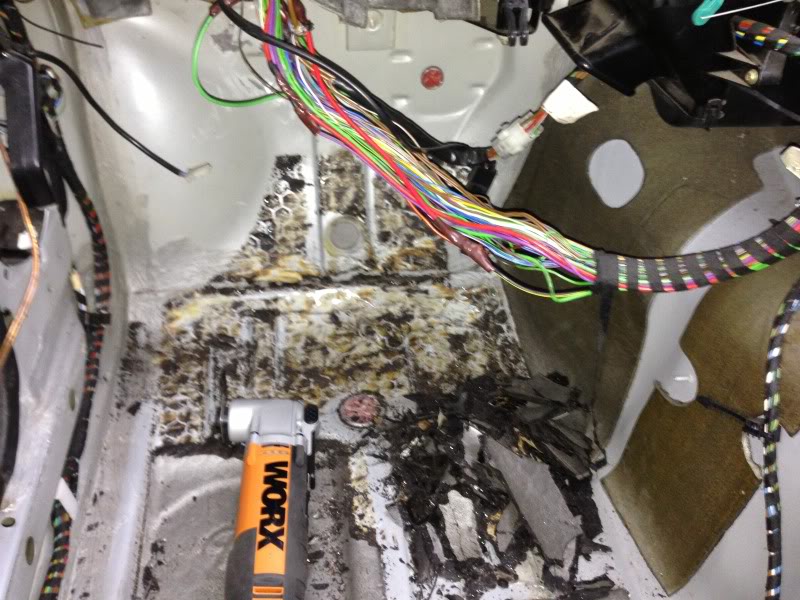
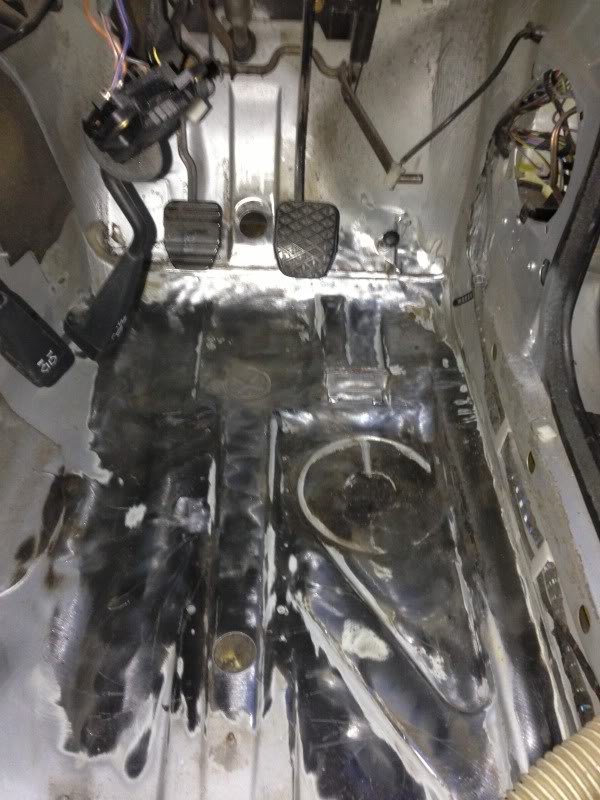
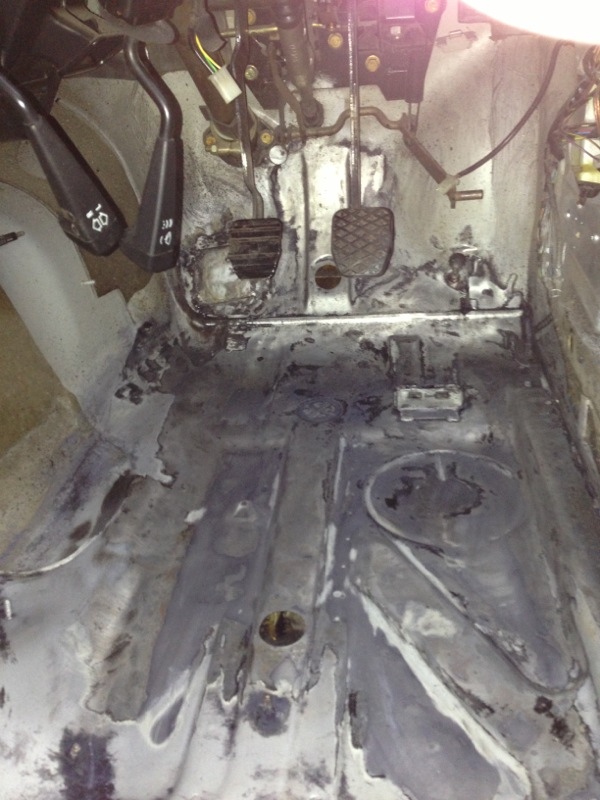
I'd bought one of those oscillating multi tools before Xmas and that was perfect for getting under the sound deadening. However it turned out to be a pointless exercise as the passenger side was perfect so I only took up the front half, should've guessed since the drivers side pulled up by hand whereas the passenger side was still stuck solid.
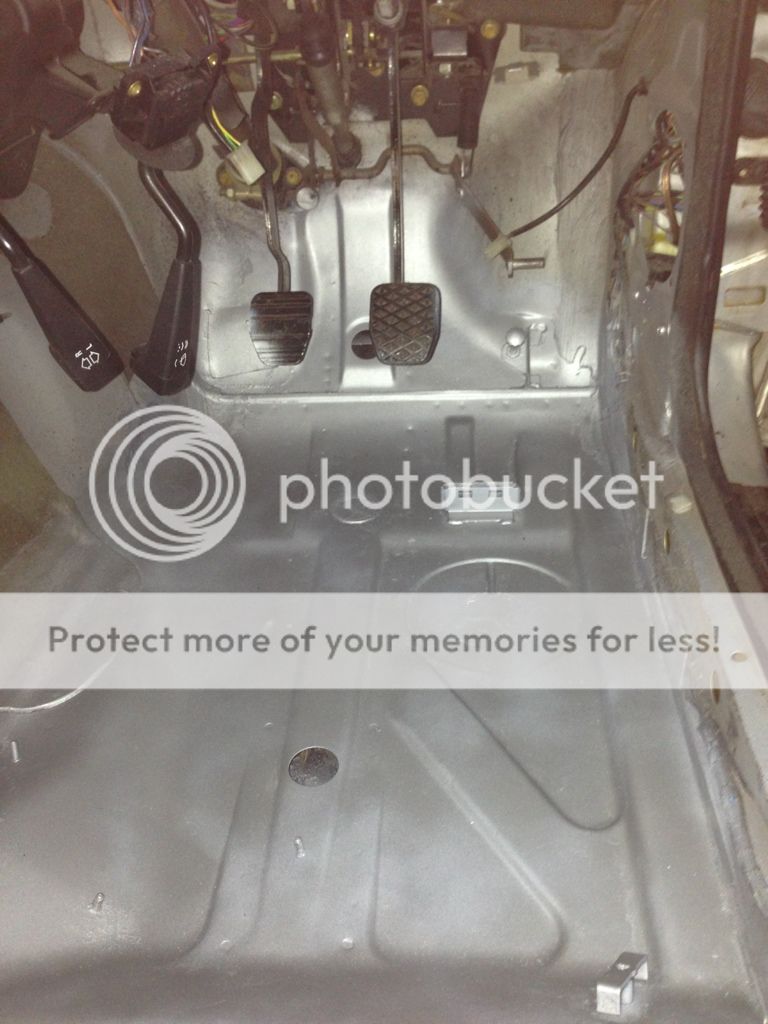
This was 10mins work with the OMT.
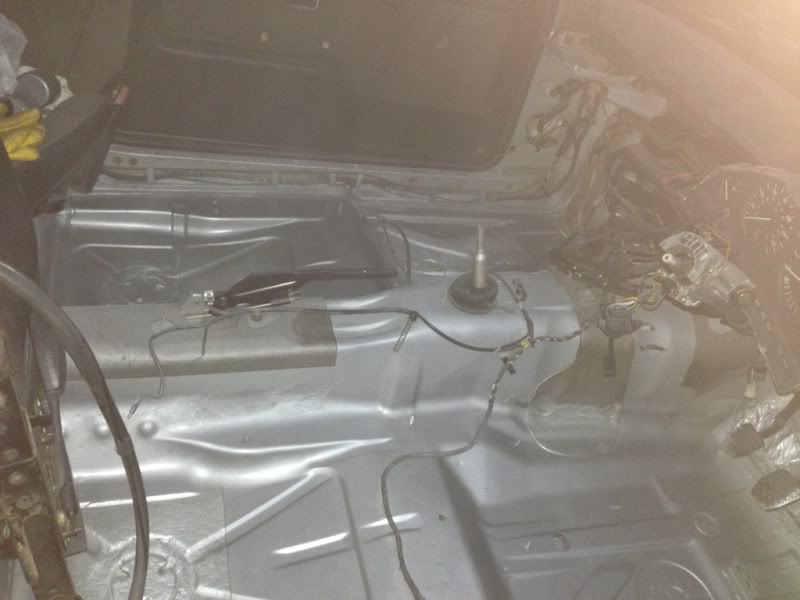
Took a whole lot longer with more scraping and grinding to get to this so I've got a good surface to repaint.

Drivers side took a lot more work though, especially with the added trickery of the throttle pedal mount and stop. After much contortionism it got it to this standard.
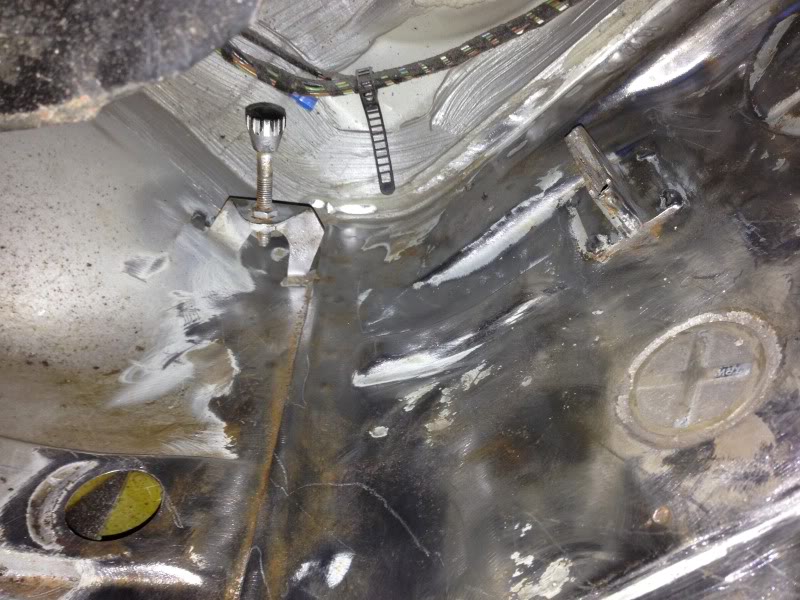
Found I had to go quite a way up the bulkhead as well as despite looking fine this section had surface rust under the paint all the way up.
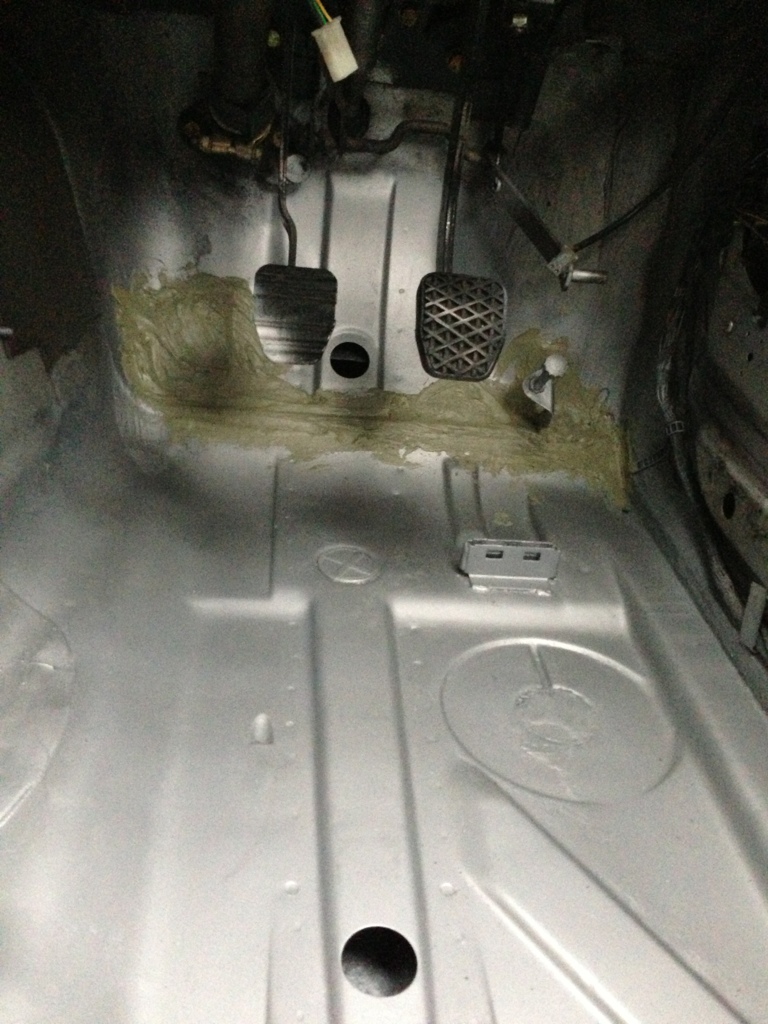
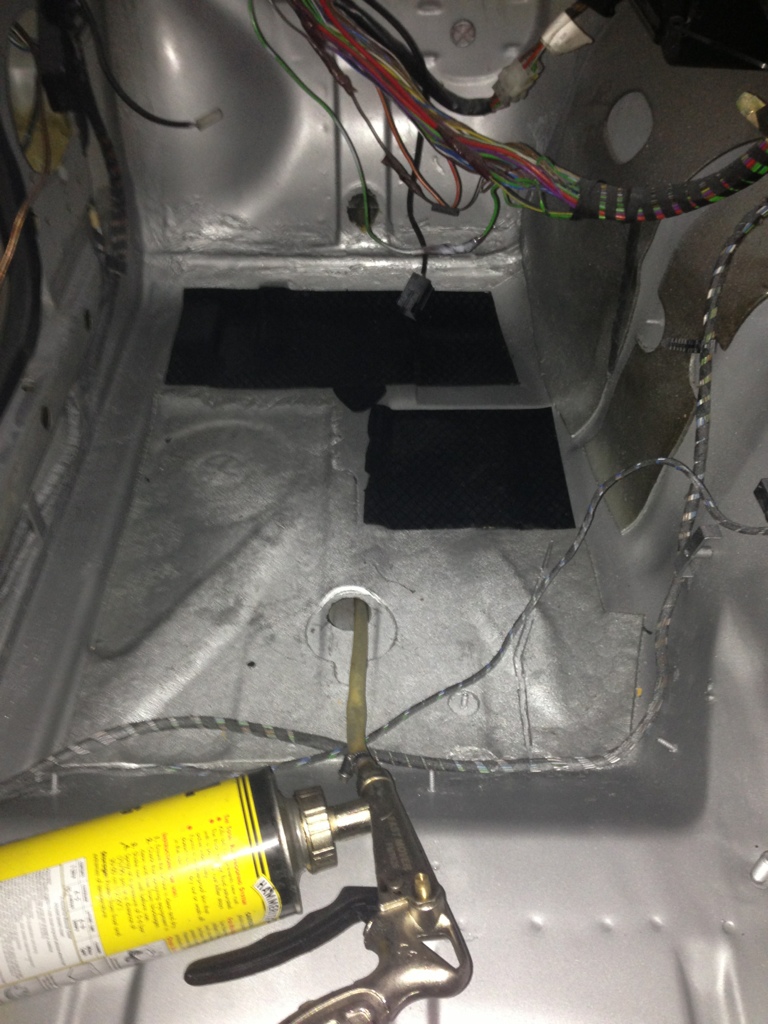
The floor has now been doused in Fertan as I won't get back on it until Monday at the earliest. I'll be fitting new plastic bungs but prior to that the the Waxoyl probe will be stuffed into the holes for a good soaking.
Posted
Settled In
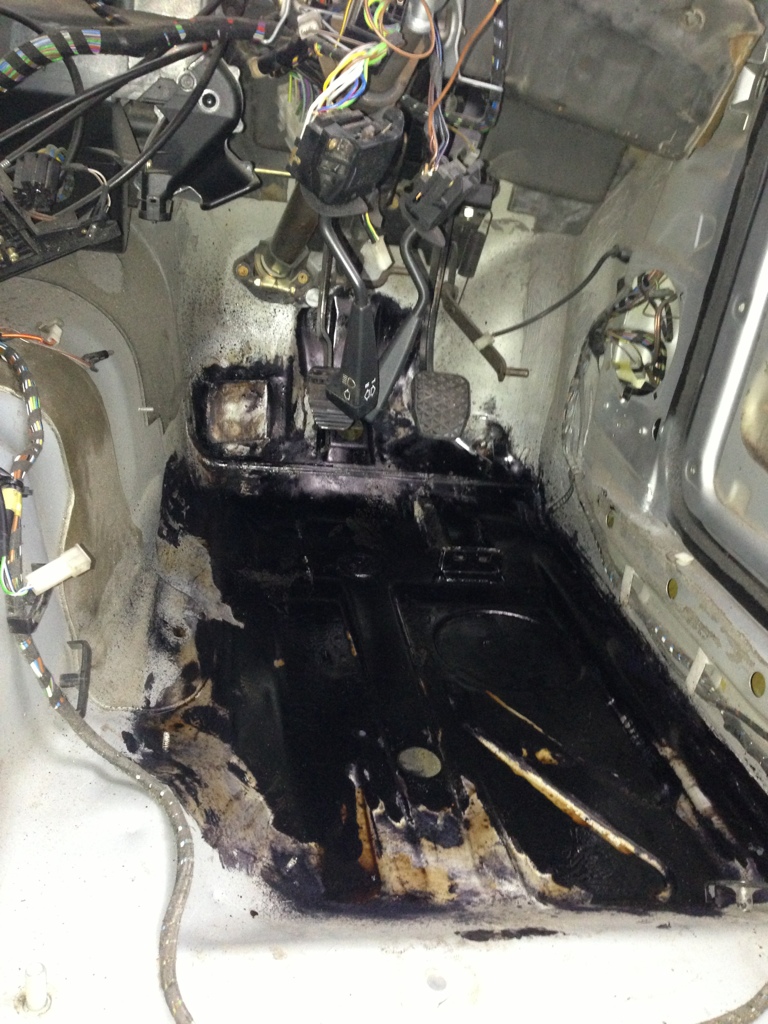
Followed the instructions and wiped it all down;

Wasn't sure that is was meant to be looking like but it didn't seem quite right, didn't seem fully dry. I decided to get the heat gun into action to dry off the water used for wiping it down and the Fertan just started turning to dust so with a quick wipe with a kitchen towel I was left with this;
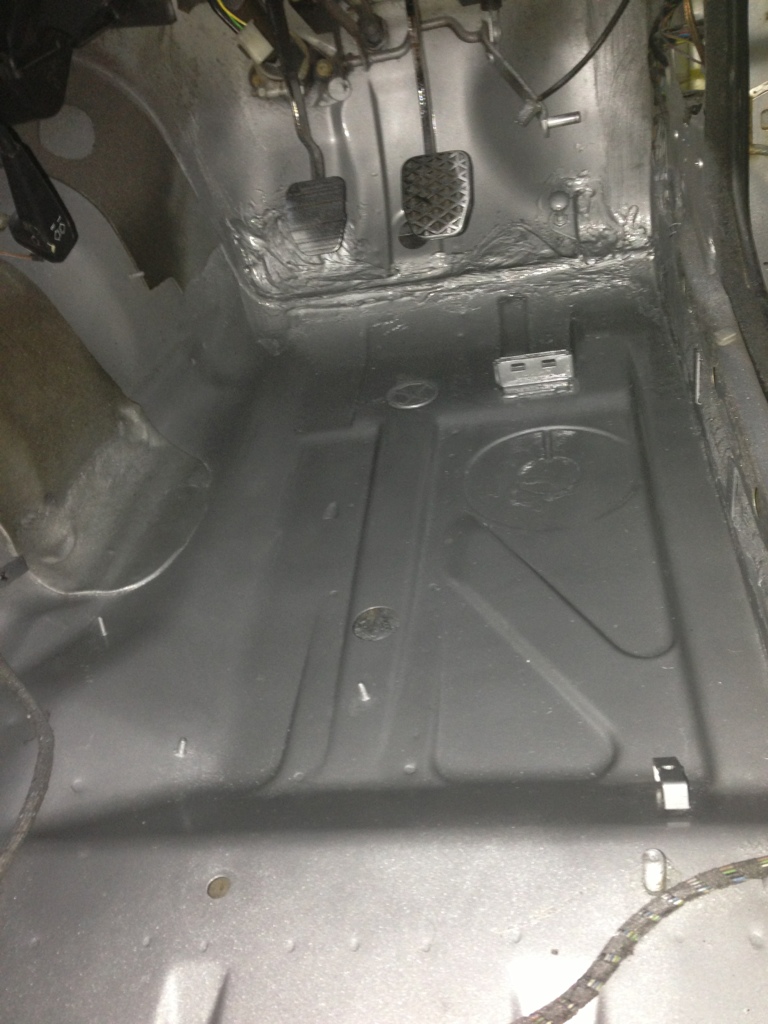
It then had a quick coat of etch primer and then a couple of zinc primer.
The next day out came the heat gun once again (partly to keep me warm as well as get the surfaces to a descent temperature. This time it was the turn of the seam sealer to get smeared into place and then left to set for a few hours after a couple of minutes under the gun. I took the decision to keep the pedal mount free of it though.
Then later in the afternoon on went the base coat and then lacquered. Luckily Polaris silver matches cheap wheel silver quite well 8)� (pics aren't great as I was running out of light).

Now just need to put some sound deadening down and then I'll start on the wiring for the stereo, just need to source a stereo loom, then the rest of the interior can start going back together.
Posted
Moderator


Posted
Settled In
End of this week I want to get the electic window mechs and looms fitted along with any stereo wiring I need to run front to back. By the time that's done I'll hopefully have sourced the foam I need for under my carpet.
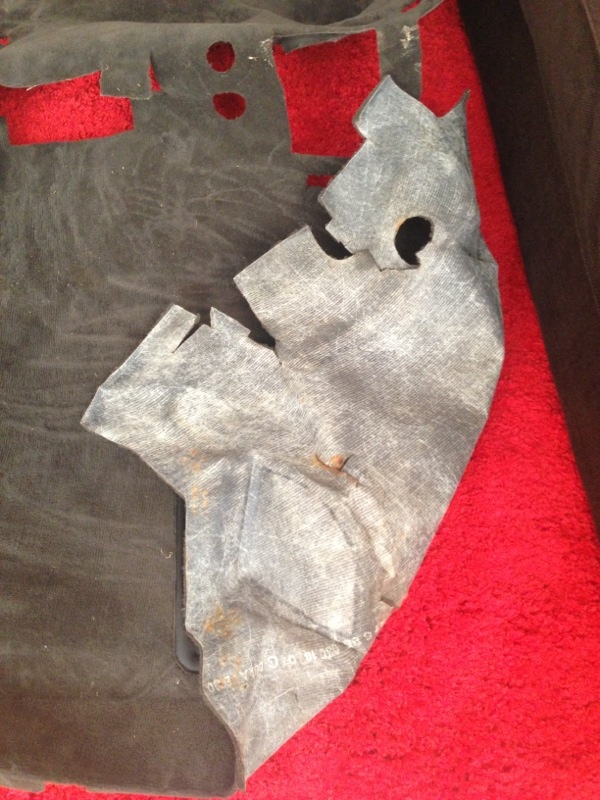
This is what my carpet is like underneath, there is usually think foam insulation,
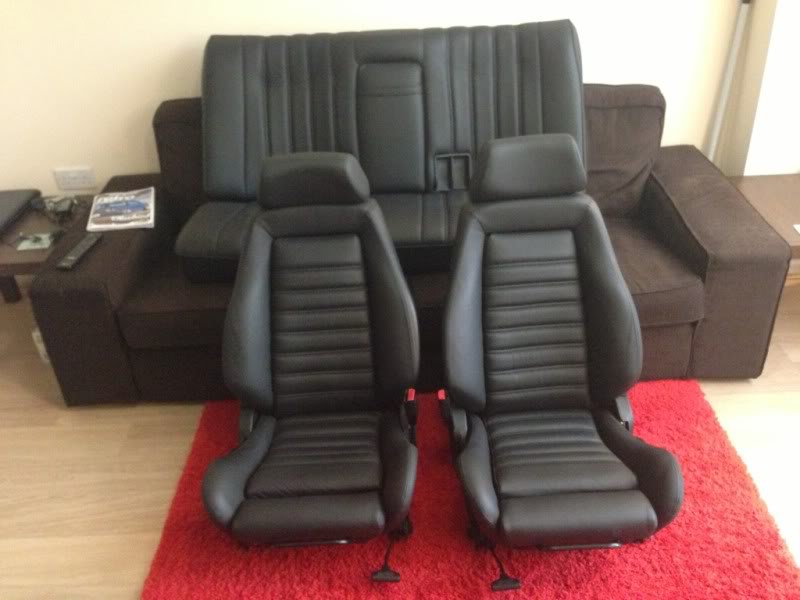
Also bought a spanking new interior. Was all set to go for genuine Recaros in Houndstooth Cloth, my seats were pretty tired but I had the cloth from another set of seats that had been stripped to be trimmed in leather so could've still made them look pretty good. However word came about that an interior was about to become available that had only been retrimmed in buffalo leather 2 years ago buy a company in London that do a lot of work for BMW (b-trim) so before they were even advertised a deal was done and I had a road trip to Surrey on Sunday to get these;
Posted
Moderator

Posted
Settled In
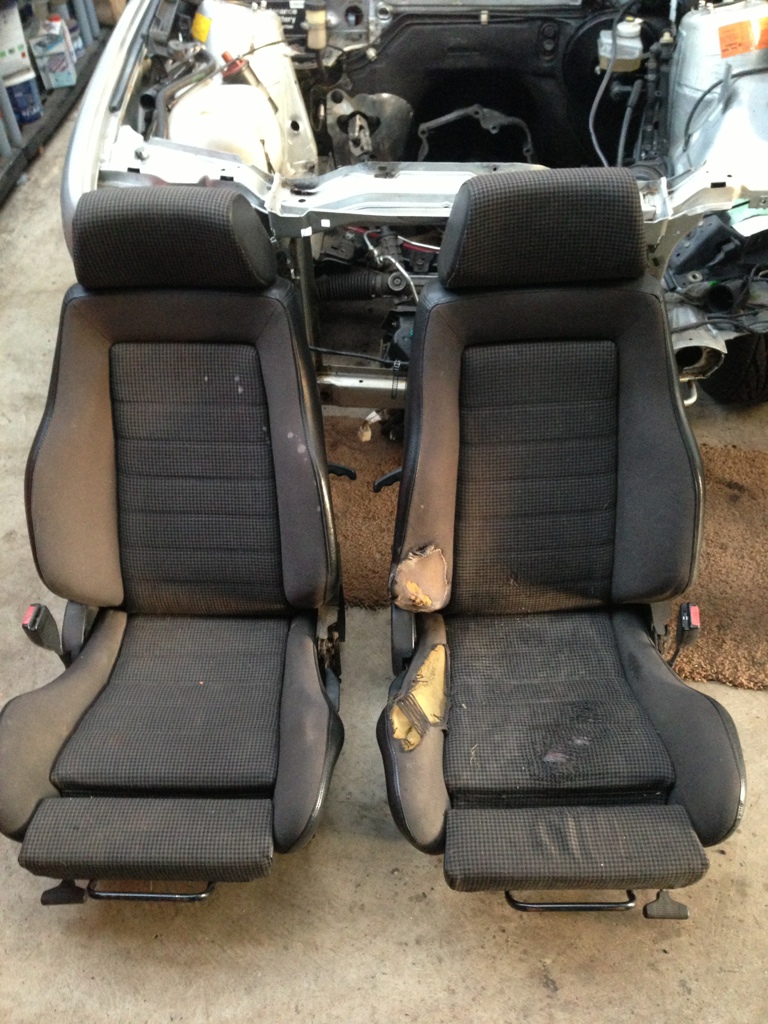
They weren't cheap but I paid a lot less than the cost of the retrim and I've already sold all my old interior by word of mouth (E30 Recaros rarely make it to the open market as they are so rare). Looking at the work my old seats needed, frame and runners refurbing, new bolster foam, hinge covers which are NLA, cloth swapping the new intterior probably only owes me a couple of 100 more than getting the old one up to scratch and it looks like new.This is the old interior
Posted

Settled In
Posted
Settled In
While the engine is out again I've had the front valance off and ground back all the little scabs on the front panel and repainted it so it's up to standard with what the rest of the car will be.
Grinding work in progress,

Freshly painted;

Bought some 3M cavity wax in aerosols to try out;

Really impressed with it as it's barely visible against the Polaris unlike Waxoyl, on initially application it does look like someone has spunked allover your car
 : ;
: ;
It's dries nice and clear, but still being tacky it's probably going to be a dirt magnet so hoping that by the time this hits the road it'll have lost the tackiness;

Front valance is now back on. Underside of the section in front of the front wheel arches have had the same treatment, along with the section under the scuttle, airbox and wiper motor have both been out to aid in this and then the whole scuttle are has been dosed in Waxoyl.
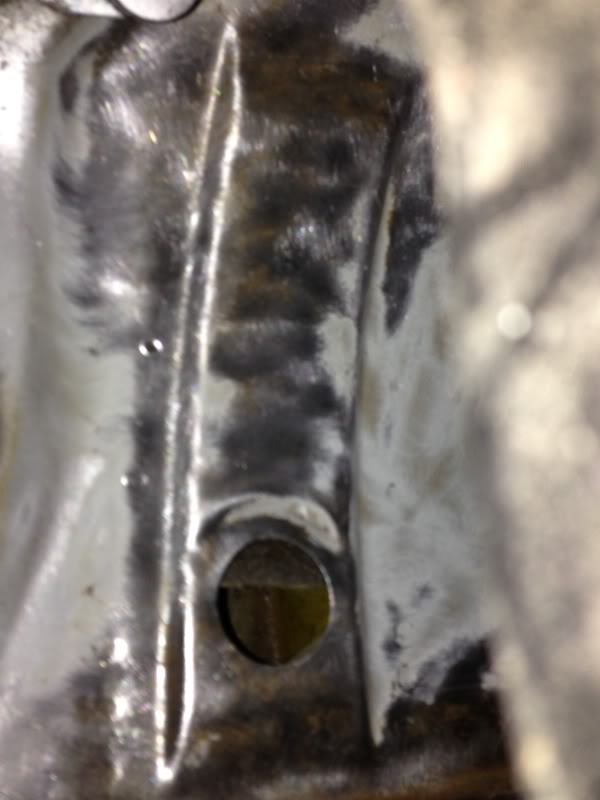
The rust has been chopped out of the battery tray as well, really don't know why I didn't do this ages ago as it's now holding me up from getting the dash back in while I wait for my mates Dad to come weld it up.
 At least now the only rust left on the car is in the rear section of nearside sill
Carpet is now back in after eventually sourcing the underlay I needed thanks to a very charitable donation from a mate. After several weeks drip drying in the garage and being blasted with an electric heater I still needed to resort to ripping bits of the foam off the rubber top and hanging it on the airier to get it dry and then gluing it back together.

All worth it though;

Been gathering up many new trim parts as well over the past month or so ready for putting putting that all back together while I'm not spending out much on other things for the car
 Also managed to get hold of a rare BBS boot spoiler, I think it looks better than a Tech 1 spoiler and also has the benefit of being stuck on so I won't need to swap over the spare lid to run it.

Onto the engine build. The chap who's doing this is still working away with this fitting it around his day to day work so progress is steady but it's one of these builds that keeps getting held up by the need of a missing part or extra measuring/testing.
As you've seen the head has been built back up and now the cam has been fitted. The bottom end has been bolted together as well, standard 325i block, very early small webbed 328i crank, 320i conrods and high comp 325i pistons.


It's now been trial built to check tolerances and the valve to piston gap is a little close for comfort, approx 1mm and should ideally be around 2mm and this is before any meat has been taken off the block to increase the CR as planned to the pistons are now going to need the valve reliefs machining 2mm deeper to allow for the extra lift from the cam and then potentially 0.5mm machined off the top of the block to give a great CR of 11:1.
Inlet;

Exhaust;

This was timed using the standard cam pulley, this will once complete be fitted with a vernier we're having made to get the timing spot on.
Posted

Local Hero


 Like the detail being done to the engine - 6-pot too, lovely!
Andy
LINCOLNSHIRE REGION -�https://www.facebook.com/groups/467122313360002/
1983 MK1 Golf GTI Campaign Model - Under (looooong) resto!
1962 Rover P4 80
2002 BMW 745i
2008 BMW Z4 2.5Si
LINCOLNSHIRE REGION -�https://www.facebook.com/groups/467122313360002/
1983 MK1 Golf GTI Campaign Model - Under (looooong) resto!
1962 Rover P4 80
2002 BMW 745i
2008 BMW Z4 2.5Si
Posted
Moderator


Posted
Settled In
Posted
Local Hero
Kedge said
Cheers guys, certainly didn't start the build with the intentions of it getting anything like as indepth as it has! At times I wish it hadn't so I can just drive it now!
Often the way mate!

Andy
LINCOLNSHIRE REGION -�https://www.facebook.com/groups/467122313360002/
1983 MK1 Golf GTI Campaign Model - Under (looooong) resto!
1962 Rover P4 80
2002 BMW 745i
2008 BMW Z4 2.5Si
LINCOLNSHIRE REGION -�https://www.facebook.com/groups/467122313360002/
1983 MK1 Golf GTI Campaign Model - Under (looooong) resto!
1962 Rover P4 80
2002 BMW 745i
2008 BMW Z4 2.5Si
Posted

Local Hero
Posted
Settling In

Posted

Settled In
Keep the updates coming.
Mrs Choc Rolls Stock!
Posted
Settling In
0 guests and 0 members have just viewed this: None.