


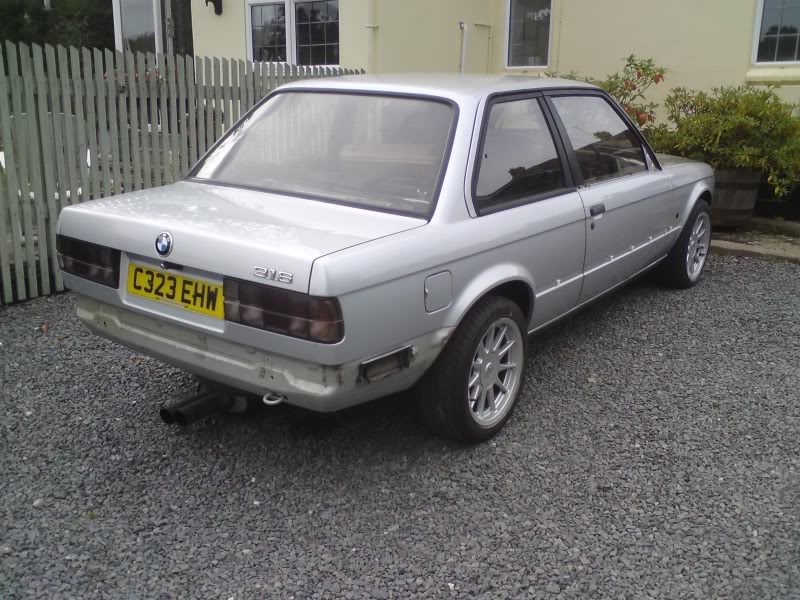
1986 BMW E30 316 (2.8)

Posted
#1185762
(In Topic #141675)
Settled In

1986 BMW E30 316 (2.5)
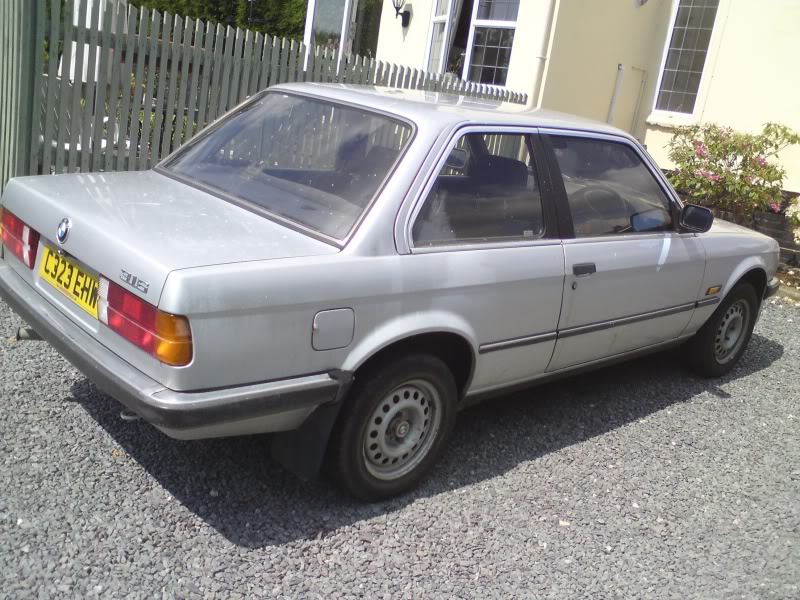
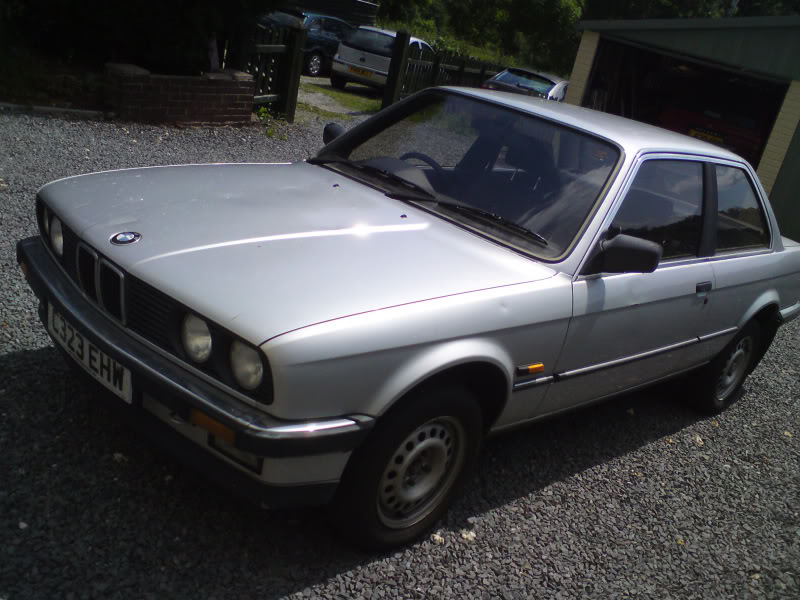
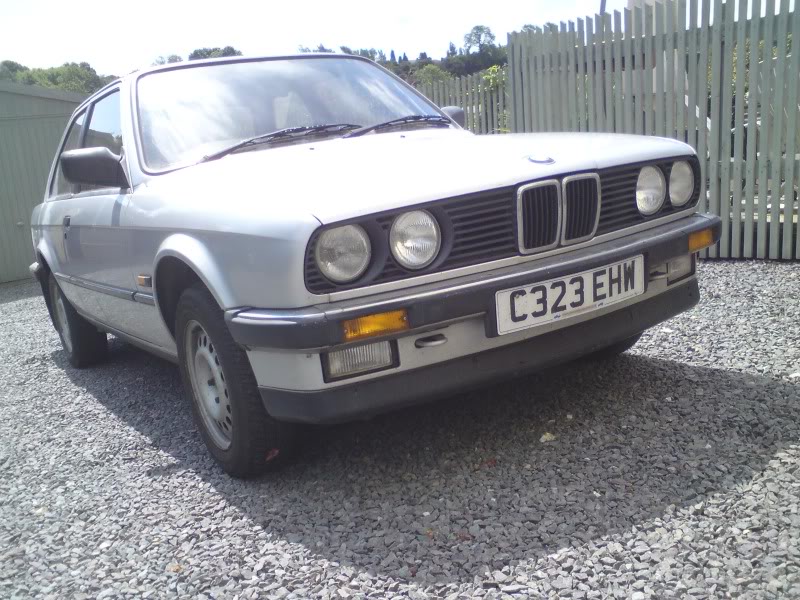
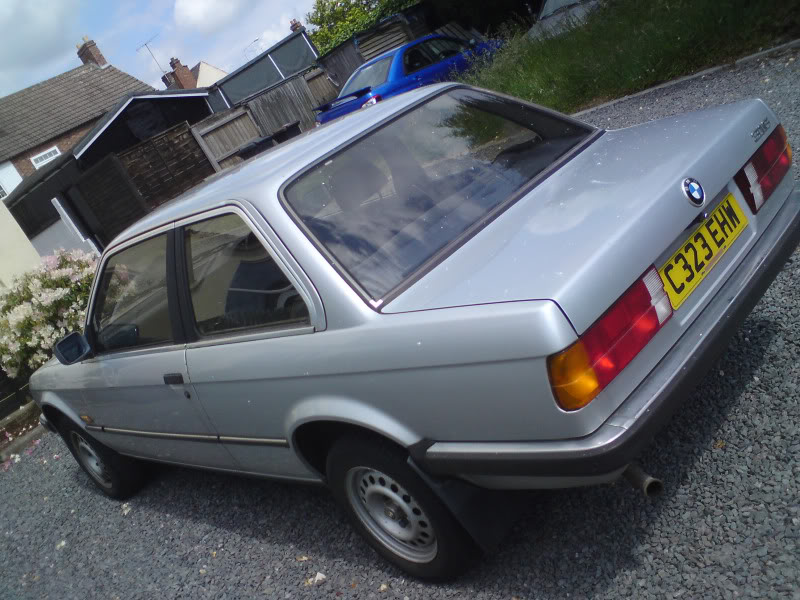
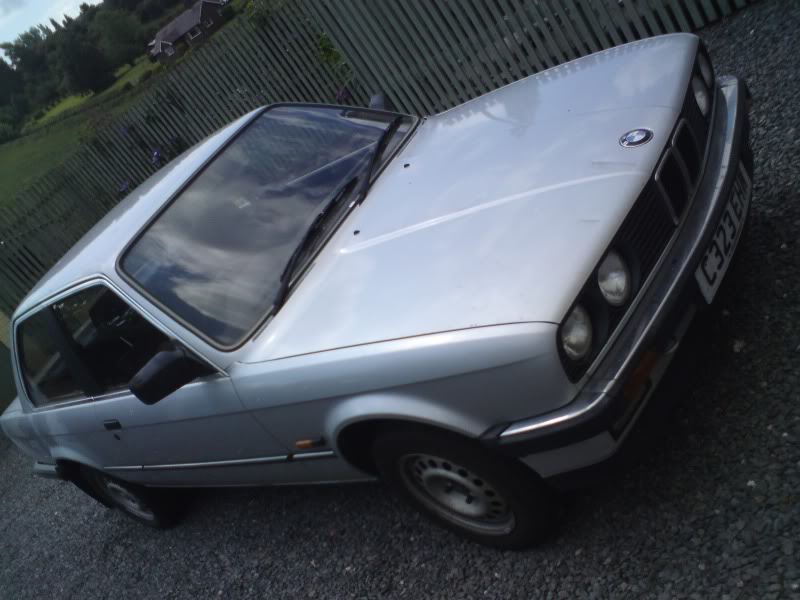
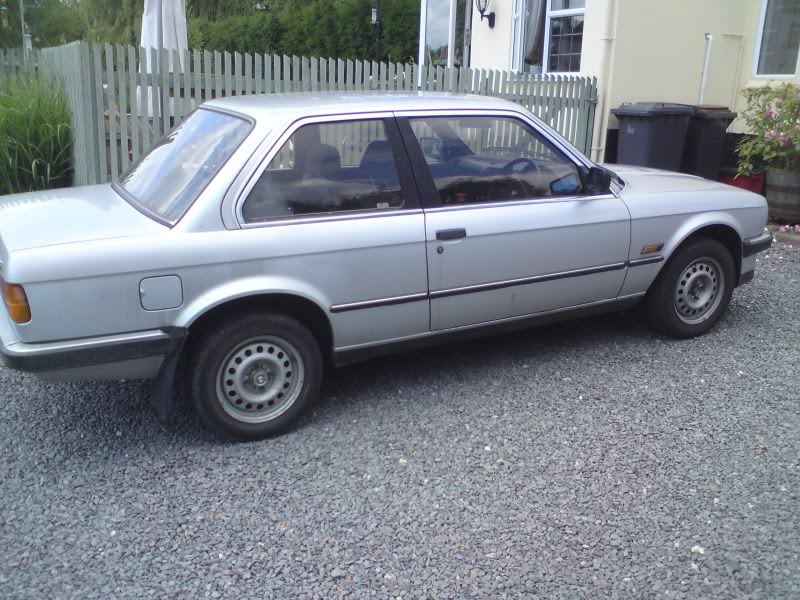
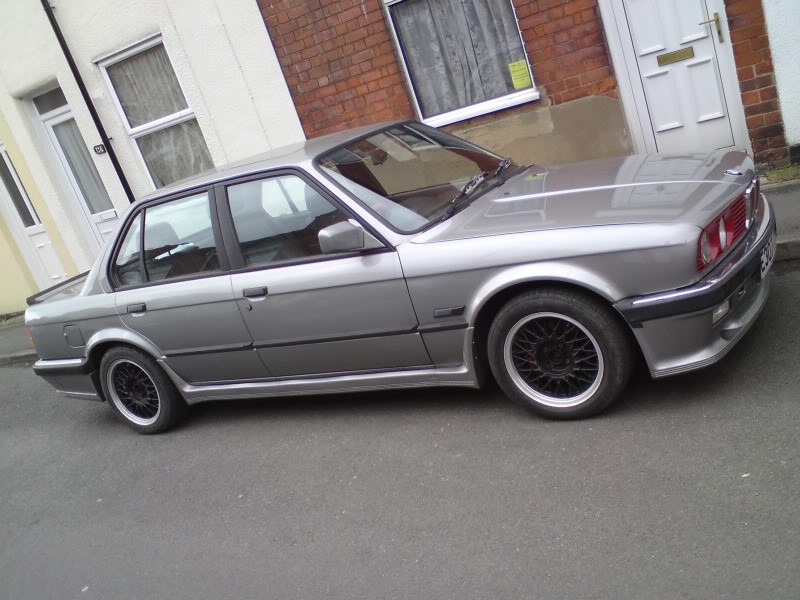
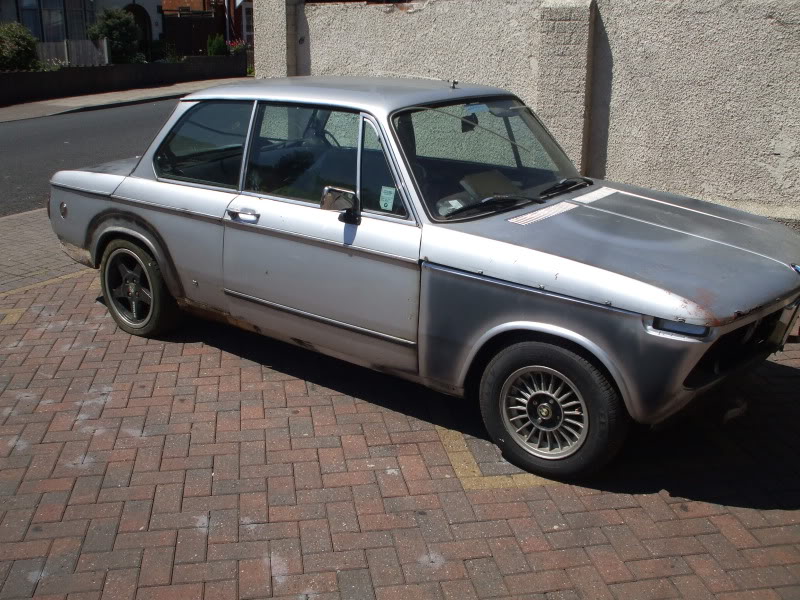
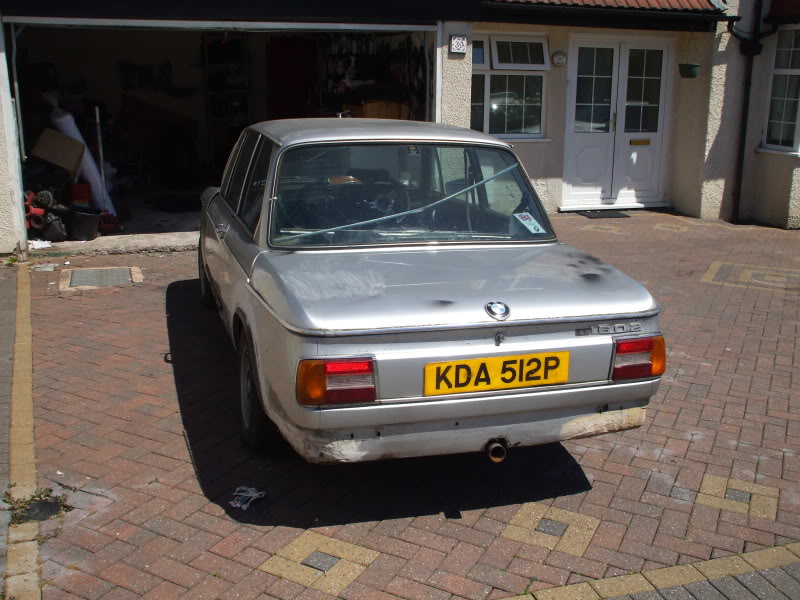
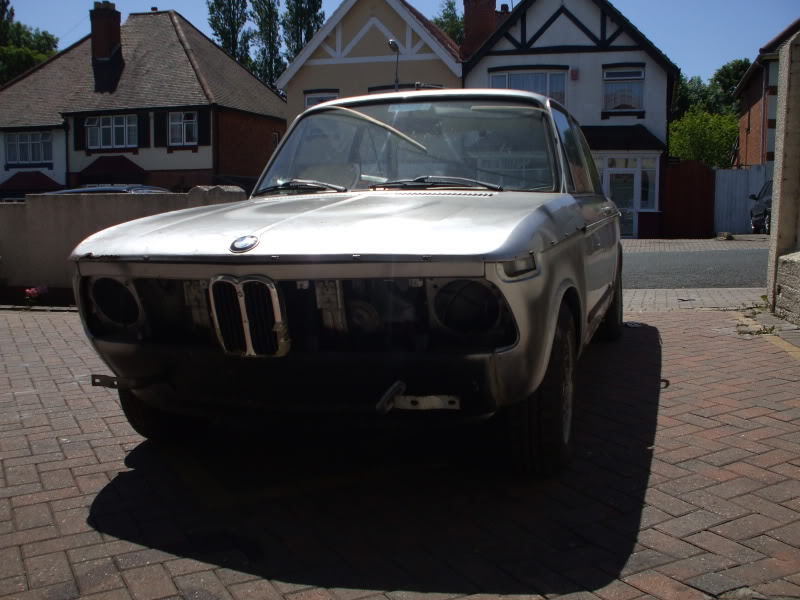
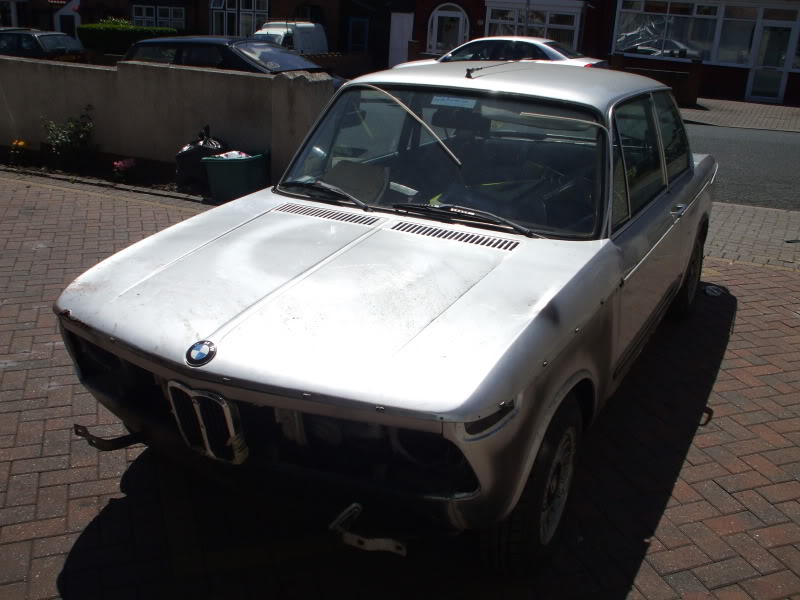
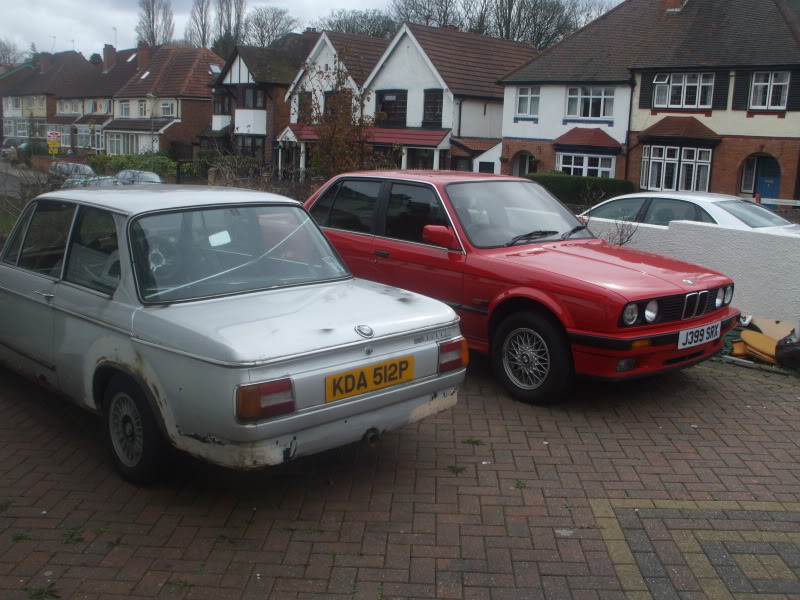
I picked this up a couple of years ago and it was meant to be a quick engine swap, respray and fit a Tech-1 Sport bodykit. Well as we all know things never work out quite as initially planned, what with real life going on. The car started life as a basic poverty spec 316 1.8 carb engined E30, the sole reason for buying it was the lack of a sunroof and the apparent lack of rust, ideal blank canvas to start a nice little project with since i'd picked up a great donor car (more on that later). Just a shame that despite the paint being in really good condition nearly every panel has a good dent or scratch.
Here's a few pics of what it looked like on the day it was delivered to my Mum's. Had been driven all the way up from Bracknell without missing a beat despite not being on the road for a couple of year, got to love ze Ger man engineering.
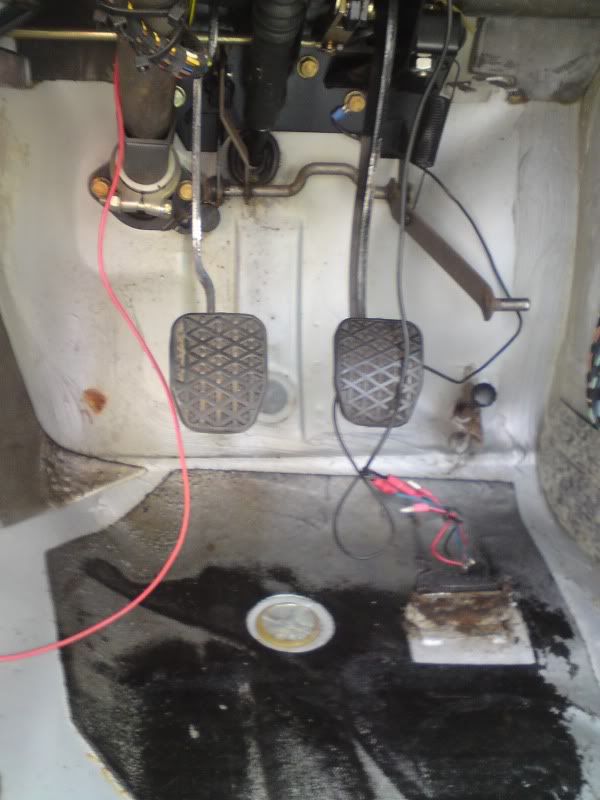
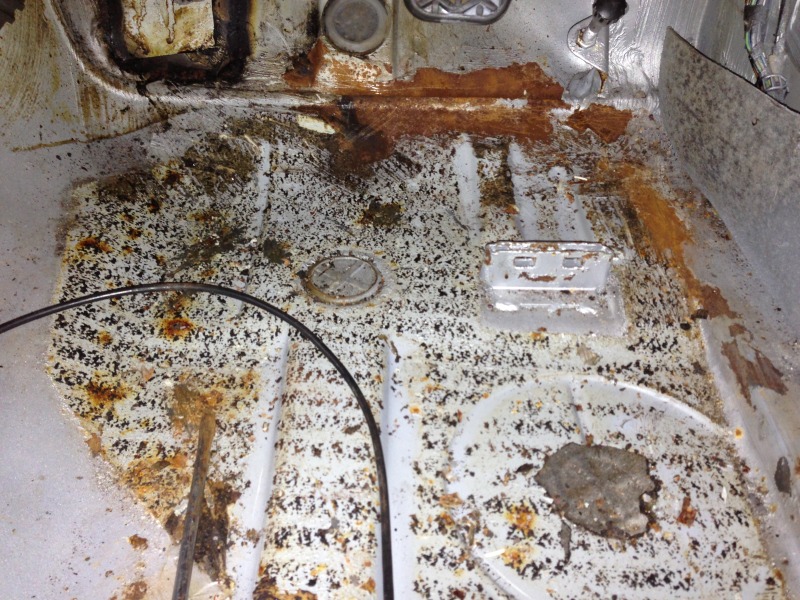
One of the first things to do was remove the shonky blue comfort cloth interior and have a real good look for rust, always a scary few hours.
Results;
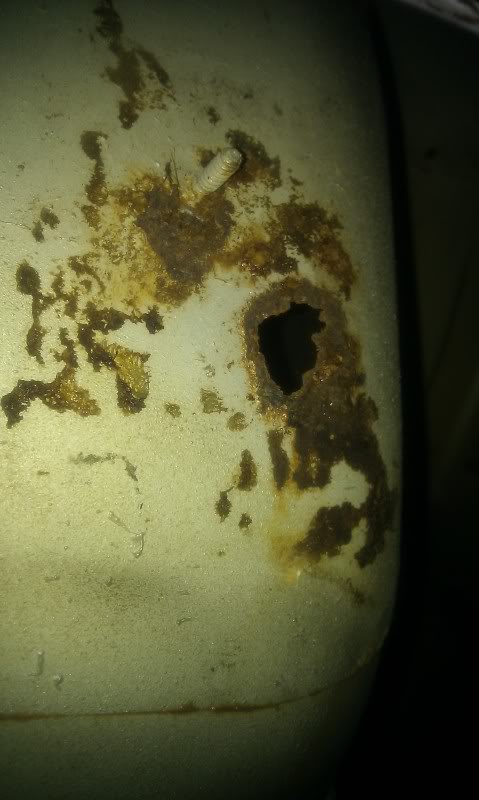
Drivers footwell (that brown splodge to the left of the clutch peddle has turned out to be a little hole that has since been cut out. Looked like it was due to trapped moisture behind the insulation on the transmission tunnel.
Throttle pedal mount, broke the pedal when I removed it like a knob;
Rear drivers side footwell;
Passenger footwell;

Rear passenger footwell;
Rear passenger side inner arch;
Rear drivers side inner arch;
Boot/rear arches.

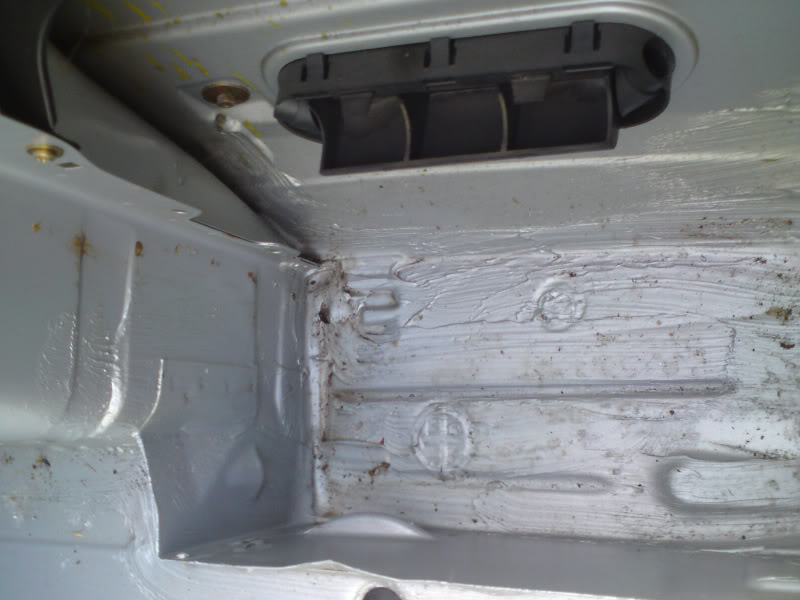

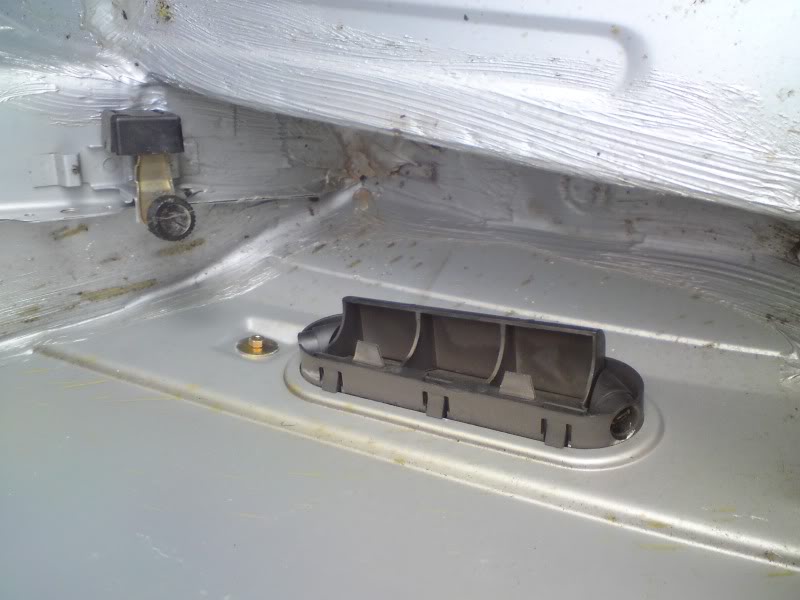
Not even a hint of rust around the number plate lights 8)
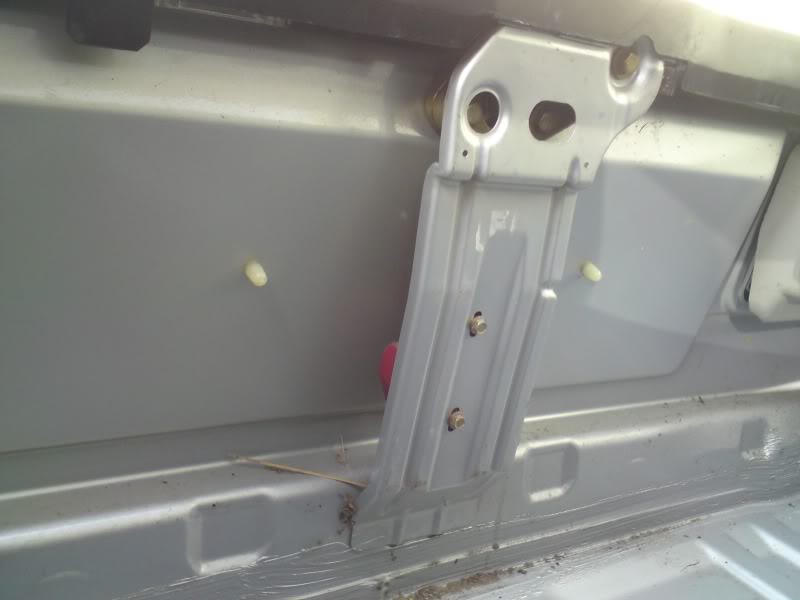
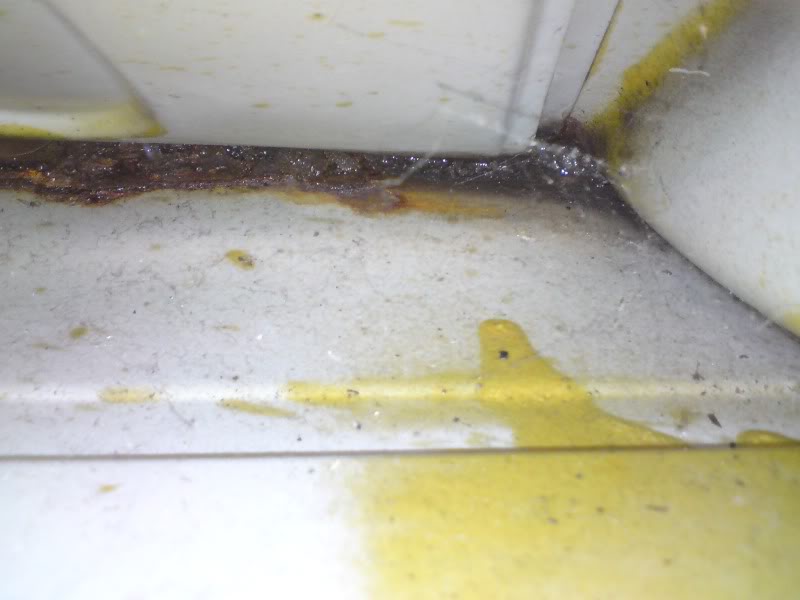
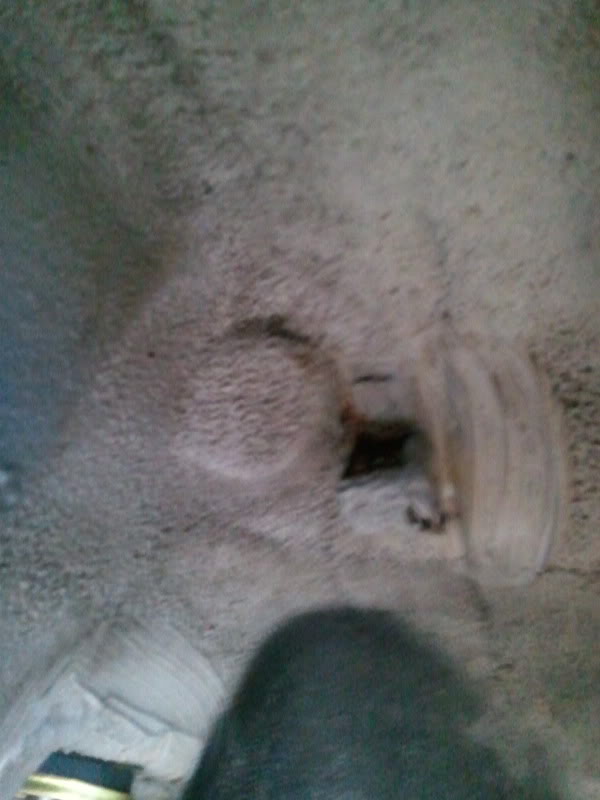
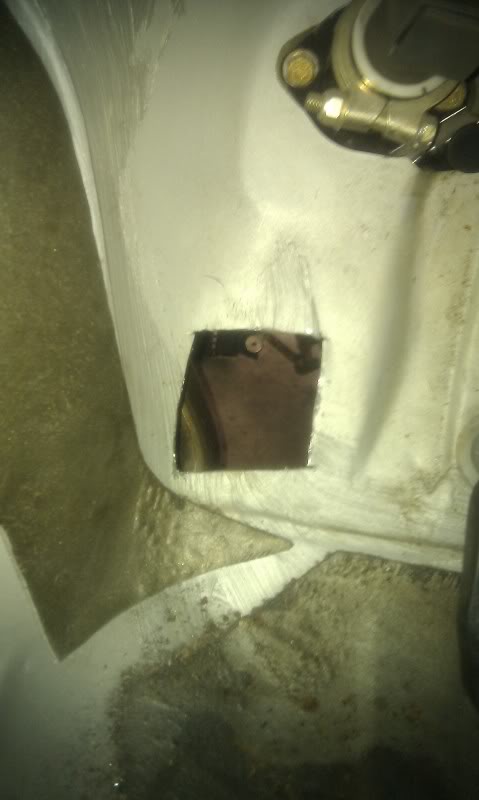
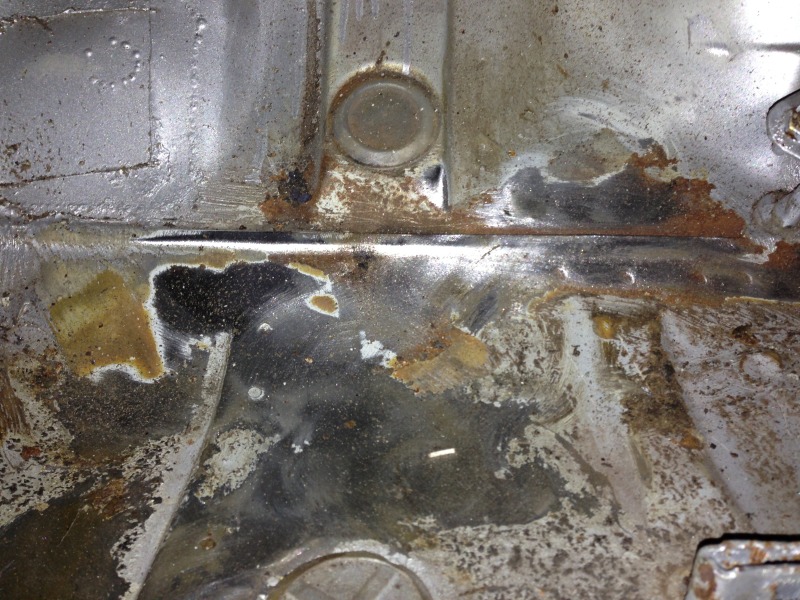
Eventually after things were looking too good to be true I found this lurking deep deep down in the sill on the passenger side between the rear arch and B pillar;
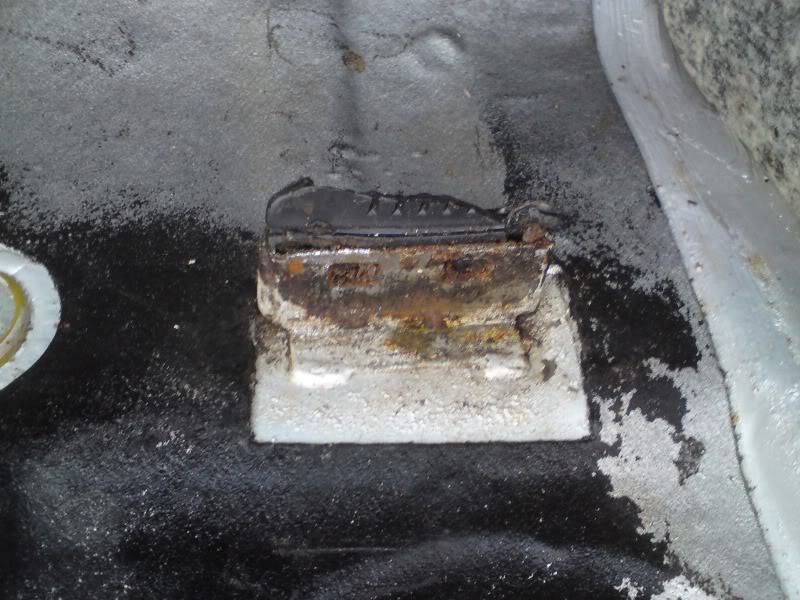
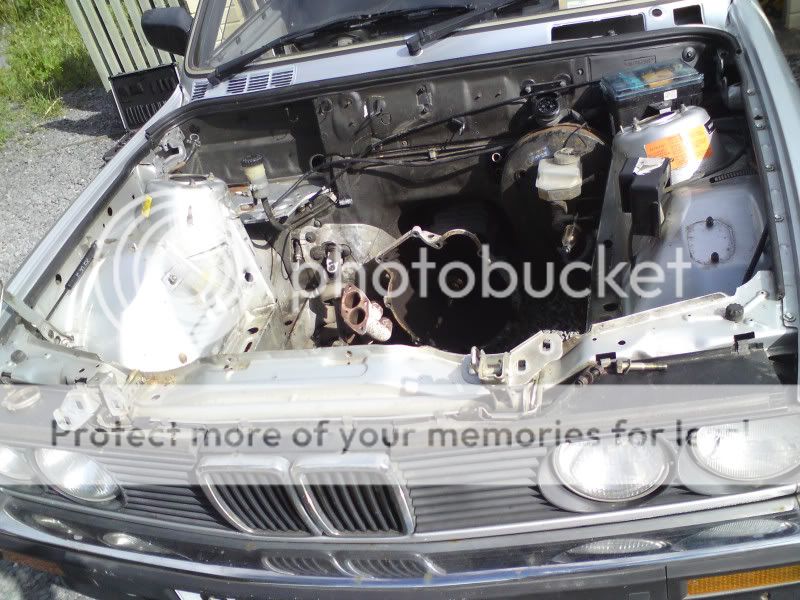
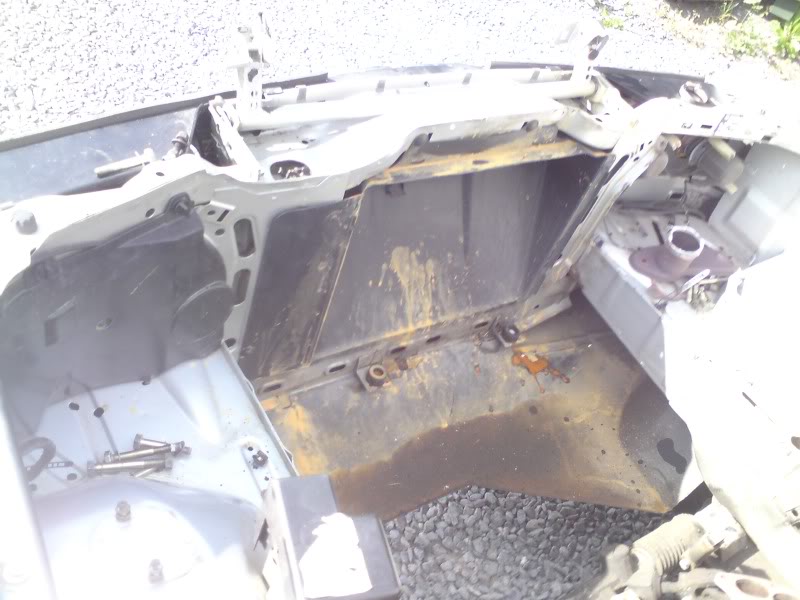
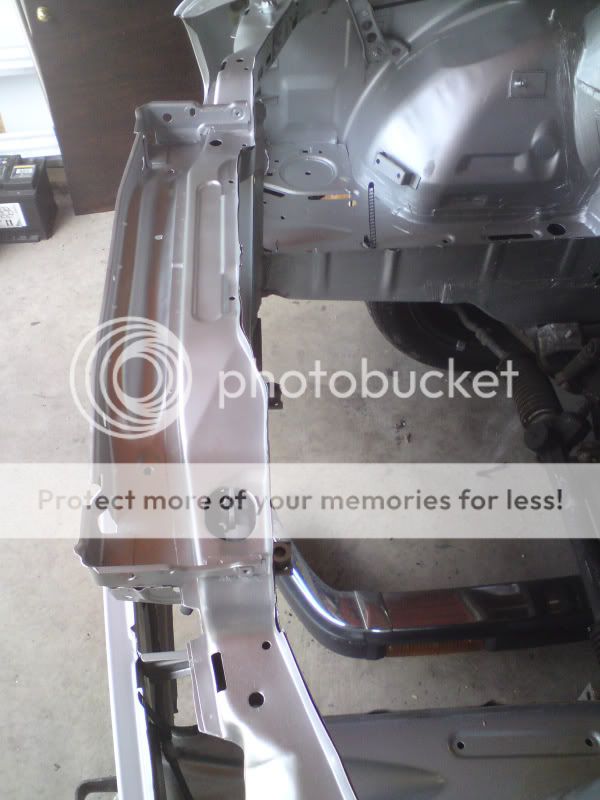
Gave the engine bay a quick once over and removed the alarm siren and associated wiring from teh engine bay as well, only found a couple of little scabs of rust on the chassis rails that i'd already seen.
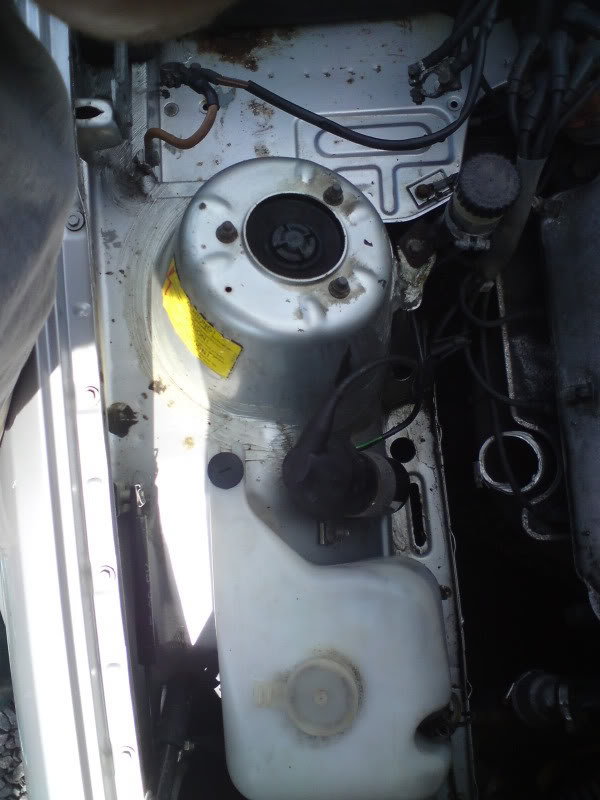

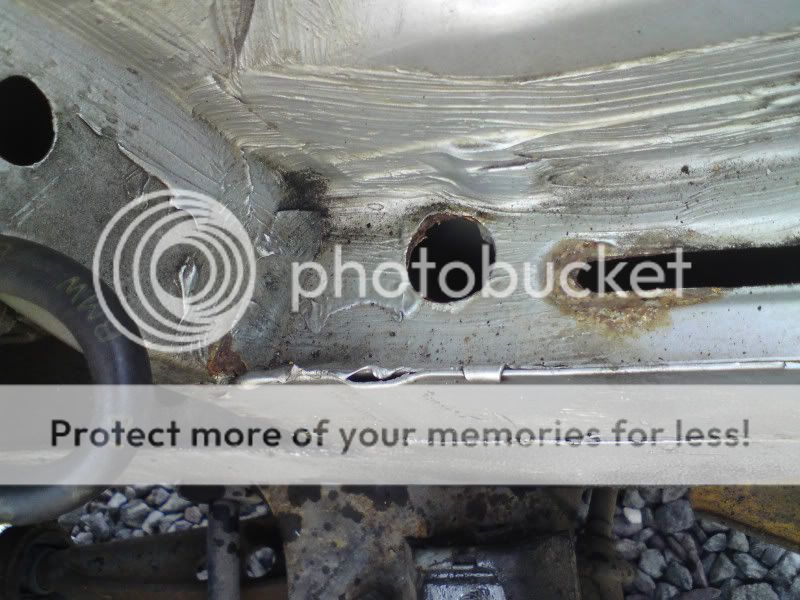
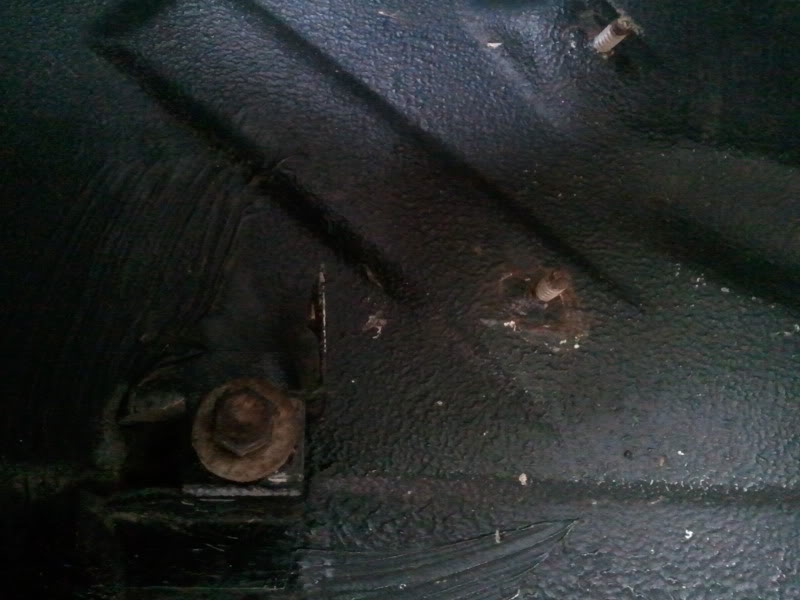
Found a little bit of rust at the back of the battery tray as well which has actually gone through after further inspection so that will need chopping out.
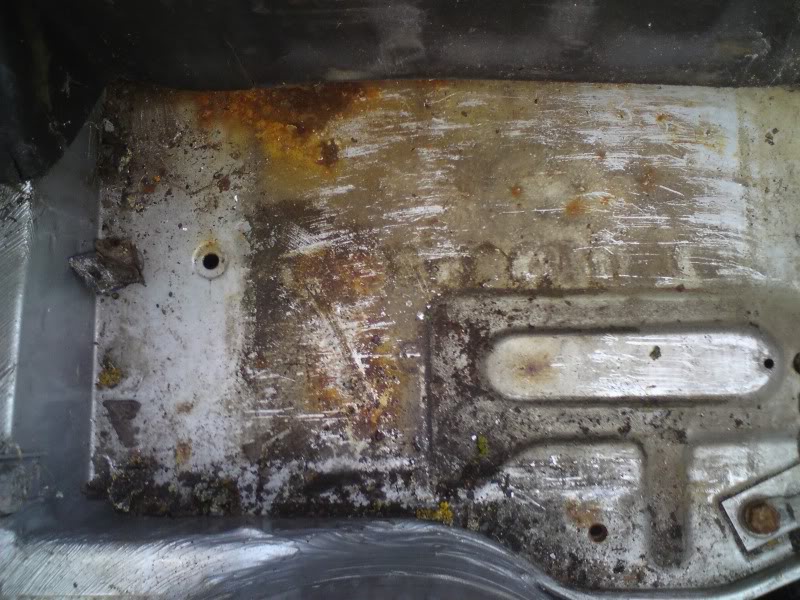
Yes that is as bad as it get for rust in the cabin, that bit in the sill and a scabby throttle pedal mount, happy days!!!
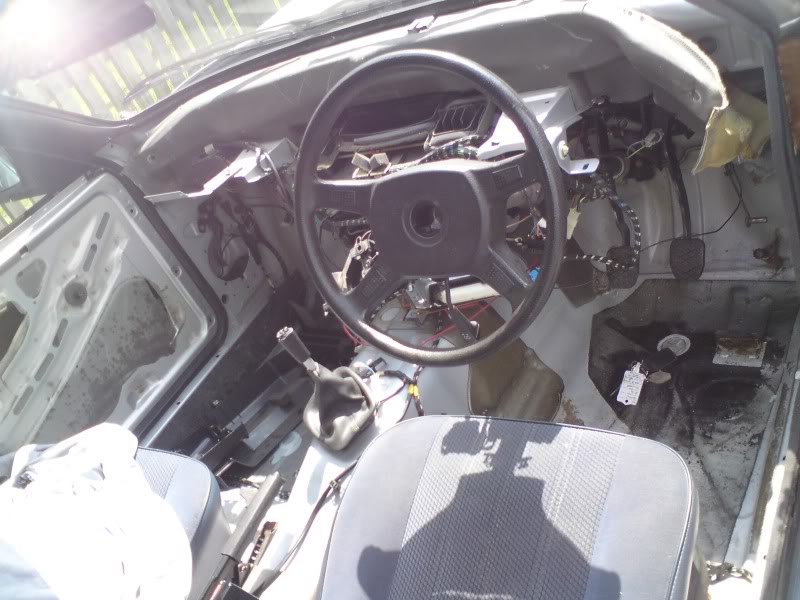
Dash also came out since it was cracked, will give me better access for any wiring type jobs I need to do later as well. Bulkhead is all nice and solid to.
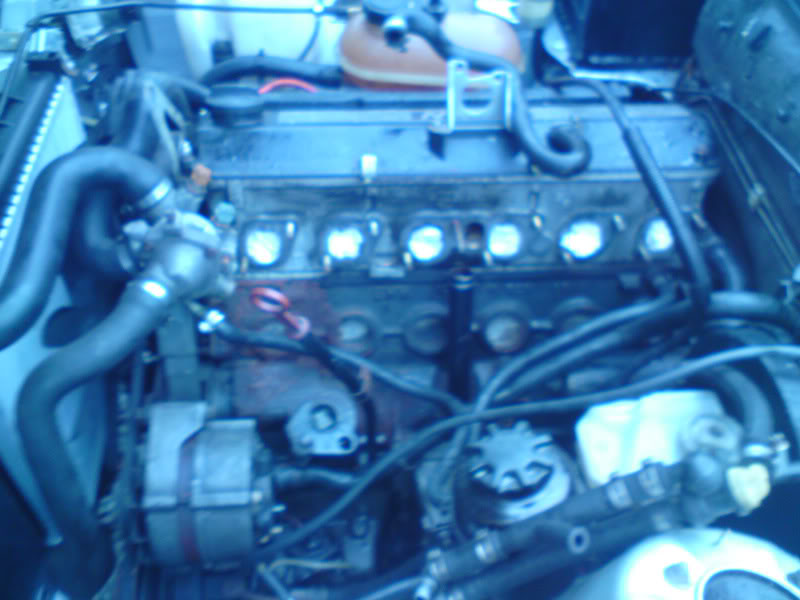
Next job was to remove the wheezy M10 engine, probably the easiest engine i've every removed from a car. Was collected not long after by a chap to use in a boat �???
 Last edit: by Kedge
Posted
Settled In

Spec;
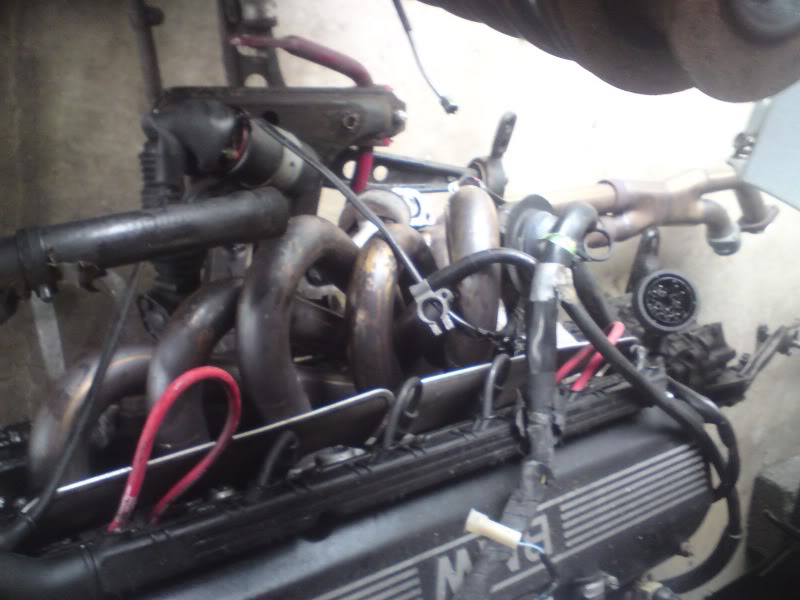
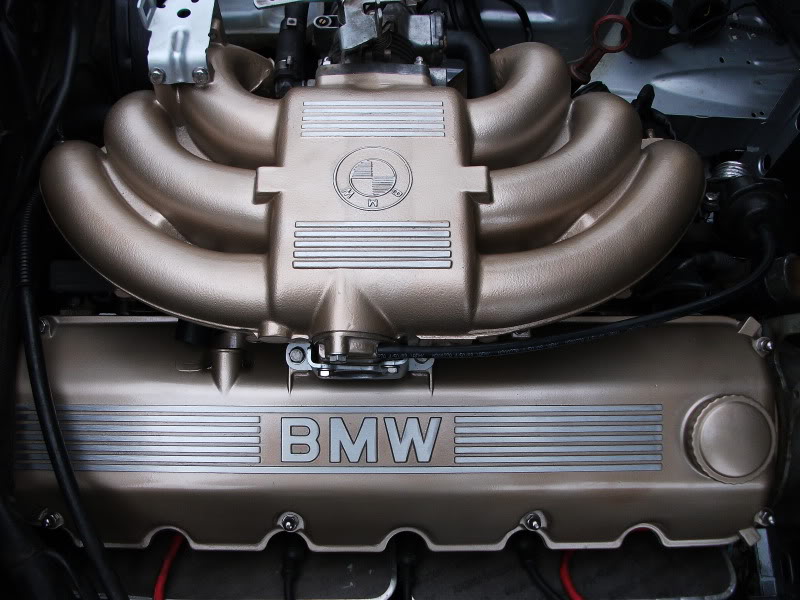
Nice healthy M20B25 with a new cambelt
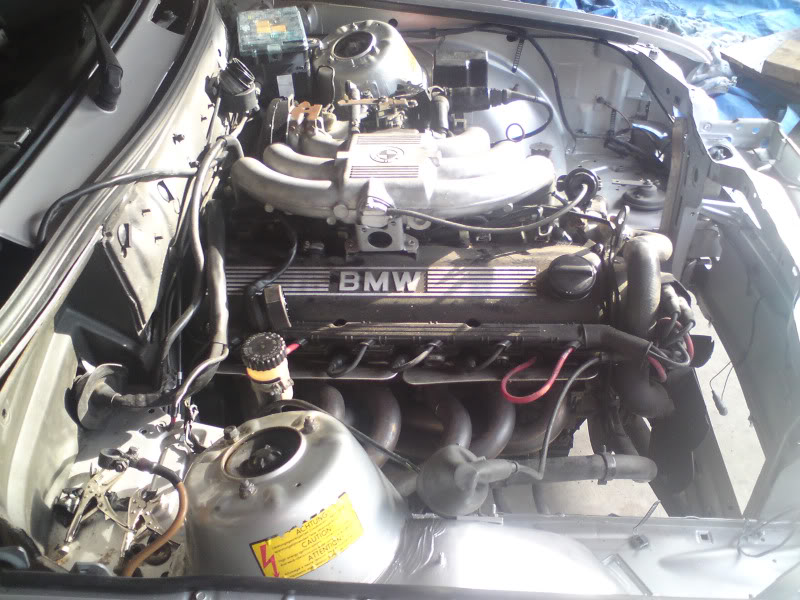
BTB 6 branch manifold
Scorpion exhaust
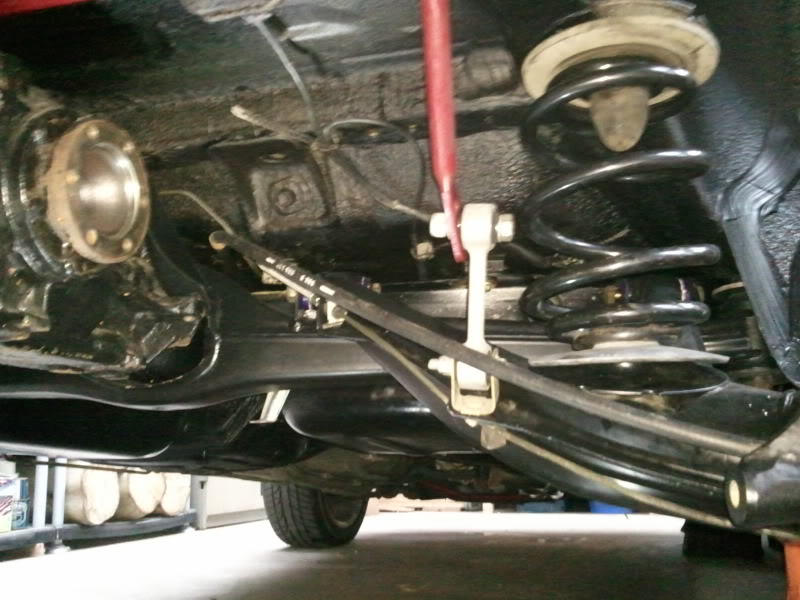
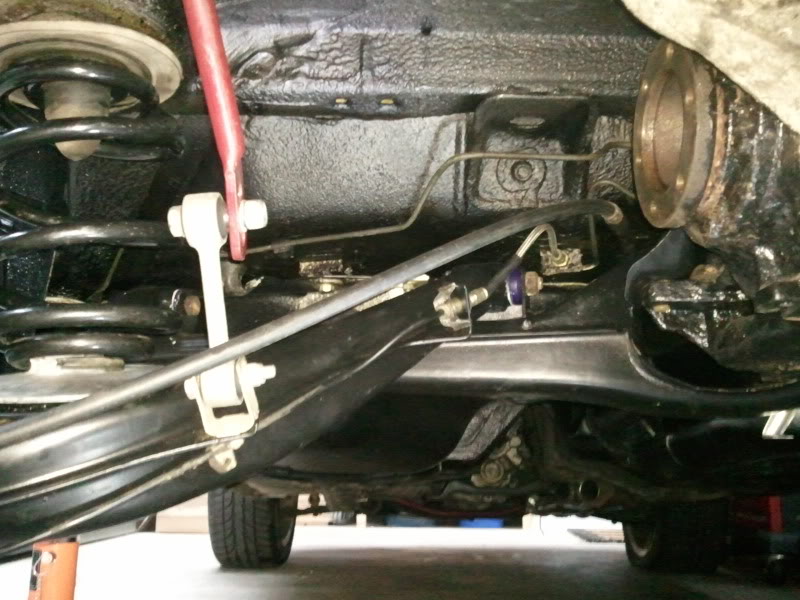
B8 Bilsteins on the front and B6s on the rear on KW 35mm springs.
Eibach ARBs
Rogue Engineering top mounts, still in the bag
Black Diamond drilled and grooved discs all round
Black Diamond pads all round
Black Diamond braided brake lines
M-Tech 1 bodykit
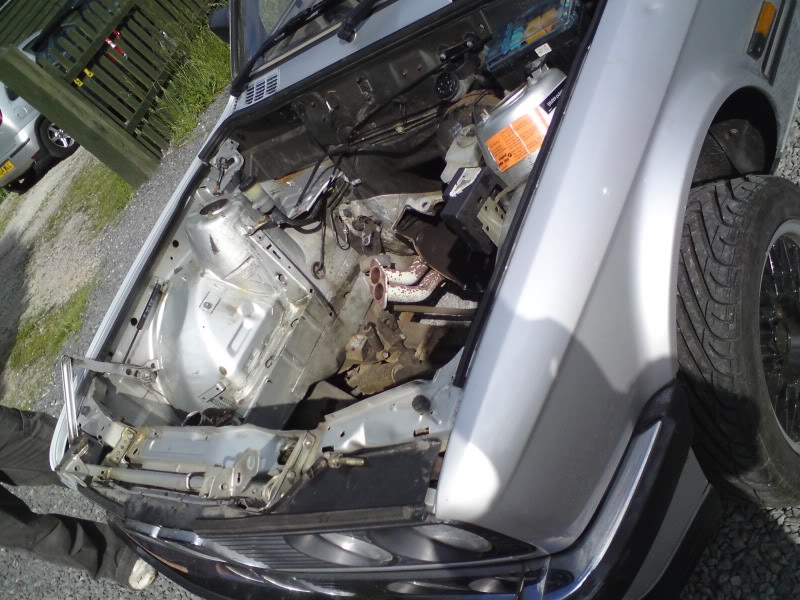
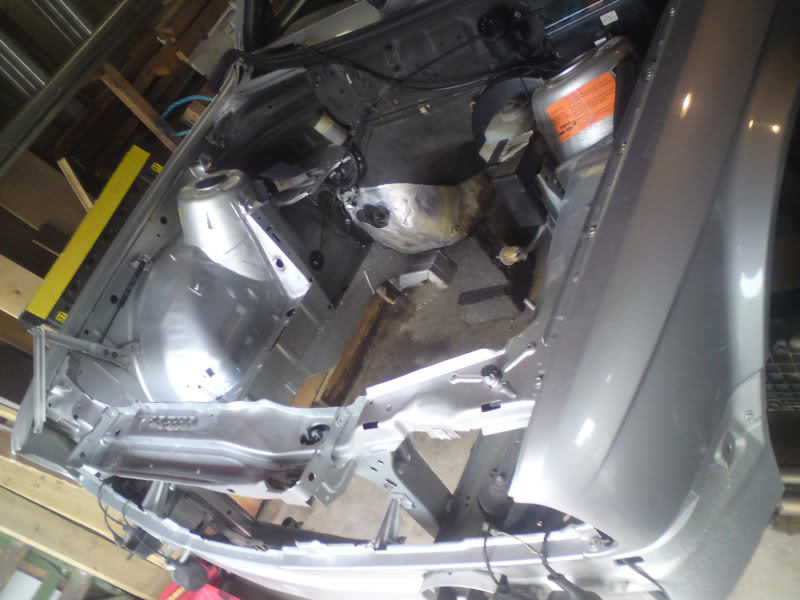
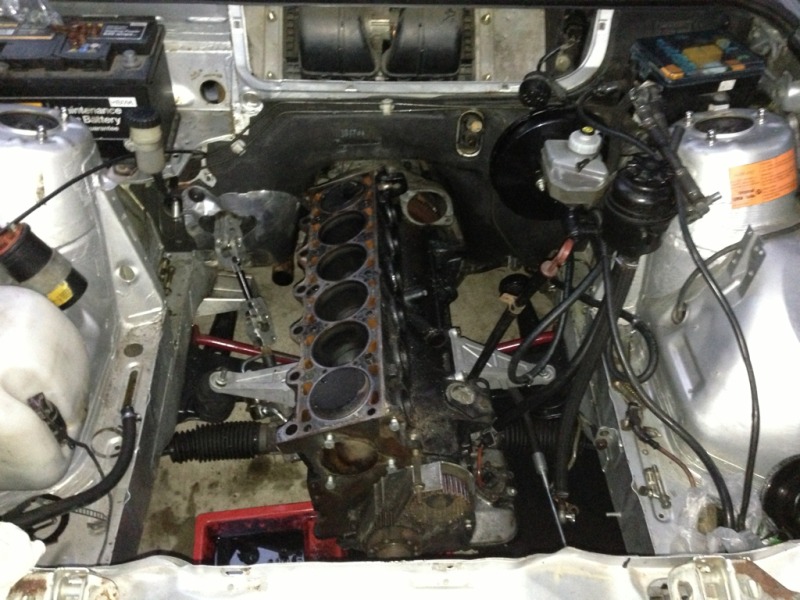
Decided that since I was going to be using the suspension and breaks from the donor car it would just drop the subframes and kit the engine from underneath.
Engine bay bare & ready.


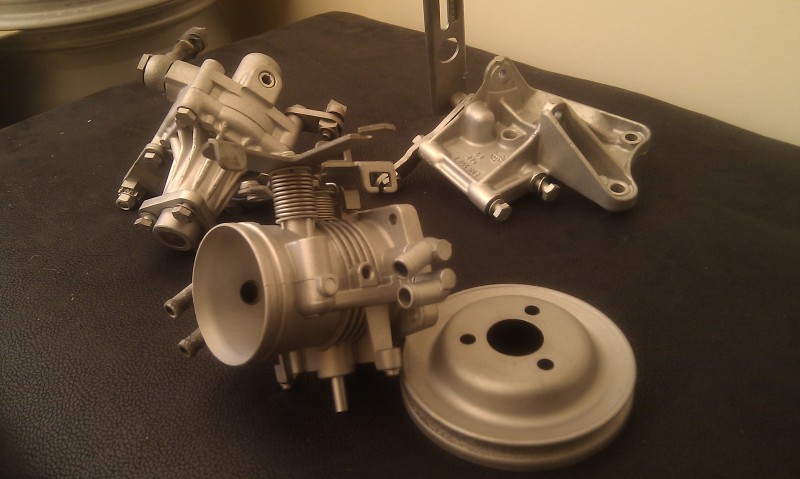
Some of the goodies are just about visible in the pics below, was also plesantly surprised to find the it is also fitted with nice new M3 eccentric control arm bushes to go along with everything else. Also turned out that it had a pretty new clutch to my suprise, still since i'd already bought one I still fitted it along with a lightened flywheel while the engine & gearbox were on the floor.
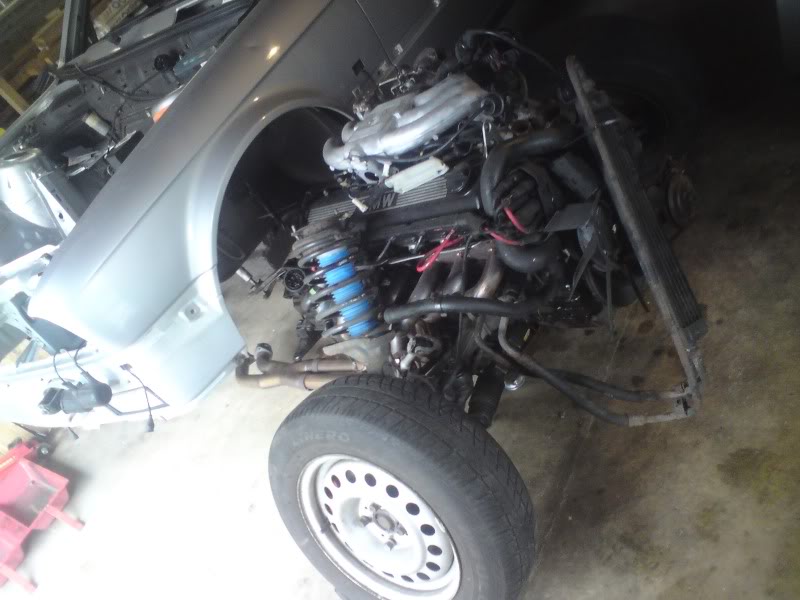
Couple of pics of the car up in the air ready for the engine to be rolled under;
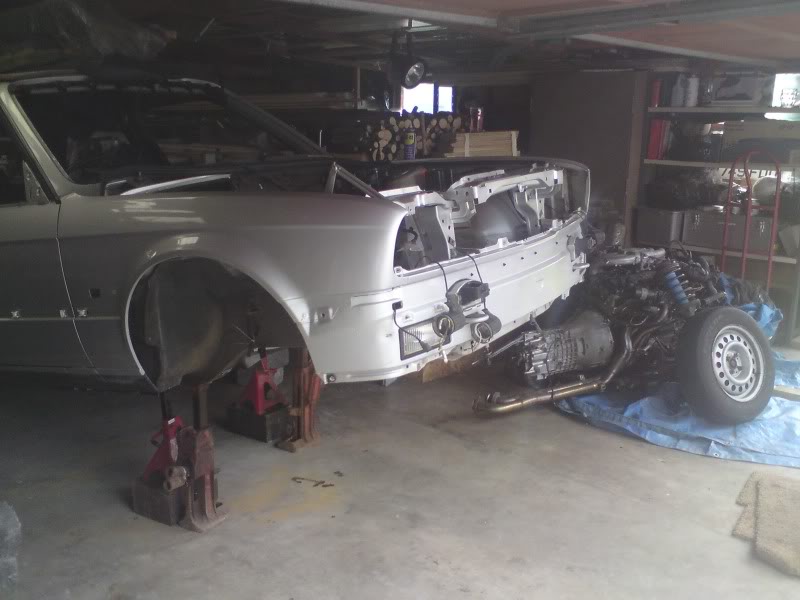
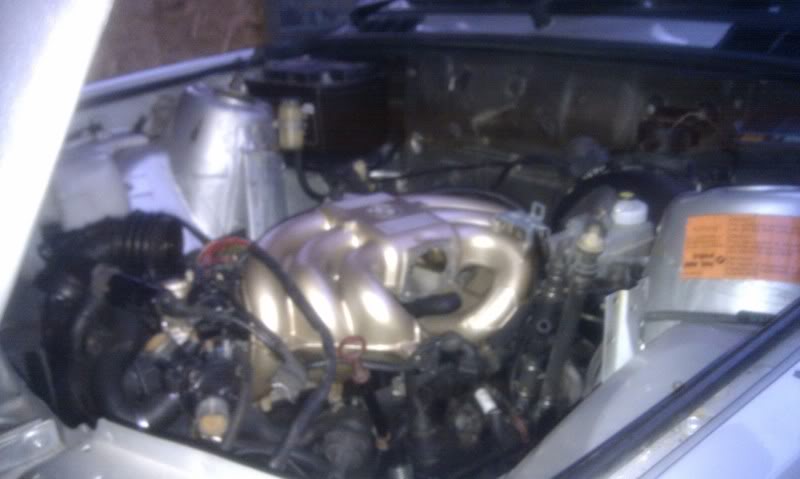
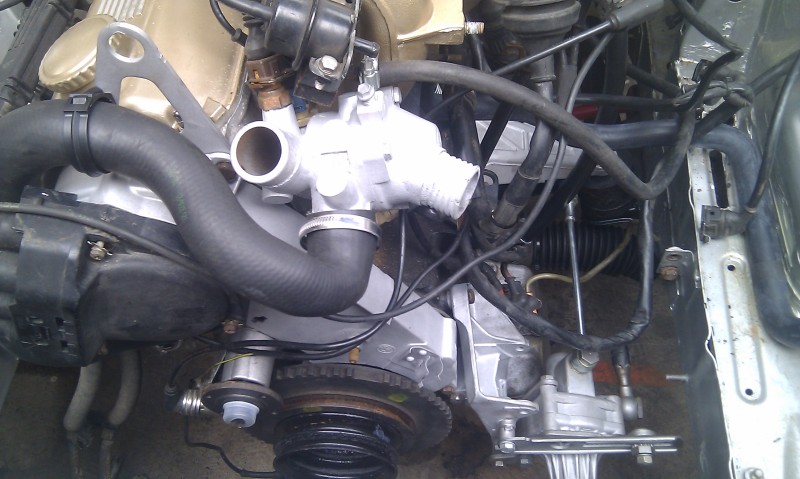
Engine in and all bolted up, all that's left to do is attach the prop and sort the wiring, plumbing and fueling
. Was a bit of a pain getting the subframe lined up with the chassis.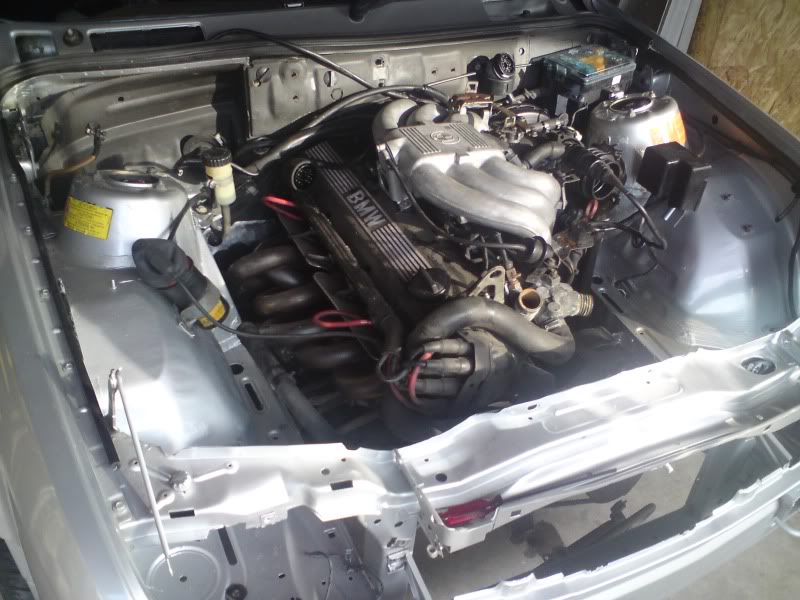
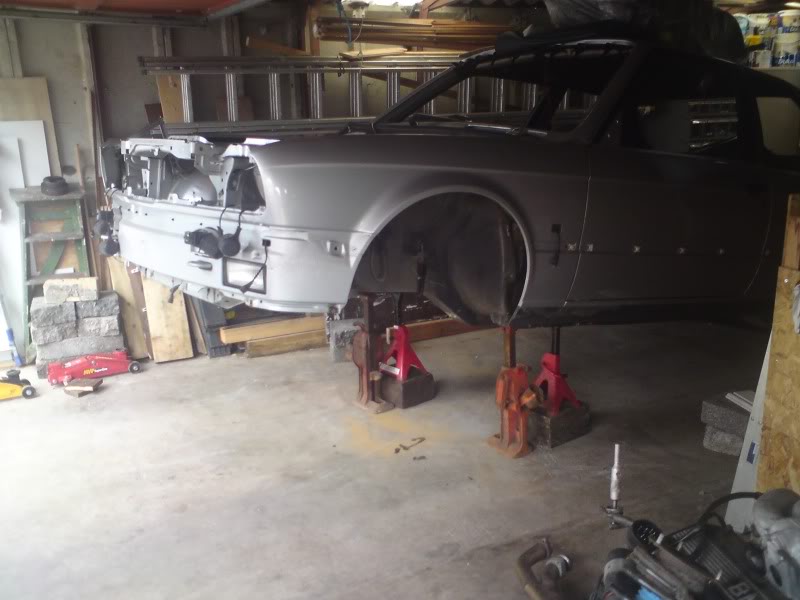
Then we hit the first long lul in progress. Had move the car out of the garage which coincided with winter. I still hadn't got the engine fired up, was getting spark and fuel but would not go. Common census was that it was either the ECU or the flywheel pickup sensors. After having absolute nightmares trying to shift the sensors from the bellhousing I decided that i'd go down the route of upgrading the engine management from Motronic 1.1 to 1.3 and do away with those flywheel sensors.
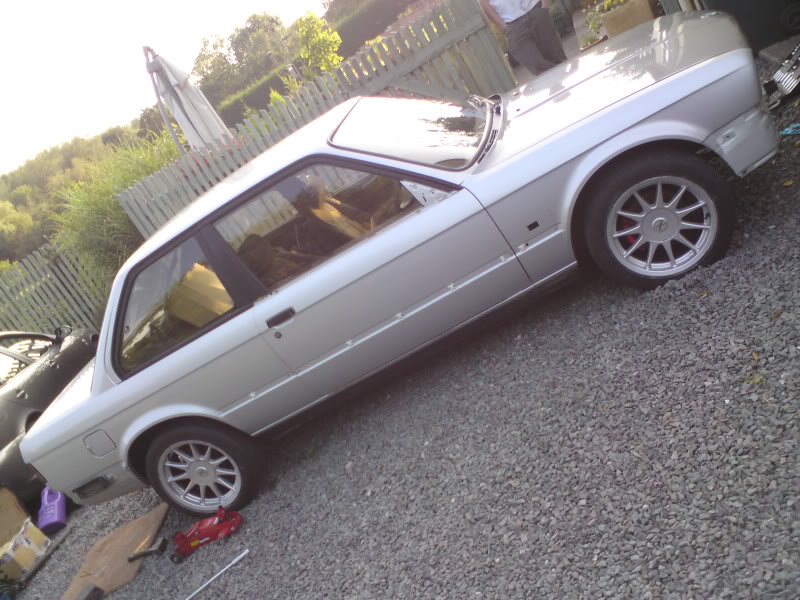
Also in amoungst the engine swap i'd fitted dechrome window trims, rare Startec smoked rear lights, genuine smoked Hella's some sexy Hartge wheels. The prop 325i prop was now on along with a 3.64 ratio LSD.
Posted

Old Timer

1983 Cabby Gti All White Edition
Posted
Settled In
Engine striped down to the head and block.
Pretty much all back together and ready for a trial run to make sure it fires up.
And then there was life………………………bit noisey mind with just the manifold on though……….
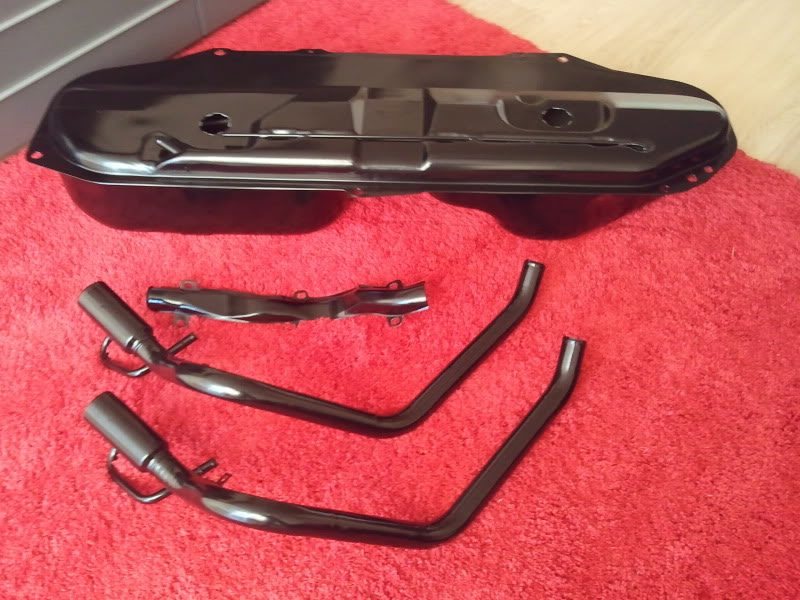
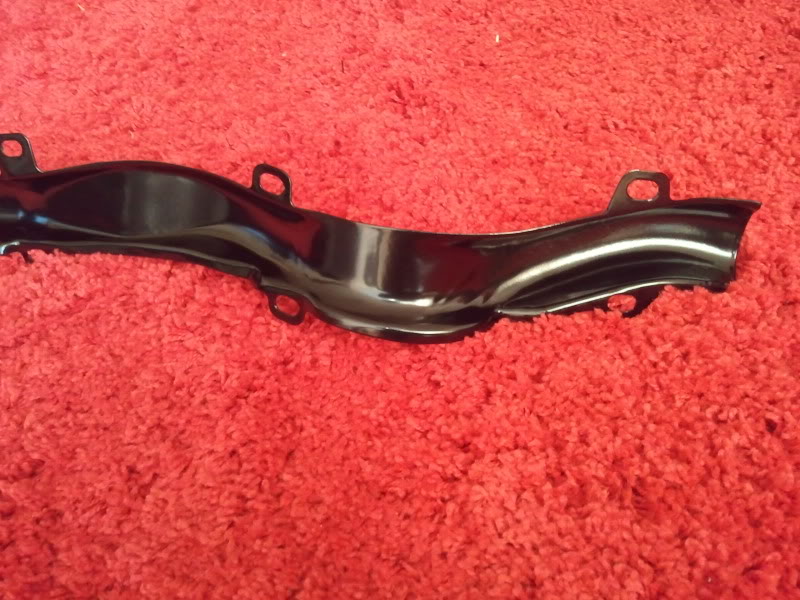
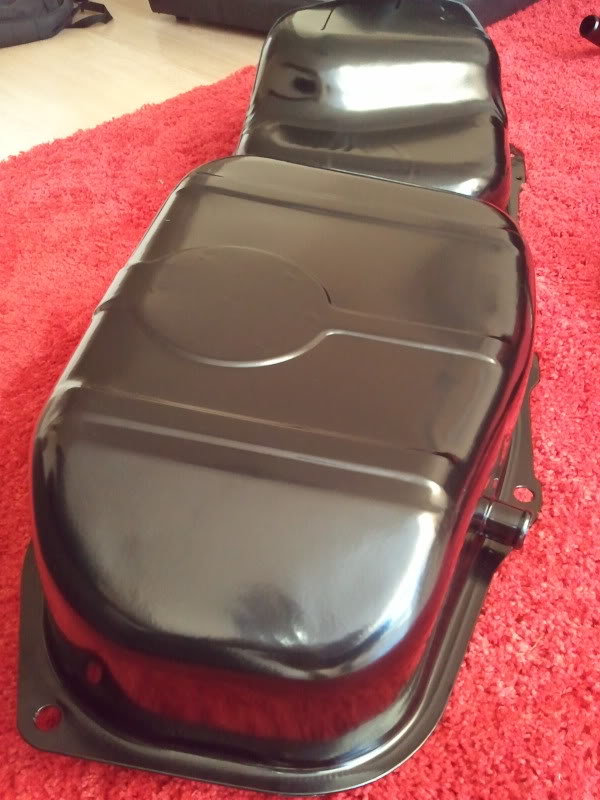
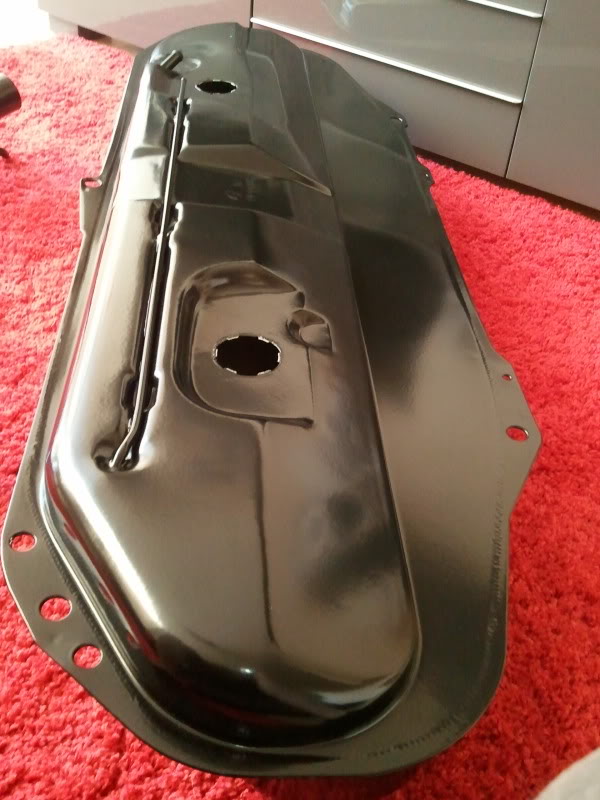
Started cracking on with a job i've really not been looking forward to, changing the tank since the old one won't be fitted with a swirl pot and i've been strongly advised I need one with the 2.5 to prevent fuel starvation.
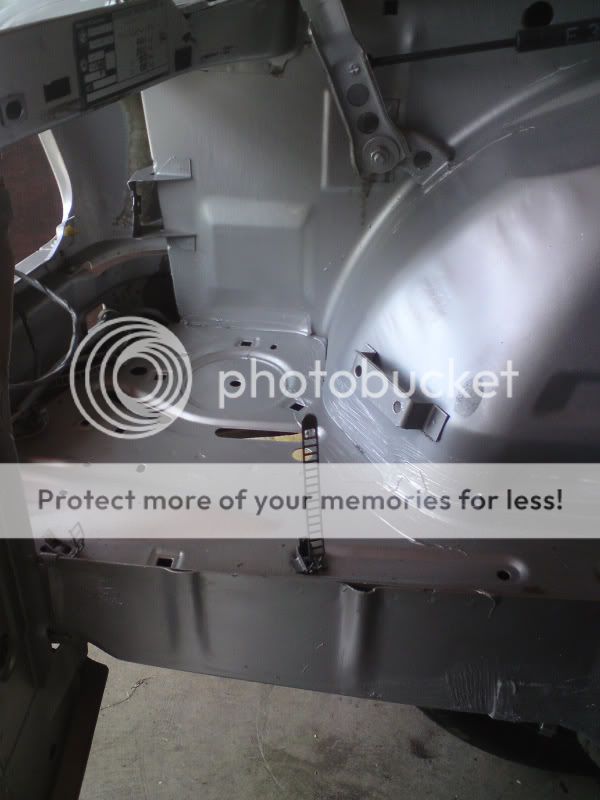
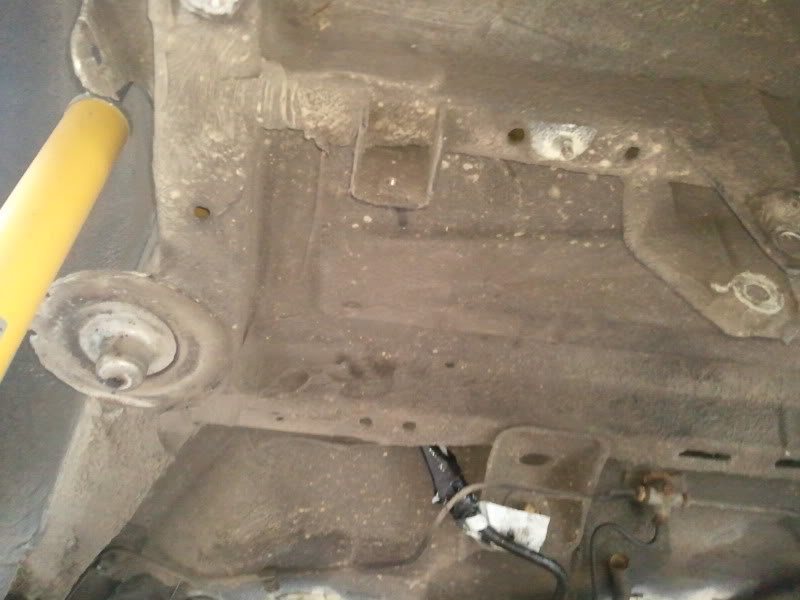
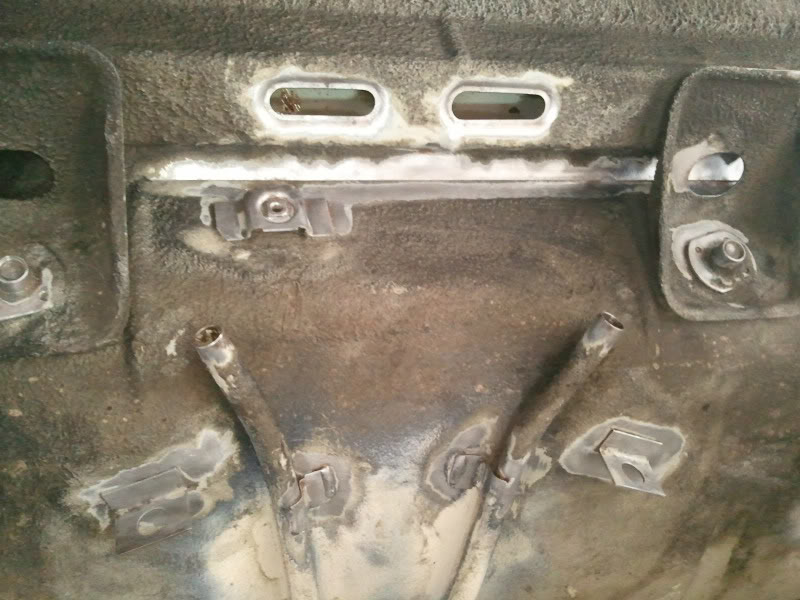
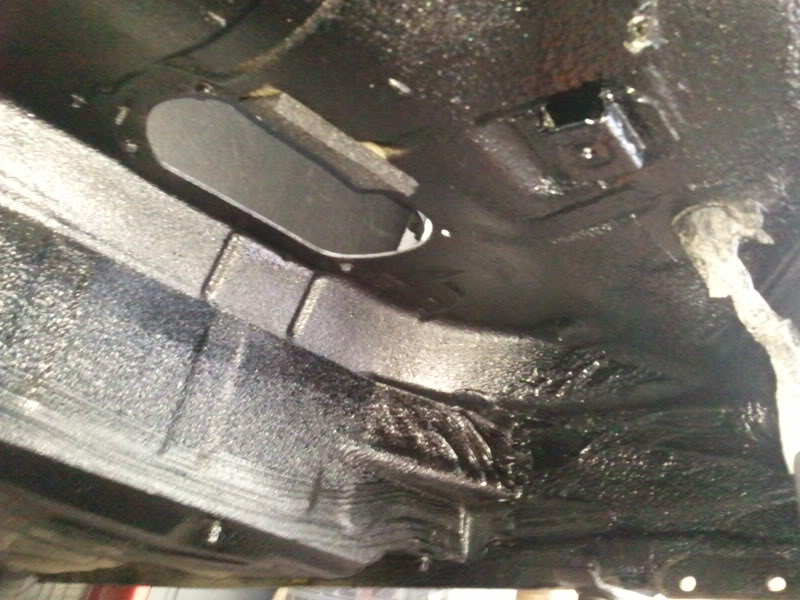
While the tank is out I took a few pics of the underneath, only signs of rust is on various mounting points, bar 2 scabs high on the transmission tunnel which I think should just sand down fine;
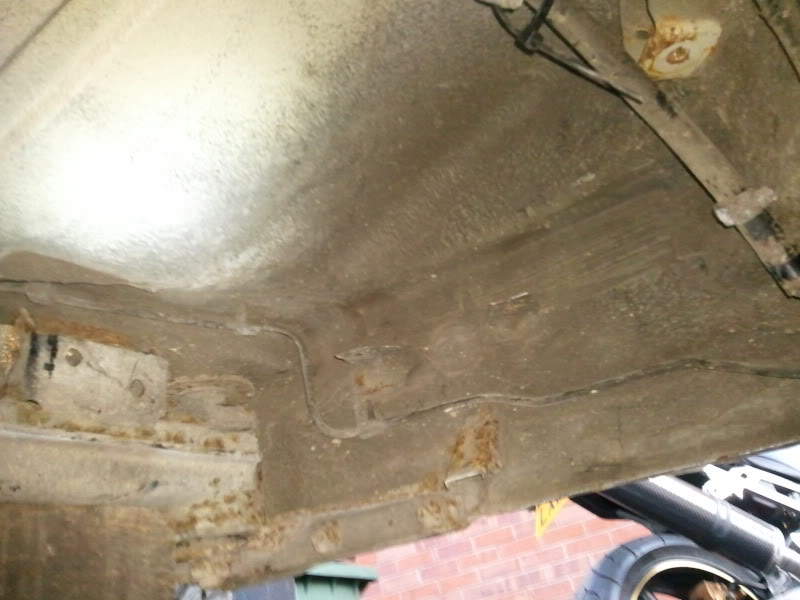
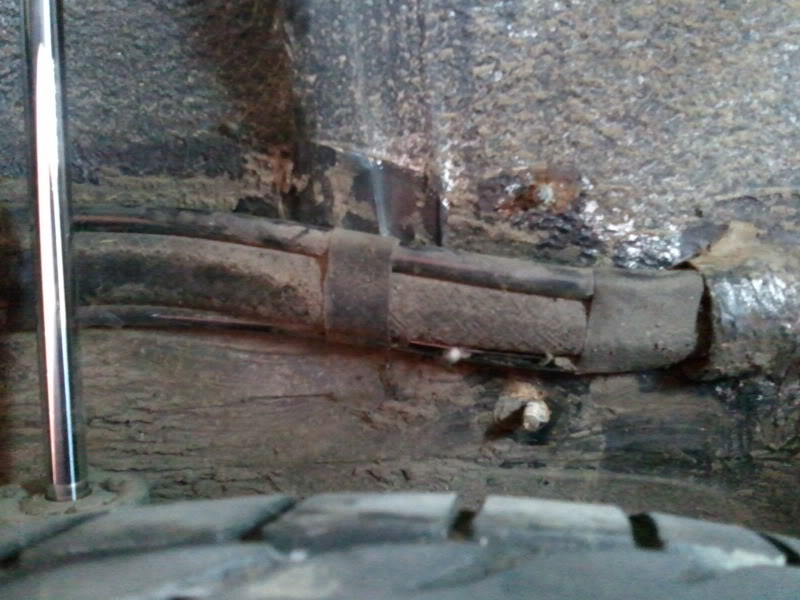
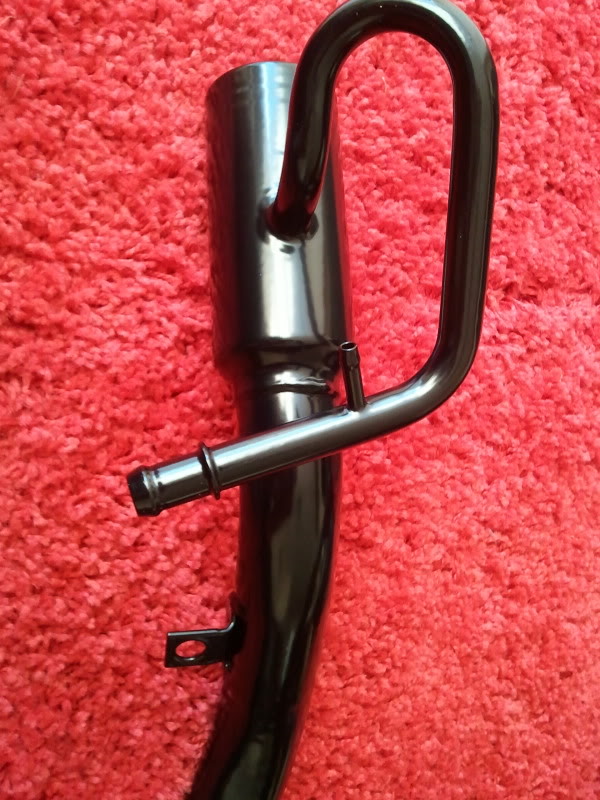
Also braved removing the problomatic fuel breather pipe cover, was some surfice rust on and inside the cover but the inner wing is just fine, again just needs cleaning and some waxoyl on it maybe?

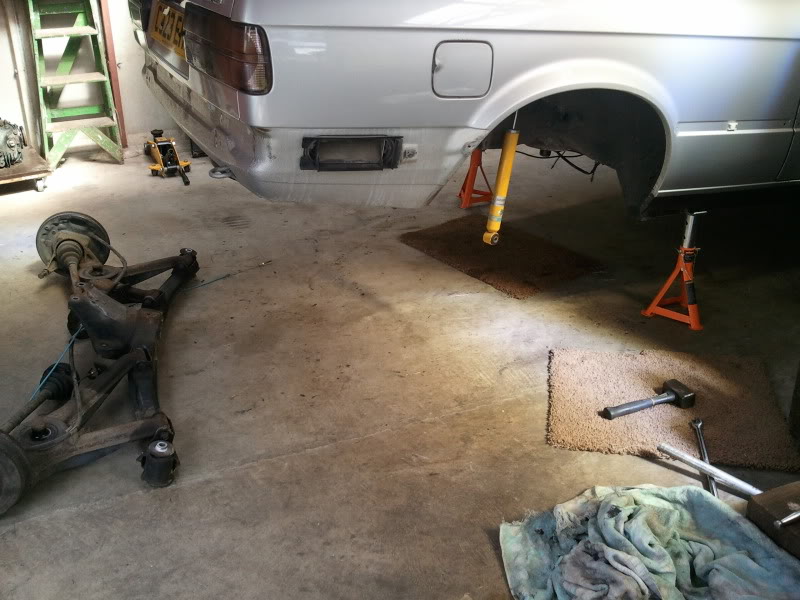
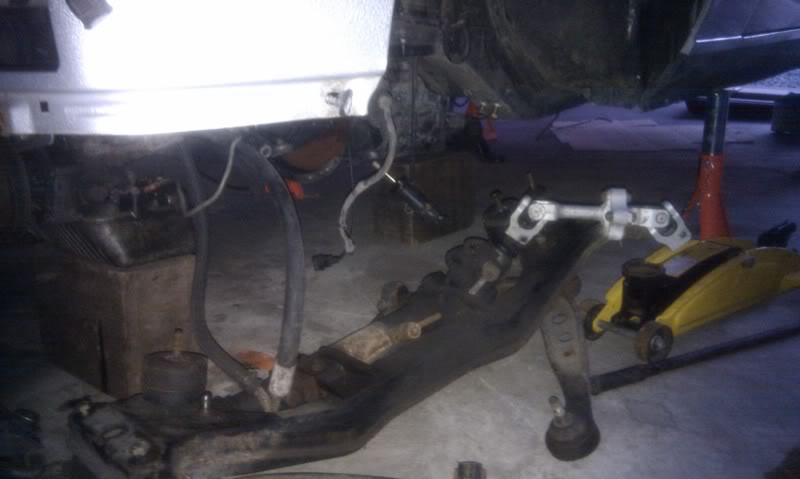
Attempted a quick trial fit of a 63l tank from the 325i touring in my sig pic and quickly realised that it was going to be an impossibility with the rear beam still fitted and the brackets on the inner sill for an external fuel pump. So off came the rear beam and trailing arms.
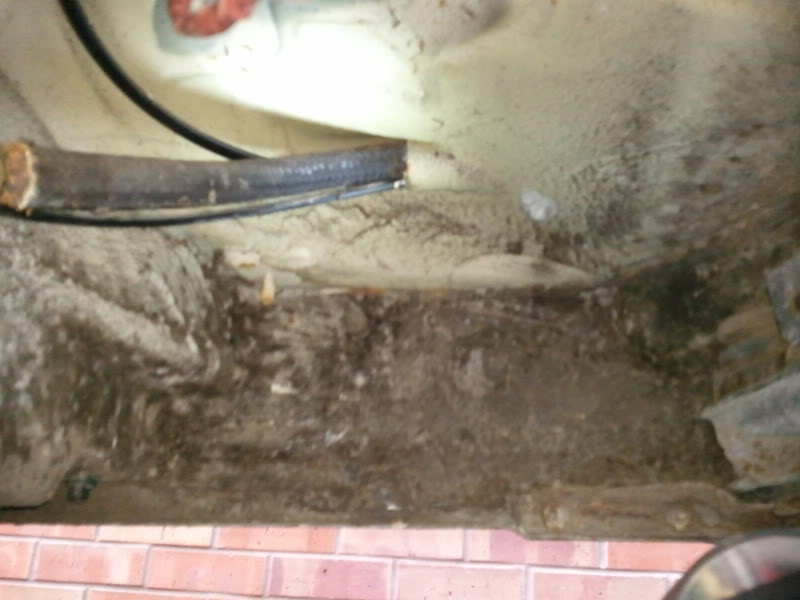
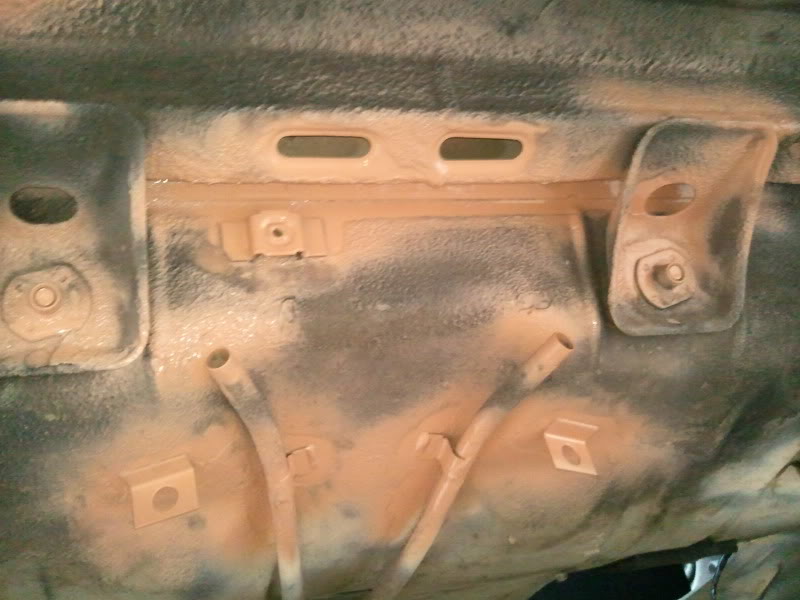
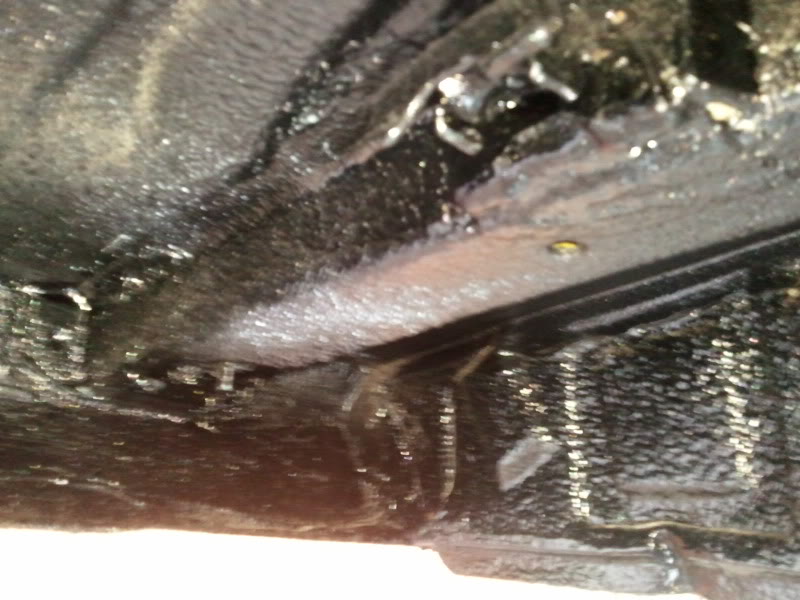
All looking pretty good under the car, I wipe over revealed a few cracks in the original underseal which needed taking back to bare metal but nothing to worry about.
All the bits of flakey seam sealer and surfice rust has now been removed and primered up with some anti rust primer ready for fresh seam sealer, not been a fun job at all!
Just a couple of pics, was far more patches though and the back of the spare wheel well was an bloody pain to get in at.
Gave the primer a good 24hrs to go off and then got on with reapplying the seam sealer (forgot to take pics though), bit of a messy job so hopefully worth it, then shutz'd it the next day.
It has since had another touching up to get the few bits I missed with the first tin.

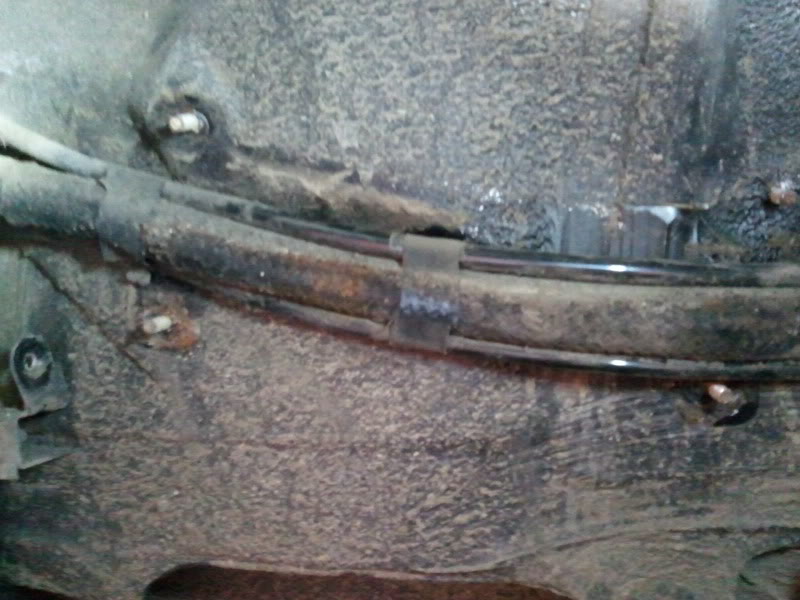
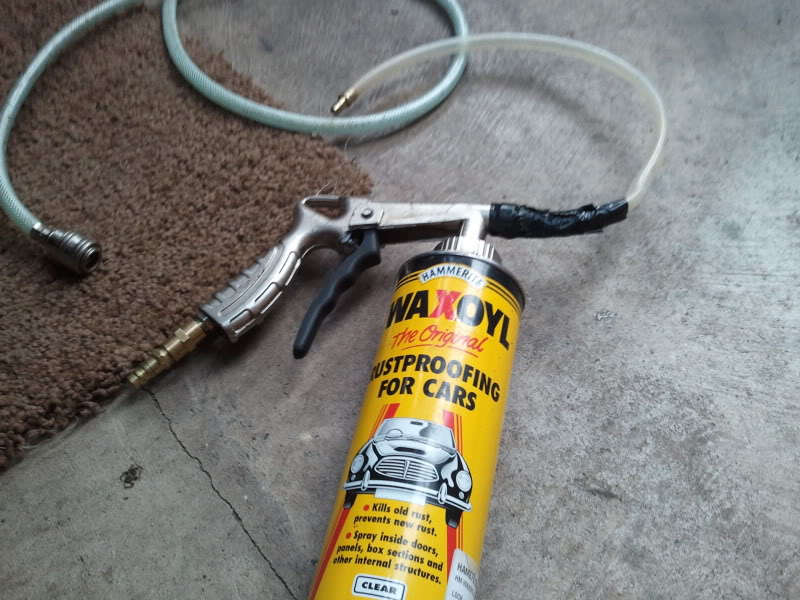
Once the shutz had had about a week to dry off everything got a good dosing of Waxoyl, need to do the box sections from inside the boot as well for maximum effect now;
Tool of choice.
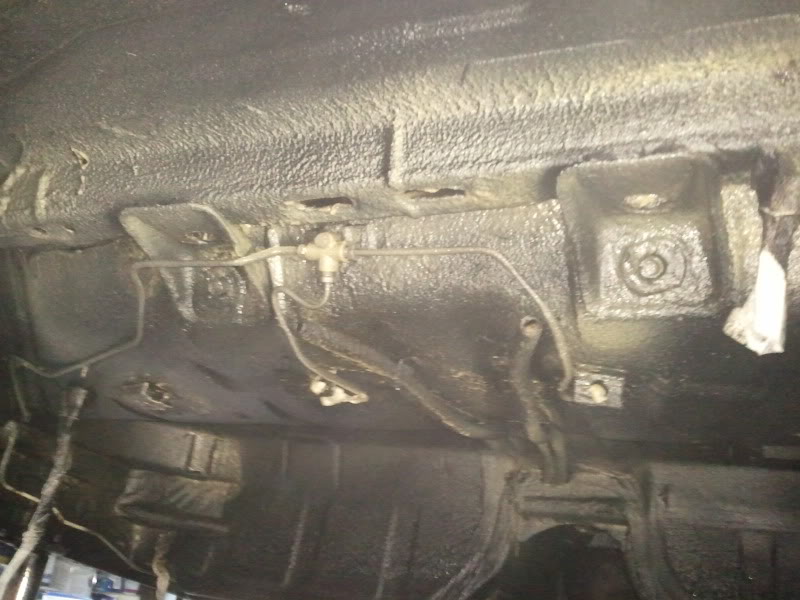
Sample of crossmember box section done.

Now all over is covered, 2l sunk into it so far, don't want to give rust anychance to set in.
Posted
Settled In
j
1991 1.8 clipper 
Posted
Settled In
Posted
Social Media Manager


il show you a few of my ex and current bm's :wink:
Ex 325i Sport :twisted:
Current 325i (for sale on ebay)
My 1602 running 2002tii engine (been in the family almost 20 years now)
1983(Y) VW GOLF GTi

Posted
Settled In
Posted
Social Media Manager
Kedge said
Love the 1602, that going to get restored?
its been a project for the last 5 yers, its had new wings, sills, under floor, front and rear panel

hopefully one day it will be back on the road :wink:
1983(Y) VW GOLF GTi
Posted
Settled In
ans4r said
Kedge said
Love the 1602, that going to get restored?
its been a project for the last 5 yers, its had new wings, sills, under floor, front and rear panel
hopefully one day it will be back on the road :wink:
Proper long termer then 8) 8)
Posted
Local Hero
Looking forward to updates on this, and it's worthy of keeping your Mk1 project on hold! 8)
Mk1 Golf floor mats - for tin top and cabriolet - Zero7796 17298Five
Posted
Settled In
GavB95 said
I ran a 318iS a few years back, what a car! I wish I'd never sold it but it drank like a fish and I knew I'd get a ban if I kept it! :twisted:
Looking forward to updates on this, and it's worthy of keeping your Mk1 project on hold! 8)
My first E30 was a 318iS, went to that straight from my Mk1 Drivers
That was 8 years ago and had E30's ever since, 13 of them and an E21 plus a couple of Mk2 GTi's but always wanted to get back to a Mk1 8) If you think an iS is thirsty try keeping up with a 325i's drink problem 8O :cry:
Posted
Settled In
Then after admiring the parts in my livingroom for a few weeks it got round to bolting them to the car. First job to do was get the tank in, and my word what a pain of a job that was, since my car is a prefacelift model it has brackets on the inner sill for an external fuel pump and the larger 63l tanks really struggles to squeze past these, took a couple of hours to get in place, the odd swear word might have been uttered on occasions. :-X

Onto the beam and rear arms. I got the bushes and brake pipes fitted to the rear arms, though in this pic the inner bushes are the wrong way round :
 so I had to take them out and swap round, good job I asked for advice on this beforehand. Had some standard bushes already instock so they were used in the rear beam, have some void fillers on order to stiffen these up and increase their lifetime.
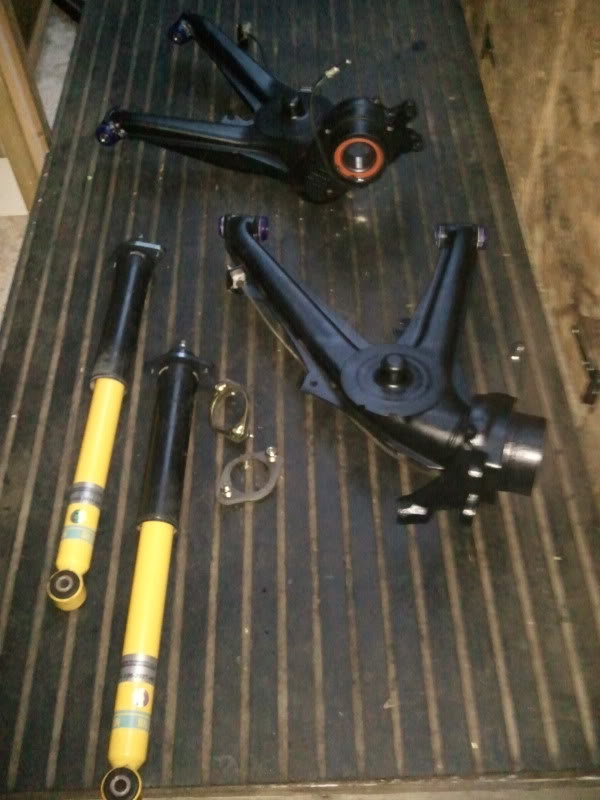
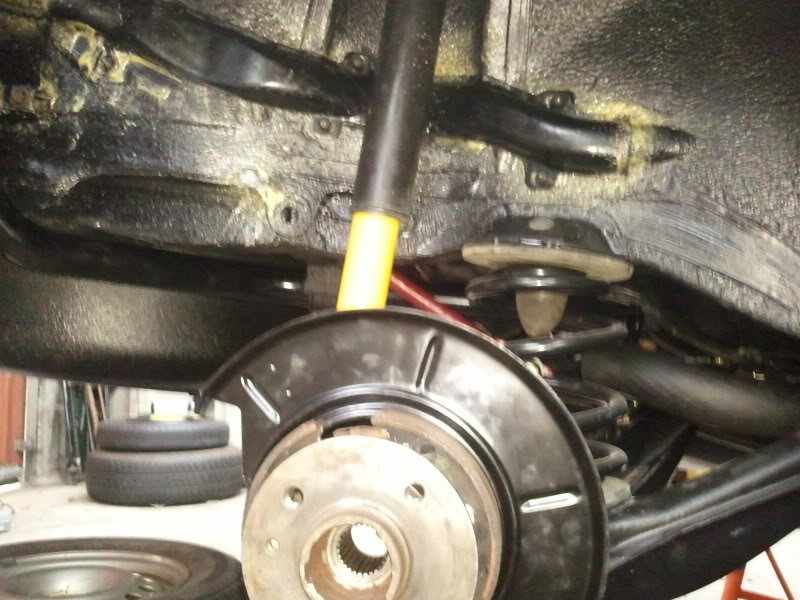
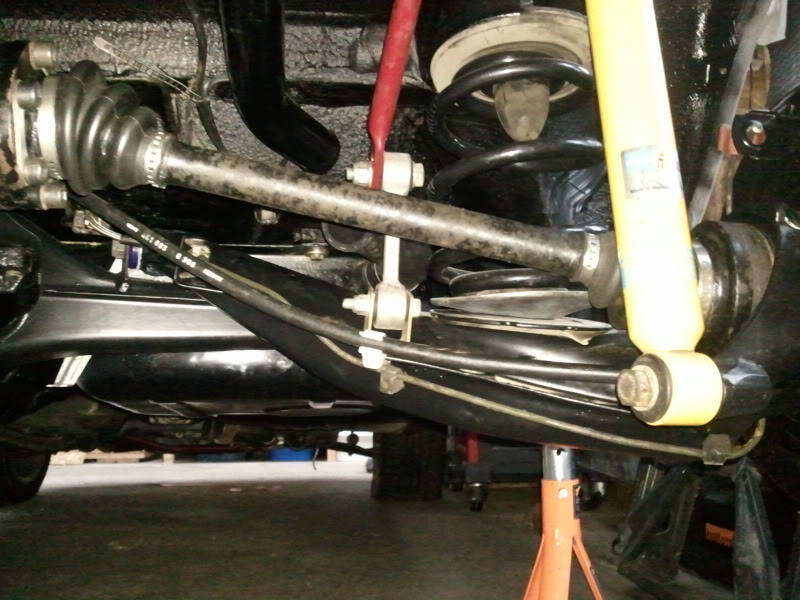
Here's how it's all looking now, diff in, handbrake cable, Eibach ARBs mounted, Eibach lowering springs in, thinner spring pads also used, Bilstein shocks and Rogue Engineering top mounts all fitted. 8-)
The rear hubs were then hammered into the bearings, not a job i enjoyed as i was convinced i'd bugger the bearings. Then I got the filler neck and vent piping all fitted, just need to dig out a rubber collar for the filler neck to sit on the bracket under the floor correctly before it's finally plumbed in. Gave it all a coat of Waxoyl behind the vent cover and all the other little traps.
I then progressed to regreassing the drive shafts. Just pulled back the gators, cleaned out all the old grease as best as I could before refilling and fitting new crimps.
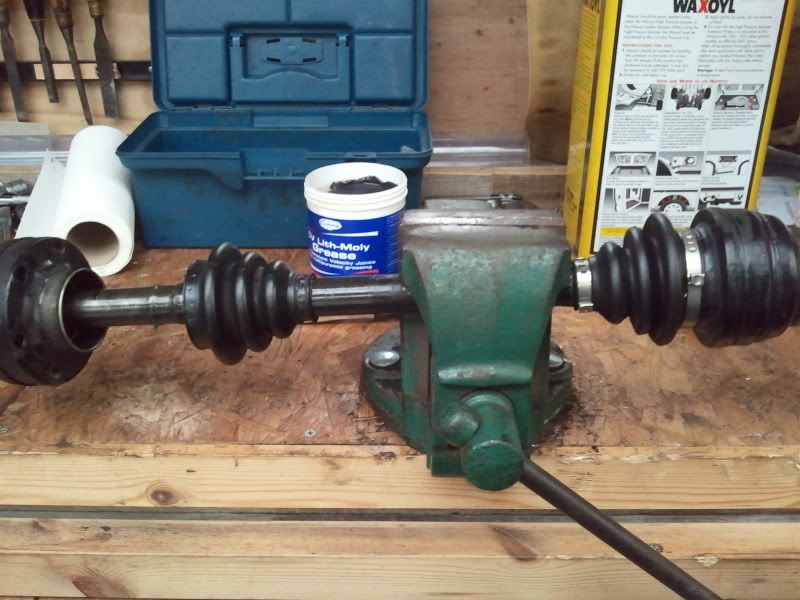
One down, one to go.

Driveshafts now bolted up to the diff and then slid into the hubs, just need it back on the deck to tight them up.
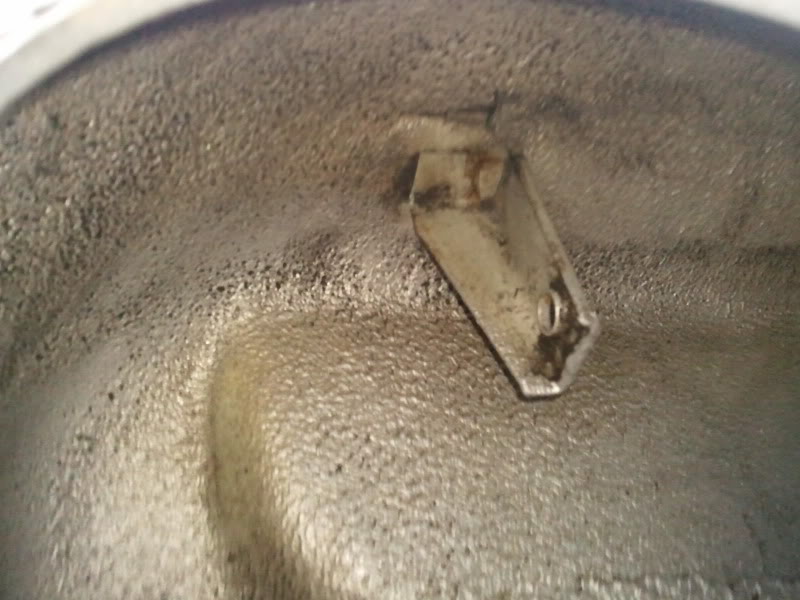
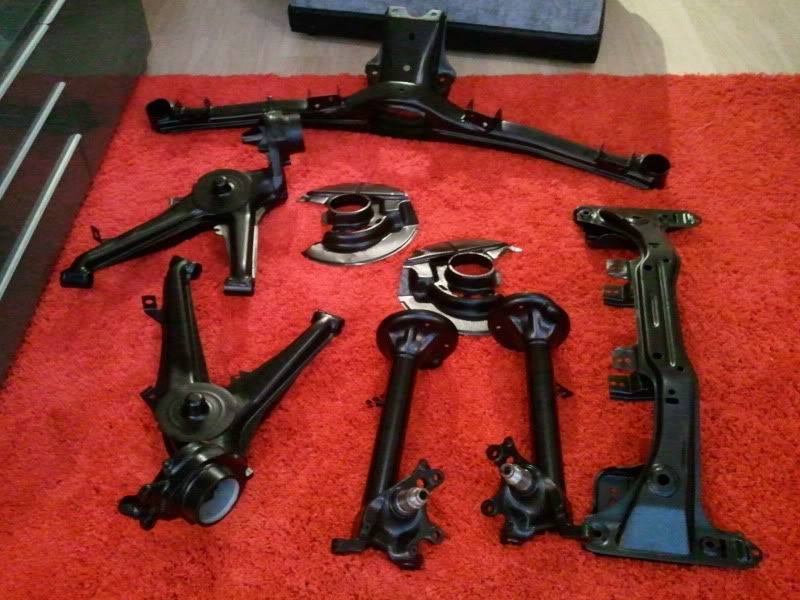
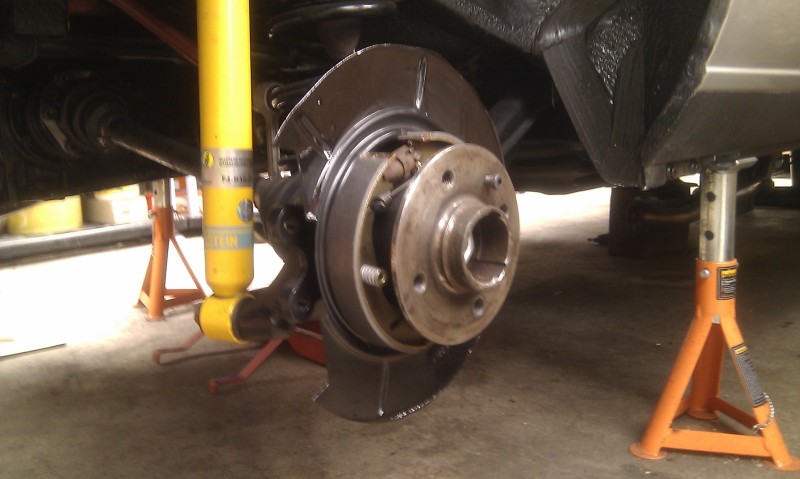
That's pretty much how the rear end is sitting now, been waiting on the new brakes to be delivered so i've started on the rest of the floor and the front end while waiting.
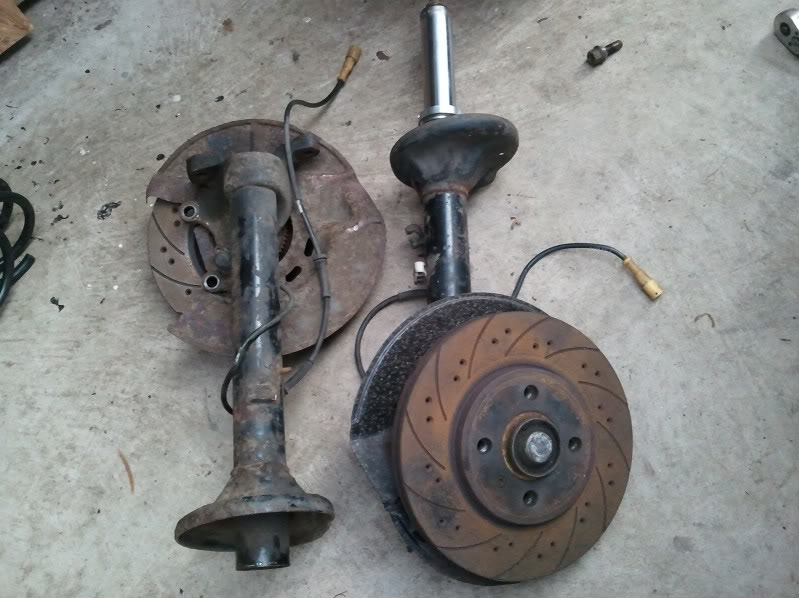
Old struts nearly finished being stripped, actually in decent condition, disc backing covers seem fairly solid which is rare these days so might be able to refurb these and sell them on.
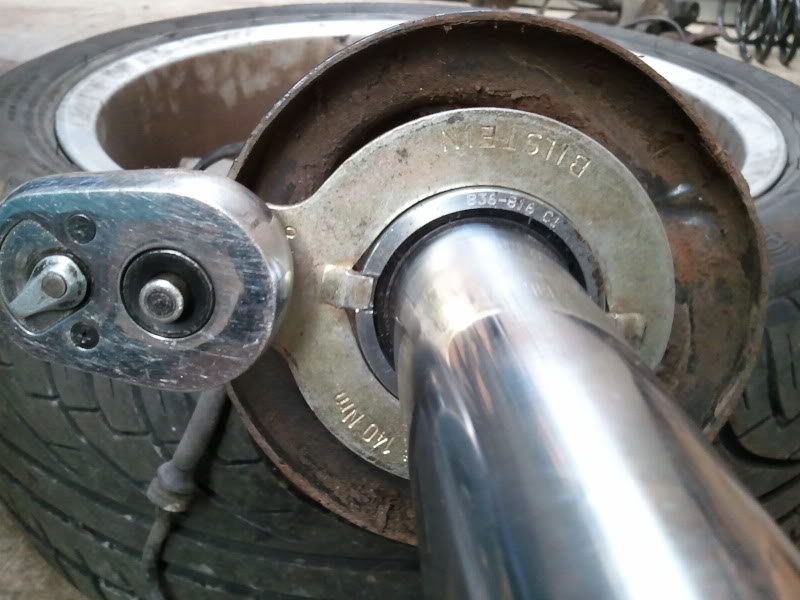
Amazing how the proper tool makes short stress free work of a job. Didn't fancy attacking this with a stilson as per so many peoples advise incase I damages the collars or shocks.
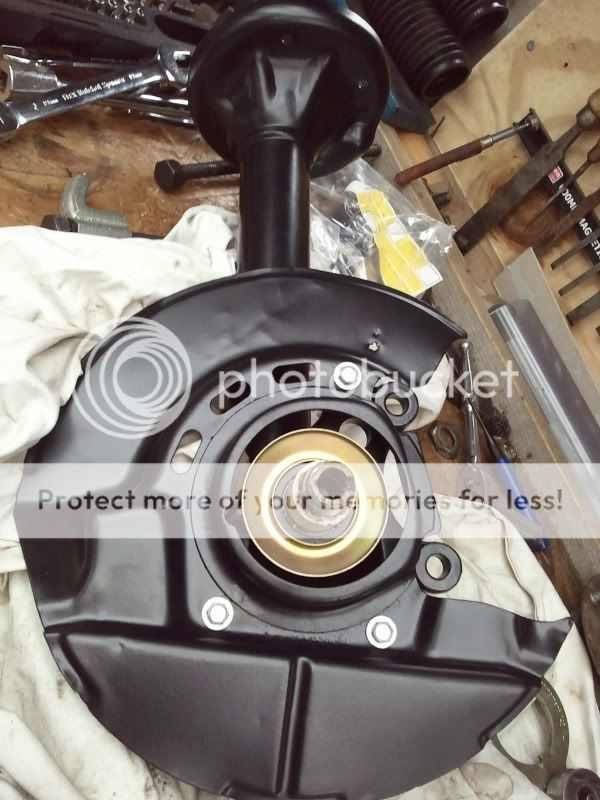
Powdercoated strut and disc backing ready for the wheel bearing to go on
Struts fully rebuilt

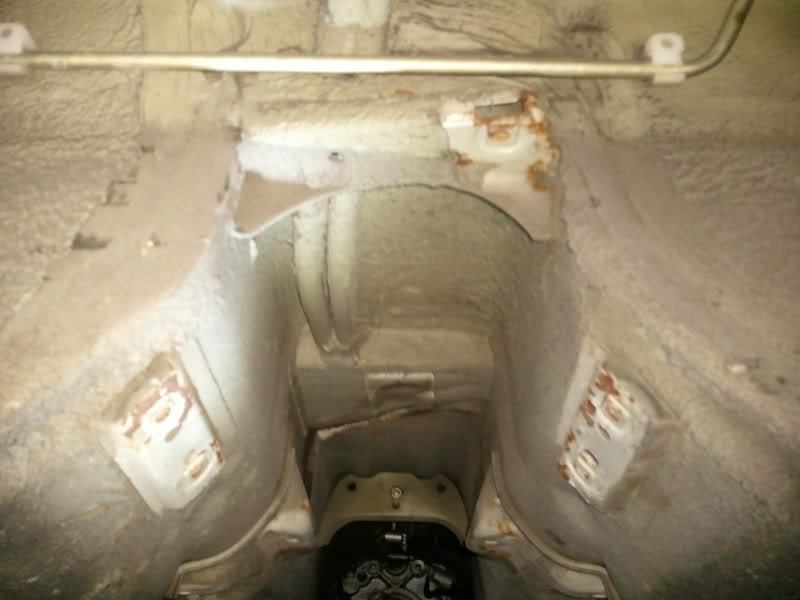
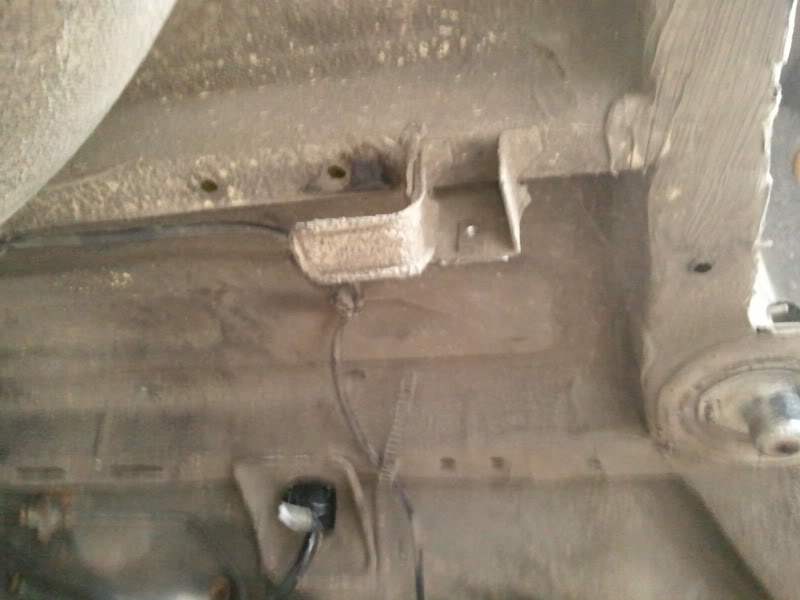
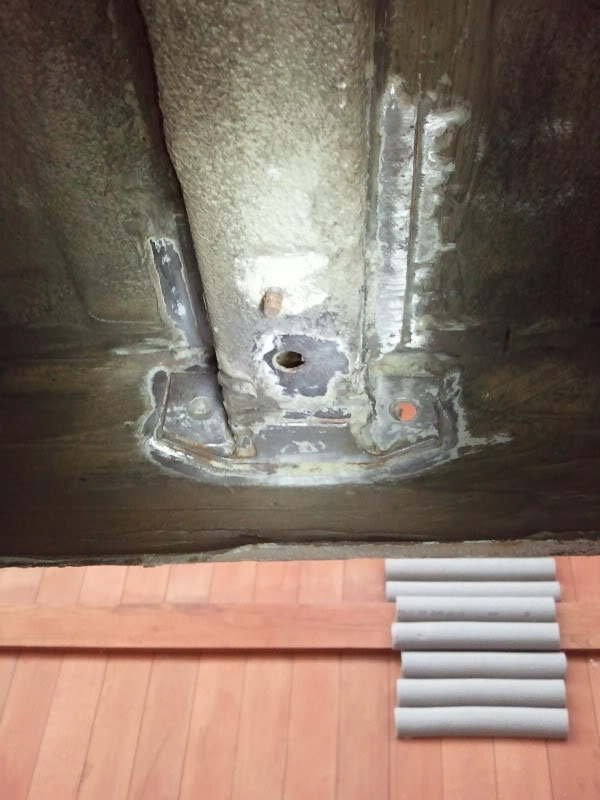
Got the engine dropped next ready to remove the insulation from the transmission tunnel due to a small rust patch. All went smoothly once I'd remembered to disconnect the bloody steering linkage!
Dragged out the crossmember ready to make way for the refurbished ed one, just need to disconnect the PAS. I think it'd be a wise idea to change the sump gasket at this point so i've bought one ready.
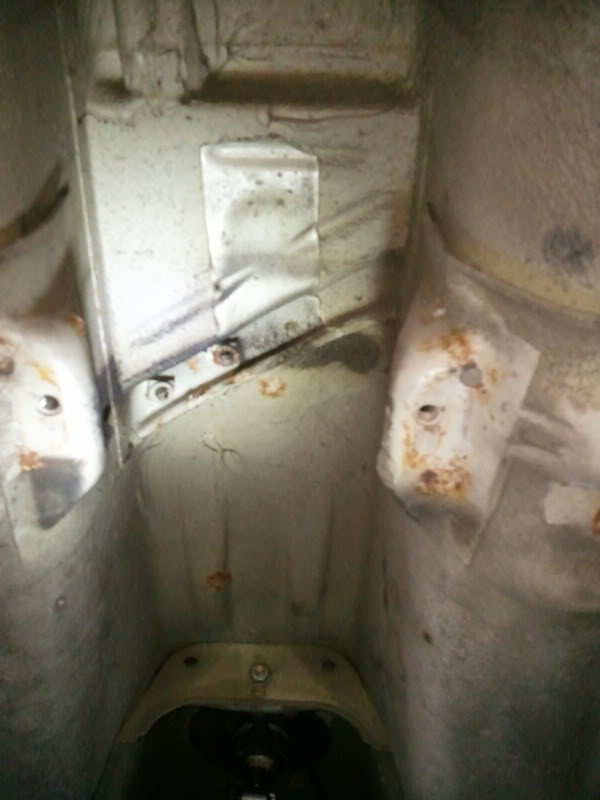
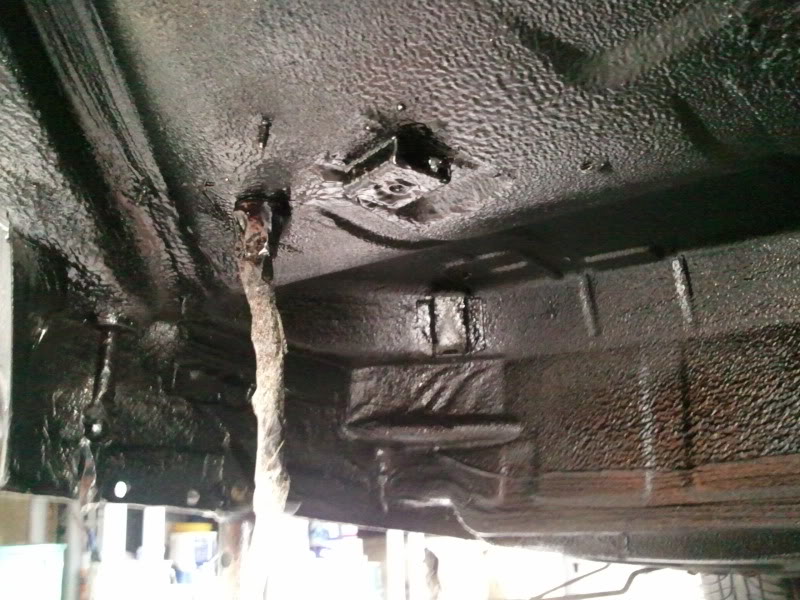
Brake servo is out, did have to come out as there's no way new insulation would go back on with it still losely in postion, no great shakes though. Pleased to report it's sweet behind that side on the bulkhead (the brown is just glue);
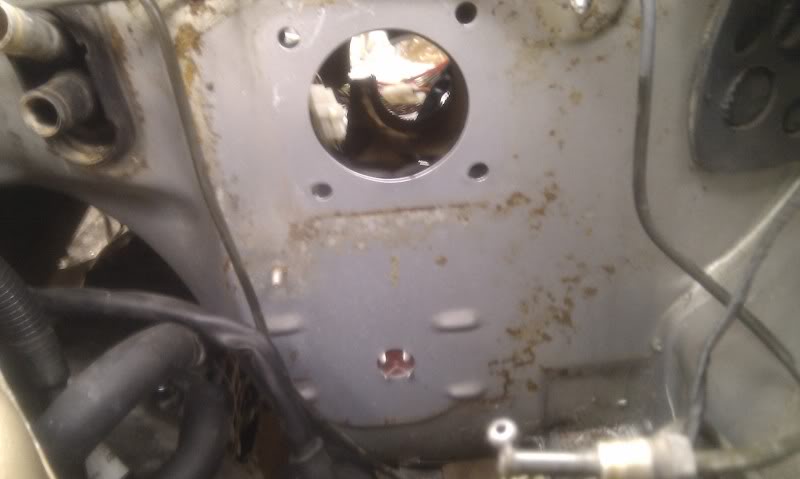
Then out to the otherside and the reason why i'm having to p!ss about with this added hassle.
From the inside;

From the outside;
A few sparks later;
I've never welded so will be relying on my mates old man to put a new patch in, do need to learn so i can ahve a bash at a few bits on the Golf.
And that folks brings you bang up to date, other than the added rare rear prefacelift number plate surround which i think set's the rear end off rather nicely.
Posted
Settled In
Floor is now welded up and the engine is back in after the rigmarole of getting hold of a suitable bulkhead insulation panel, first one was a LHD one and the next two weren't in an acceptable condition for a brand new part from BMW.
Prior to the engine going back in the cross member was rebuilt with the E36 steering rack and roll bar added;
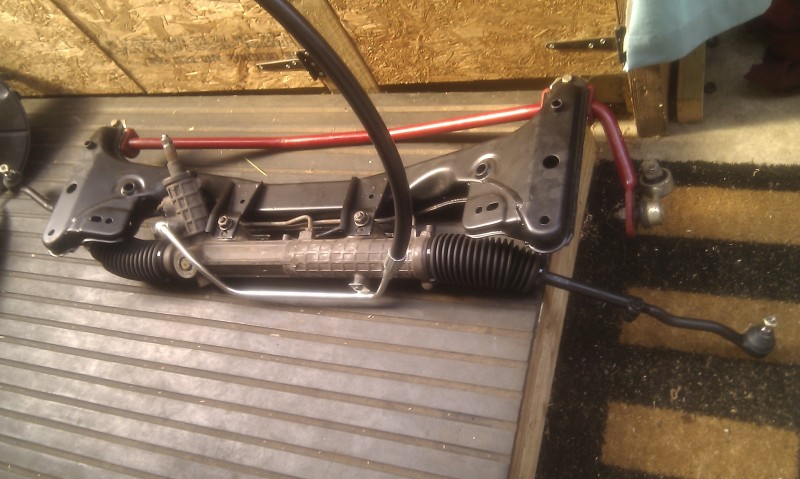
The engine is sitting on lefthand E28 M5 mounts which has provided clearance between the BTB2 manifold & the custom steering linkage on the E36 rack, the bottom UJ had some edges massaged down to add another couple of MM clearance so hopefully it will be ok once it's on the road but we'll have to see.
Also since my last update I've found a fetish for Soda blasted parts which coincided with a local biker setting up his own blasting & plating unit just round the corner.

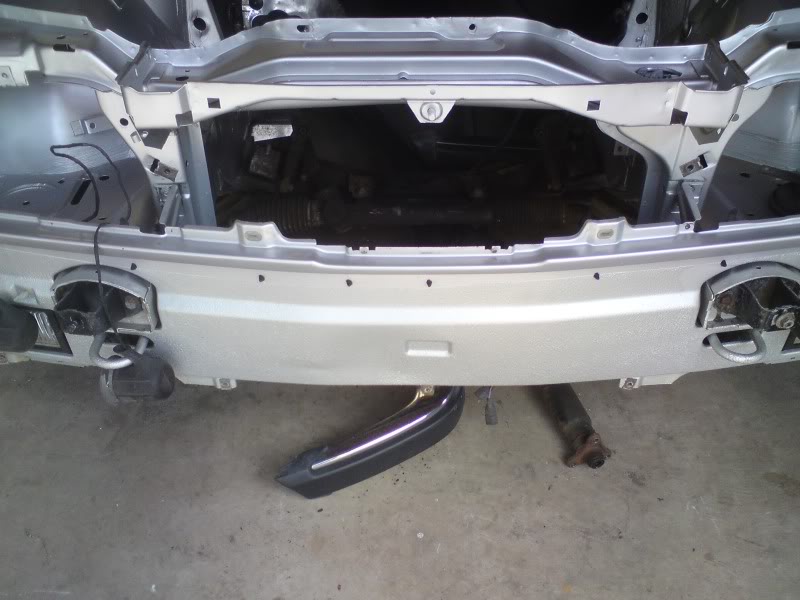
I've also decided to fit an E36 rad now to save the hassle of welding a bracket into the bay for the header tank and and more clutter, also provides me with a bigger rad so will be more effective………………….this has obviously added further hassle though since I've got to convert the rest of the piping to facelift spec.
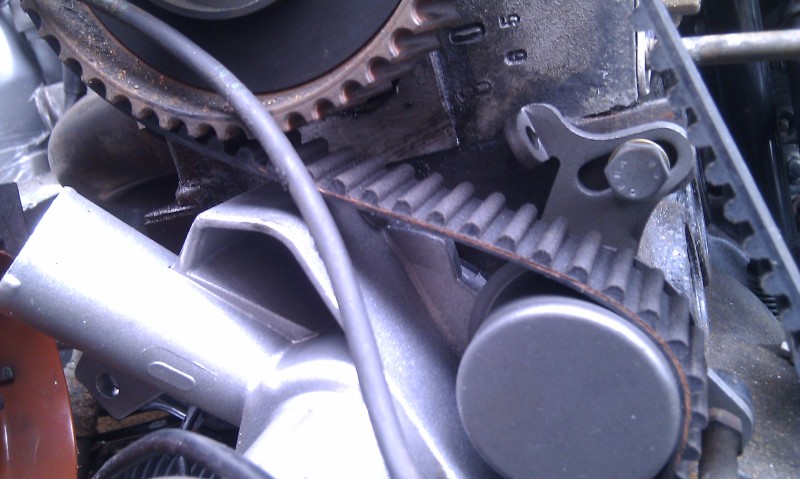
Since I was going to be messing with coolant pipes again and I'd need to fit a facelift cambelt cover to enable me to fit the metal pipe across the front of the engine I though I'd attempt my first cambelt change even though it had only just been changed prior to buying the donor car, bloody good job i did since it was bodged!!!! :roll:
Notice anything missing???? (this it the new belt and tensioner in place but it's how i found the old one)
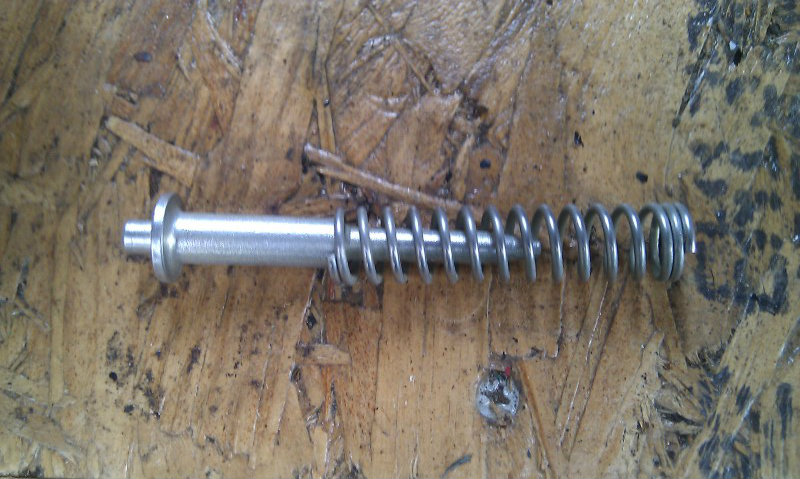
So a quick call in to a mates and we took the spring/tensioner from his yank spec 325e breaker, since this was covered in crap and looking the 20 odd years old it is I dropped it off with a few other parts to get blasted and zinc plated.
All in place now with a new water pump, can't believe how easy an M20 cambelt is to do 8O
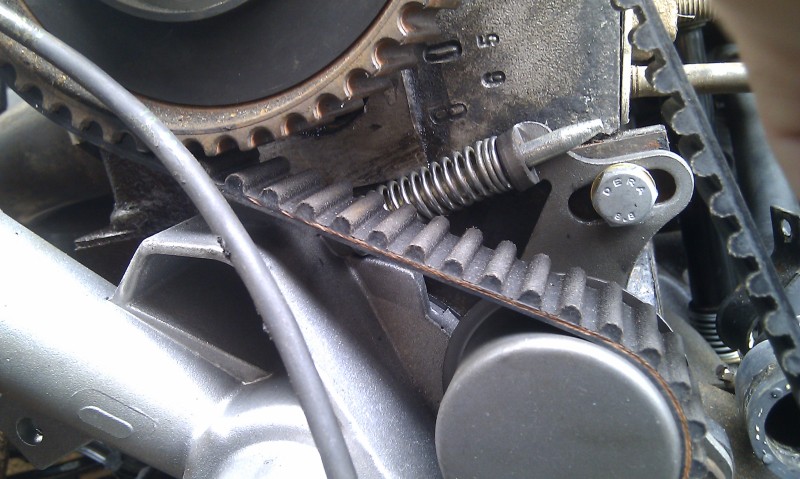
How it looks when i left it this afternoon;
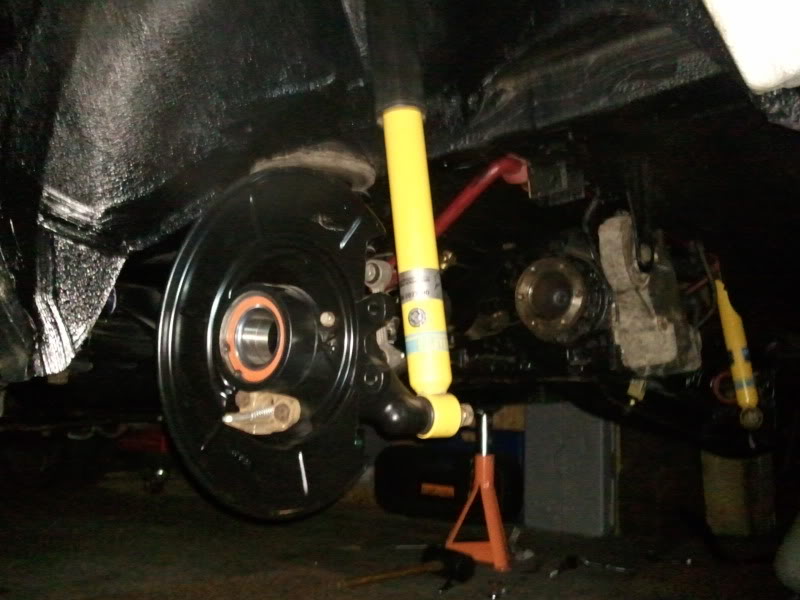
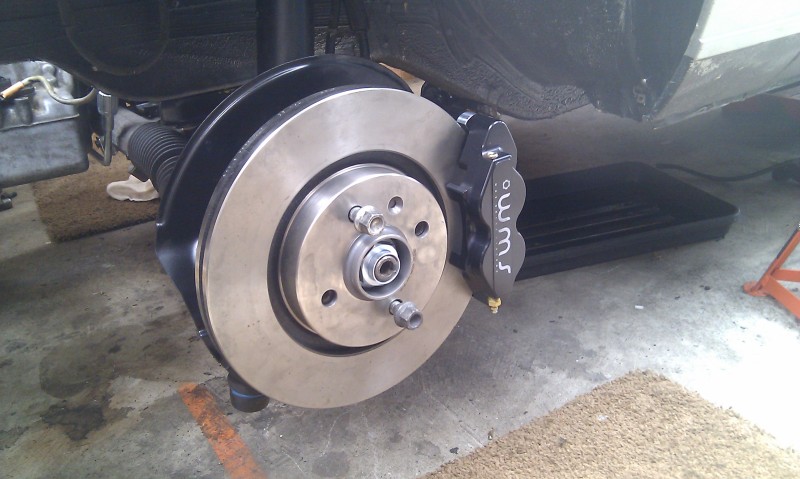
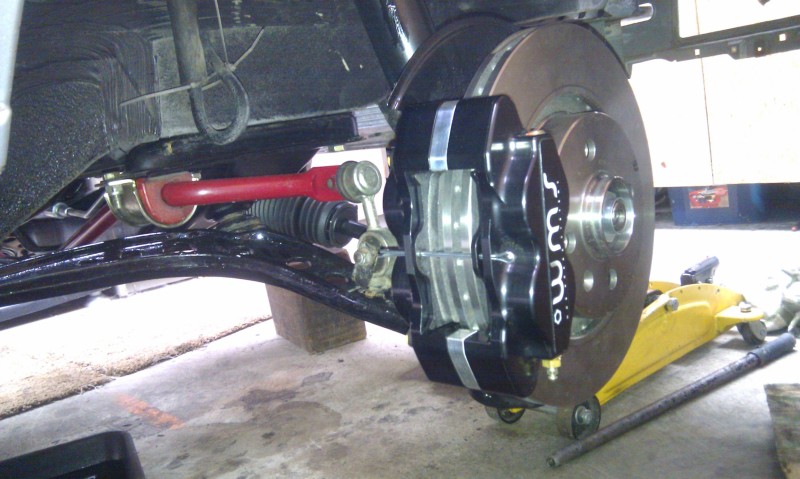
Now on with fitting some brakes…………………. winkeye
Front discs and calipers mounted after a LOT of fiddling;
New rear shoes and trimmed dust shields;
Discs, calipers & pipes fitted;


Posted

Settled In
Posted
Settled In
My New Year's resolutions are: 1. Stop making lists. B. Be more consistent. 7. Learn to count.
Posted
Settling In

Had a go of my mates ex318 convertible the other day, it's had the 3.5litre conversion now and lumpy cams, sounded awesome toe-heeling it on the down-shift, proper torque monster.
Posted
Settled In
RBPE said
toe-heeling it on the down-shift
Always satisfying getting that right, straight 6 engines sound great!
Posted
Settled In
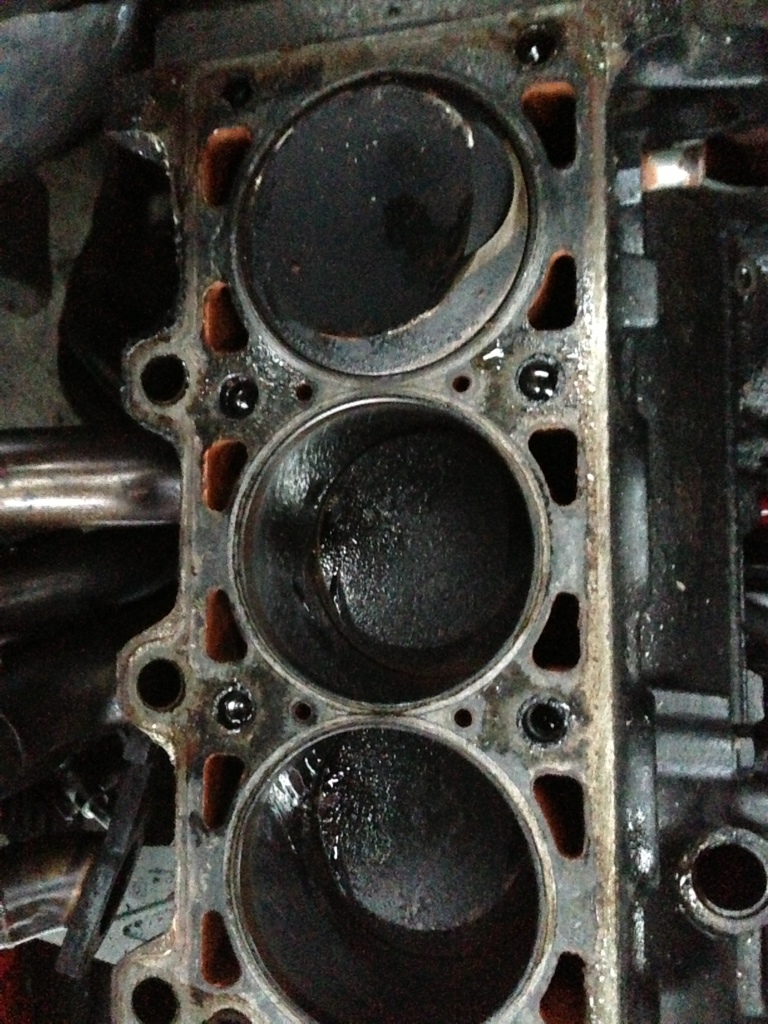
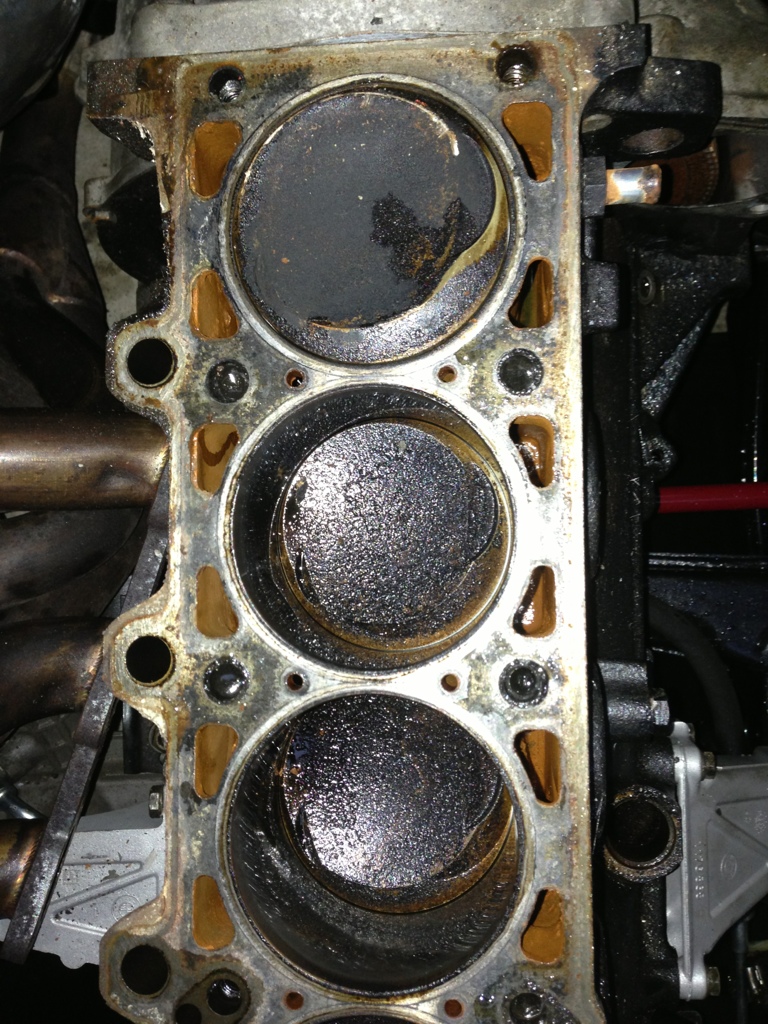
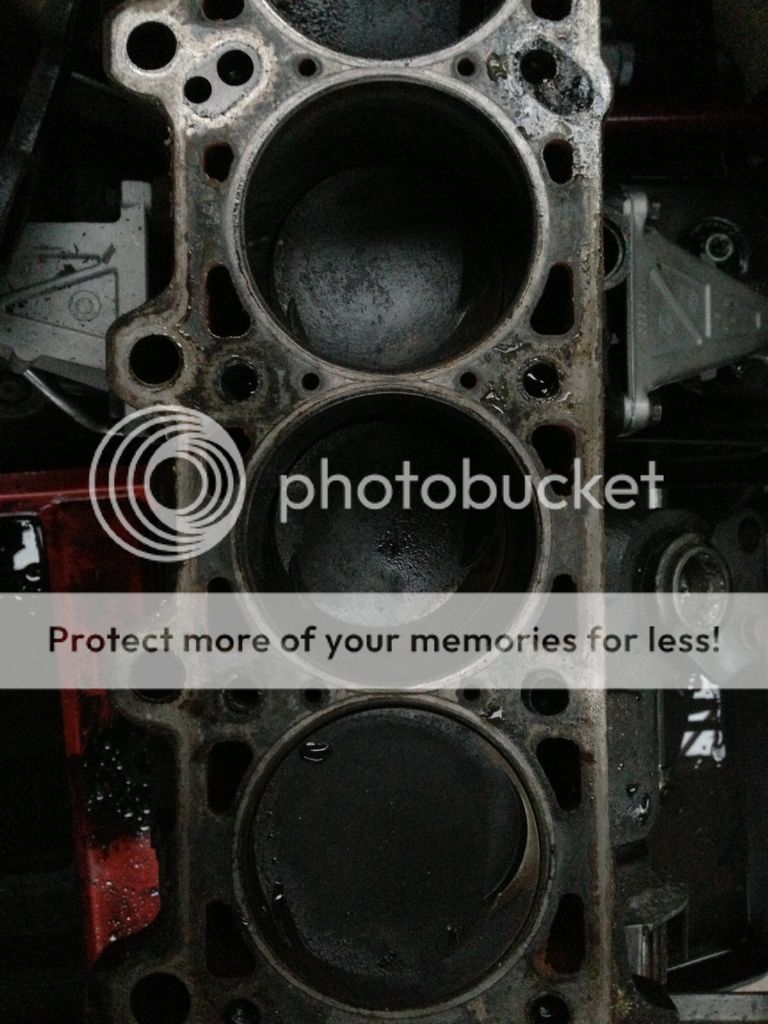
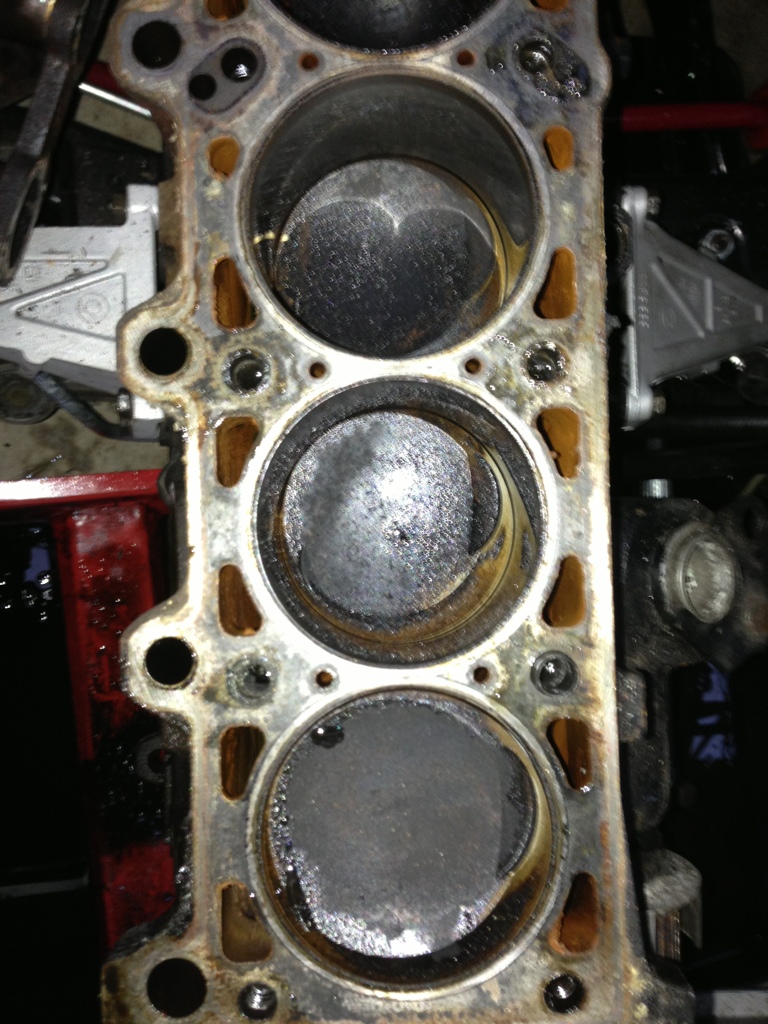
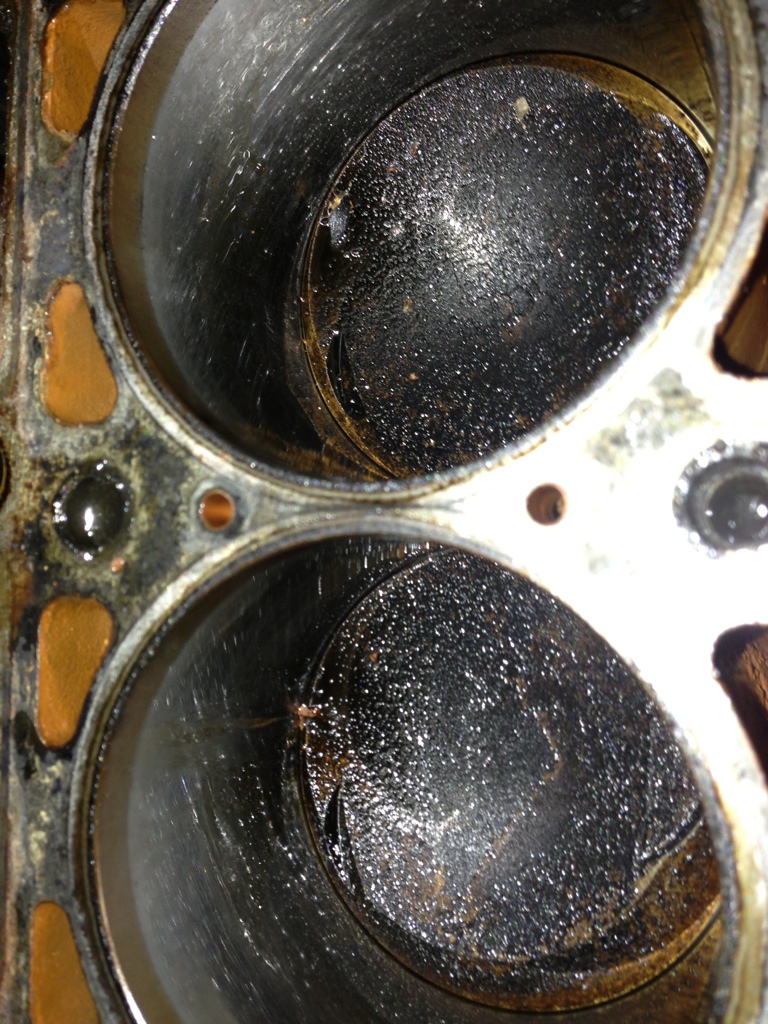
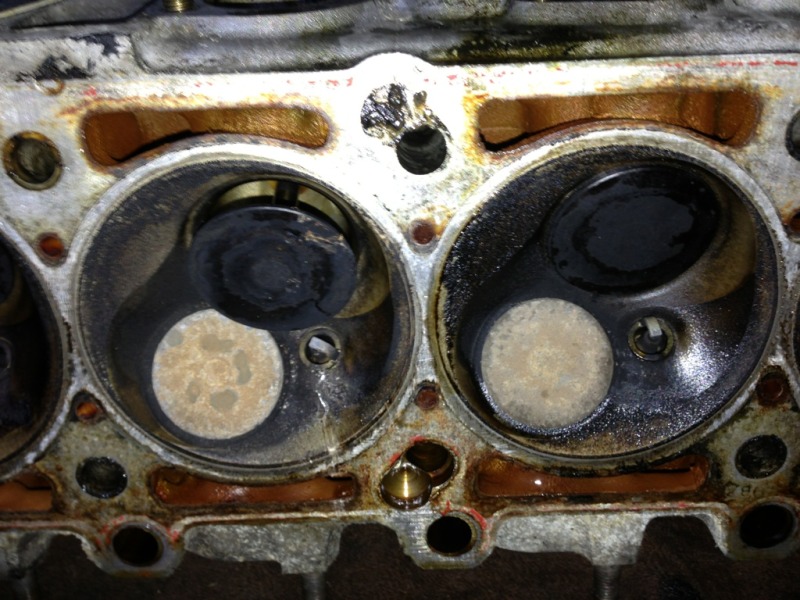
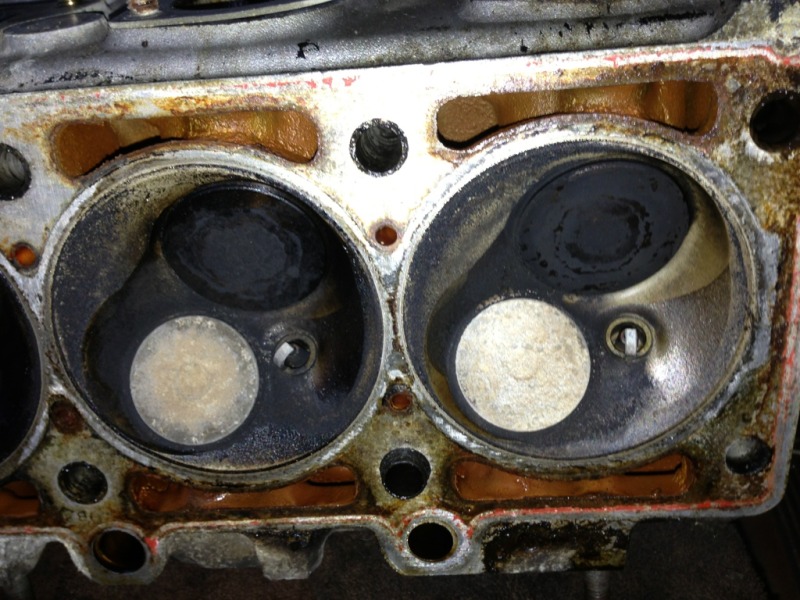
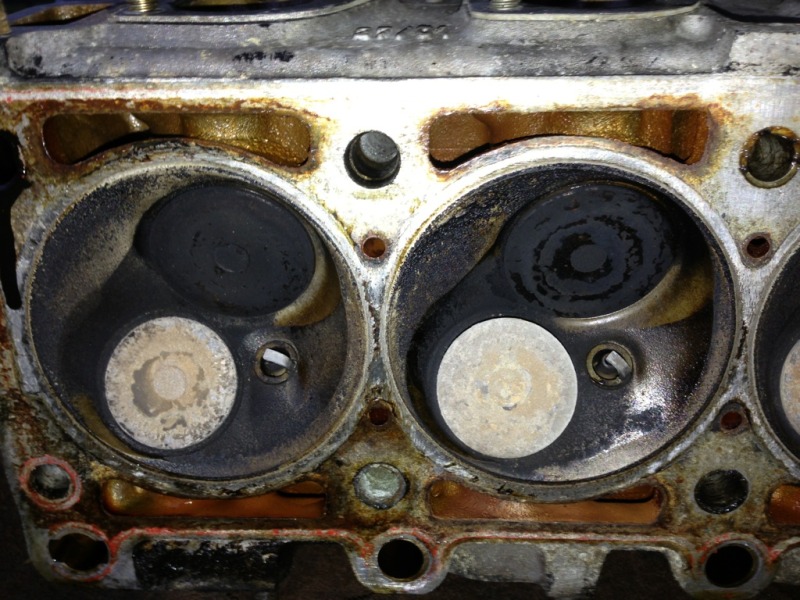
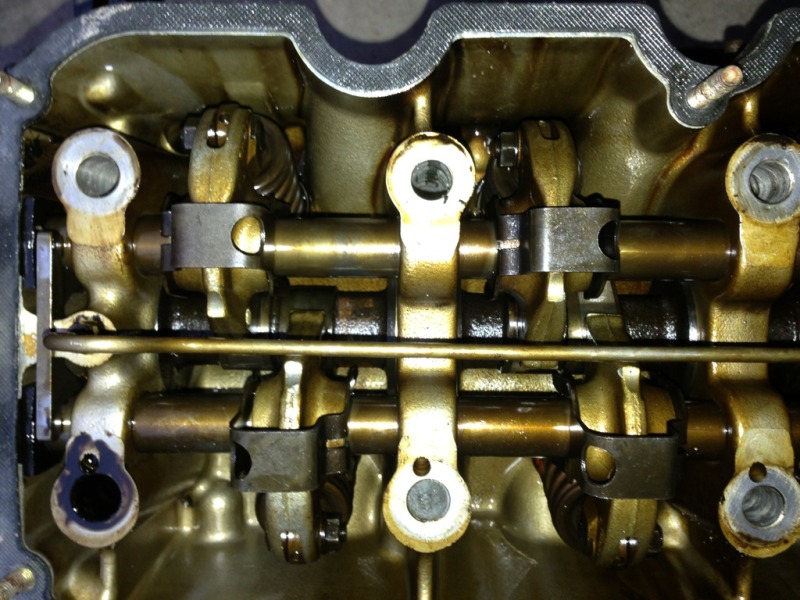
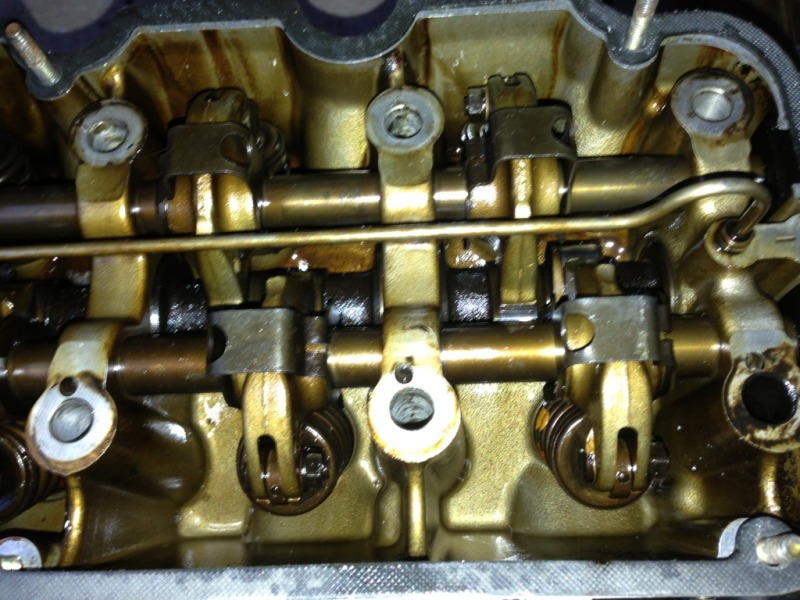
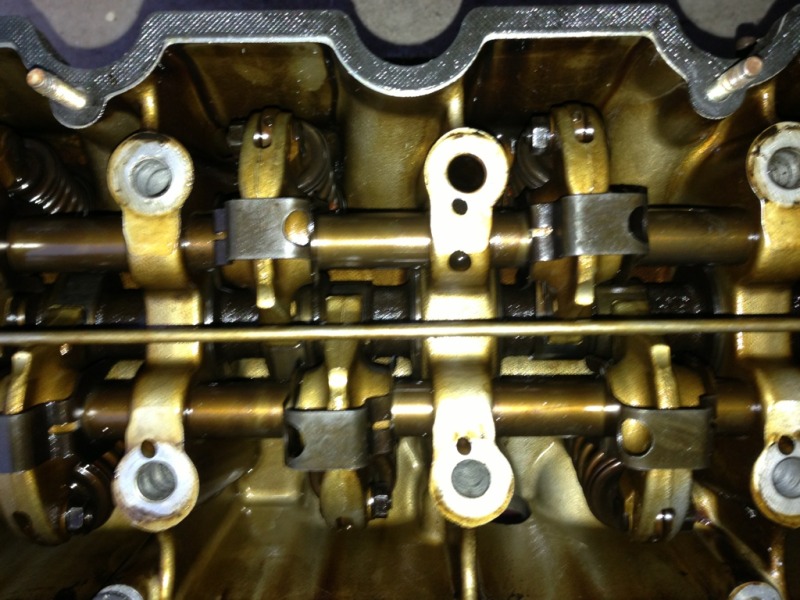
It's now back on wheels as everything is pretty muck finished. A couple of weeks ago I thought I was pretty much at the stage of getting it booked in for painting, engine was fired up for the first time in about a year and it sounded like a complete sack of shite. I'd taken the care to turn it over by hand while filling with oil beforehand. No matter what I did I couldn't get it to tick over less than 1200rpm, revs were dropping with the oil cap off, everywhere I could think of was sprayed to check for air leaks, the ICV was swapped (all that I tried were also making a hell of a lot of noise as well on top of the normal buzz. The final stray was the fact the exhaust manifold was blowing all of a sudden, I'd never even removed that during the swap, I went to have a feel around for lose studs and went and found that one was snapped so I was resigned to needing to get the head off to sort that, then the engine developed a metallic noise so I've bitten the bullet and ripped the whole lot out again ready for it to be rebuilt into a 2.8.
Head was pulled off yesterday and then the block this afternoon, here's a fer pics of how the internals look. Looks OK to me, nothing to suggest the metallic noise it developed was it starting to eat itself inside out.

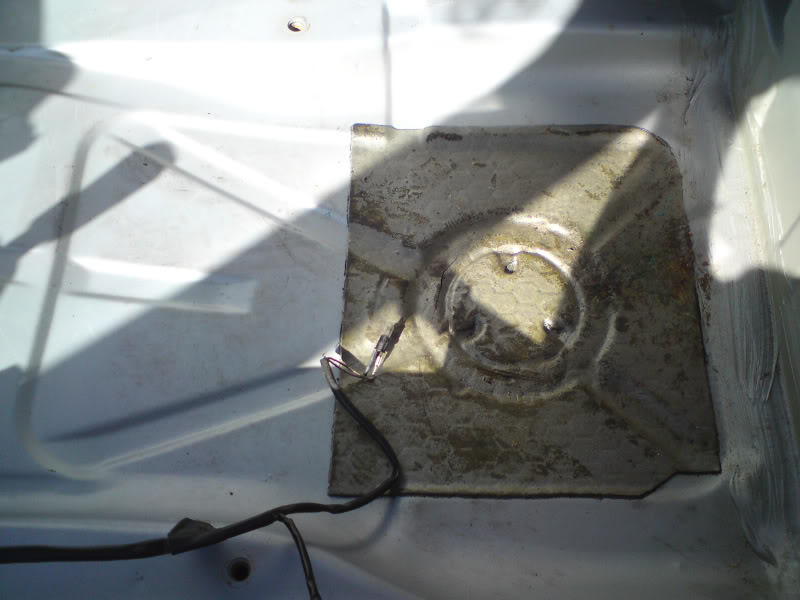
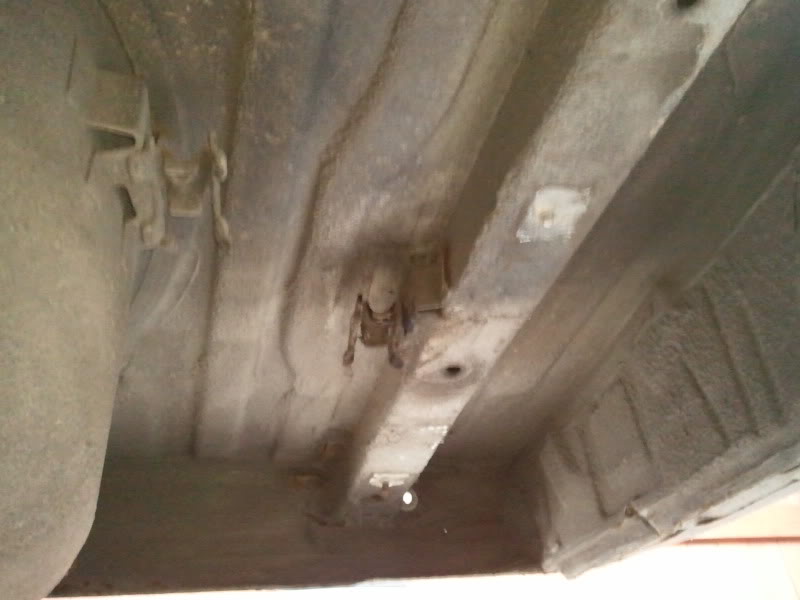
Also found the dreaded bulkhead rot :doh:

30 seconds work and it was sorted
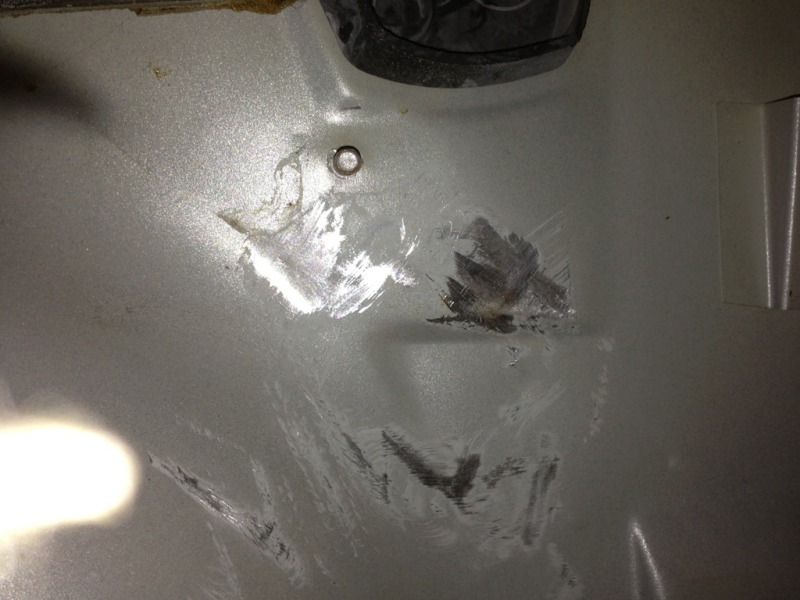
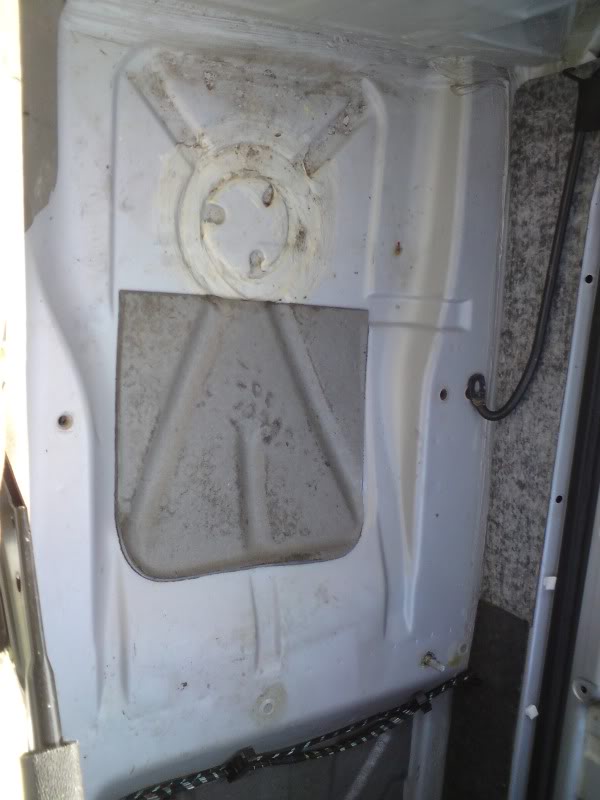
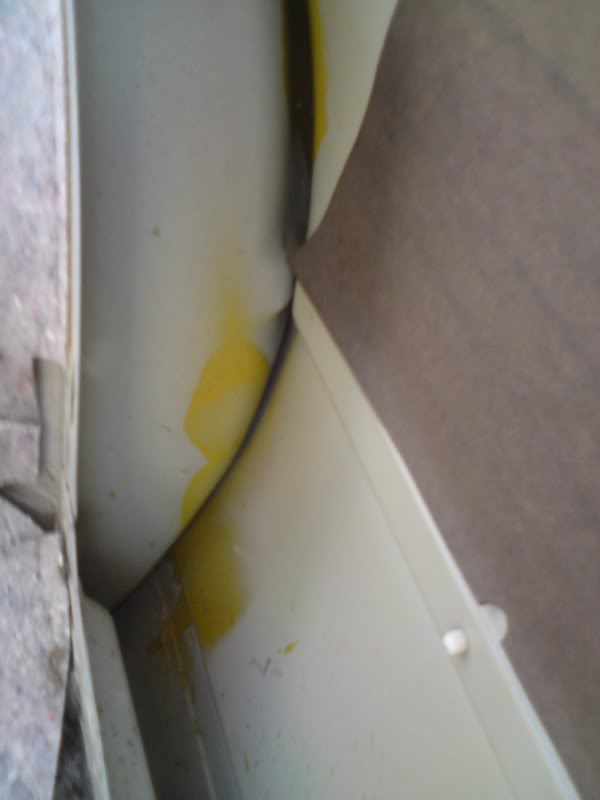
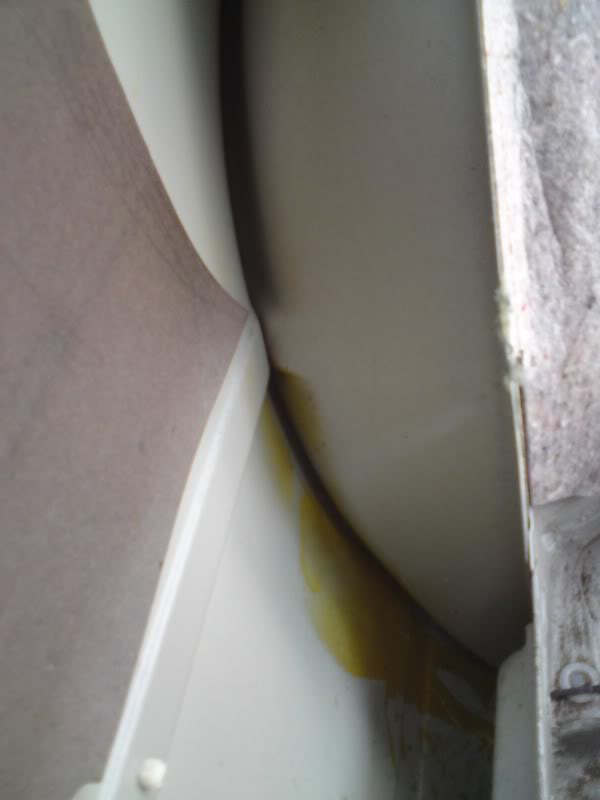
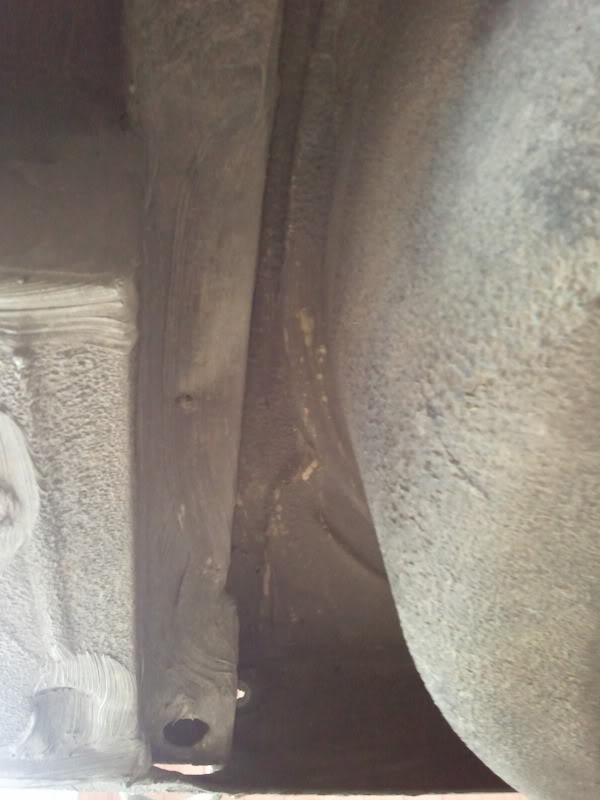
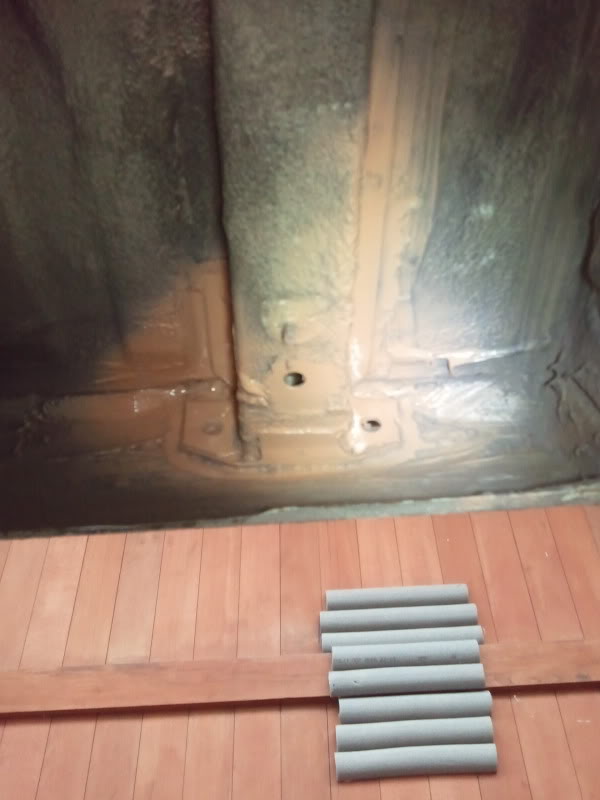
Then I went on to giving the drivers side footwell some closer inspections as there was some very light surface rust I already knew about needing to rub back and paint but I soon found myself poking at the sound deadening and found it was coming up really easily to my surprise. This also led me to pulling up the seam sealer where the floor meets the bulkhead.
Here's a picture of what was found partway through the removal of the seam sealer, I'm sure you can already guess what it is though!!
The start of the clean up though revealed it's nothing serious at all, I'm sure most out there wouldn't be so lucky though!
The whole floorpan will be taken back to bare metal and then zinc primed.
Posted
Settling In
Re your last post, is it me or have the valves struck the pistons?? Was the timing set up spot on? Apologies for saying that as you obviously now what your doing, but that was my intitial thoughts on the internals pictures.
Dougie
0 guests and 0 members have just viewed this: None.