


HOW TO CHANGE THE AUTOMATIC TRANSMISSION FLUID (MODS HOW TO)

Posted
#1034761
(In Topic #123365)
Local Hero

HOW TO CHANGE THE AUTOMATIC TRANSMISSION FLUID (MODS HOW TO)
Had fun today doing this.
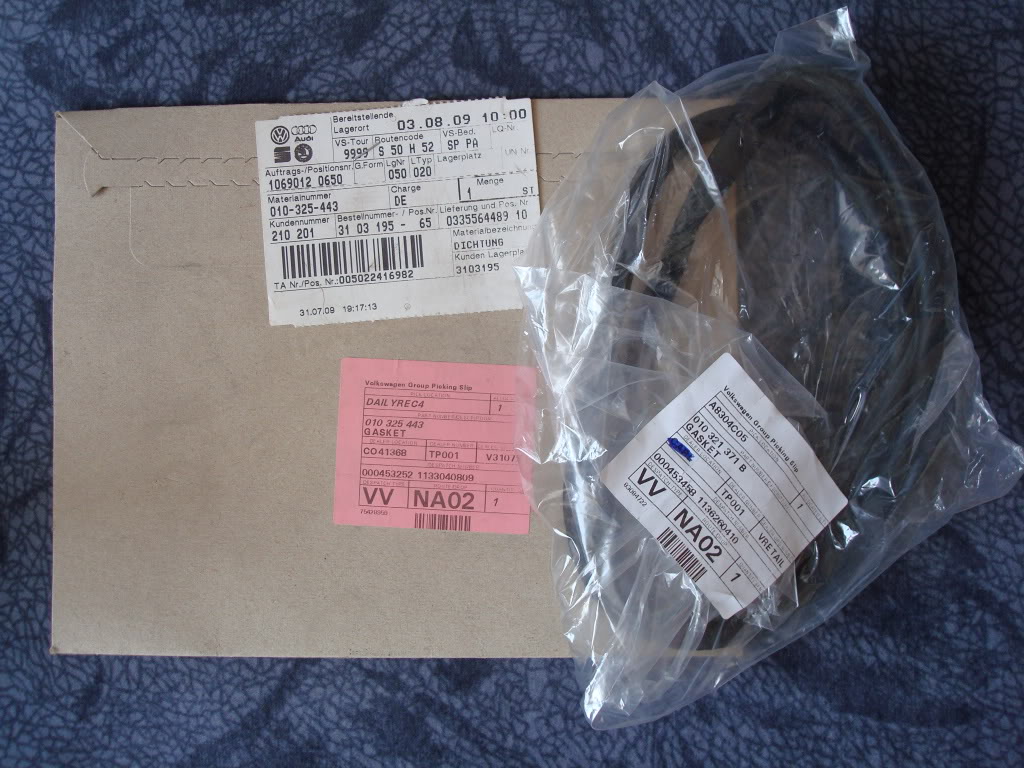
Start of with gathering all the components you need inc tools.
You will need a phillips screwdriver, 17 mm socket or spanner, 13mm socket, 5ltrs ATF DEXRON II rated, new pan gasket seal: 010 321 371 B
strainer/Filter Seal : 010 325 443.
Start off by jacking the car up and make sure it's safe.
Undo the 17mm bolts that hold the sump guard in position 3 in total.
2 on the side.
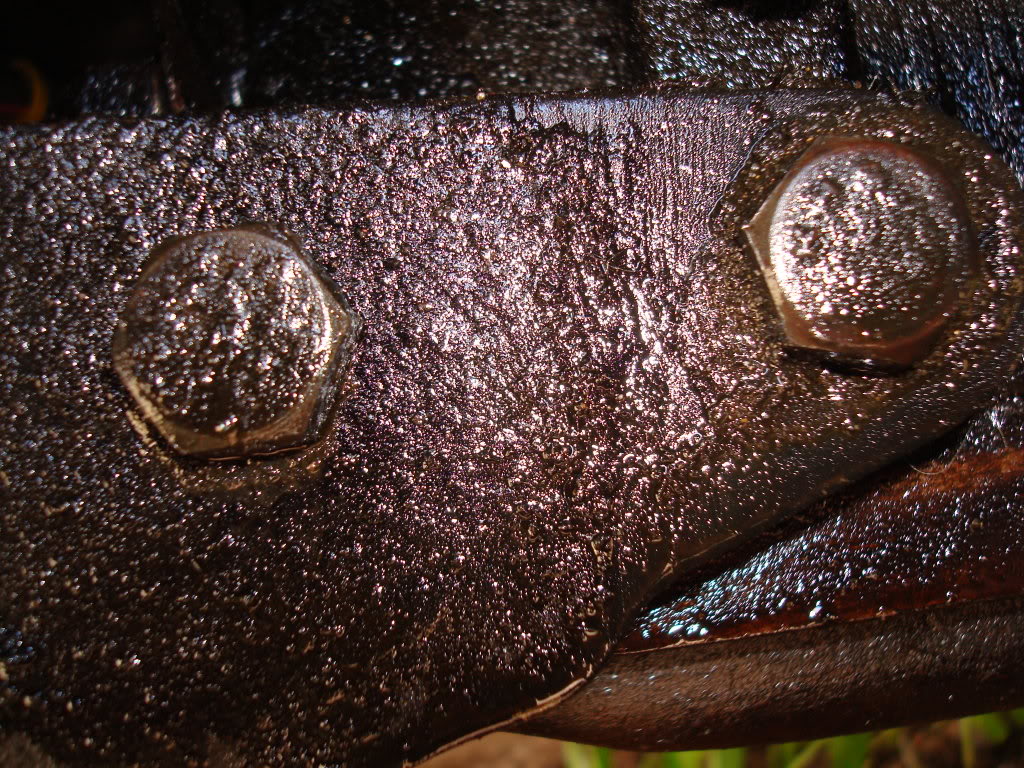
The 3rd is hidden up to the left at the front.
The side of the Guard is slotted into the casting, so this simply slides out.
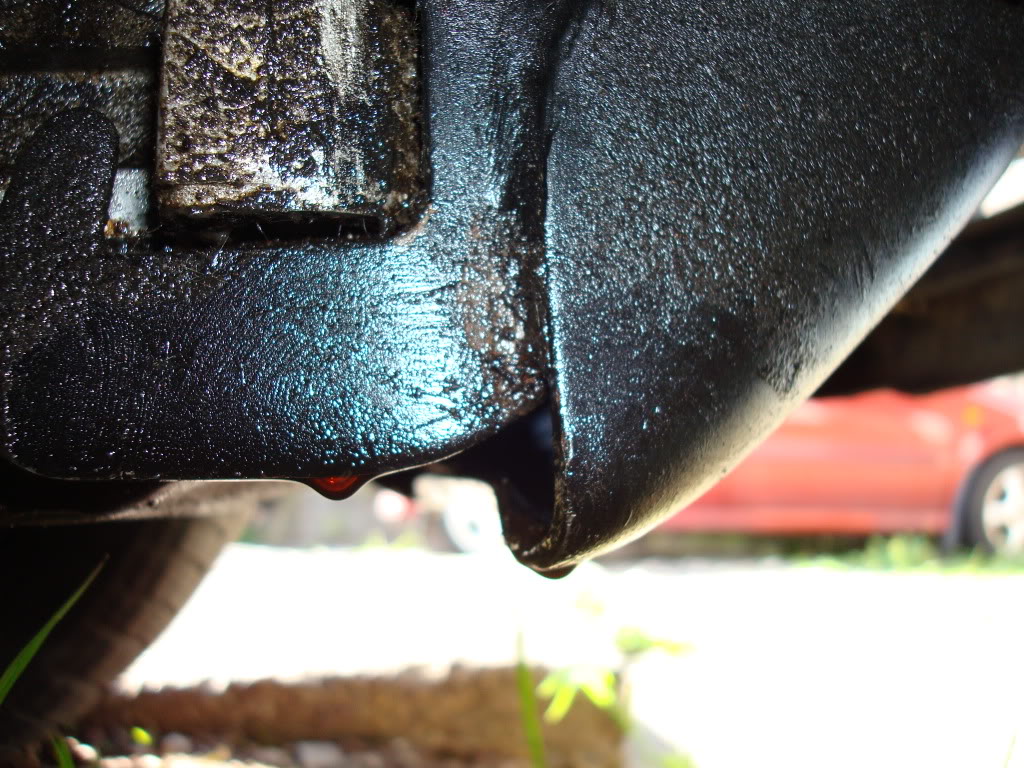
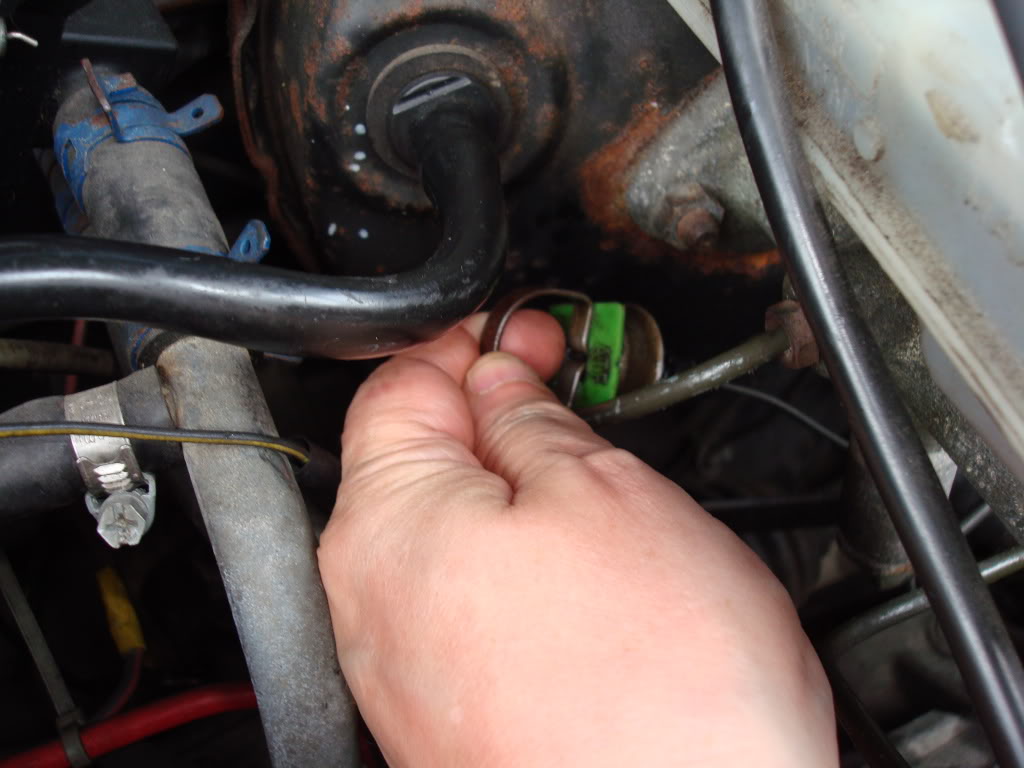
you will see that there is a spring that goes to the to the bottom of the sump guard and connects to metal on the plastic end of the cable.
simply extend and remove.
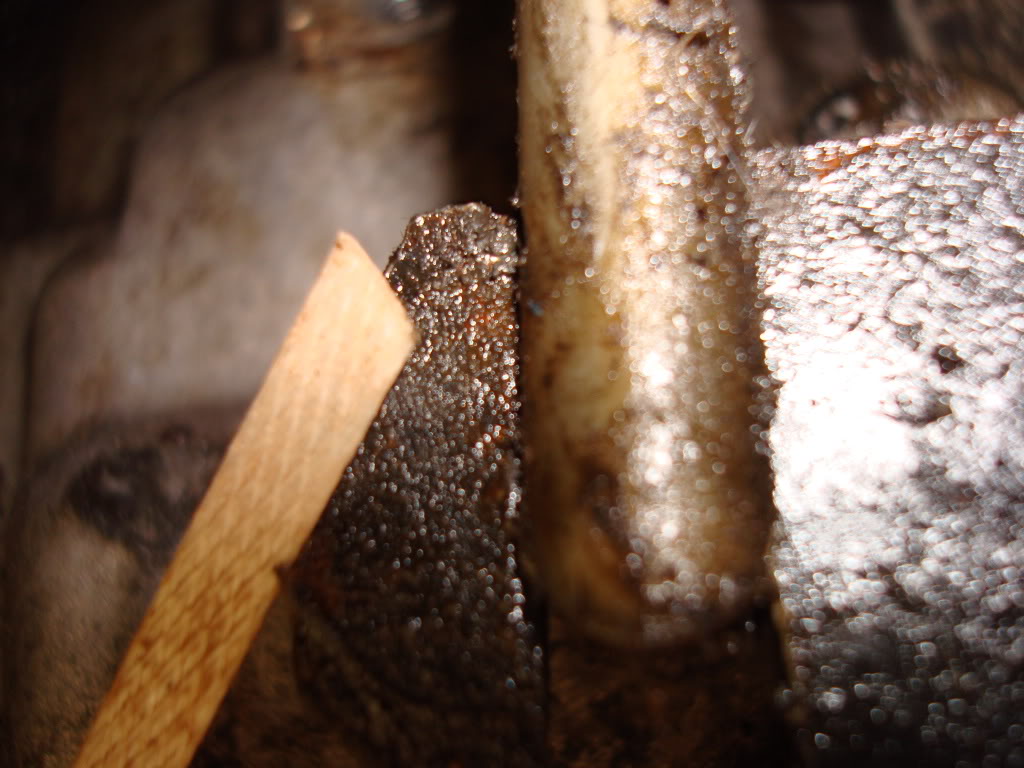
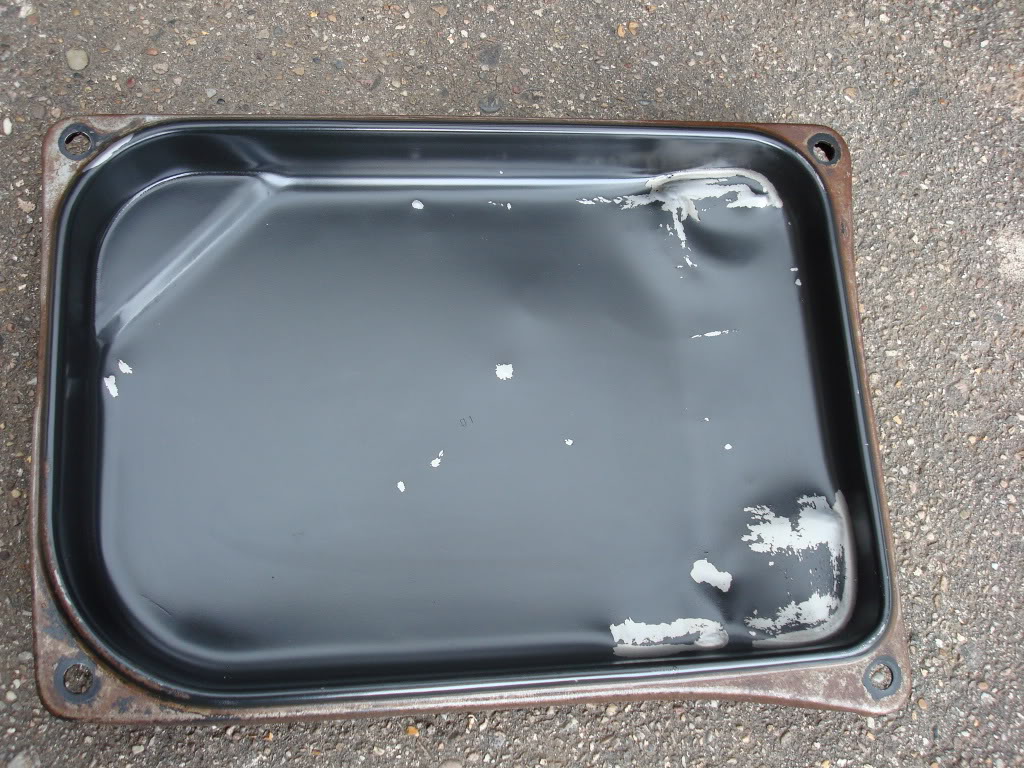
looking underneath the 4 13mm bolts that hold the pan in place should be visisble.
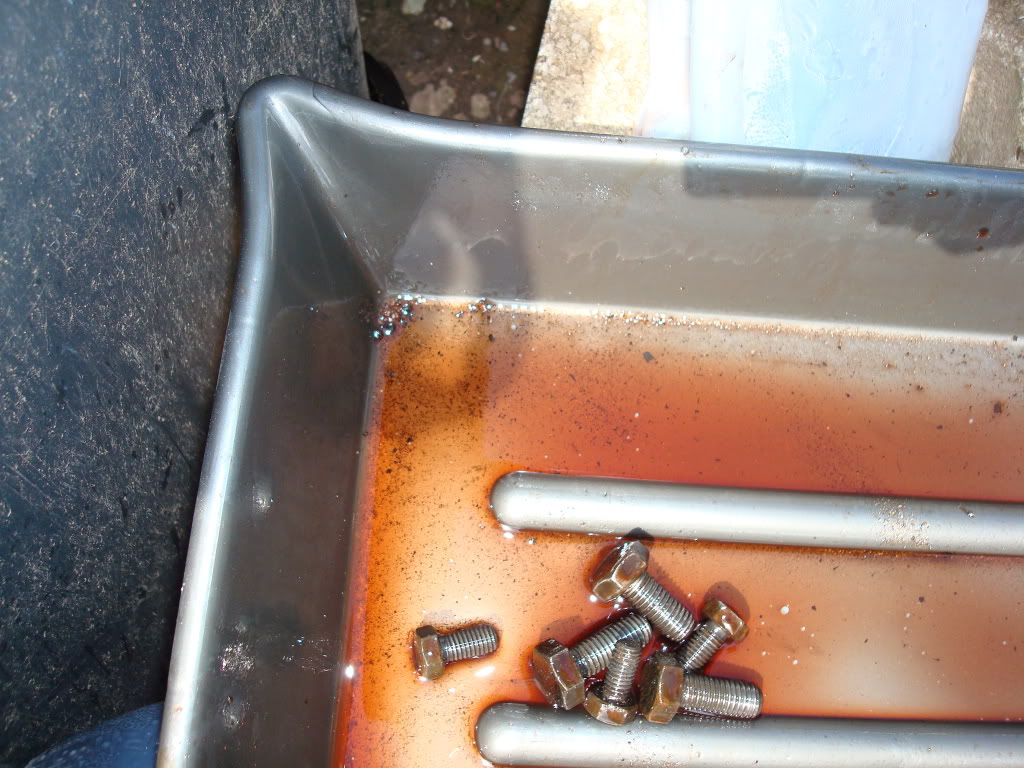
place a suitable container to catch the fluid as it drains, I had a purpose made one from the motor factors.

Slaken off the 2 rear bolts and let some fluid run out for a while, then move to the front and undo these slightly, there should be quite a flow by now.
When the fluid has all but stopped, undo the front bolts completely and undo the rears so the front of the pan is tilted forward to drain off even more, remember that the pan it's self will be full of fluid too.
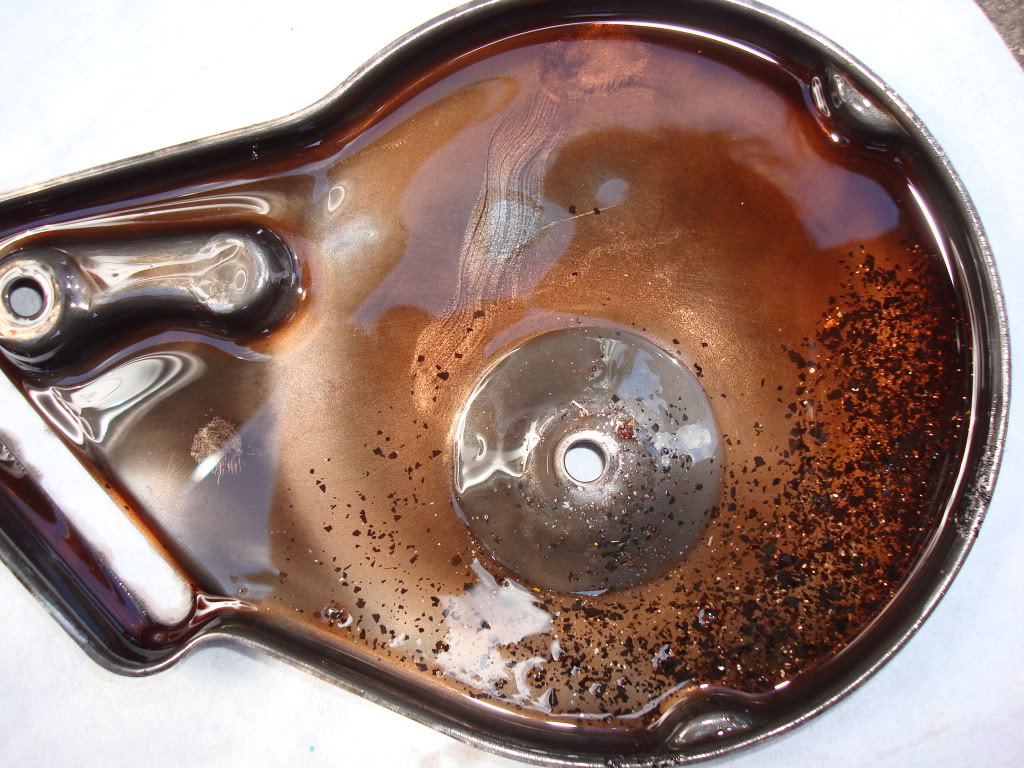
Undo the rear bolts completely and lower the pan down and drain.
There will still be some fluid dripping so make sure your tray is in place.
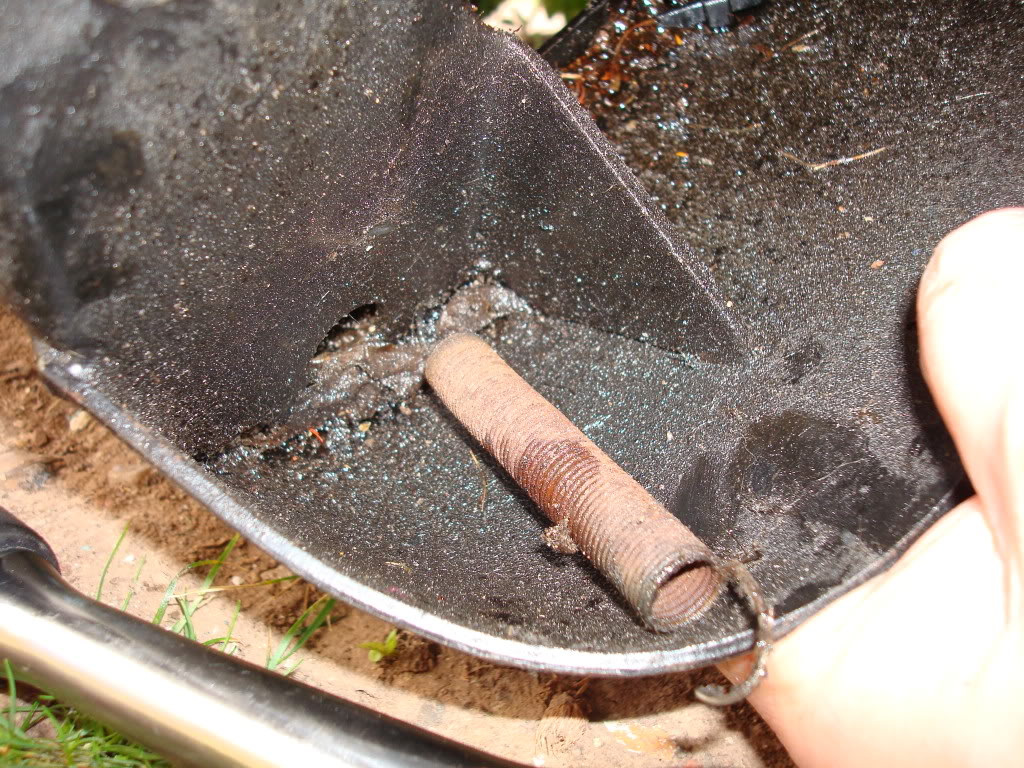
You will see the strainer cover is held on by 2 screws.
One middle and one further towards the front.
Remove these screws and place the cover with strainer to one side.
Mine had quite a lot of bits in the bottom of the cover.

Whilst the rest of the fluid is draining, clean out the bottom of the Pan and strainer cover.
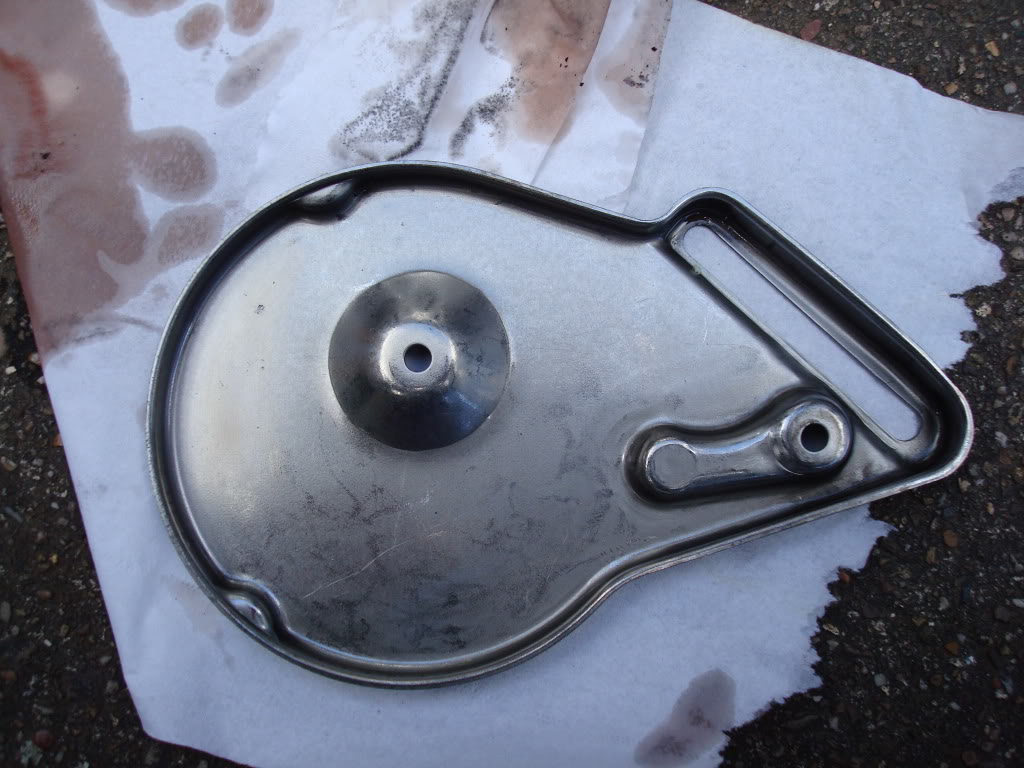
If the strainer is damaged replace. part No 010 325 421 A
You can see all the debris in the bottom of the tray here.
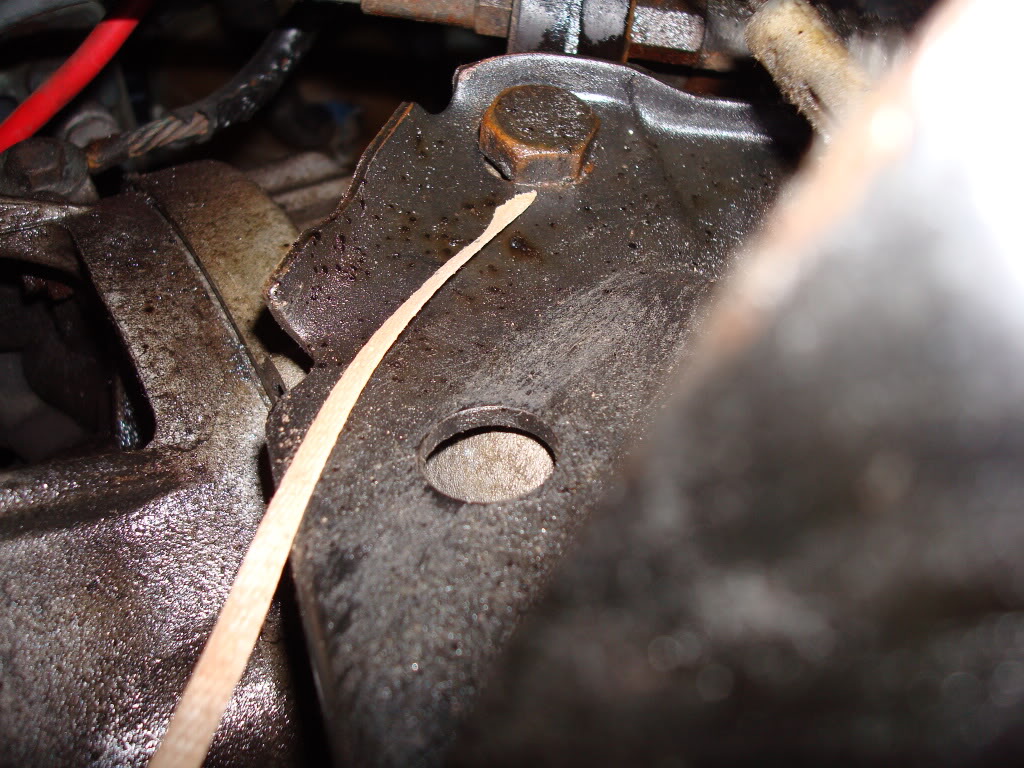
Remove the paper strainer cover gasket and replace with the new one.
Place the new pan gasket into position on to the pan, noting that one of the corners is a slightly slower radius to the others, on the rear left hand corner.
Screw the pan cover with the strainer replaced in place and torque to 2.2 LB/FT
Place the pan and gasket in place and replace the 4 bolts, tightening in sequence, make sure as you do this the gasket is seated into it's groove.
Hand tighten and torque to 15 LBS/FT.
I used a funnel and a length of tube inserted into the gear box oil dipstick tube, start pouring in the new ATF fluid, keep checking underneath for drips.
I put in about 3 litres.
Finally replace the sump guard, remembering to re hook the spring and your dipstick.
Originally I had a constant drip from the front of the sump, so after topping up with a couple of litres I decided to give it a full change and set of seals. It appears that in the rear left hand side of the locating groove was fouled, so I had to clean this area up, as this was causing the leak originally.
So far there has been no further leaks, happy days.
I have no idea of when the last time mine was done judging by the colour of the old fluid.
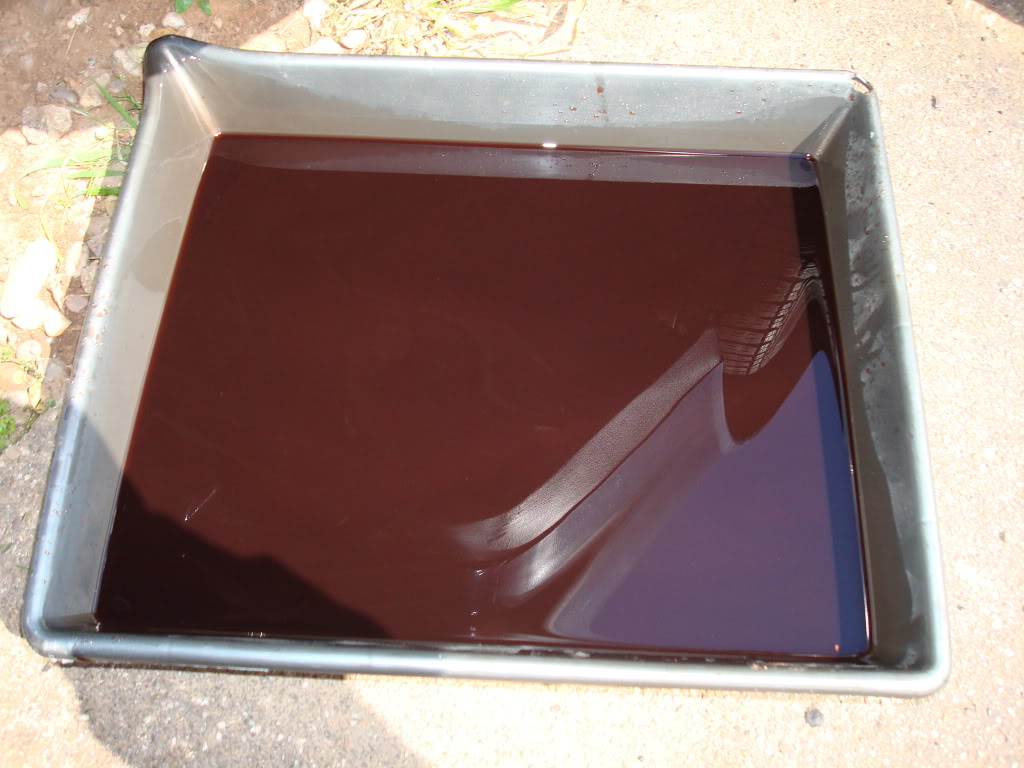
I got this much out, not including what dripped onto the drive :redfaced:

Big thanks to superworm for the technical data/part numbers and original explanation.
Oh and go for a drive. Re check the level and adjust if neccesary.
Is there any way of moving the dipstick tube as it is an awkward position to get the dipstick out? :redfaced:
"Making Cabbies More Beautiful One Roof at a Time"�
Posted

Old Timer


should help some people out

Posted
Settled In

How much was the sump gasket??
I just swoped the fluid on mine by sucking out and topping up but seeing the amount of crud you found I've got that sinking feeling…..especially as my fluid was darker than yours!
A job that has moved up the to do list…… 8O
86 Cabby 1.6 auto - Super cool daily retro various
Posted
Local Hero
�17.00 odd and 55p for the paper strainer seal.
yep saw your pump thing on another thread we posted on.
I had a leak anyway so it needed doing pronto.
I wouldn't leave it to be fair, there was a lot of debris in my old fluid.
Like I have put, I have no Idea when mine was last changed, so it's not to difficult to do.
"Making Cabbies More Beautiful One Roof at a Time"�
Posted
Old Timer
and your timing is PERFECT !!! Got the gaskets, now waiting for a less windy, dry and warmer spell to do our automatic. Many thanks.
Owning a Mk1 cabby is a vertical learning curve…
1989 Mk1 Clipper 1.8 automatic - Sadly now up for sale - medical issues dictate)
1999 (Nov) Passat S Saloon 1.9 TDI (AFN) - TUG 1 (Remap by CCC ( - **** …..change pants !!) with cruise control
2000 (Mar) Passat Sport Estate 1.9 TDI (ATJ) 5 speed automatic with Tiptronic - TUG 2�(Remap and cruise control by CCC)
Posted
Old Timer
…how did you clean the strainer - surely can't use any fluids?
..and did you just wipe the pan out with kitchen roll or what?
Thanks….already saved as a word doc and printed for easy ref….
Regards
H
Owning a Mk1 cabby is a vertical learning curve…
1989 Mk1 Clipper 1.8 automatic - Sadly now up for sale - medical issues dictate)
1999 (Nov) Passat S Saloon 1.9 TDI (AFN) - TUG 1 (Remap by CCC ( - **** …..change pants !!) with cruise control
2000 (Mar) Passat Sport Estate 1.9 TDI (ATJ) 5 speed automatic with Tiptronic - TUG 2�(Remap and cruise control by CCC)
1989 Mk1 Clipper 1.8 automatic - Sadly now up for sale - medical issues dictate)
1999 (Nov) Passat S Saloon 1.9 TDI (AFN) - TUG 1 (Remap by CCC ( - **** …..change pants !!) with cruise control
2000 (Mar) Passat Sport Estate 1.9 TDI (ATJ) 5 speed automatic with Tiptronic - TUG 2�(Remap and cruise control by CCC)
Posted
Local Hero
I brushed the strainer with a soft toothbrush, it's not reccomended that anything that can leave fluff behind is used as this can can cause a blockage.
I got most of the bits off mine, some were stubborn, If I was to do this again I would get a new strainer too.
Perhaps in another 24,000 miles I will lol.

It was a messy job and I had to avoid the frequent showers and hail
Not sure if you could use other fluids to clean with?
I wiped out the pan with a microfibre cloth, but gave it a really good shake, it really picked up the rubbish and left no fluff or lint behind. I would not advise using paper towels.
"Making Cabbies More Beautiful One Roof at a Time"�
Posted
Old Timer
Mmmm…might just get the strainer as well….
..just waiting now for a warmish day and the wind to change direction - blowing a gale straight into the garage….my old bones will be complaining !
Owning a Mk1 cabby is a vertical learning curve…
1989 Mk1 Clipper 1.8 automatic - Sadly now up for sale - medical issues dictate)
1999 (Nov) Passat S Saloon 1.9 TDI (AFN) - TUG 1 (Remap by CCC ( - **** …..change pants !!) with cruise control
2000 (Mar) Passat Sport Estate 1.9 TDI (ATJ) 5 speed automatic with Tiptronic - TUG 2�(Remap and cruise control by CCC)
1989 Mk1 Clipper 1.8 automatic - Sadly now up for sale - medical issues dictate)
1999 (Nov) Passat S Saloon 1.9 TDI (AFN) - TUG 1 (Remap by CCC ( - **** …..change pants !!) with cruise control
2000 (Mar) Passat Sport Estate 1.9 TDI (ATJ) 5 speed automatic with Tiptronic - TUG 2�(Remap and cruise control by CCC)
Posted
Old Timer
..only when I re-filled with 3 ltrs it was over filled…(checked hot in neutral)!!!
So I siphoned some off (about 3/4 ltr using a washer system tube pushed onto the end of the tube on the trigger top of an old window spray bottle)…was under the lower mark - so topped up a bit at a time….I reckon it only took 2 1/2 ltr in the end…..????? But drove faultlessly…????
Since doing this the changes are noticeably smoother, and I thought it was smooth before!!.
And on the trip to Cornwall and back we hardly noticed the gear changes….impressed!
So, thanks again. :clap: :clap: :clap: :clap: :clap:
Owning a Mk1 cabby is a vertical learning curve…
1989 Mk1 Clipper 1.8 automatic - Sadly now up for sale - medical issues dictate)
1999 (Nov) Passat S Saloon 1.9 TDI (AFN) - TUG 1 (Remap by CCC ( - **** …..change pants !!) with cruise control
2000 (Mar) Passat Sport Estate 1.9 TDI (ATJ) 5 speed automatic with Tiptronic - TUG 2�(Remap and cruise control by CCC)
1989 Mk1 Clipper 1.8 automatic - Sadly now up for sale - medical issues dictate)
1999 (Nov) Passat S Saloon 1.9 TDI (AFN) - TUG 1 (Remap by CCC ( - **** …..change pants !!) with cruise control
2000 (Mar) Passat Sport Estate 1.9 TDI (ATJ) 5 speed automatic with Tiptronic - TUG 2�(Remap and cruise control by CCC)
Posted
Local Hero
What colour was the fluid?
I think I only put in about 2.5 litres to be fair, as I had already topped up from the 5ltr container I bought, so that is about I got left.
The problem I have is the dipstick tube is facing into the left when looking from the front and it fouls on on parts of the engine when trying to pull it out.
The problem also is it wipes the fluid off the dipstick before you can see the level due to how tight the stick is in the tube.
I did see a couple of bolts around where the tube bolts in and thought that they could be undone and the tube swivelled to face the front thus making it easier to accsess the dip stick?
If that makes sense?
"Making Cabbies More Beautiful One Roof at a Time"�
Posted
Settled In
With regard to cleaning the bits, especially the strainer…I like the idea of using the toothbrush……I use them all the time but hadn't thought of using one here (and the microfibre cloths) …. again well done.
For finally cleaning everything off, I was going to use my favourite Brake Cleaner (aerosol)….(gerrem cheap at the autojumbles). I use this for nearly all cleaning jobs as it carries the muck away well and evaporates quickly leaving no residue.
I don't recall any probs with the dipstick….I'll have a look at Tracey's this weekend and if it seems OK I'll grab a piccy so you can compare.
Cheers
Mk1 GTI
B5 Passat Estate 5 SPeed
Riley 1071"S" Elf Mk2 (Bl**dy Hooligan machine!)
Bosch Lawnraker 32
B5 Passat Estate 5 SPeed
Riley 1071"S" Elf Mk2 (Bl**dy Hooligan machine!)
Bosch Lawnraker 32
Posted
Local Hero
mine was desperate as you could see that it was dripping.
It was your description plus the part No's that made this easy enough to do, hence the credits.
my dipstick tube points to the left and gets fouled so I can't really accses it

I wonderd if could rotate as there is more room towards the front.

you see it gets caught on the brake manifold and catches on the srvo on the way out and because it's in at a very sharp angle it's knuckle catching too lol.
"Making Cabbies More Beautiful One Roof at a Time"�
Posted
Old Timer
Hardly any muck on the strainer, so the toothbrush trick worked ok…
My dipstick is slightly different…the top end is further forward than yours….and has a metal bracket welded to it to bolt onto one of the bolts for the sump guard….I'll get some pics up later…..I would think you could turn it slightly…????
…and I used a bit of suitable tubing to fit into the pipe, a suitable length (about 2ft) of clear plastic tubing from a Hardware shop , and filled a recently emptied 1 ltr trans fluid bottle - the spout on top just fits inside the tube…..no mess…..
Owning a Mk1 cabby is a vertical learning curve…
1989 Mk1 Clipper 1.8 automatic - Sadly now up for sale - medical issues dictate)
1999 (Nov) Passat S Saloon 1.9 TDI (AFN) - TUG 1 (Remap by CCC ( - **** …..change pants !!) with cruise control
2000 (Mar) Passat Sport Estate 1.9 TDI (ATJ) 5 speed automatic with Tiptronic - TUG 2�(Remap and cruise control by CCC)
1989 Mk1 Clipper 1.8 automatic - Sadly now up for sale - medical issues dictate)
1999 (Nov) Passat S Saloon 1.9 TDI (AFN) - TUG 1 (Remap by CCC ( - **** …..change pants !!) with cruise control
2000 (Mar) Passat Sport Estate 1.9 TDI (ATJ) 5 speed automatic with Tiptronic - TUG 2�(Remap and cruise control by CCC)
Posted
Local Hero
Mine has a bracket welded to the tube which is bolted onto casing as you can see it below the servo.
was there a modification at some point?
A piccy of yours would be good to compare against.
Cheers
"Making Cabbies More Beautiful One Roof at a Time"�
Posted
Old Timer
The bracket seen here goes down to one of the 2 front bolts on the guard…the other end of the tube where it is fitted to the 'box has 2 bolts holding it….don't know if its just a clamp plate so the tube can be rotated…or if it's welded to the tube.

Owning a Mk1 cabby is a vertical learning curve…
1989 Mk1 Clipper 1.8 automatic - Sadly now up for sale - medical issues dictate)
1999 (Nov) Passat S Saloon 1.9 TDI (AFN) - TUG 1 (Remap by CCC ( - **** …..change pants !!) with cruise control
2000 (Mar) Passat Sport Estate 1.9 TDI (ATJ) 5 speed automatic with Tiptronic - TUG 2�(Remap and cruise control by CCC)
1989 Mk1 Clipper 1.8 automatic - Sadly now up for sale - medical issues dictate)
1999 (Nov) Passat S Saloon 1.9 TDI (AFN) - TUG 1 (Remap by CCC ( - **** …..change pants !!) with cruise control
2000 (Mar) Passat Sport Estate 1.9 TDI (ATJ) 5 speed automatic with Tiptronic - TUG 2�(Remap and cruise control by CCC)
Posted
Local Hero
Hmm mine is not bolted to the sump guard.
Very strange, My car is an 88.
wonder if there was a mod?
"Making Cabbies More Beautiful One Roof at a Time"�
Posted
Settled In
Attached are 3 piccies
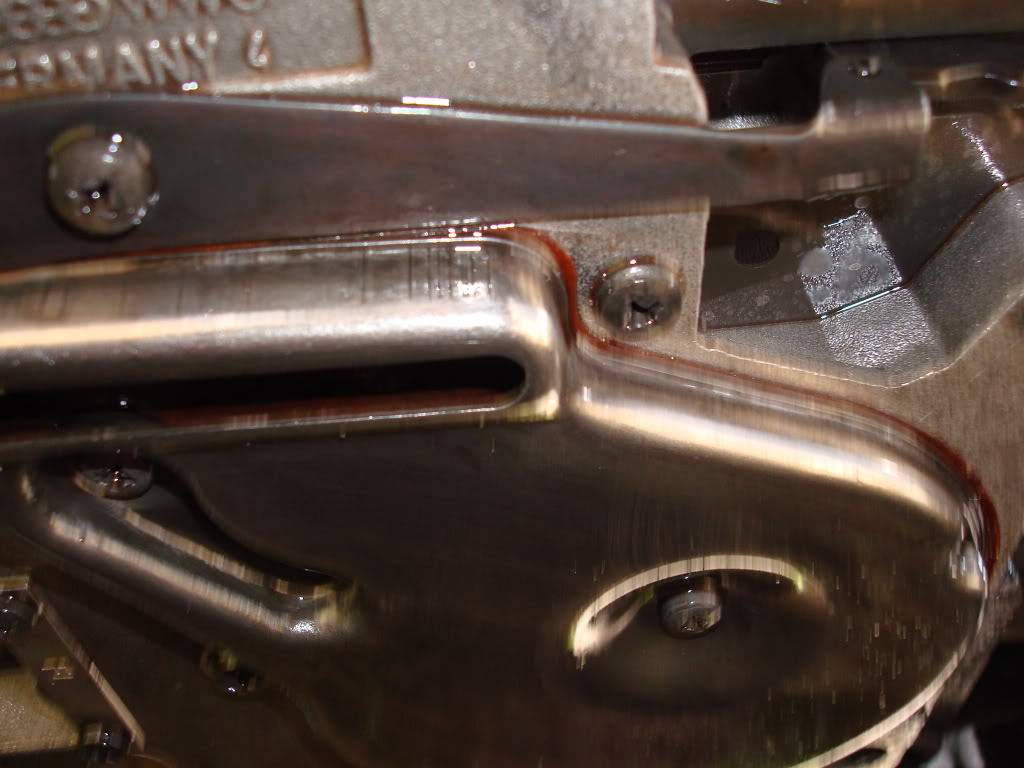
The first is taken from well back so you can see reference parts around it (M/Cyl, etc) to get you orientated….

The second shows the dip stick half pulled out — you can see heads straight for the dizzy body
The third better identifies the strap/bracket which is welded to the tube and is bolted to the auto tranny Sumpguard as described by Prowler….it is quite long and curves over the top of the tranny down to the topmost bolt attaching the sumpguard towards the offside of the cab at the front of the tranny.
Hope this helps…I should be looking to see if a used one can be had which has the correct orientation…According to ETKA, the part number (010 321 405 A) is the same for Mk1 & Mk2 so you may be able to get one from a scrapper….the dipstick may be different also (010 321 431 H) so if you go on a hunt, get both. I'm not sure how this pipe is attached to the tranny….I guess its probably a tight push fit like the engine dipstick tube….I'll know in a few weeks when I get the Auto engine out of Tracey's olde MK2.
Cheers
PS …don't believe there was a mod…..all the dipstick tubes on ETKA have the same part nos for those years that I looked at ('88-'92)
Mk1 GTI
B5 Passat Estate 5 SPeed
Riley 1071"S" Elf Mk2 (Bl**dy Hooligan machine!)
Bosch Lawnraker 32
B5 Passat Estate 5 SPeed
Riley 1071"S" Elf Mk2 (Bl**dy Hooligan machine!)
Bosch Lawnraker 32
Posted
Local Hero
"Making Cabbies More Beautiful One Roof at a Time"�
Posted
Settled In
Maybe you could unbolt yours and see if it comes out of the 'box easily and then post a picture of it so we can see what we're dealing with. If not the same then perhaps you can post a wanted on the Mk2 site…you may have a better chance than on this forum !…supposedly the same part number as far as I can tell
http://www.vwgolfmk2.co.uk/modules.php?name=Forums&file=viewforum&f=9
Cheers
Mk1 GTI
B5 Passat Estate 5 SPeed
Riley 1071"S" Elf Mk2 (Bl**dy Hooligan machine!)
Bosch Lawnraker 32
B5 Passat Estate 5 SPeed
Riley 1071"S" Elf Mk2 (Bl**dy Hooligan machine!)
Bosch Lawnraker 32
Posted
Settling In

did my fluid change today
all guide was very good
surprised how small parts was look at lot bigger on pics lol
now running sweet
thanks again for info and pics
vw dubs for life
0 guests and 0 members have just viewed this: None.