


GarytheGolf

Posted
Settled In

GarytheGolf
<a><img></a>
Posted

Old Timer


Posted
Settled In
<a><img></a>
Posted
Old Timer
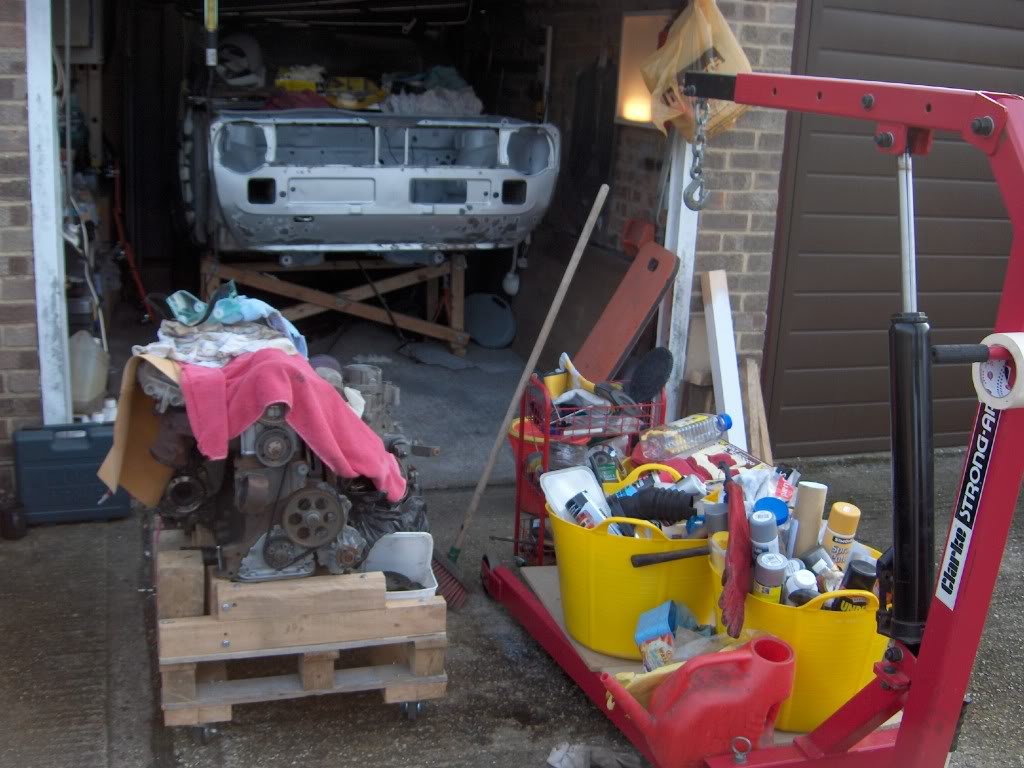
I lifted the front of the car and mounted it on my support jig in the garage. Using the trolley jack not the crane.


When everything is out of the way, there is plenty of access to the engine bay for cleaning / refurb.


I gave the engine a squeaky clean and removed a few parts for access /refurb.
A single garage is very tight for storage, everything is put away for another day.

 Last edit: by Malcolm
Posted
Old Timer
In addition, I removed the footbrake bellcrank mechanism, servo & master cylinder and front brake pipes. All the cables, speedo clutch, throttle, bonnet release have been removed.
The only things I cannot remove are the fuel pipes, I can move them out of the way though.
Looking at the rear firewall of the engine bay, you can see where the clutch cable comes through. On this car there seems to be a reinforcement plate already fitted by VW. I shall have a good look to see if any further reinforcement is required.

and likewise the rear brake pipes. I removed the engine looms, some went inside, the main loom (yellow plug, live and two earths) was disconnected from the fuse board and pulled through.

One of the great things about lifting the front end of the car up is the access, I did most of my work sat on a stool inside the bay.

Apart from general surface rust , no real problems.

I removed the steering rack and disconnected the gearbox linkage. So far, only noticed a few worn linkage bearings to be replaced. However the steering column gaiter has gone very brittle and will need replacing / repairing.

The bay is ready for cleaning, derusting and paint prep. My plan: I intend to paint the bay myself, reinstall everything and get it running before the car eventually goes to the paint shop.
Last edit: by Malcolm
Posted
Old Timer
I destroyed an angle grinder gearbox in the process, got a free replacement under warrranty, and ended up with my drill only going in reverse. Manged to fix that myself.
Surprisingly it was mostly surface rust in the engine bay with only a bit of a split in the scuttle panel.

I still have some work to do on the inside / middle of the front panel and around the lights.

Having a break eating my sandwiches I noticed that there is some more work to do.

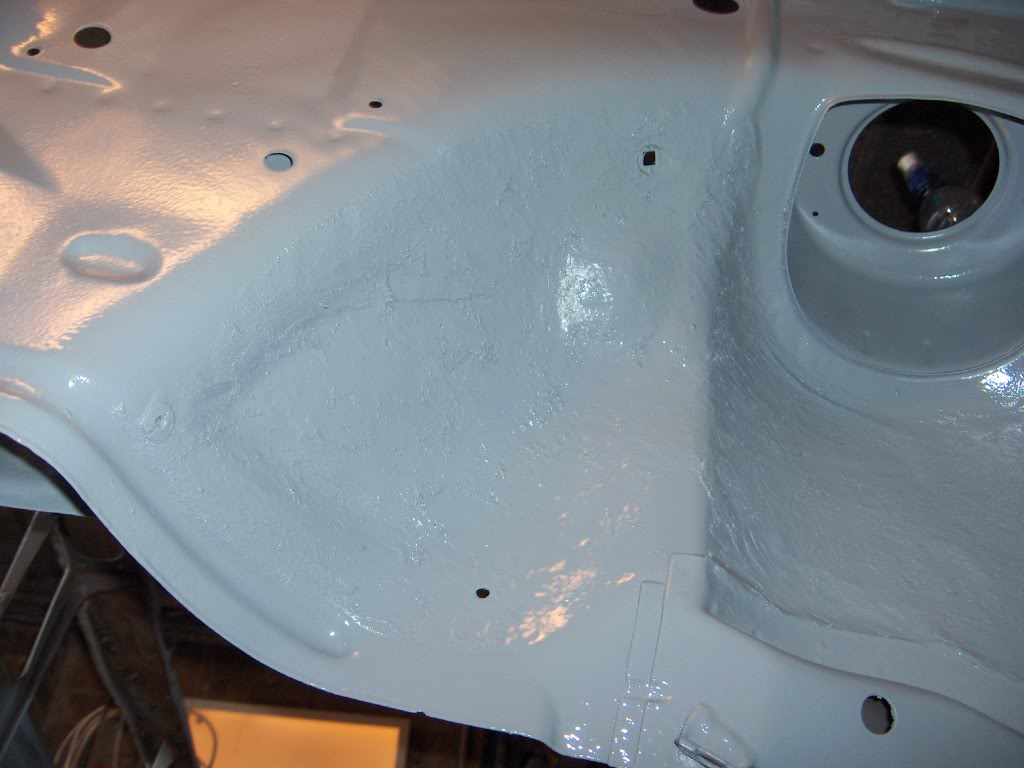
With all this bare metal I needed to protect my work before the end of the day as I am unable to work on the car for the next couple of weeks, so I keyed with wet & dry, washed with soap and water and wiped down with thinners to make ready for paint.


Engine bay sprayed with Upols Acid 8 Etch primer. Use a mask for enclosed spaces. Pretty happy with my work.


As usual time to pack the stuff away. Still a mountain to climb.
Last edit: by Malcolm
Posted
Local Hero

Diesel Possessed
A97JCE
Feeby
A97JCE
Feeby
Posted
Settled In
Posted
Old Timer
Posted

Old Timer
Dibbler.
Golf MK1 GLi Golf MK2 GTi Golf MK3 GTi Galaxy 2.3 Ghia X Seat Inca 1.9 Diesel Tomorrow is almost over, today went by so fast The only thing to look forward too is the past.
Posted
Old Timer
Discovered the garage roof leaks now, not the best time to get it replaced. I am now covering the front of the car and engine with a tarpaulin to keep dry.
Managed to do about 4 hours today before the heavens opened, here is an update since my last entry.
Where required, the front wheel arches have been stripped and original stone chip roughed up.
Drivers side. Door post solid.

Hardly any rust anywhere.


The only rust I could find, this has been removed and treated.

The front wheel arches etch primed, original stone chip primed.

New stone chip applied.

Passenger side.

Again door post solid.


Finished off with some stonechip paint in the engine bay around the vunerable areas.


Under the battery tray, inner wing and lower front valance

Pretty happy with the work done. Still have the scuttle and inside front panel to address, that's for another day.
Last edit: by Malcolm
Posted
Settled In
Posted
Old Timer
Looking forward to getting a full day done tomorrow. unfortunately to refit the front suspension and allow the car to be removed from the garage and the garage roof replaced.
Posted
Old Timer
It's been some time since my last post, in that time I had to refit the front suspension and move the car out of the garage to have the garage roof replaced.
Due to weather the replacement took about five days before I could get the car back in again, the car up in the air and the suspension off again. I have had to put the engine and gearbox in the back garden under cover to gain some space in the garage.
The front has had some stone chip applied to the lower scuttle panel and coloured for protection, I intend have a professional respray done at a later date.

The paint has also been applied in the engine bay, quite a few coats using cans with the clear laquer on top. The finish is not bad with only a few runs that can easily be covered up with a loom or engine or two.


So far I have focused on the steering rack and wishbones. The steering rack has been checked for wear including the track rod ends. The gaiters are OK. The usual squeaky clean and POR 15 treatment followed by satin black paint.


The knuckle joints initially looked OK, but once cleaned one was quite loose, so I decided to replace both of them. The rivets were drilled out, wishbones refurbished and the new joints refitted with bolts.


I also refurbished some of the gear change components, plus purchased a linkage recon kit from ebay.

The car is 4 speed and I have a 5 speed box which I intend to fit. Later 4 speed cars seem to have similar linkages to the 5 speed with only afew differences, I have yet to source a few components.
The steering rack is temporarily refitted, I need to sort out the gaitor which is quite brittle and cracks. I have already tried to glue the breaks, the gaitor is quite expensive to replace costing �35-40 from fleabay or CQs

The wishones are refitted with new rear bushes, the fronts are OK. The front bolts are temporary, with the originals getting cleaned up.

My next few jobs will be the front struts and hubs, I have got to change the front bearings as one it shot. I may have to seek a garage to replace the bearings.
I intend to retrofit front and rear anti-roll bars from a GTI, which I have already aquired, but need to drill extra holes in the front wishbones.
to be continued !
Last edit: by Malcolm
Posted

Old Timer

Posted

Settling In

I'm just delighted, congratulations for good work .
Greetings from Bulgaria..
Posted

Settled In
Your approach to this car is very professional and Im rescpeting that kind of job! :clap:
Very nice mate :cowboy:
Das Gnoj 1,1L 1978.
FEEL FREE TO VISIT US ON www.golfmk1.com.hr


FEEL FREE TO VISIT US ON www.golfmk1.com.hr
Posted
Old Timer
Posted
Old Timer
I have been focusing on the front struts and the wheel bearings. I managed to separate the front wheel hubs with the pullers I had and refurbished the bearing carriers and stub axles.
Then took a members advice and had the new bearings fitted by an independent VW specialist garage during the week at a cost of �30. half an hours work nowadays.
One word of warning though, a few days after they had been fitted, I realised the disc backing plates had been fitted the wrong way around, the discs and wheels would never fit on the stub axlle flanges.
I had partially assembled them myself, my error was not noticed by the garage before fitting the bearings. This caused some lost of sleep when I realised the error late Friday night.
I managed to rectify the situation Saturday morning by cutting the disc backing plate near the front caliper mounting and rolling the metal each side like a can of spam opener to allow the disc backing plate to be removed over the hub bearing carrier. They then could be fitted the right way, unrolling the metal back into position with some manipulations of a pipe wrench.
The front struts were stripped and the innards taken out. The strut holders, springs and caps were derusted, pickled and por-15'D. The strut and wheel bearing holders were oversprayed with satin black.


The springs have to be compressed quite alot to allow the strut to be re-assembled with all of its components.

New strut inserts have been fitted with new top bearing kits.


The struts and wheel bearing carriers are assembled and installed onto the car with the wishbones. The wheel bearing kits I bought came with some nice new bolts & nuts for assembly, very useful.
Note the disc backing plate now fitted the correct way around !! Camber and alignment checks will be left to another day.

Maybe next weekend, I can get the car back on the ground.
Last edit: by Malcolm
Posted
Old Timer

Halfords caliper paint. I use this all the time.


What miserable weather for a Bank Holiday! I decided to take over the dining table, with a few worried looks from the wife, to re-assemble the calipers.
I was able to get new seals from ebay, however the external piston boots supplied were a slightly different shape. I was able to re-use the original boots after cleaning.
I was quite amazed how the parts all came up, particularly the pistons, guide pins and the anti rattle springs. Clean everything with methylated spirit before assembly. I had already assembled the rubber and plastic sleeves back into the caliper body

I was able to get the red rubber grease or assembly paste. In addition the mechanical green grease for the guide pins and good old copper grease for the threads.


I always buy new tools as I need them.

The red rubber grease is used for all those parts incontact with the brake fluid.

After fitting a new seal, use the tool to wind the piston back in.

The external boot fits over the piston and pushes into the caliper housing. Put a little extra grease in the boot to keep the moisture and dirt out.

Assembly of the outer mounting with the guide pins. Guide pins are installed with copper grease to ease later dismantling as required.

Green mechanical grease for the guide pins, this grease is not for use with brake fluid.


You can see that these calipers are the MkII Kelsey Hayes type. I believe that these where also used on the Mk 2 Golf and could accept GTI vented discs.


All assembled and ready to fit on the car. It's still raining !! maybe tomorrow!. I am happy with my work today.

Last edit: by Malcolm
There are too many online users to list.