83 GTi - now MOT'd!
Posted
Settled In


Posted
Old Timer


Citric acid finally did it's job on the rad cowling.
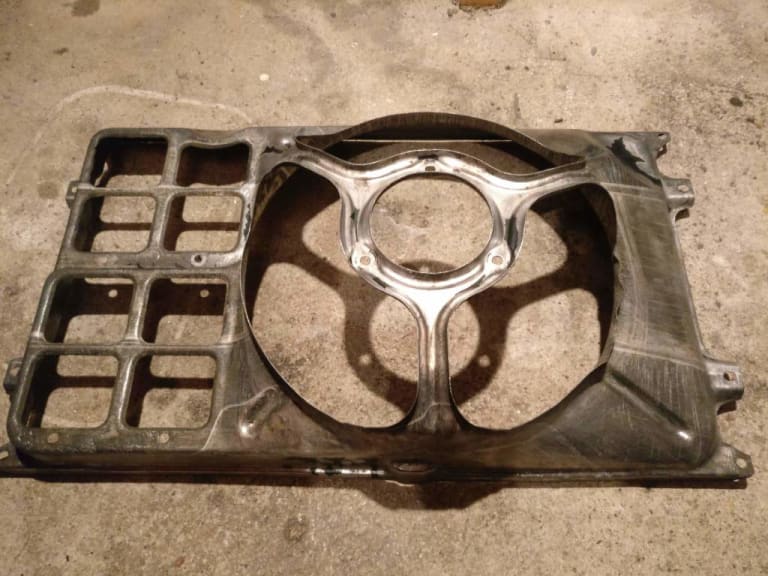
It has obviously been knocked about at one point as one of the edges was a little rippled.
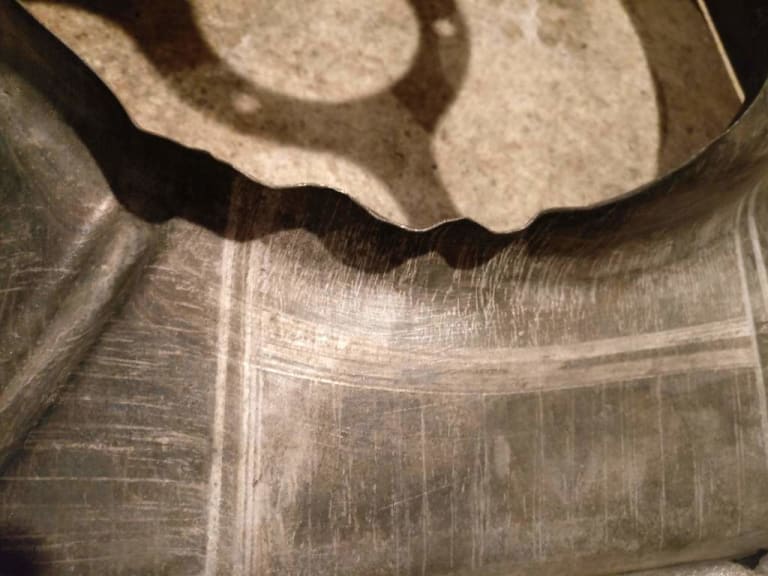
I knew that trying to bend it back with pipe grips was just going to make it worse, so I made a former from a bit off wood marked off a tidy section. Does it fit..?

I figured I could apply some heat to the damaged edge and knock it back to the correct shape. After a bit of gentle persuasion with a hammer and a few costs of primer and paint, the finished result:
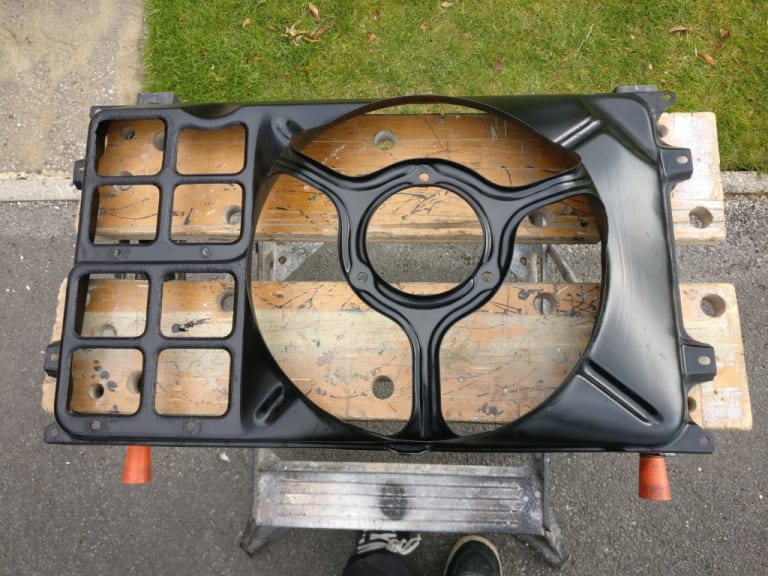
The dodgy bit was on the right - it still looks a bit off in that photo, but it's not. Granted, it's not perfect, but a darn sight better than it was. Pleased with that.
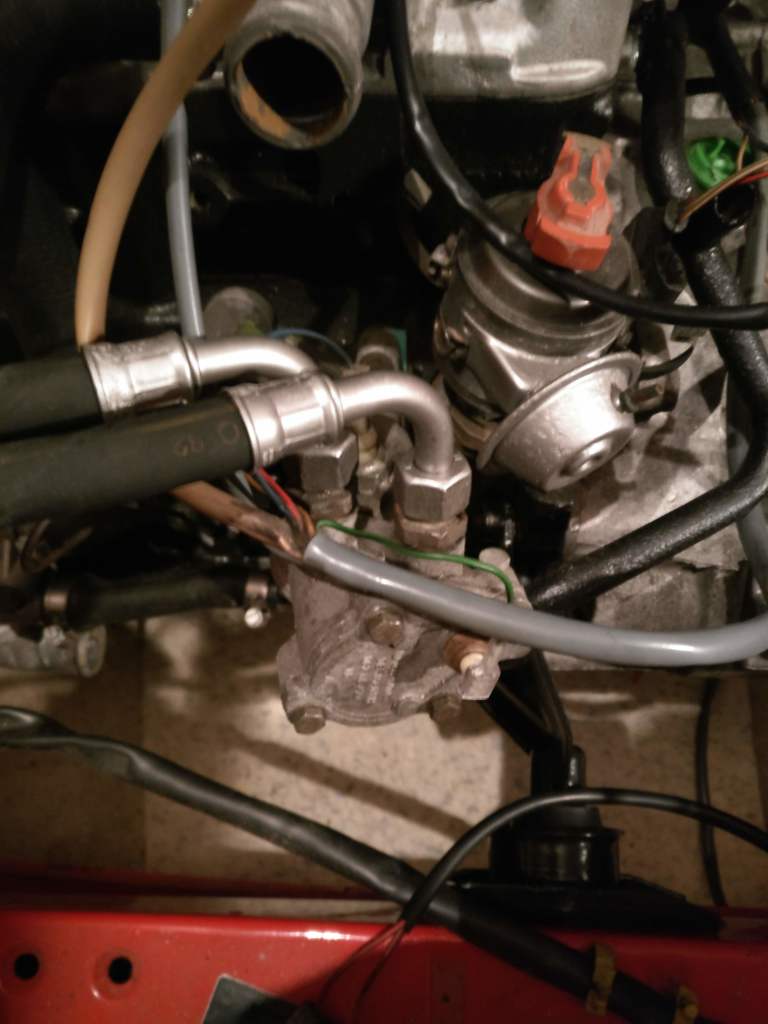
Got the oil cooler mount bracket sprayed up and fitted the new cooler.
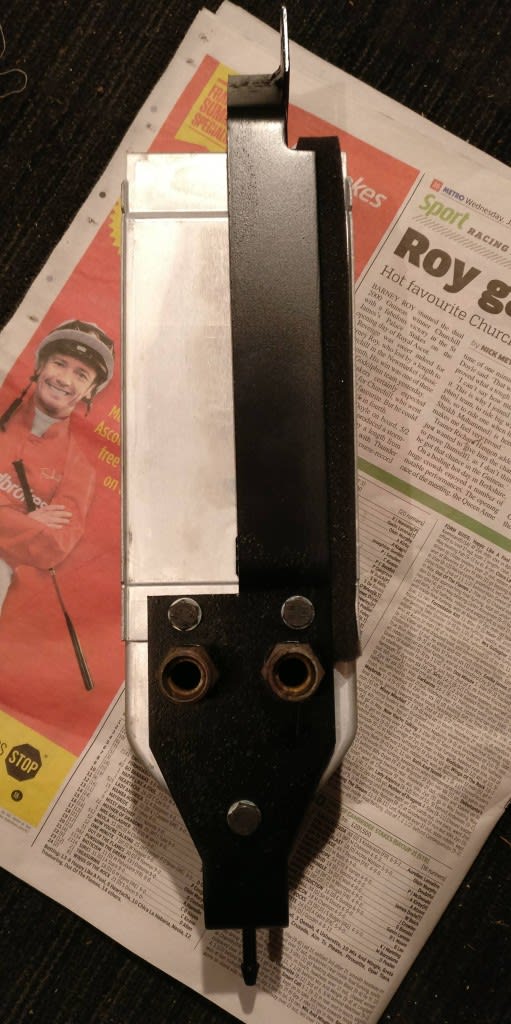

Oil cooler fitted and plumbed in. I sprayed up the pipe ends, think they came up quite well. To be fair, they weren't that scabby.

Assembled the radiator, fan and cowling and got that connected up.
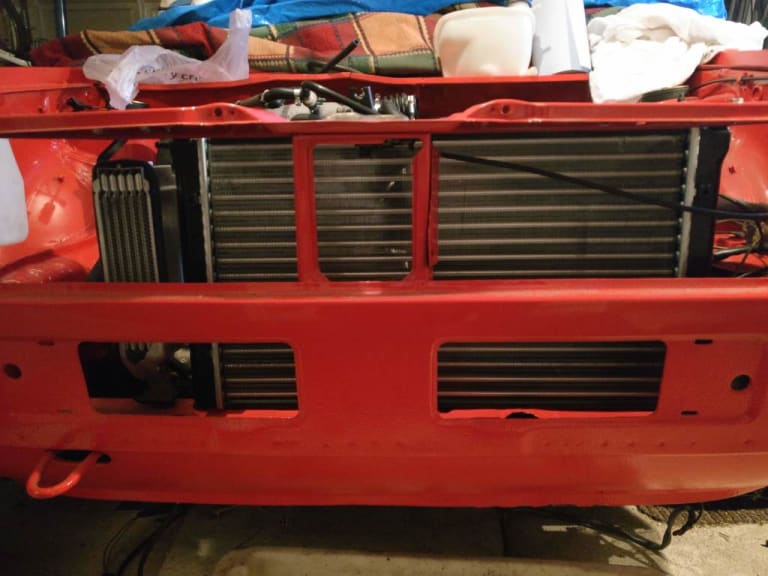
Whilst looking at a pic on Pistol's rebuild thread, I noticed that my radiator wasn't on the same mounting points on the slam panel as mine, however, the pipes fit perfectly where mine is mounted, so I'm going to leave it where it is. I don't know which is right, but it's not a big issue for me either way.

I bought a 16v WUR off ebay a while ago, turns out the vac diaphragm had gone (could pull air right through it). Thankfully I hadn't paid much for it at all, so I bought a refurb kit - that was expensive! good kit though, all nut's and bolts including new banjo bolts and mounting bolts and very detailed instructions. Set about cleaning and rebuilding it.
Before:

About to rebuild (good use of the kitchen tray!).
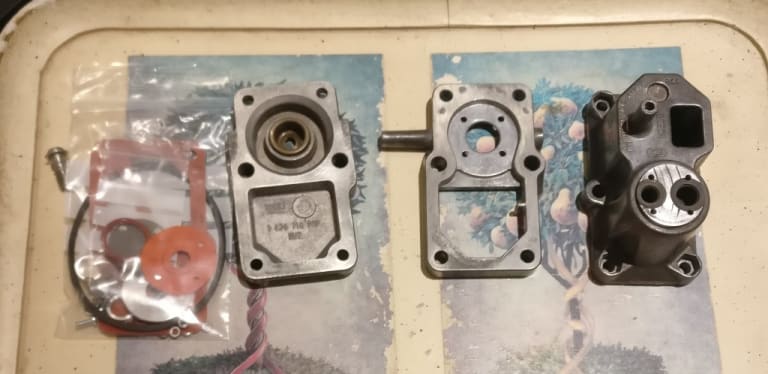
Had to put my glasses on for that job. Right fiddle!
Finished article:
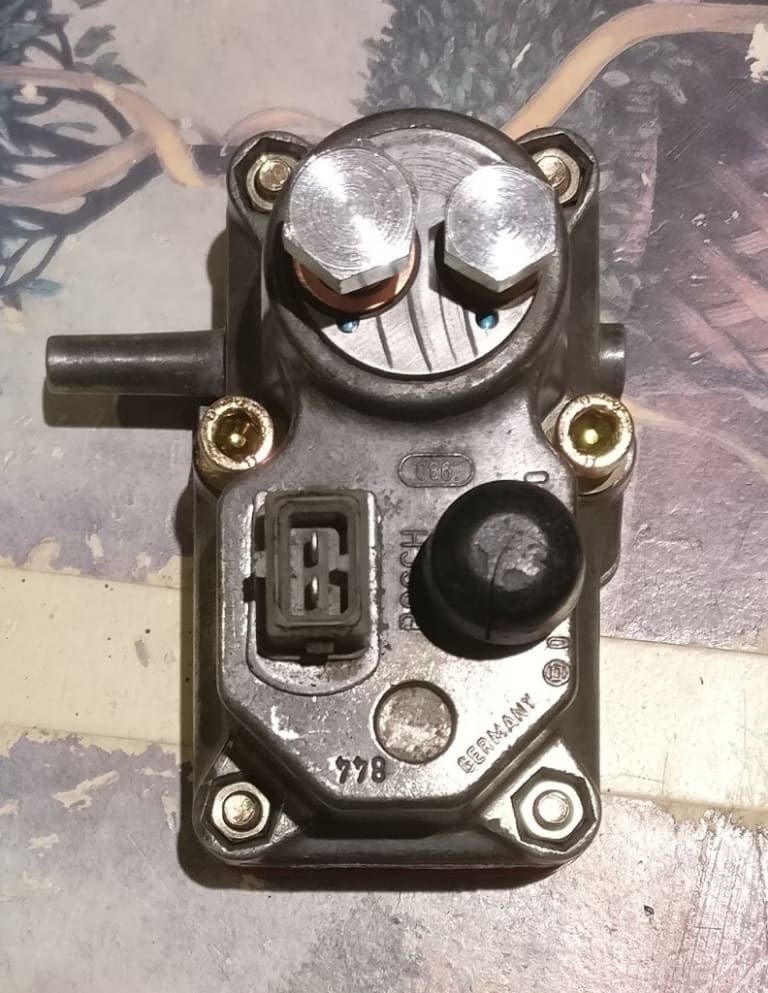
hard to get a good picture as the lights in the kitchen are too bright. It's not polished, but it's not filthy any more. The scoring on the fuel cell is original, I just cleaned it all up.
I bought a kit for doing the fuel distributor as well, so that is my next little job.
Anyone have any recommendations as to where I could get the banjo bolts off the fuel distributor re-plated? That's the only thing I'd really consider re-plating on my motor so I don't think it's not worth me investing in a kit. Assuming it's cheaper than just buying a new set...
Thanks for reading!
J
Posted
Old Timer


Tackled the fuel distributor - not too bad a job, the kit I bought had some very detailed instructions, and coupled with an issue of Practical Classics where they covered a re-build, it went well. The true test will come when I get round to firing it up.
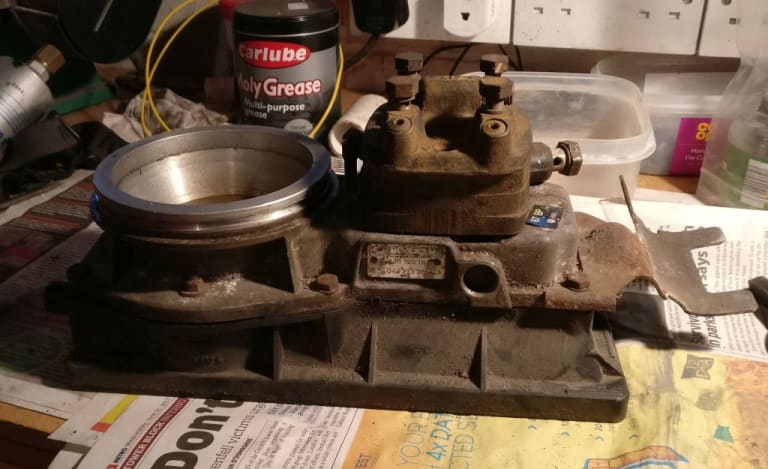
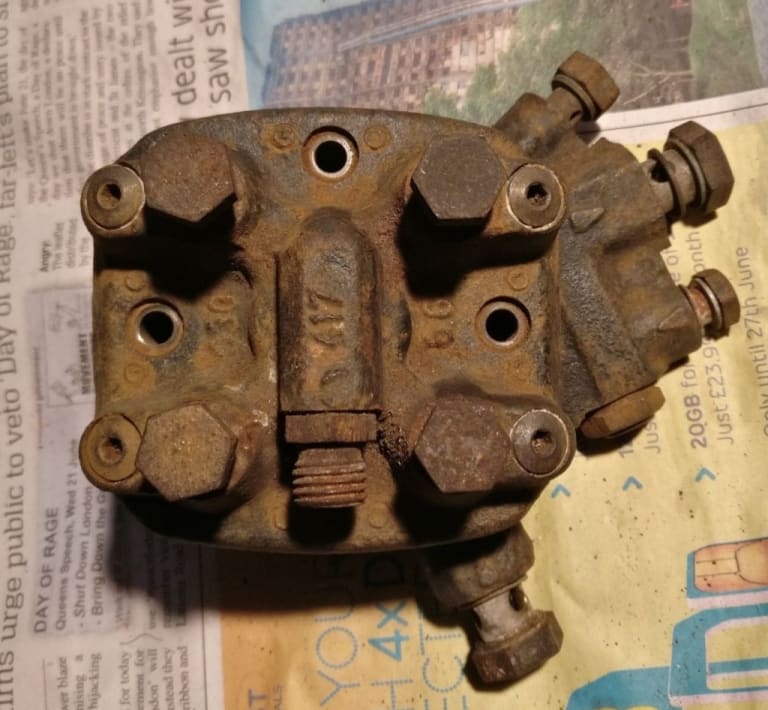
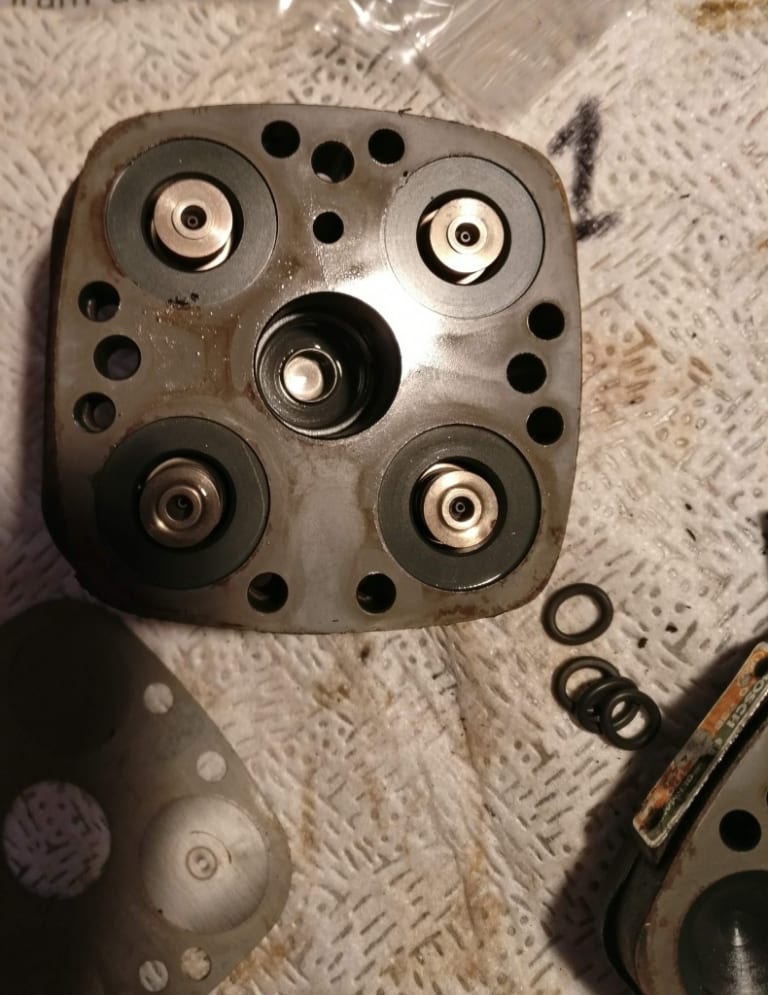
Getting the rings that hold this filter in place was a challenge. Was convinced I was going to tear the fine filter…

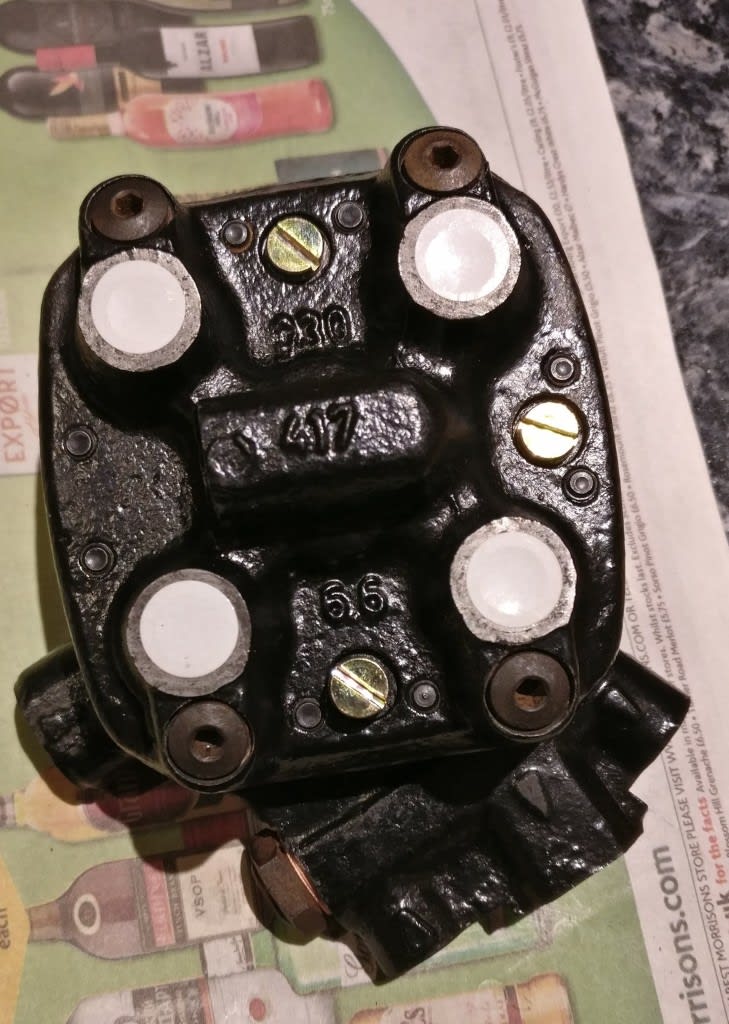
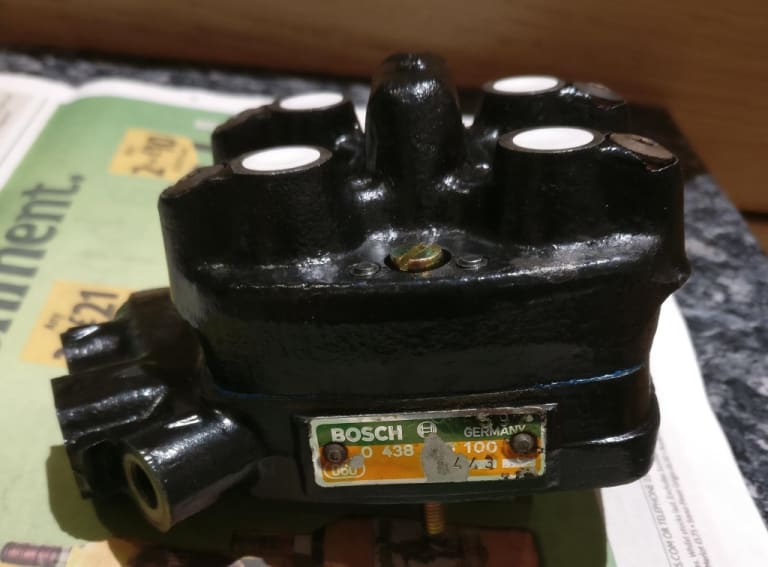
For some reason I haven't got a pick of it all assembled back on the airflow unit - will take one next time I have it out the box it is resting in.
I ordered some new banjo bolts from the same place I got the WUR and Fuel disty kits from, so that will make it look nice and tidy.
Also modified the WUR so I can adjust the cold pressure (the other mod that is done on the rear is for warm pressure). Pretty easy with a pillar drill.
Finally got round to getting some brake fluid in and doing an initial bleed with a pressure-bleeder thing. What I didn't realise was that one of the front bleed nipples wasn't properly seated so I ended up with 1/2 litre of brake fluid all over the garage floor. I hate brake fluid - it gets everywhere you don't want it to. I'll leave it a couple of days to let any remaining air gather and then do it again. Once I connect the brake pedal back up I can do an old-school bleed and make sure there aren't any other leaks! On the subject of the brake pedal, if anyone has any advice on how to set it up correctly, I've a post in the Help section that could do with some answers.
Got some gearbox oil, so I'll fill that tonight. Next job is the fuel tank. I had it off a long time ago and cleaned it all out and it was in good condition, but since then it has been sat empty. I'm having nightmares that it has gone all scabby inside, and keep putting off taking a look, but it needs checking before I hook up the pump and accumulator.
J
Posted
Old Timer


Tested the sender gauge with a DVM - no joy - so I took it apart, cleaned up the contact points, and bent the contact arm a little more - sorted.

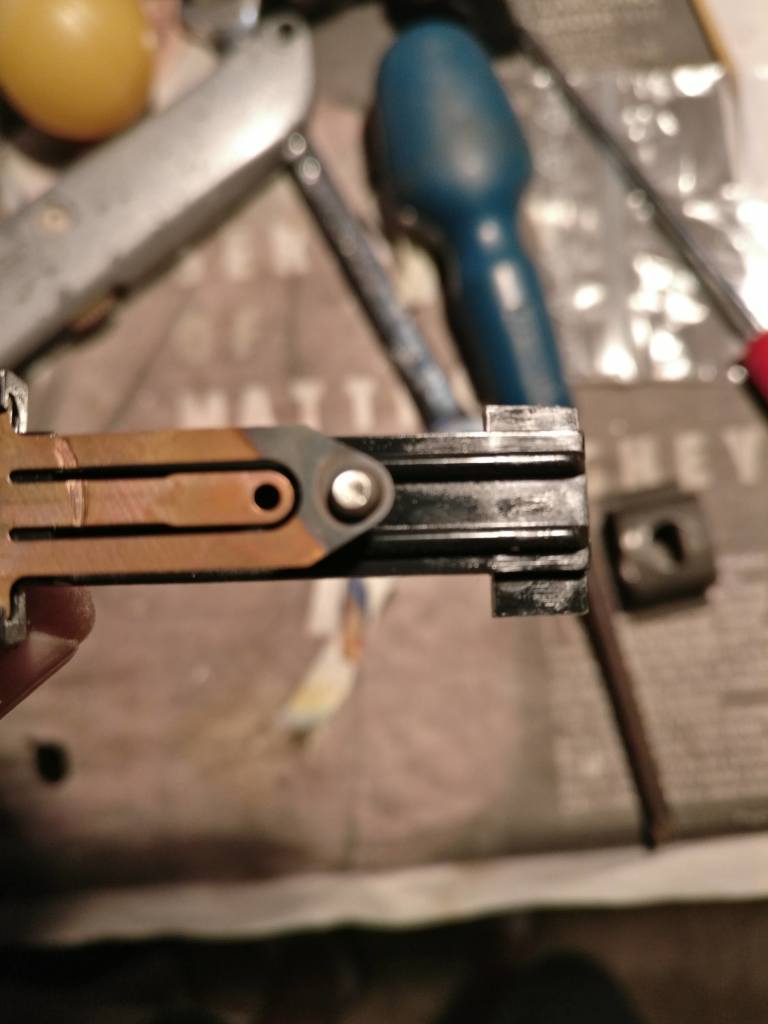
Got my brake pedal connected up. In order to get the measurement of the pedal to linkage rod correct, I removed the rod entirely, assembled it on the bench at the correct length, and then marked the rod up so that I could reassemble to the correct length back in the car.
I was then able to do a proper bleed through of the brakes, unfortunately, I found a leak. Join to the flexi over the rear axle. No way to get to it without part dropping the axle, just glad I'd copper greased the nuts. In the end I had to make up a new line to the drum as I couldn't get it to stop leaking. PITA that was. Pedal feels alright, but will do it all again once I have a seat in the car!
Fitted accelerator and clutch cable - routed both under the 5th injector. I don't think my clutch cable has ever gone that way, but thanks to a post on here I discovered that is the right way. The clip that is supposed to hold the clutch cable along the rocker cover was past it's best so I used a P-clip instead. Actually looks quite tidy. Speedo cable was a pain - turns out the bolt the hold it in to the gearbox is M7x1.25 - a very non-standard size, and no, I couldn't find the one I'd taken out! I could pay about £11 for a new one or tap it out to M8x1.25 which is very standard. I went for the tap option and was quite pleased I managed to do that with most of the engine bay full.
I'm so close to moving on to external trim and interior that I actually believe I could have it finished this year!
Posted
Settled In


Might look at the routes of the cables to when re-connecting clutch and speedo on mine - do need the gearbox/speedo cable gasket as mine was knackered so more shopping.
As for getting it on the road this year…. Makes 2 of us there so hopefully they'll get there!!! Keep up the work and the posts!!
Posted
Old Timer


New Yuasa battery also arrived, I went for a 075 instead of an 063 - not much bigger but more amps, and who doesn't like more amps.
Thing is, it looks like I need some kind of adaptor on the rear of the battery where it fits under the lip of the battery tray as the gap seems too big. I don't recall ever having one before, any ideas?
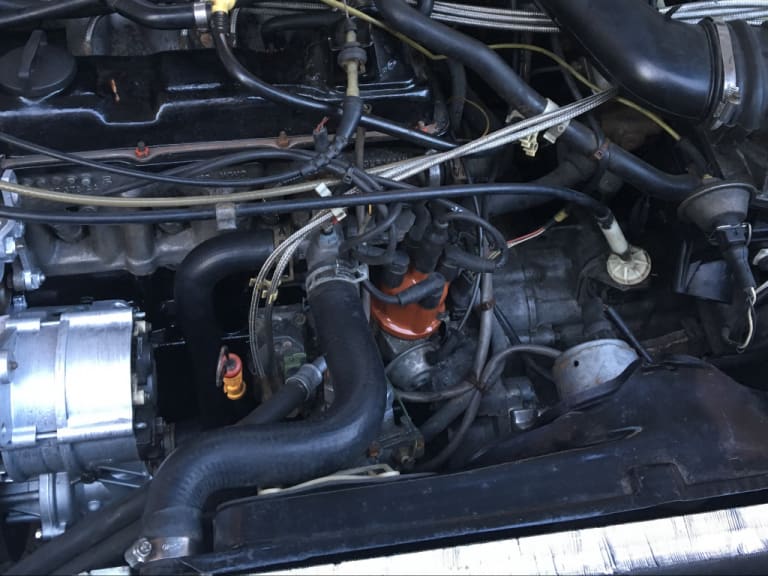
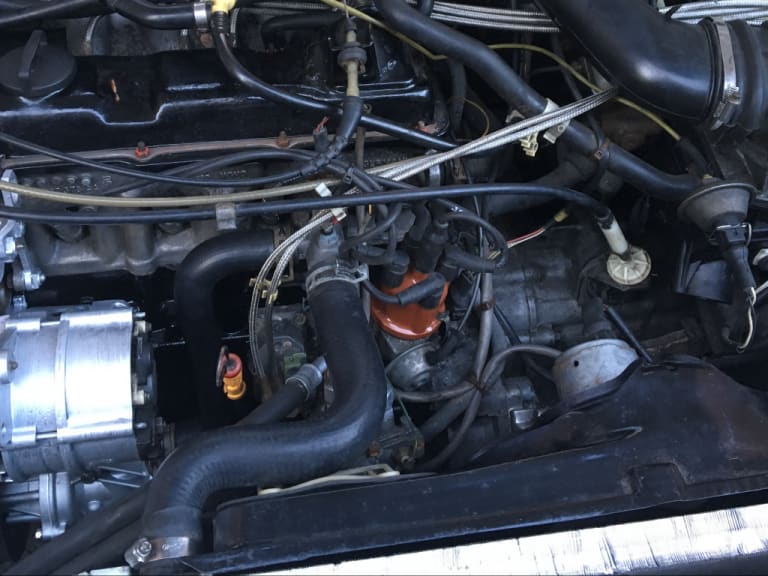
Having the battery in place has allowed me to get the wiring pretty much were it should be and most of it is now connected up. Engine bay is starting to look quite full.
Cleaned up my filler neck - was actually in very good nick given it's age. I had some fuel tank sealer that I bought before I realised you couldn't use it on a geniune tank, so I used it on the filler neck - note, that stuff makes duct tape useless. Was a bit messy, but the result is good - fully lined filler neck! Wire brushed off what was left of the external paint, put some rust converter on the odd bits, and slapped on two coats of red oxide primer. I'll paint it black this evening. Completely forgot to take any pictures of the work in progress.
I bought a MK3 wiper motor of ebay so I could do the standard upgrade - looked like an easy job. Until my motor arrived….

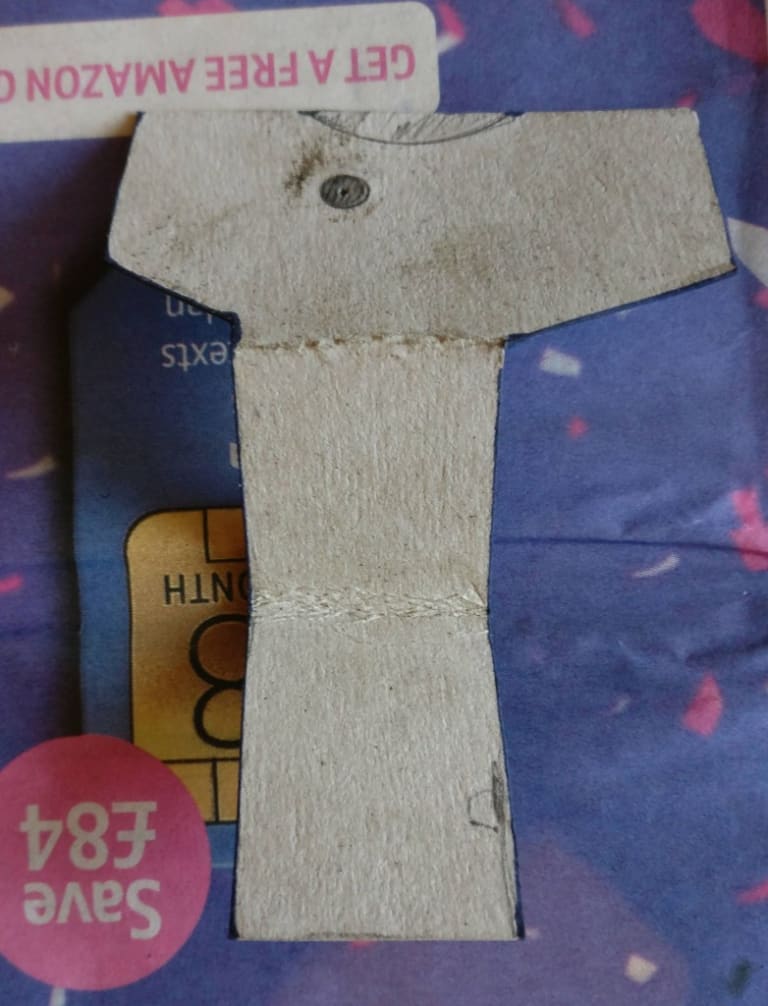
Back plate was clipped on, not screwed, so there was no way I could swap the backing plate off the MK1 motor. Thanks to the power of this Forum I discovered that others had been through this and just ditched the bracket. That seemed a bit rough to me, so set about making a bracket.
Made a cardboard template
Brought it to life with some steel plate…
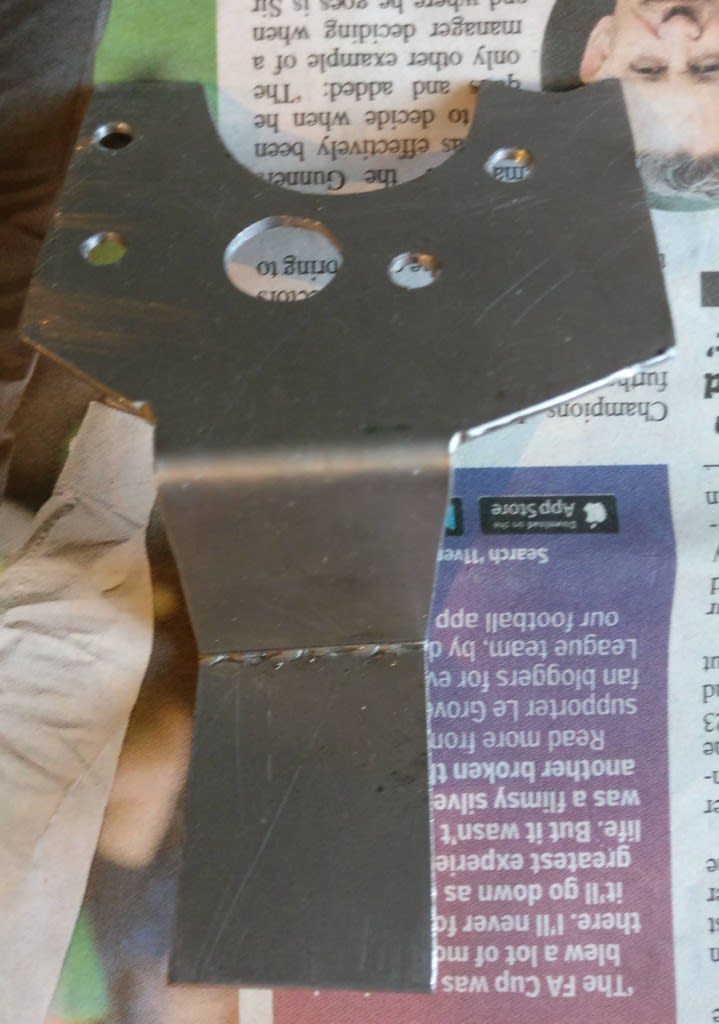
painted it up and fitted it to the wiper mechanism (note, I had to rotate the motor for actually fitting, no way it would go in with the motor on the right! I tried.)

Bought a proper connector for the MK3 motor and connected it up to the MK1 plug. I had a spare motor so I still have the original and I've tried to make any mod I've done on the car reversible back to stock with minimal effort. Again, thanks to the Forum I learned about DIN codes, so now I know what all those little numbers on the Haynes wiring diagrams are!
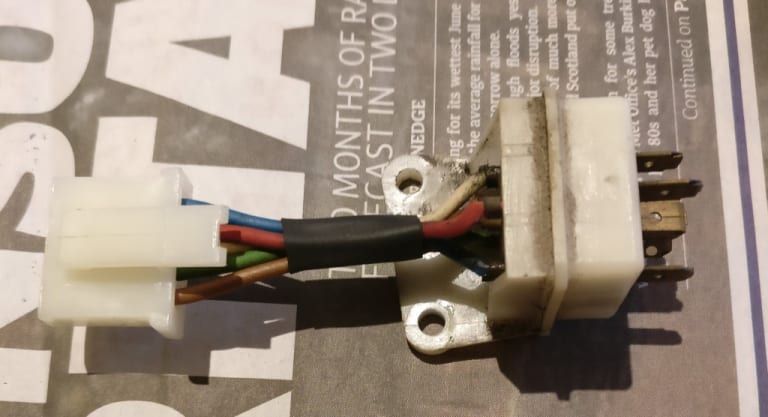
All fitted. I think it looks pretty tidy!
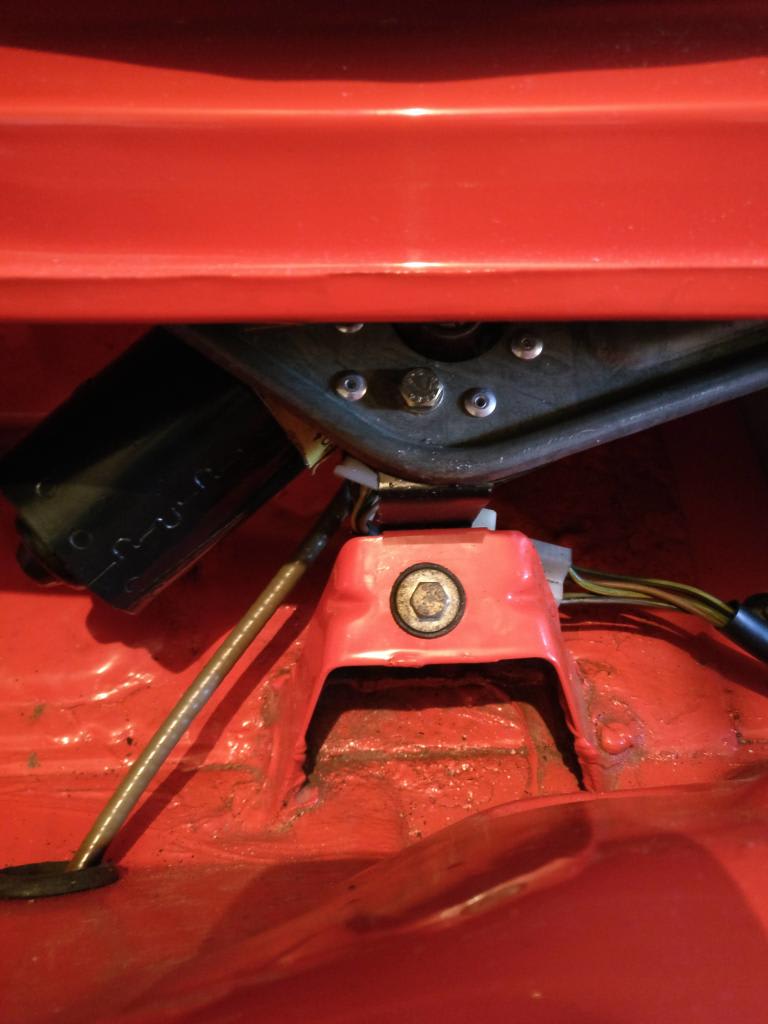
Next up I have to re-adjust the gear linkage mechanism as it didn't seem right. When I did some more digging it would appear that the critical gap measurement is 15mm, not the 19 that is in the Haynes (that I used!). Hopefully setting at 15 will sort it out. Once I've got that set, I need to make up a heat shield to go round the shift boot as I don't recall ever seeing one on my car!
Thanks for reading!
Posted
Old Timer


andyriggers said
Some great and detailed work!!! Looking good!!
Might look at the routes of the cables to when re-connecting clutch and speedo on mine - do need the gearbox/speedo cable gasket as mine was knackered so more shopping.
As for getting it on the road this year…. Makes 2 of us there so hopefully they'll get there!!! Keep up the work and the posts!!
Thanks Andy. I think the only positive thing to come out of this pandemic will be some completed project cars!
Posted
Local Hero


I have either placed some old lino/vinyl floor covering under the battery to lift it up or wedged a wooden dowel between the clamp and the battery. The correct way is use stoopidly expensive bits of plastic in the link below.
https://www.ebay.co.uk/itm/VW-MK2-Golf-GTI-Genuine-OEM-Battery-Base-Adapter-Strip-Pair-Brand-New-Stock/270935283204?fits=Car+Make%3AVW%7CModel%3AGolf&epid=1216966277&hash=item3f15005604:g:A90AAOxybi9Rbn7~
1983 Mars Red 1.8 Golf GTI
1987 Alpine White 1.8 Clipper Cabriolet
The trouble with doing nothing is that you never know when you are finished.
1987 Alpine White 1.8 Clipper Cabriolet
The trouble with doing nothing is that you never know when you are finished.
Posted
Old Timer


J
Posted
Local Hero


1983 Mars Red 1.8 Golf GTI
1987 Alpine White 1.8 Clipper Cabriolet
The trouble with doing nothing is that you never know when you are finished.
1987 Alpine White 1.8 Clipper Cabriolet
The trouble with doing nothing is that you never know when you are finished.
Posted
Moderator


Like the bracket for the wiper motor
With the battery sometime moving it about a bit might help, if it can or I think we may have used the original battery clamp thingy upside down on one battery and that worked weirdly.
Ian
Posted
Old Timer


Posted
Old Timer


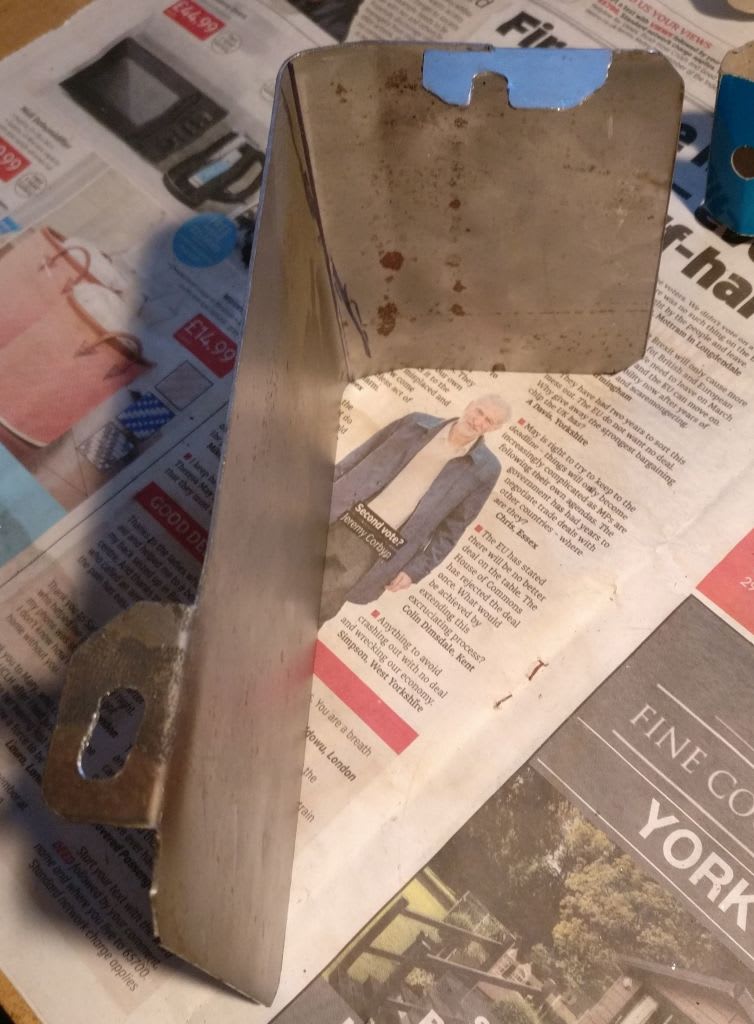
doesn't look to pretty, but no one will see it. fits perfectly, but until I get the exhaust on I don't know if it will need tweaking.
Before fitting it I had to set the linkage up. Having done it once at 19mm as per Mr Haynes and finding it was dire, I found out (thank's to the forum) that it should be 15mm. So I cut some alu block down to 15mm. Clamped it in place with a clamp (obviously). Ta Da!

That made the whole process a lot easier. Shift seems better, but until I have it running I won't know for sure.
Whilst I was messing with the linkage I managed to snap the earth wire off the rack (for the horn). Had to put a new wire in which was an absolute pig as struggled to get the screw out the rack. Would have been much easier to have put a new wire on when the bay was empty….obviously.
Other than that, I got the filler neck painted up and refitted, not as easy as I thought it would be!
Also got most of the wiring connected up under the bonnet although I'm confused by the earth to the rocker cover. The wire I think it is is brown with a white stripe, not plain brown - anyway separate post in Help section for that. Also, not sure where the alternator harness attaches, it's got some clips on the loom that look like they push in to some holes somewhere, but I can't see where, so if anyone can tell me that it would be much appreciated!
Connected up the vac lines, including the 16v WUR. Also put the headlights in as my good lady told me it needed headlights!
It is starting to look a bit crowded in there!
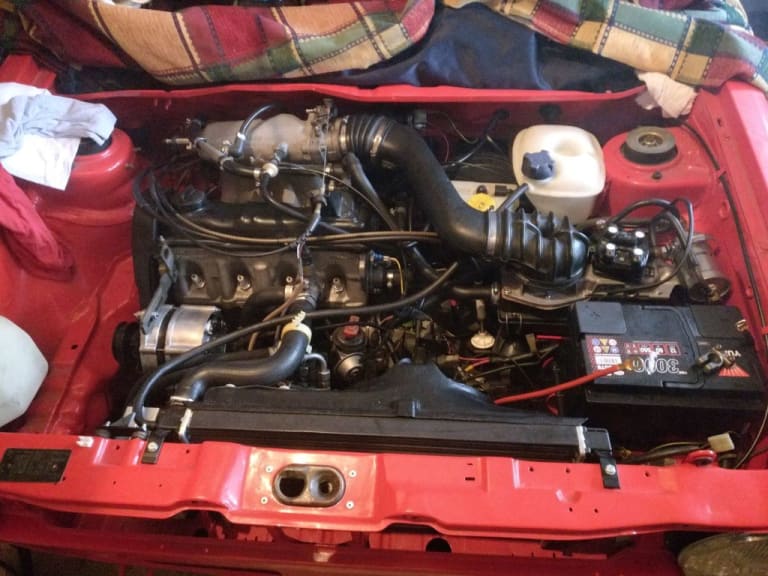
Should have my bonnet stay back and lower strut brace back from the powdercoaters today, so I can get those on tomorrow evening (Wednesday night is poker night). Does any one know if I can remove the front wishbone bolt without the whole lot falling out of line? I thought I'd jack the car, put some blocks under the wheels, and lower it just enough to put some pressure on the shock to keep it in line. Worth a go!
Posted
Moderator


Clampy thing idea is a good one, I've always used tape which, of course, falls of just at the wrong moment.
My rocker cover wire is a flat one about 10mm wide that goes to the corner of the rocker cover (mind you it is a clipper)
I'm trying to remember where the alternator loom goes. Does it not run along the front valance under the radiator maybe?
Ian
Posted
Settled In


And got my linkage to rebuild before I bolt the exhaust on - So gonna use the clamp idea for sure!! Proper top tip that!!
Posted
Old Timer


Ian, I've got the headlight loom running along the front valance, there may be some other holes that the alternator loom goes in. I'll have to take another look.
J
Posted
Old Timer


paceman said
Ian, I've got the headlight loom running along the front valance, there may be some other holes that the alternator loom goes in. I'll have to take another look.
J
I don't think the alternator loom is long enough to run along front valance. Interested to hear confirmation of where it should route to because I don't think mine is quite right either. I think one of the clips just goes onto a gearbox casing fin and then along the sump joint line and up.
Nut & Bolt Resto Complete (Mars Red GTi original): https://vwgolfmk1.org.uk/forum/index.php?page=topicview&type=misc&id=projects%2Fyour-mk1-golfs_2%2Fpistolpete-s-mars-red&start__keyed=
Nut & Bolt Resto in Progress (Lhasa 16v): https://vwgolfmk1.org.uk/forum/index.php?page=topicview&type=misc&id=projects%2Fyour-mk1-golfs_2%2Fpistolpete-s-lhasa&redirected=1
Nut & Bolt Resto in Progress (Lhasa 16v): https://vwgolfmk1.org.uk/forum/index.php?page=topicview&type=misc&id=projects%2Fyour-mk1-golfs_2%2Fpistolpete-s-lhasa&redirected=1
Posted
Old Timer


have you got the feed to the alternator coming off the starter? That's where mine was when I took it apart, and it looks long enough to reach the valance, although I have yet to try it.
Got a date for your MOT yet?
J
Posted
Settled In


Posted
Settled In


0 guests and 0 members have just viewed this: None.


