


Pistolpete's Mars Red Mk1 GTi restoration

Posted
Old Timer


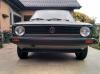
Restoration thread for my 1983 Y-reg Mars Red GTi, non-sunroof model
I know what you mean about the zinc plating. To be honest, I'll probably buy a home plating kit when I come to restore the engine and ancillaries as it'll be all little bits and pieces.
Did you sell your red Mk1 tintop? I was surprised you decided to sell.
Nut & Bolt Resto Complete (Mars Red GTi original):��https://vwgolfmk1.org.uk/forum/index.php?page=topicview&type=misc&id=projects%2Fyour-mk1-golfs_2%2Fpistolpete-s-mars-red&start__keyed=
Nut & Bolt Resto in Progress (Lhasa 16v):� https://vwgolfmk1.org.uk/forum/index.php?page=topicview&type=misc&id=projects%2Fyour-mk1-golfs_2%2Fpistolpete-s-lhasa&redirected=1
Nut & Bolt Resto in Progress (Lhasa 16v):� https://vwgolfmk1.org.uk/forum/index.php?page=topicview&type=misc&id=projects%2Fyour-mk1-golfs_2%2Fpistolpete-s-lhasa&redirected=1
Posted

Moderator


The zinc plating really looks the biz but does discolour over time with both heat from the engine and I guess oxidation. I bought the kit too. Never used it. Take loads of pictures of all the bits at least that what I did. Have an archive of pictures now!
Cheers Hugh.
www.vwgolf1.com - vw golf parts and genuine accessories!

www.vwgolf1.com - vw golf parts and genuine accessories!
Posted

Settled In


Old Timer


Hopefully things will progress a bit quicker now. Having said that, I've started looking at electroplating kits !!!! This project has definitely grown arms and legs, what started as a stripped thread in the front hub has become a full concourse resto. I just want to get the shell finished so I can start putting it all back together.
Nut & Bolt Resto Complete (Mars Red GTi original):��https://vwgolfmk1.org.uk/forum/index.php?page=topicview&type=misc&id=projects%2Fyour-mk1-golfs_2%2Fpistolpete-s-mars-red&start__keyed=
Nut & Bolt Resto in Progress (Lhasa 16v):� https://vwgolfmk1.org.uk/forum/index.php?page=topicview&type=misc&id=projects%2Fyour-mk1-golfs_2%2Fpistolpete-s-lhasa&redirected=1
Nut & Bolt Resto in Progress (Lhasa 16v):� https://vwgolfmk1.org.uk/forum/index.php?page=topicview&type=misc&id=projects%2Fyour-mk1-golfs_2%2Fpistolpete-s-lhasa&redirected=1
Posted
Moderator
Cheers Hugh.
www.vwgolf1.com - vw golf parts and genuine accessories!
www.vwgolf1.com - vw golf parts and genuine accessories!
Posted
Old Timer
Keep up the good work

Posted
Old Timer

After this I re-applied the Hydrate 80 after some more thorough degreasing with Xylene and left to dry for the day. �Went back out this evening and have got a fair bit coated now in the Bilt Hamber Epoxy Mastic. �This stuff is really nice to use, goes on really well and covers very nicely. �It still stinks as the hardener also contains Xylene so you need a well ventilated area when using it. �Pleased with the finish so far.

Nut & Bolt Resto Complete (Mars Red GTi original):��https://vwgolfmk1.org.uk/forum/index.php?page=topicview&type=misc&id=projects%2Fyour-mk1-golfs_2%2Fpistolpete-s-mars-red&start__keyed=
Nut & Bolt Resto in Progress (Lhasa 16v):� https://vwgolfmk1.org.uk/forum/index.php?page=topicview&type=misc&id=projects%2Fyour-mk1-golfs_2%2Fpistolpete-s-lhasa&redirected=1
Nut & Bolt Resto in Progress (Lhasa 16v):� https://vwgolfmk1.org.uk/forum/index.php?page=topicview&type=misc&id=projects%2Fyour-mk1-golfs_2%2Fpistolpete-s-lhasa&redirected=1
Old Timer

Nut & Bolt Resto Complete (Mars Red GTi original):��https://vwgolfmk1.org.uk/forum/index.php?page=topicview&type=misc&id=projects%2Fyour-mk1-golfs_2%2Fpistolpete-s-mars-red&start__keyed=
Nut & Bolt Resto in Progress (Lhasa 16v):� https://vwgolfmk1.org.uk/forum/index.php?page=topicview&type=misc&id=projects%2Fyour-mk1-golfs_2%2Fpistolpete-s-lhasa&redirected=1
Nut & Bolt Resto in Progress (Lhasa 16v):� https://vwgolfmk1.org.uk/forum/index.php?page=topicview&type=misc&id=projects%2Fyour-mk1-golfs_2%2Fpistolpete-s-lhasa&redirected=1
Posted
Old Timer
Nut & Bolt Resto Complete (Mars Red GTi original):��https://vwgolfmk1.org.uk/forum/index.php?page=topicview&type=misc&id=projects%2Fyour-mk1-golfs_2%2Fpistolpete-s-mars-red&start__keyed=
Nut & Bolt Resto in Progress (Lhasa 16v):� https://vwgolfmk1.org.uk/forum/index.php?page=topicview&type=misc&id=projects%2Fyour-mk1-golfs_2%2Fpistolpete-s-lhasa&redirected=1
Nut & Bolt Resto in Progress (Lhasa 16v):� https://vwgolfmk1.org.uk/forum/index.php?page=topicview&type=misc&id=projects%2Fyour-mk1-golfs_2%2Fpistolpete-s-lhasa&redirected=1
Posted
Settled In
My New Year's resolutions are: 1. Stop making lists. B. Be more consistent. 7. Learn to count.
Posted
Old Timer
Des, the Epoxy Mastic is a 2-pack resin which is for corrosion protection. I will be priming and then top coating the whole lot in a fresh coat of Mars Red.
You must be getting the green machine out soon. I must hook up with you gents next time you're out for a run.
Nut & Bolt Resto Complete (Mars Red GTi original):��https://vwgolfmk1.org.uk/forum/index.php?page=topicview&type=misc&id=projects%2Fyour-mk1-golfs_2%2Fpistolpete-s-mars-red&start__keyed=
Nut & Bolt Resto in Progress (Lhasa 16v):� https://vwgolfmk1.org.uk/forum/index.php?page=topicview&type=misc&id=projects%2Fyour-mk1-golfs_2%2Fpistolpete-s-lhasa&redirected=1
Nut & Bolt Resto in Progress (Lhasa 16v):� https://vwgolfmk1.org.uk/forum/index.php?page=topicview&type=misc&id=projects%2Fyour-mk1-golfs_2%2Fpistolpete-s-lhasa&redirected=1
Posted
Settled In
Pistol said
Cheers for the comments folks.
Des, the Epoxy Mastic is a 2-pack resin which is for corrosion protection. I will be priming and then top coating the whole lot in a fresh coat of Mars Red.
You must be getting the green machine out soon. I must hook up with you gents next time you're out for a run.
Yeah would be good to hook up Pete with a few mk1's or other stuff next time we are out for a run. Looking good.
Old Timer

 Last edit: by Pistol
Nut & Bolt Resto Complete (Mars Red GTi original):��https://vwgolfmk1.org.uk/forum/index.php?page=topicview&type=misc&id=projects%2Fyour-mk1-golfs_2%2Fpistolpete-s-mars-red&start__keyed=
Nut & Bolt Resto in Progress (Lhasa 16v):� https://vwgolfmk1.org.uk/forum/index.php?page=topicview&type=misc&id=projects%2Fyour-mk1-golfs_2%2Fpistolpete-s-lhasa&redirected=1
Nut & Bolt Resto in Progress (Lhasa 16v):� https://vwgolfmk1.org.uk/forum/index.php?page=topicview&type=misc&id=projects%2Fyour-mk1-golfs_2%2Fpistolpete-s-lhasa&redirected=1
Old Timer


Now I can at least get on with starting to put it all back together slowly, as each piece will be restored before re-fitting.
Last edit: by Pistol
Nut & Bolt Resto Complete (Mars Red GTi original):��https://vwgolfmk1.org.uk/forum/index.php?page=topicview&type=misc&id=projects%2Fyour-mk1-golfs_2%2Fpistolpete-s-mars-red&start__keyed=
Nut & Bolt Resto in Progress (Lhasa 16v):� https://vwgolfmk1.org.uk/forum/index.php?page=topicview&type=misc&id=projects%2Fyour-mk1-golfs_2%2Fpistolpete-s-lhasa&redirected=1
Nut & Bolt Resto in Progress (Lhasa 16v):� https://vwgolfmk1.org.uk/forum/index.php?page=topicview&type=misc&id=projects%2Fyour-mk1-golfs_2%2Fpistolpete-s-lhasa&redirected=1
Posted

Settled In
Those roll over jigs are a great example of brains over brawn!
I'll be interested in how you progress with the home based electro plating if you decide to go down that path.
I'll be over in Northern Ireland either late this year or early next year so I'll be keen to see the car.

Posted

Old Timer
Dont forget to clean all the exposed threads of paint before attempting reassembly because when torquing the components if the threads are not clean (with a light drop of oil) you will get incorrect torque settings!
I would also wax oil the cavities before installing any components because access will be much easier!
Do it once and do it right! ok, we've identified the problem, lets not make it worse by guessing……… Identifying the sympton is not the same as understanding the cause
Posted
Settled In
Posted

Local Hero

Andy
LINCOLNSHIRE REGION -�https://www.facebook.com/groups/467122313360002/
1983 MK1 Golf GTI Campaign Model - Under (looooong) resto!
1962 Rover P4 80
2002 BMW 745i
2008 BMW Z4 2.5Si
LINCOLNSHIRE REGION -�https://www.facebook.com/groups/467122313360002/
1983 MK1 Golf GTI Campaign Model - Under (looooong) resto!
1962 Rover P4 80
2002 BMW 745i
2008 BMW Z4 2.5Si
Posted
Old Timer
Matt
Old Timer

Got new clips for securing the headlight wiring to the front cross-member:-

Nut & Bolt Resto Complete (Mars Red GTi original):��https://vwgolfmk1.org.uk/forum/index.php?page=topicview&type=misc&id=projects%2Fyour-mk1-golfs_2%2Fpistolpete-s-mars-red&start__keyed=
Nut & Bolt Resto in Progress (Lhasa 16v):� https://vwgolfmk1.org.uk/forum/index.php?page=topicview&type=misc&id=projects%2Fyour-mk1-golfs_2%2Fpistolpete-s-lhasa&redirected=1
Nut & Bolt Resto in Progress (Lhasa 16v):� https://vwgolfmk1.org.uk/forum/index.php?page=topicview&type=misc&id=projects%2Fyour-mk1-golfs_2%2Fpistolpete-s-lhasa&redirected=1
1 guests and 0 members have just viewed this: None.