Mynx the Tintop 1400 16v afh bike carb'd restomod
Posted
Moderator


Posted
Moderator


Now don't get me wrong I'm not suggesting I'm the worlds best welder but, well, DAMN! it was shoddy work. No wonder the spare wheel well was full of water!
Half the welds came off when looked at a bit funny and the other half were in the wrong place. Looks like they took off the panel by letting a bunch of angry or hungry beavers at it

and the flanges at the edges


These have been de-rusted and weld thru primed
Bottom flange as bad

and 'cos the weld to the underside where it meets the wheel well hadn't been sealed at all this happened

and under the GTI arches (that had been screwed in with wood screws


Am i right in thinking I could chop of the lips and seam weld the two skins together?
So new panel ordered and delivered
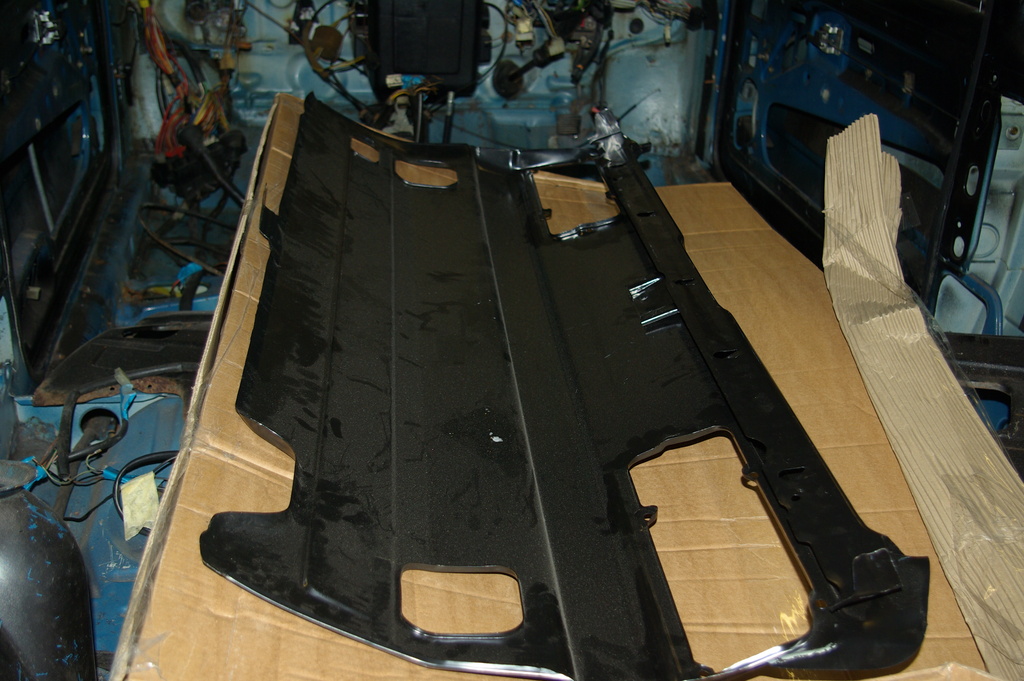
Still at least the floors cleaned up ok!
The drivers side had been pushed up so this was duly hit until it's back in it's rightful place. But I'll now have to remove all the factory sound deadening and replace it

Oh well!
In other news I know have
fuel neck filler pipe
tank
all associated bits to mate the two together
rear ARB sourced
window seal for windscreen
left hand drive wiper motor and assembly
mk4 rear caliper and mk2 16v stub axles
mk2 16v front calipers and carriers (hopefully with the courier now)
a big pile of stuff to go for powder coating and a few other bits and bobs.
Gotta love credit cards!
Posted
Moderator


If I go anywhere near mine it breaks out into a cold sweat and starts shaking.
But the work is coming on a treat, keep it up or as long as your credit cards don't show the same symptoms as mine! 🤔😂👍
Sent by a smartphone and not a smartperson!
Play Guess the Asking Price 'SEASON 4' as of Sunday the 29th of October 2017.
https://vwgolfmk1.org.uk/forum/index.php?page=topicview&id=chat%2Fmk1-golf-chat_2%2Fguess-the-asking-price_2
OLD.
https://vwgolfmk1.org.uk/forum/index.php?page=topicview&id=chat%2Fmk1-golf-chat_2%2Fold-guess-the-asking
Ever wondered who's behind the scenes of this forum?
https://vwgolfmk1.org.uk/index.php?page=committee
Mike
There's me building mine 28 years ago, almost finished!
Be proud of your VW Golf Mk1, it's very special!
Play Guess the Asking Price 'SEASON 4' as of Sunday the 29th of October 2017.
https://vwgolfmk1.org.uk/forum/index.php?page=topicview&id=chat%2Fmk1-golf-chat_2%2Fguess-the-asking-price_2
OLD.
https://vwgolfmk1.org.uk/forum/index.php?page=topicview&id=chat%2Fmk1-golf-chat_2%2Fold-guess-the-asking
Ever wondered who's behind the scenes of this forum?
https://vwgolfmk1.org.uk/index.php?page=committee
Mike
There's me building mine 28 years ago, almost finished!

Be proud of your VW Golf Mk1, it's very special!
Posted
Moderator


Well actually, not that you care anyway, I've been beavering away sorting out the back end. Thanks to some help from the esteemed
So the first thing to sort out was the spare wheel well.
When I stripped the paint I found another 3 holes
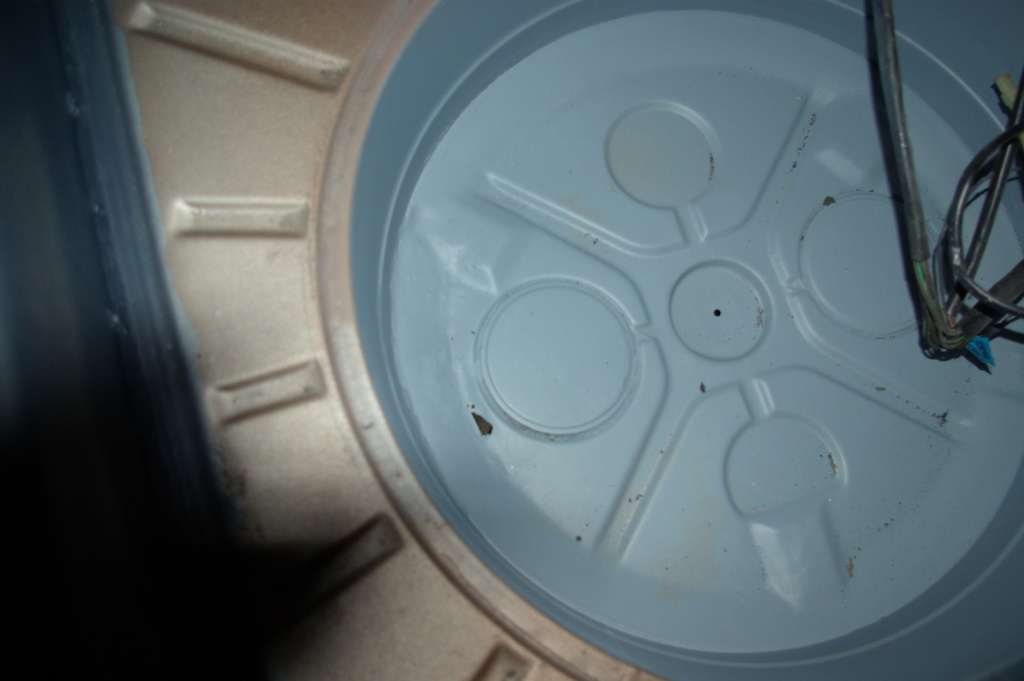
Once that was done I sorted out the crusty flanges by building them up with weld and then filing them back to gain the right profiles and thicknesses (major pain!) and chucked on the rear panel.
Well actually it's taken me about 25 hours so far. Admittedly I have never done anything like this before, but it's longer than I expected. I think there were a number of issues though to be fair. The panel came and I tried to test fit it on my own and dropped it. Which bent the ends of the panels where they meet the C pillars, so that reference point had gone. There was quite a lot of swearing involved
The spots that held the part of the panel that the latch goes onto and the rest of the panel had also come undone over half the length of the panel too. Plus the idiots that had been in before had hacked so much stuff apart I had no real reference points. I've had to build up and make good so much bodgery you wouldn't believe it
Anyway it's on
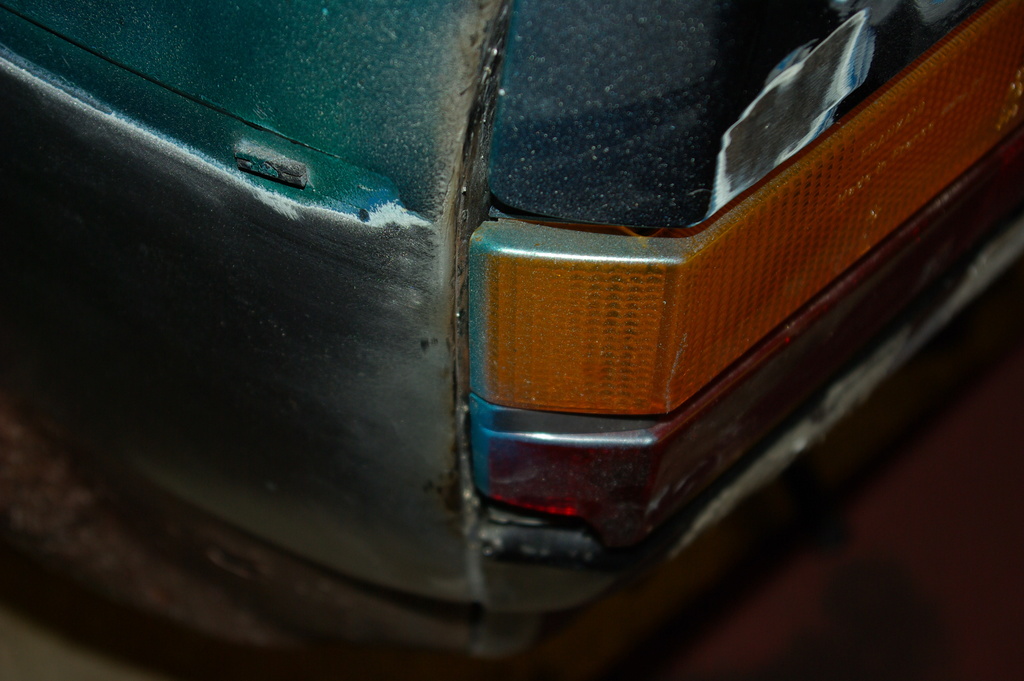
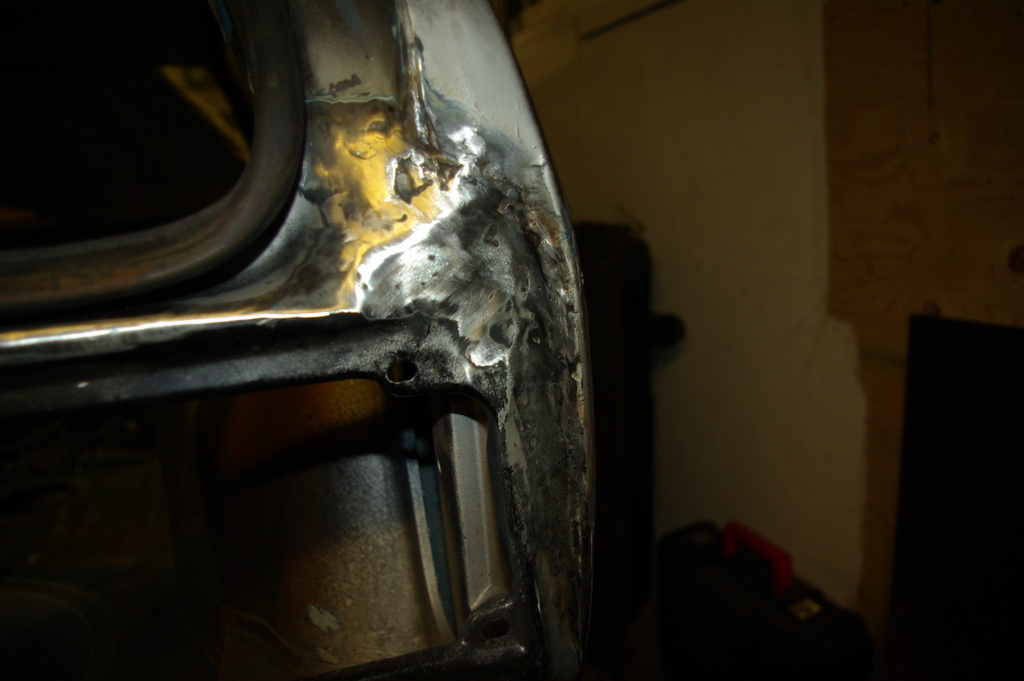
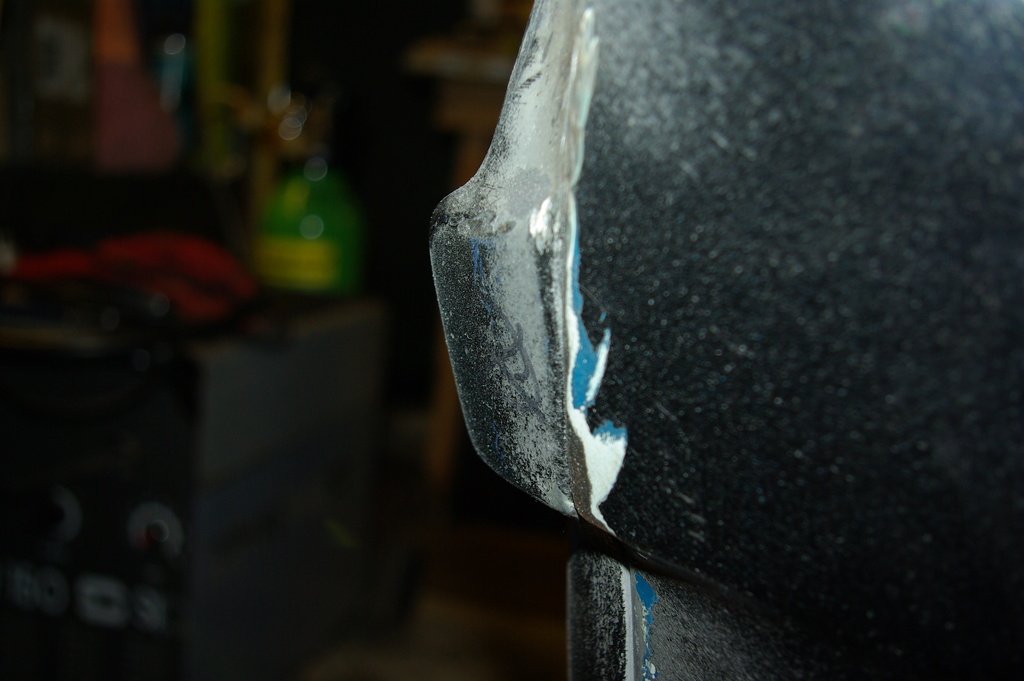
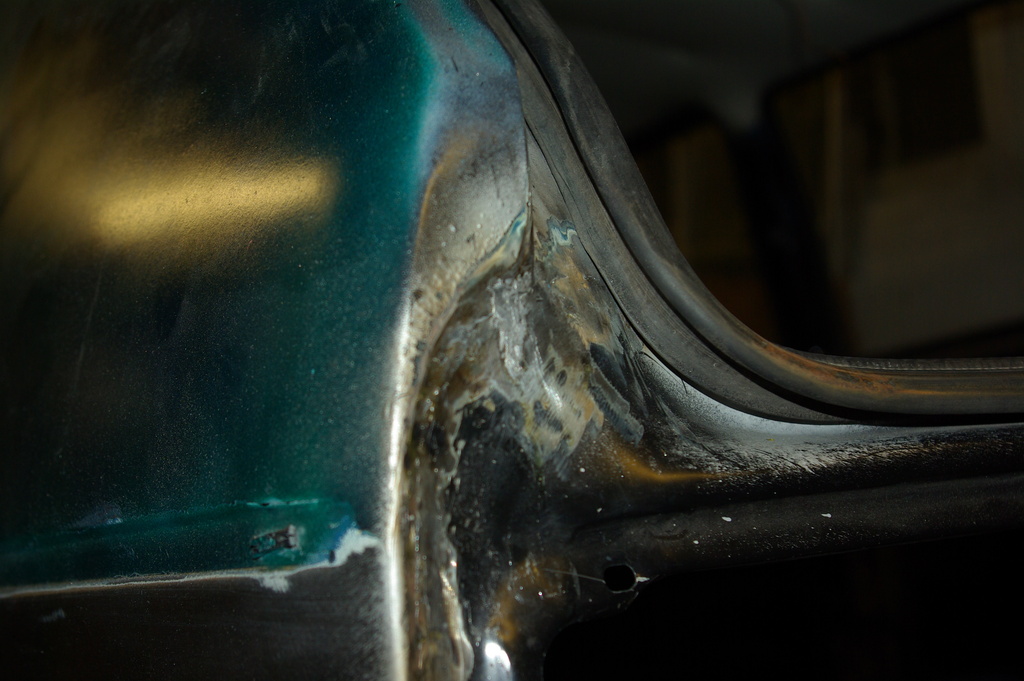
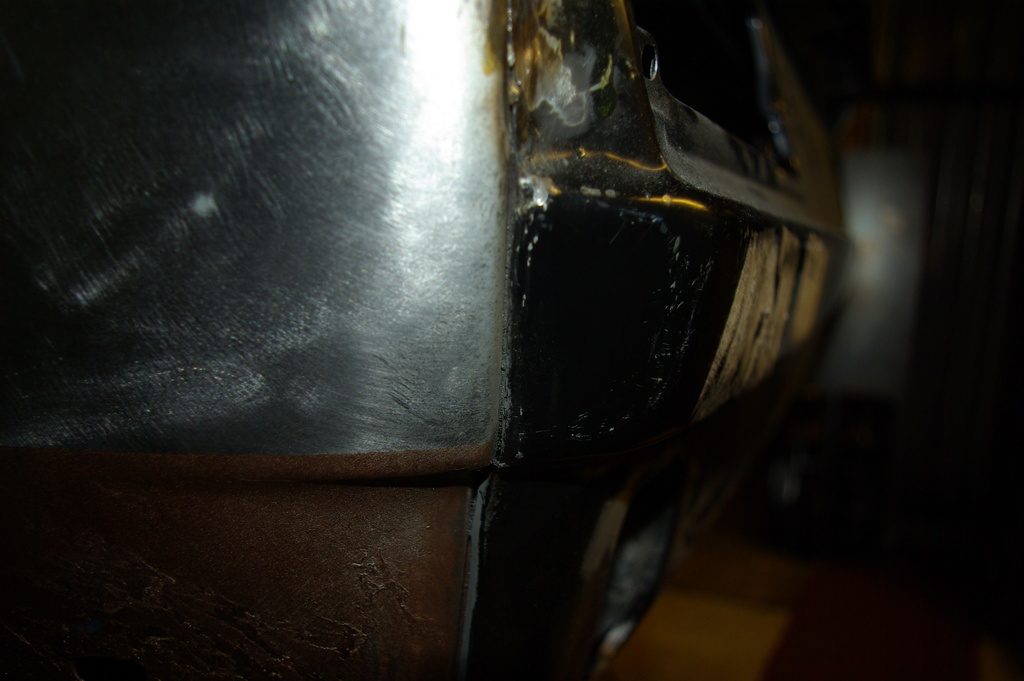
Before doing the final welds to the slam panel section on the inside I wanted to re-fit the tailgate (an epic pain on your own I might add) just to ensure that everything was lining up.
When I took the latch off the old panel it had these two bits of rubber under the latch, I assumed that this should be one large piece but it had broken at some point and needed to be replaced
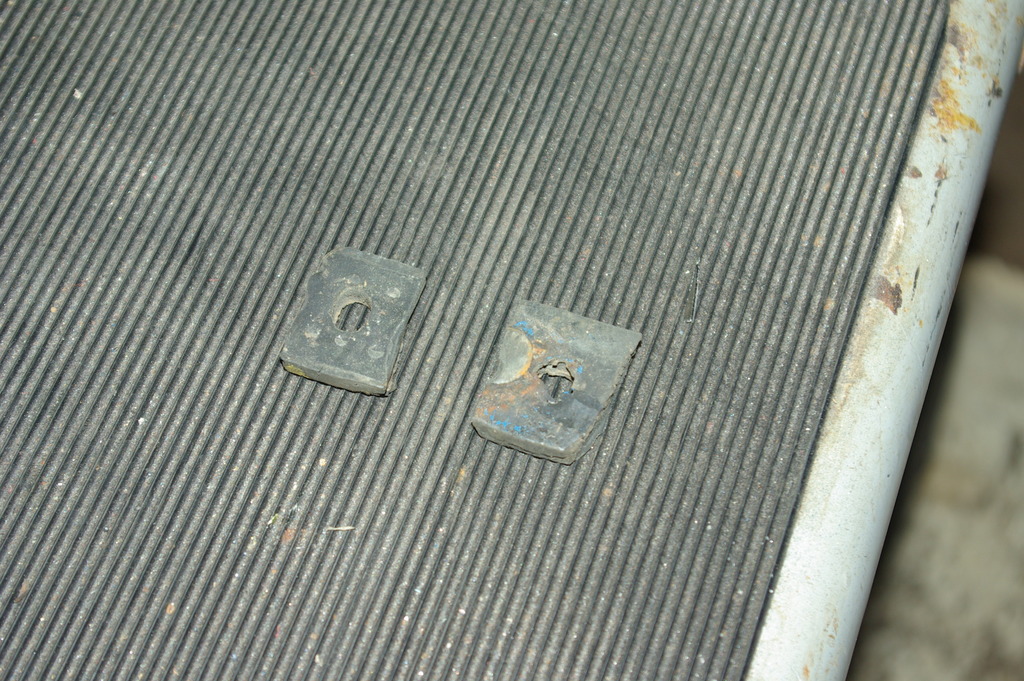
So I duly installed them under said latch. Boot wouldn't close! Much more swearing and wringing of hands. However i then went to check the un-molested Ujum and guess what? Yup, no rubber under the latch. Duly removed and boot fits perfectly! YAY

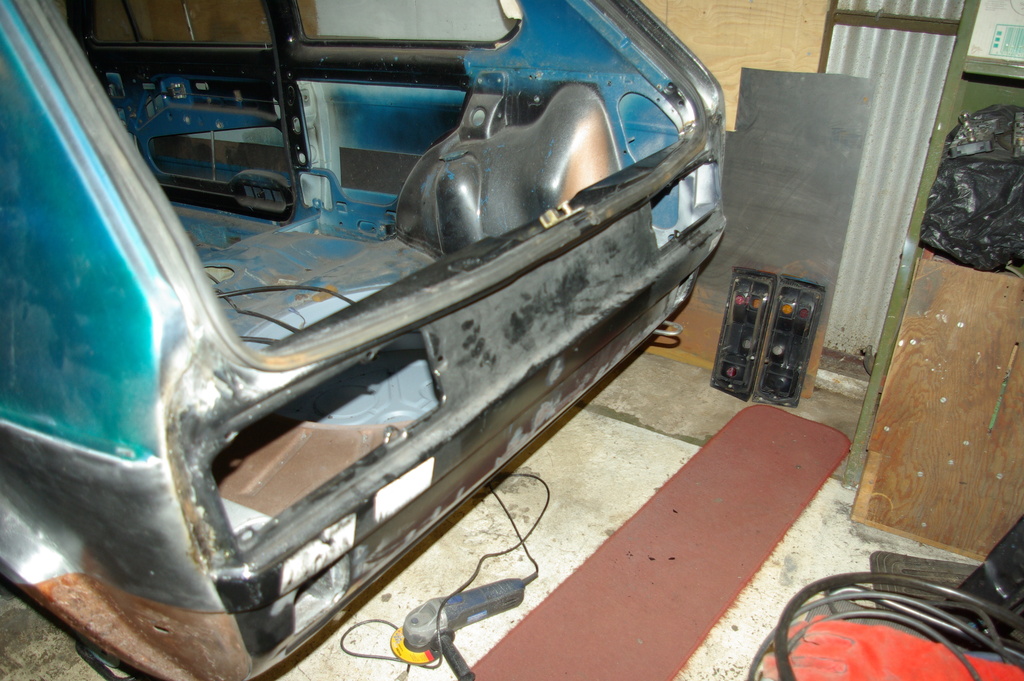
In other news
Only a few bits of welding to go now! Beginning to see the end of it hopefully.
Just got all the holes in the floor from the 'non-standard seat installation' (read 'Butchery' ) to sort out now. Which means removing the factory sound deadening. Dagnammit!
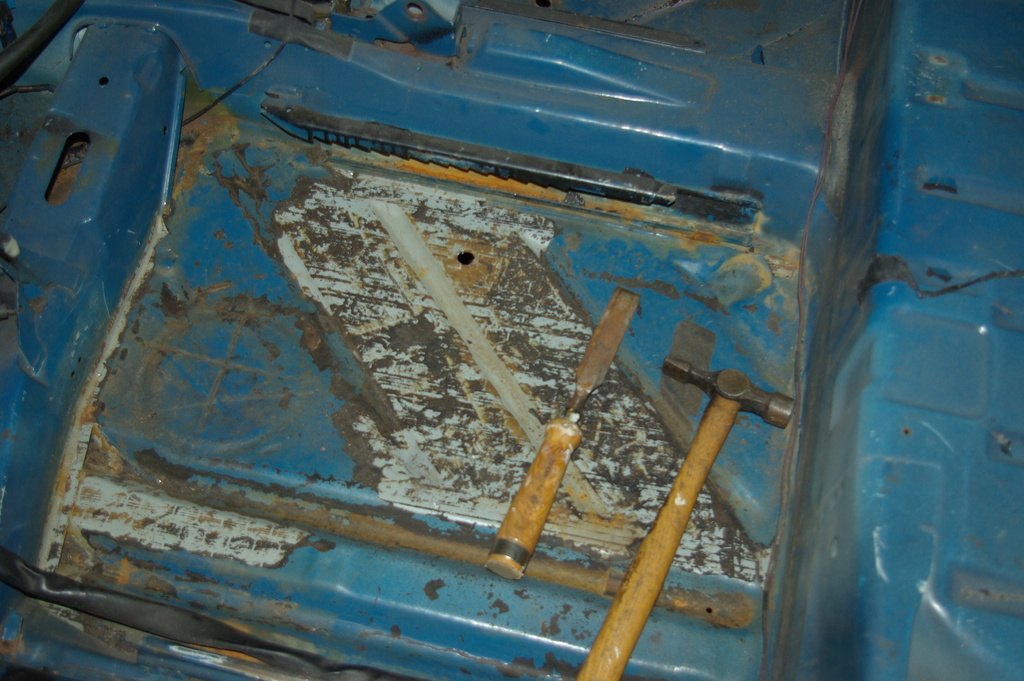
Any suggestions to assist apart from the hammer and chisel?
Feel free to join us on the next episode where, no doubt, Ian will have done more swearing, welding, grinding, swearing, sanding and uncovered more bodges!
Posted
Local Hero


Glad you're all sorted now, looks a good job - worth the time and effort.
I've fitted a tailgate on my own before too - not easy!!
Andy
LINCOLNSHIRE REGION - https://www.facebook.com/groups/467122313360002/
1983 MK1 Golf GTI Campaign Model - Under (looooong) resto!
1962 Rover P4 80
2002 BMW 745i
2008 BMW Z4 2.5Si
LINCOLNSHIRE REGION - https://www.facebook.com/groups/467122313360002/
1983 MK1 Golf GTI Campaign Model - Under (looooong) resto!
1962 Rover P4 80
2002 BMW 745i
2008 BMW Z4 2.5Si
Posted
Old Timer

Good job
Matt
Posted
Moderator


pazwaa said
Looks like this project is coming along nicely, and your welding skills are increasing 👍🏼
Good job
Matt
Thanks Matt, yup, they've gone from non-existent to poor
I finally bit the bullet a bought a lead loading kit! So another 'skill' is being emulated by an ape in his garage. Sanding filler always annoys me. I put too much on then sand off too much and have to repeat for days until I get where i want to be. Thought I'd try leading instead…………. nope it's no easier. Oh Well
Posted
Moderator


Basically lead was used 'back in the day' before the invention of body fillers. It's used to either fill dents or instead of seam sealer. It's used in much the same way but has a couple of advantages and a couple of drawbacks.
Advantages - it's metal so it doesn't shrink, doesn't crack and will probably last longer than the rest of the car.
Drawbacks - it's metal so it's harder to shape and use. Oh yeah and it's poisonous!
So what the hell, what's the worst that can happen right? I mean besides agony and death?
I bought my lead loading kit from here http://www.lb-restoration.co.uk/cgi-bin/store/commerce.cgi
A very nice gent owns and runs the business and he ships all over the world. I happened to be passing and popped in for a chat, very helpful and gave me some good tips. I went with the basic lead kit (as I had no idea how I was going to get on with it) but after discussions added another stick of lead.
There's plenty of guides on youtube about how to do it. Some more useful than others, but all have little tips and tricks. Just be careful. You're using naked flames next to the car and adding heat. Stuff like seam sealer and waxoyl will burn if you get them too hot. Wear some thick and decent gloves (so you don't burn yourself!), some glasses (yes I know you're hard and even when grinding you 'squint so it don't go in my eyes' very happy for you, but how about molten lead in the eye? Wanna try that? Nope didn't think so, put the damn glasses on idiot!), and a mask (it's lead, the fumes and dust will kill you! wear it!) Probably as well to have a fie extinguisher near by too
It's fairly basic tbh, but takes a bit of practice to get better at it (I won't say good 'cos I don't think I'm there yet!) It's a bit of a lost skill as most people stick with easy to find, easy to use filler. I wanted to learn some new skills on this project and push myself as much as possible. Hence the learning to weld and the learning to lead load.
Anyway, the basics
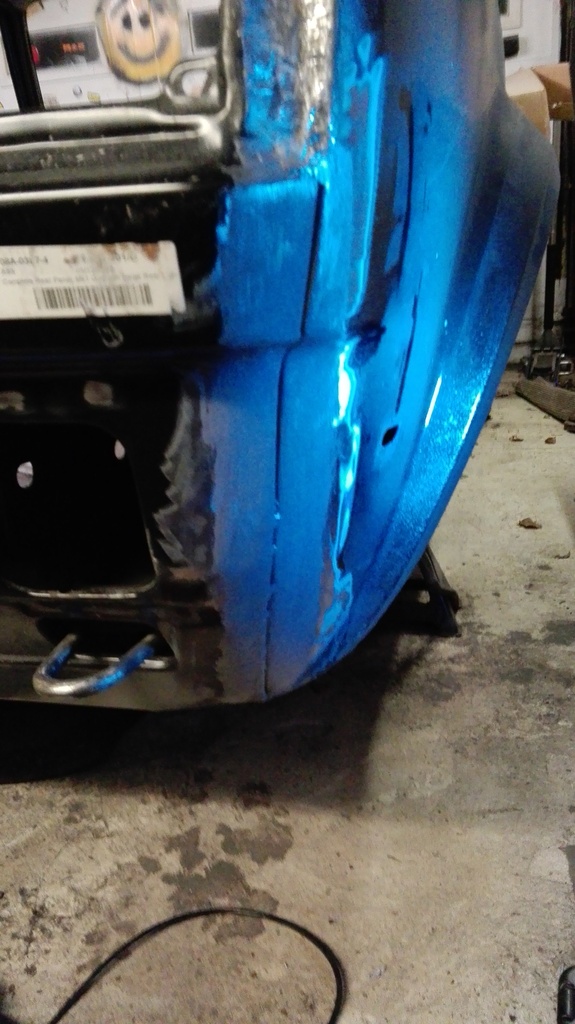
1, Clean the metal. I mean really clean it. You sure it's clean? Great! Now do it again! As you can see I had problems with the alignment of the bottom of the panel. I had to hammer it to shape working from the top down, weld, then hammer the next section, weld and keep on until i was happy with the fit of the panel. (appologies for the poor phone pics and I have no idea why they are so blue!)
2, Paint on some flux paste. This is a lead paste that coats the steel and allows the lead to stick to the metal. Almost like an etch.
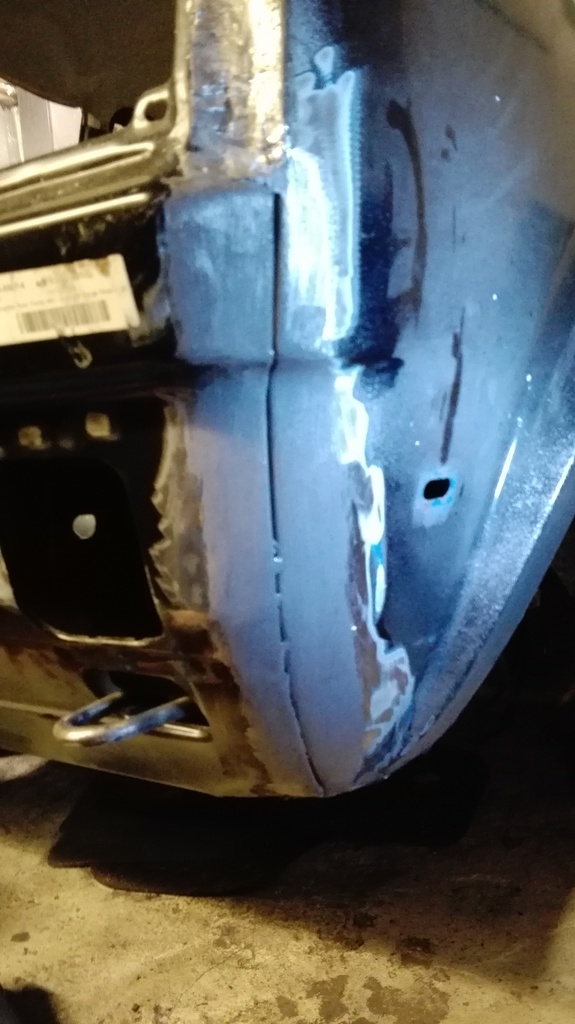
3, Heat the paste until a colour change occurs then wipe it off with a rag or paper towel. (I use paper towel so I can throw it away each time I'm done with it, otherwise you'll have lead contaminated rags knocking about that might end up used for something else.) It should then leave behind a shiny surface (i use a blow torch for the heating. Be careful though cos you can set fire to stuff, especially the paper towel and the lovely new seam sealer you installed the week before on the inside of the panel. Doh! Yeah, don't ask!)

First few times you'll either just wipe it off or burn it completely. Don't worry just re-apply and don't do it again you ham fisted monkey
4, Heat up the end of the lead stick (still got those gloves on yeah? 'cos you're heating a metal stick and guess what? both ends get a bit toastie!) then warm the panel a bit, then the stick, then the panel, then bring the two together when the stick is 'gooey'. Takes a bit of practice as the lead goes from solid to liquid quite quickly and just drips on the floor. Then squish it against the panel. I find twisting the stick helps to get the lead onto the panel.
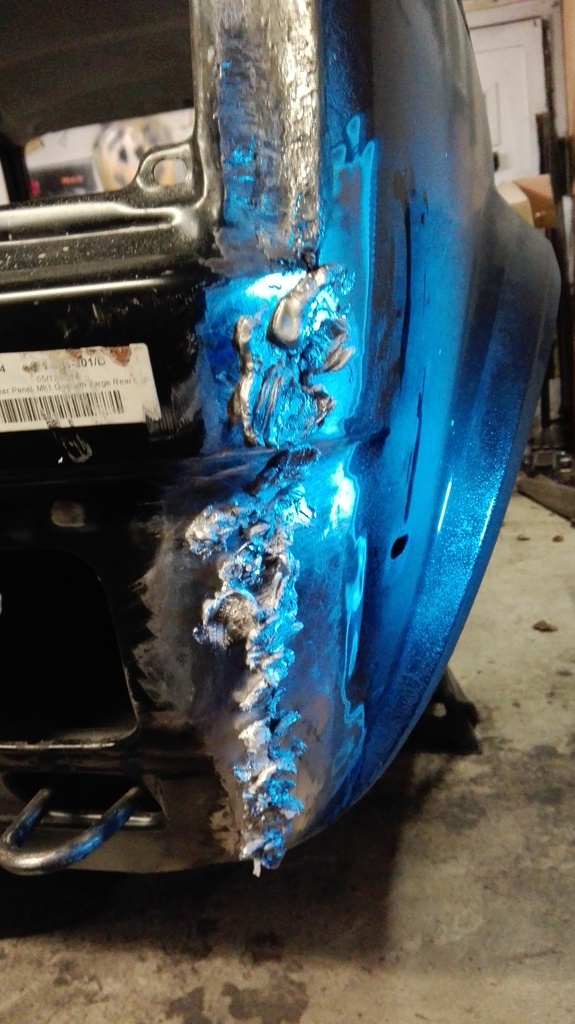
5, Working from the bottom of the panel or seam, heat the lead squishes ( I know it's not a proper word but I like it!) and using the wooden paddle coated with tallow (all in the kit) squish the lead down and spread it out. You'll find the top of the lead melts first, so do it in stages until the lead is spread a bit more evenly, then you can heat larger areas more evenly and spread it around in larger and larger areas to get it smoother
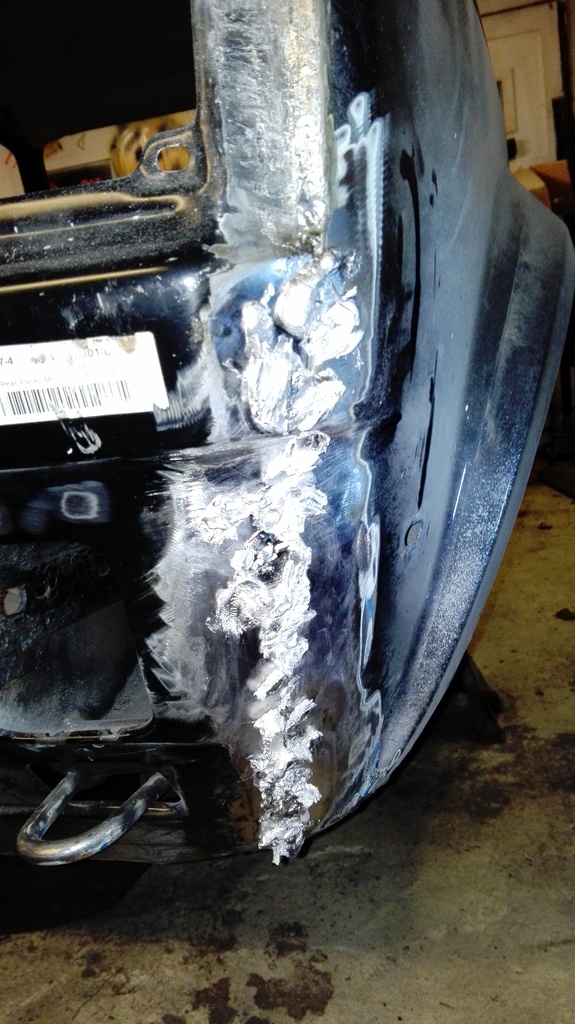
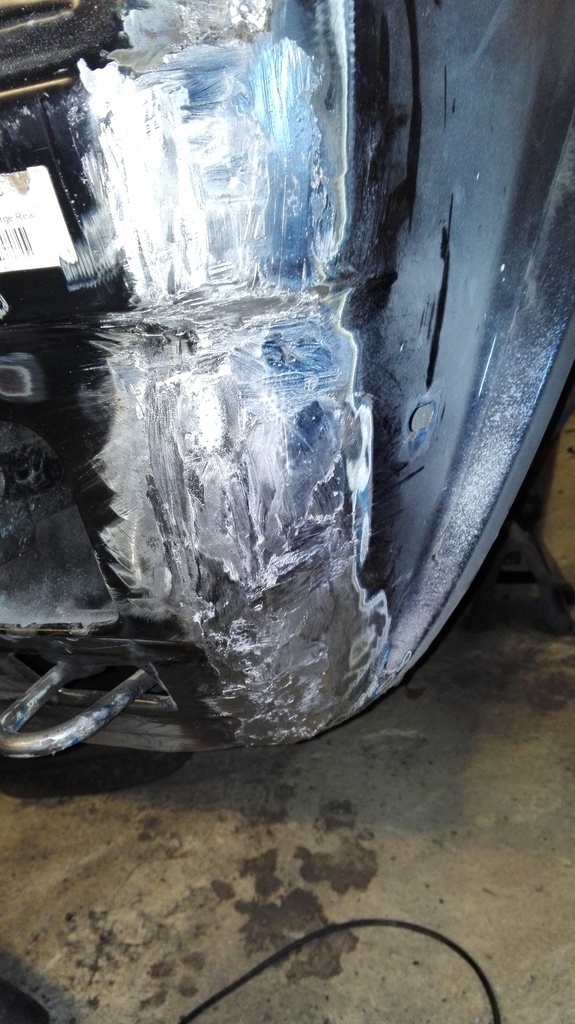
The good thing is it never goes off. Add more heat and you can move it again. However each time you move it you tend to loose some. So too much playing and you'll have to start adding more again. Rinse and repeat! The bad thing is that removing large chunks is time consuming so get it as smooth as possible.
6, Smooth, dress and make it all nice! I cheated a bit here. I didn't buy the body file cos I was only going to do the seams around the lights and the file wouldn't have worked due to the shape. However I have found that rasp for wood work works ok and a very coarse file is good for finer work. Of course as lead dust is very bad for you you shouldn't use air tools or electric sanders of any type. and wear the flaming mask at all times!
and after a lot of elbow grease later
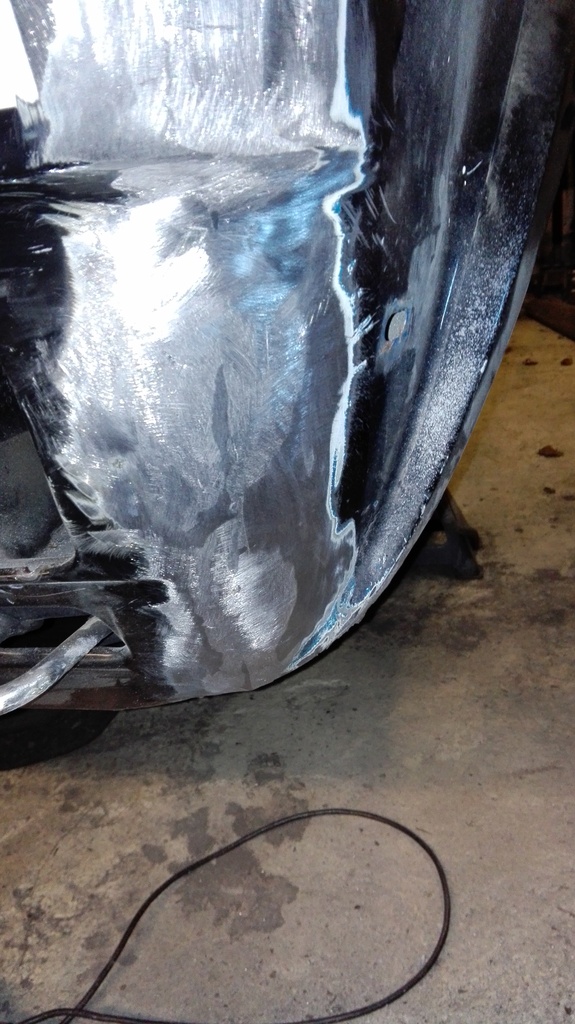
and of course a lot of it ended up on the floor as usual
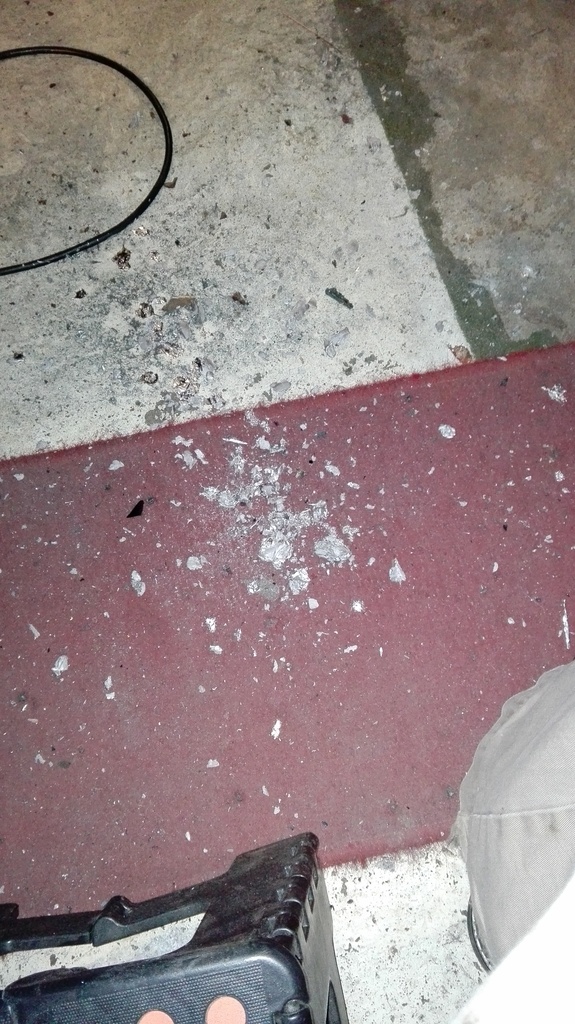
To complete this seam to this standard took me about an hour or so. Probably not much longer than if using filler, 'cos you don't have to mix it, spread it, chuck away the stuff that's gone off, clean all the wasted stuff of everything, wait for it to cure, sand it, mix more, sand it, wait, blow dust of everything, have 10 minutes outside coughing 'cos of the filler dust etc etc, but a lot longer than using seam sealer.
There's a couple of reasons I decided to go with lead and actually fill these seams. I wasn't happy with the spot welds on the inside of the seam as they're a long way from the edge of the panel and it didn't feel 'solid' enough to me. The panel wasn't fitting too well, (although after inspection of the other 3 golfs we've got knocking around it was probably fitting as well as the factory panels on those!) and as I'd been at it I wanted the best job I could do. By using lead I've joined the two panels together, very similar to welding them, (not as strong but definitely better then seam sealer or filler, which would probably just crack on this seam) which has added a bit more rigidity to the panel.
There's another reason to that will become evident as work continues. Hope you've enjoyed the read, sorry if I've waffled.
Advice, comments and suggestions gratefully received.
Cheers
Ian
Posted
Old Timer

Posted
Moderator


abfmk1 said
Brave man, something I would never attempt.
That's the great thing with having very little knowledge mate, you do things that people who know better would never attempt!
Doesn't always work out though
Posted
Old Timer

Looks like it's turned out well, result!
Matt
Posted
Local Hero


pazwaa said
Good on you Ian, giving another new thing a go. And great guide too 👍
Looks like it's turned out well, result!
Matt
Ditto Ian!
I was nervous as hell when I first tried it but loved it! Also felt a lot better for filling my arch repair with lead rather than filler.
I certainly plan to use it wherever possible/suitable
Andy
LINCOLNSHIRE REGION - https://www.facebook.com/groups/467122313360002/
1983 MK1 Golf GTI Campaign Model - Under (looooong) resto!
1962 Rover P4 80
2002 BMW 745i
2008 BMW Z4 2.5Si
LINCOLNSHIRE REGION - https://www.facebook.com/groups/467122313360002/
1983 MK1 Golf GTI Campaign Model - Under (looooong) resto!
1962 Rover P4 80
2002 BMW 745i
2008 BMW Z4 2.5Si
Posted
Moderator


Hairyarse said
pazwaa said
Good on you Ian, giving another new thing a go. And great guide too 👍
Looks like it's turned out well, result!
Matt
Ditto Ian!
I was nervous as hell when I first tried it but loved it! Also felt a lot better for filling my arch repair with lead rather than filler.
I certainly plan to use it wherever possible/suitable
Thanks chaps. Andy, feel free to weigh in with any suggestions if I'm doing owt wrong! Sounds like you've got a bit more experience than me.
Update time!!
Done a bit more lead loading
Both wing mirror holes have disappeared.
Passenger side finished
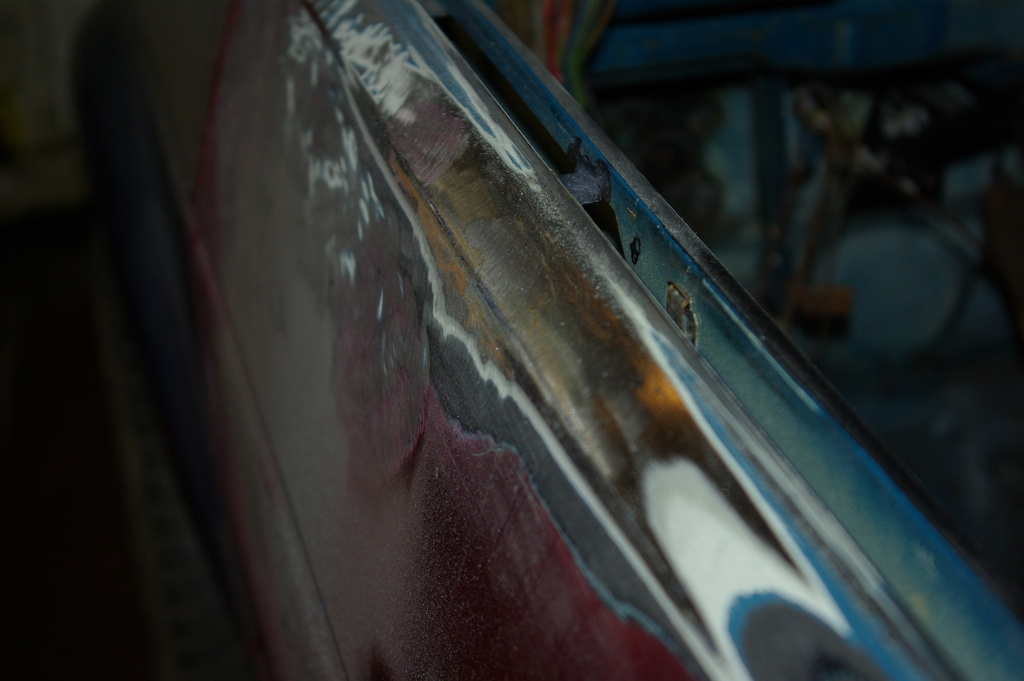
Driver side loaded but needs finishing
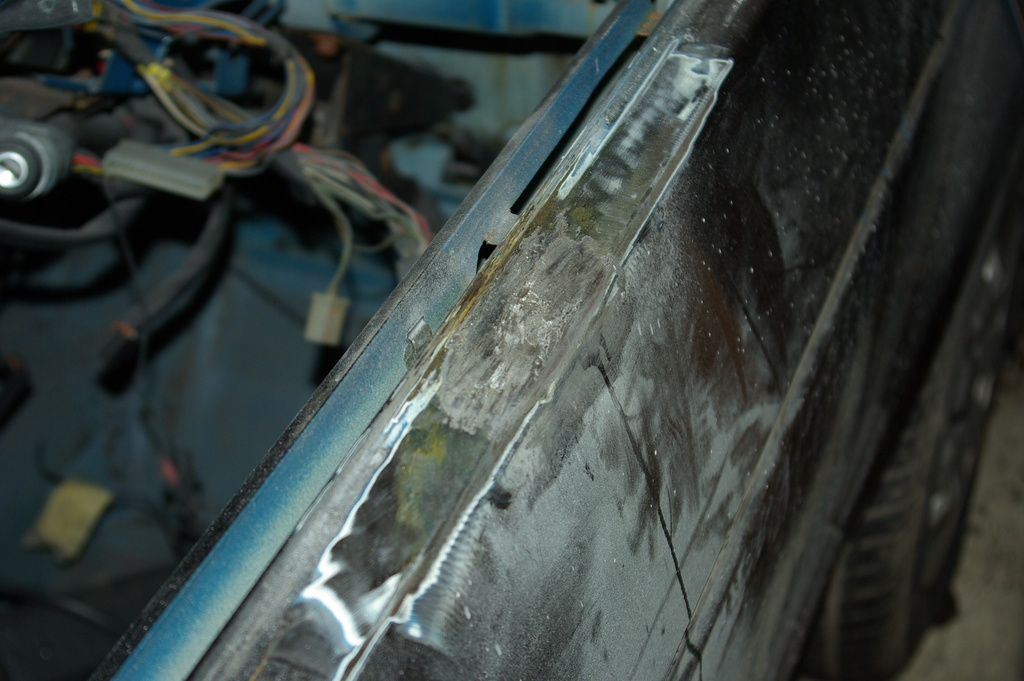
Arial hole also vanished!
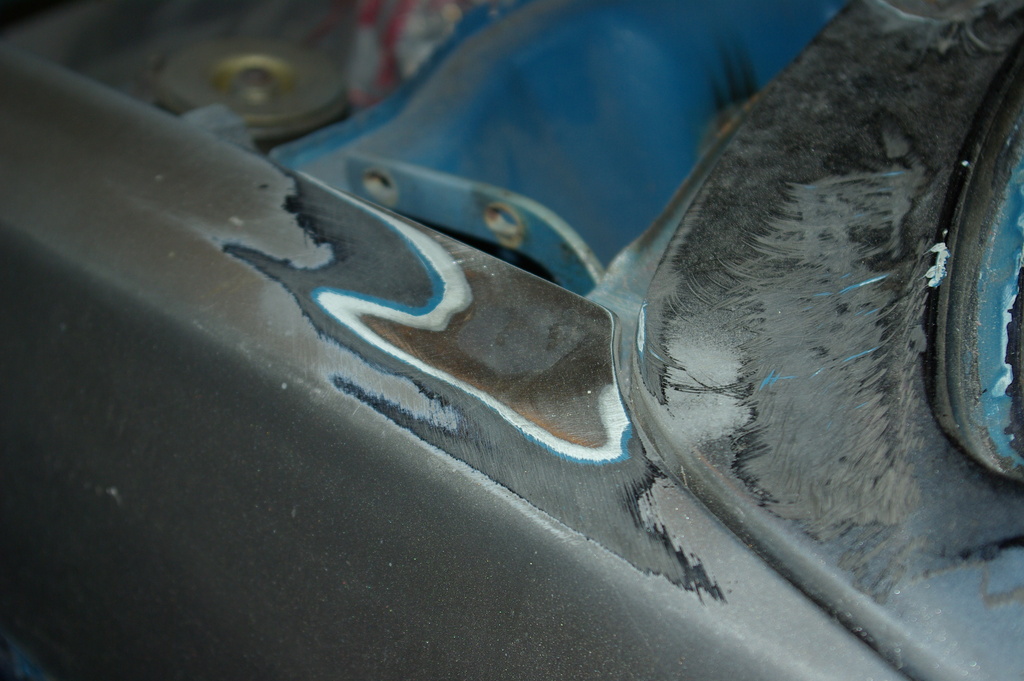
Welded up the holes for the wipers and got one leaded up.
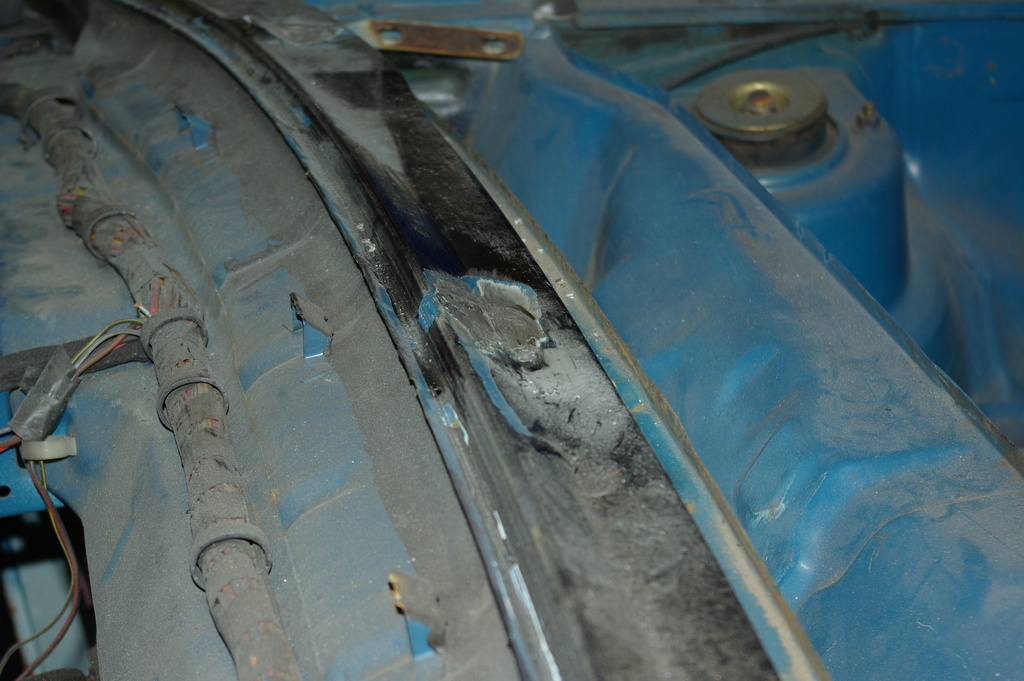
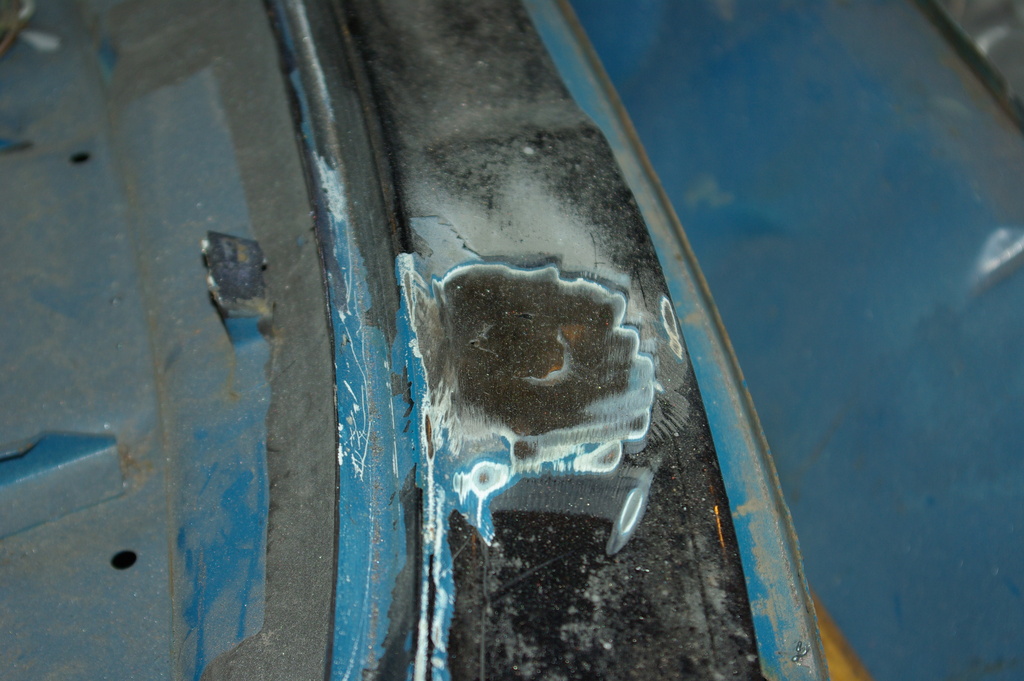
In other news finally happy with the rear panel so chucked some etch on it on the outside.
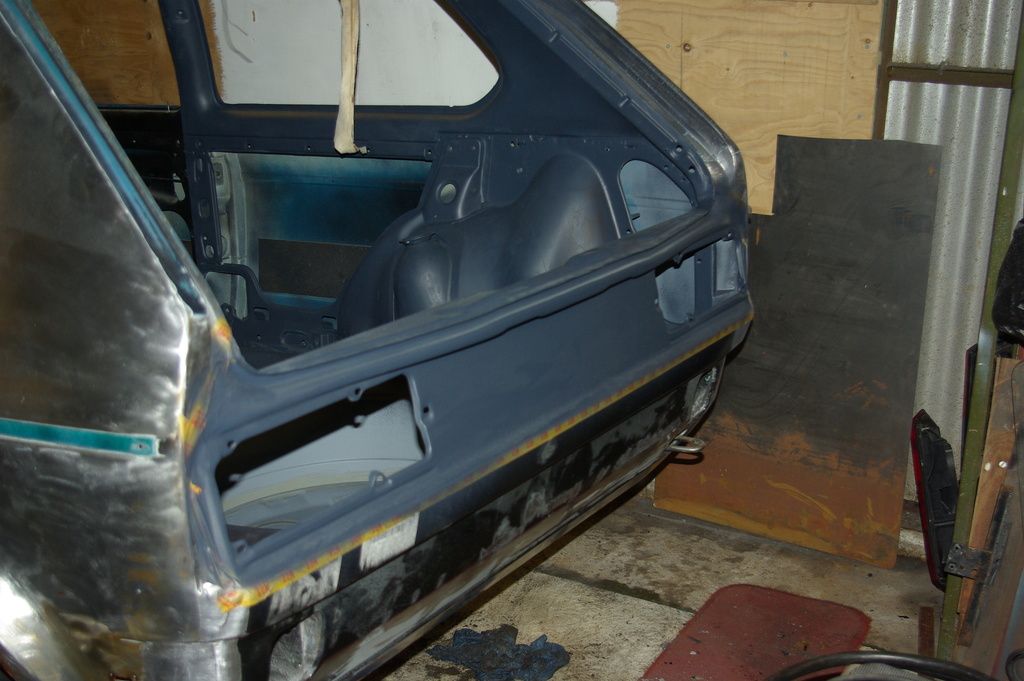
Then got a bit bored so decided it was time to get rid of some of the horrible black paint job from the inside, lots of sanding, filling, a bit of welding, more sanding, the odd touch of filler and it's all one colour in the back! (well nearly) Yay!
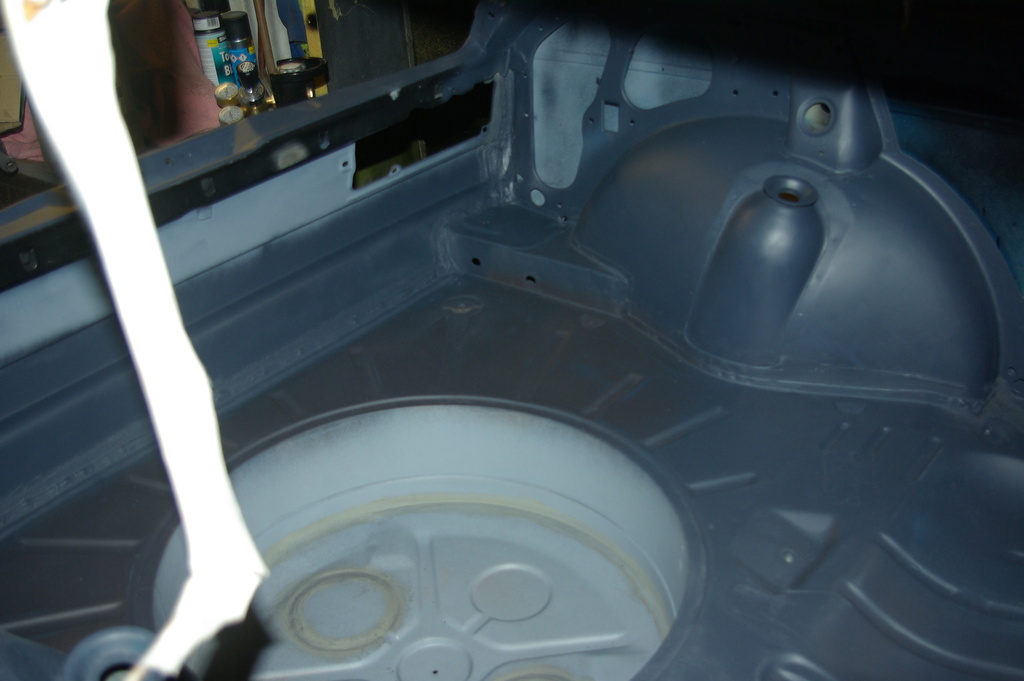

So there we go. All up to date.
Just the holes in the floor to do and tidy up the tab under the rear panel where it attaches to the spare wheel well and then a bit of a clean underneath and onto the use of Raptor bed liner for the underside!
Posted
Local Hero


I think you're just find on the loading
I think once you learn the point when it's about to melt on the floor - and remove the heat then you're fine!
My main panic was it looks awful when you put all the blobs of lead on - that's hard to get them to stay on sometimes. But once you start with the paddle and shape it, it's totally transformed!!
I did buy a body file which was really useful on the arch that I leaded - I also used a woodwork rasper like I think you mentioned.
My one mistake was following the instructions to the letter and washing down the panel with fresh water after finishing. Despite drying it off, the following day I had surface corrosion appearing already - I couldn't believe it! Especially when I had had panels left unpainted for more than a year which were still shiny!!
Andy
LINCOLNSHIRE REGION - https://www.facebook.com/groups/467122313360002/
1983 MK1 Golf GTI Campaign Model - Under (looooong) resto!
1962 Rover P4 80
2002 BMW 745i
2008 BMW Z4 2.5Si
LINCOLNSHIRE REGION - https://www.facebook.com/groups/467122313360002/
1983 MK1 Golf GTI Campaign Model - Under (looooong) resto!
1962 Rover P4 80
2002 BMW 745i
2008 BMW Z4 2.5Si
Posted
Moderator


I've not had any rust start showing yet and I think with the amount of messing about I do with the lead I'm probably burning off any flux during the process.
We shall see…….. I'l probably be updating this in a year and having to go back and weld in all new metal
Posted
Local Hero


Andy
LINCOLNSHIRE REGION - https://www.facebook.com/groups/467122313360002/
1983 MK1 Golf GTI Campaign Model - Under (looooong) resto!
1962 Rover P4 80
2002 BMW 745i
2008 BMW Z4 2.5Si
LINCOLNSHIRE REGION - https://www.facebook.com/groups/467122313360002/
1983 MK1 Golf GTI Campaign Model - Under (looooong) resto!
1962 Rover P4 80
2002 BMW 745i
2008 BMW Z4 2.5Si
Posted
Moderator


So been busy, but not really seeming to get anywhere, little bit annoying but I suppose all these little jobs have to get done at some point.
I was messing about with the drivers side rear wheel arch and generally adding some Vactan to any surface rust and having a bit of a tidy up, whilst trying to figure out how to repair the inner lips and thinking.
Whilst in contemplative mode I managed to find this (admittedly after using a screw driver and hammer to test for poor metal)
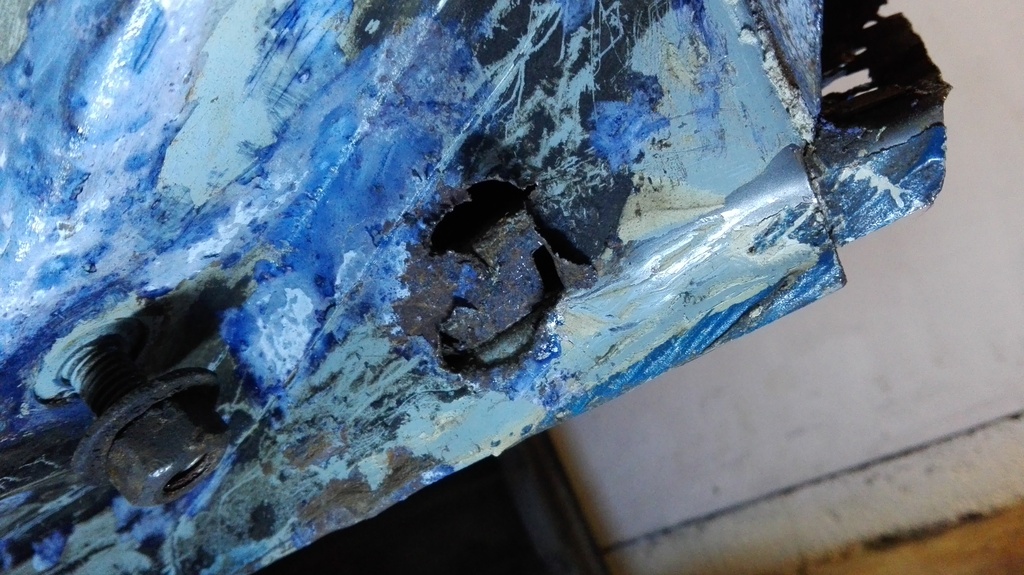
PANTS
Still dug deep and after a bit of dremal cutting and welding later all good again
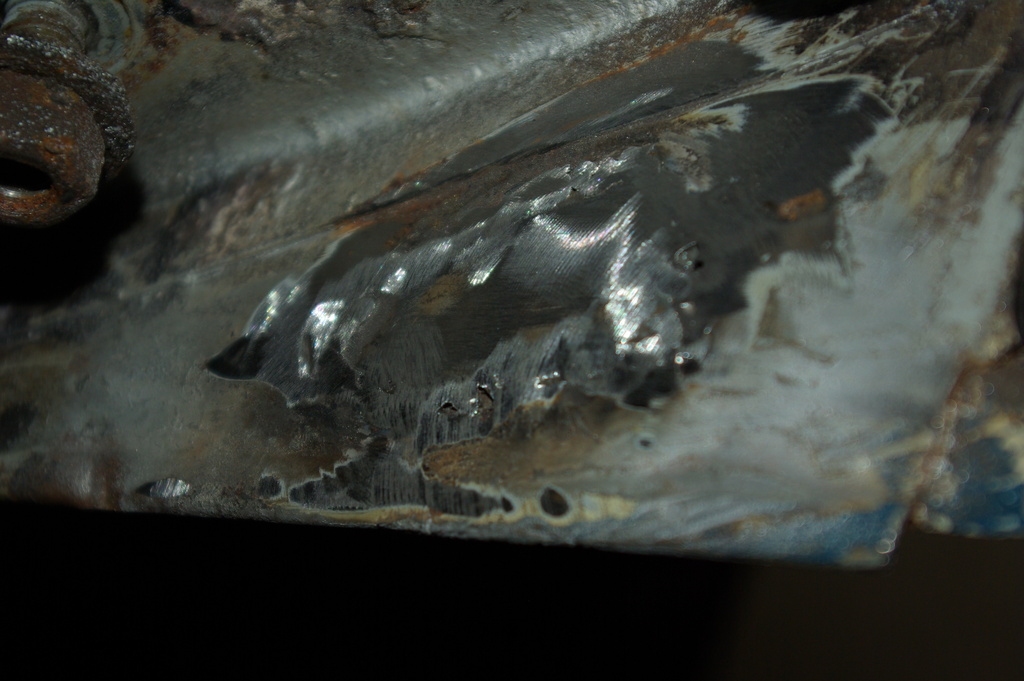
In other news
Fuse box and wiring removed from the cabin (gulp) along with the heater box

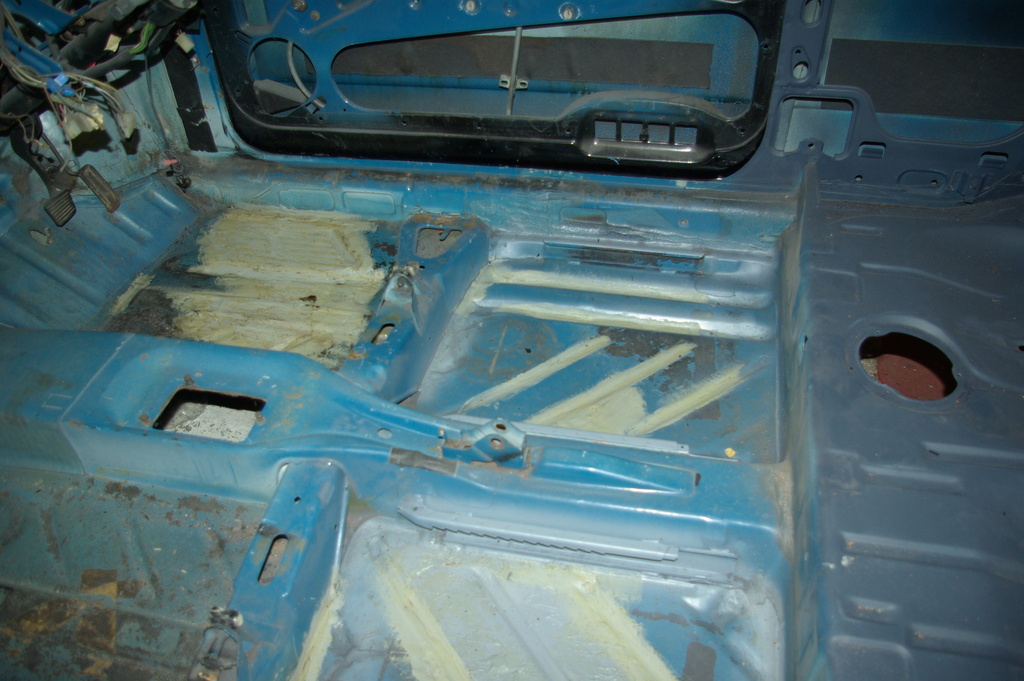
Also decided to cheat abit with the tar like gunk on the floor, after welding up the holes in the floor, I decided against trying to get it all off. what hadn't caught alight or had come off easily must still be pretty secure (I hope) so I used some seam sealer over the edges and to cover/fill any cracks in it.
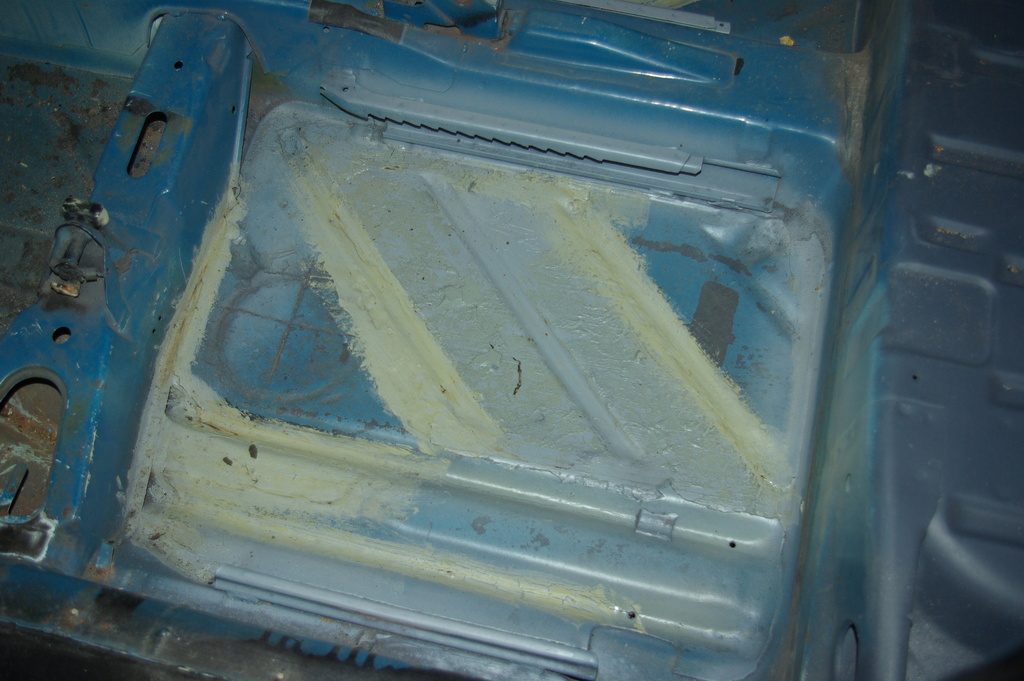
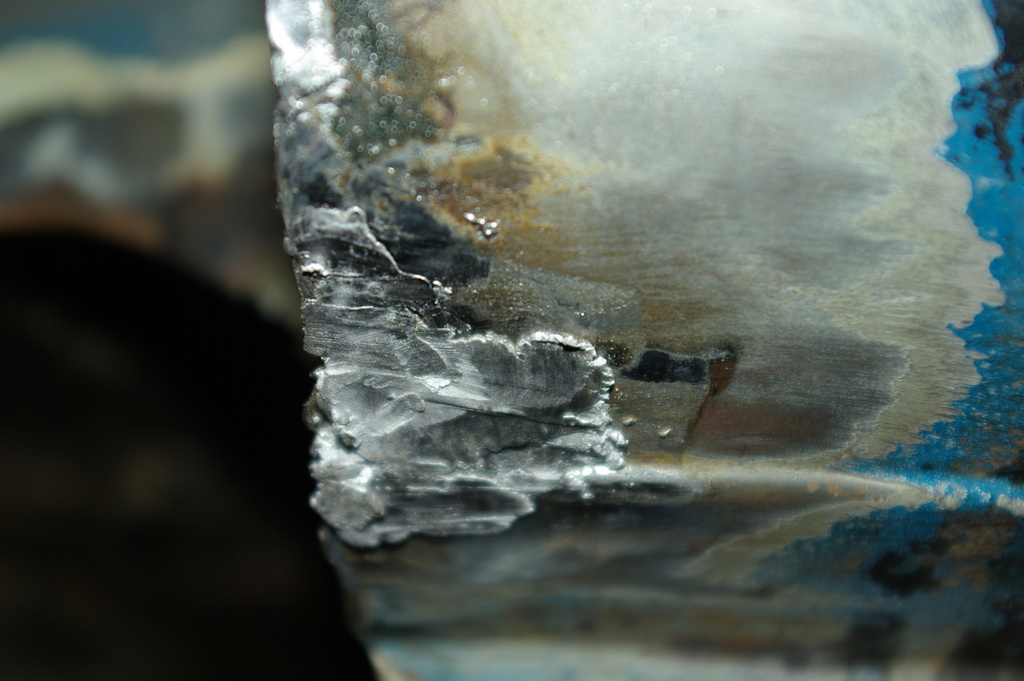
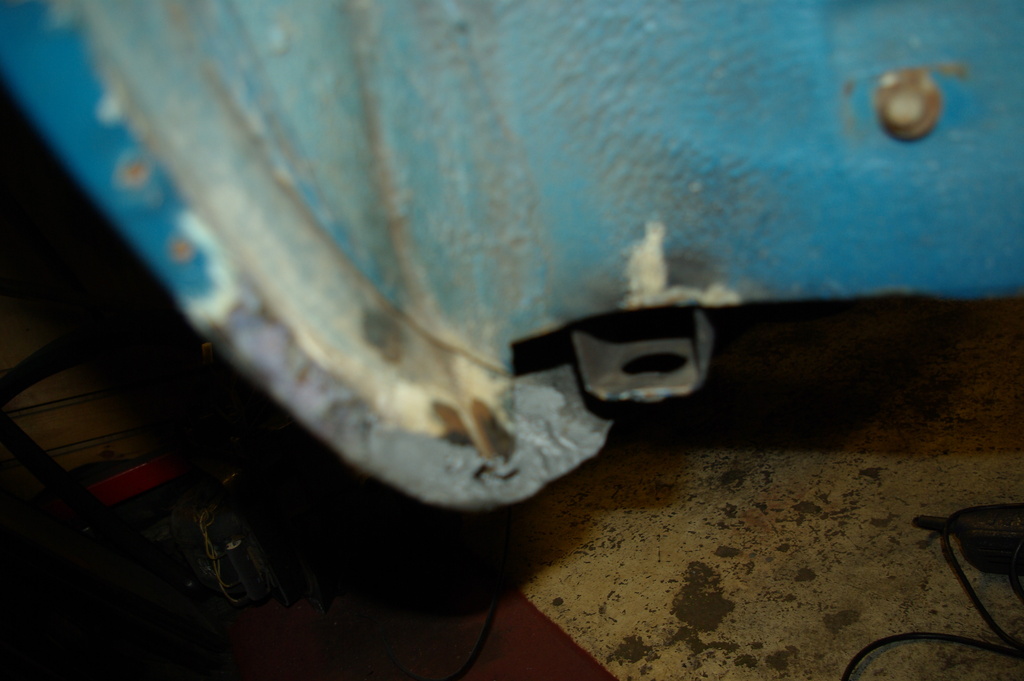
Did a bit more leading and welding and sealing to some areas of the rear arch lips.
Sorry for the rubbish piccies
So that's about it for this weeks update. A bit annoying really, but at least the UPOL Raptor turned up, so hopefully this week will see the back half of the underside done and and the inside all 'raptored' up!
Later!
Ian
Posted
Old Timer

Matt
Posted
Moderator


As I'm completely changing the brake set up and the fueling system and the wiring I've been trying to get things straight in my head, drawing diagrams and making lists of all the stuff I need to buy. So after 3 days on the internet and the phone I think I've managed to obtain all the stuff for the braking system,( Front and rear discs, handbrake cables, pads, flexi lines, Cupra nickel pipe and fixings), all the stuff for the fuel lines, (bike carb pump, 6mm id pipe from the tank, 10mm od copper pipe for the new fuel lines, 10mm id cotton braided pipe, stainless jubilee clips, joiners/reducers, P clips, silicone pipe for the bike carbs, black anodised jubilees for the bike carbs, replacement pipes for the breather system), BMW positive battery cable and a load of clips, joiners and other misc stuff for the electrics!
Still got to sort out the size of battery I'm going to use (063, 065 or 075) then I can get the battery tray and finalise the battery tray position (boot behind the seats or sacrifice the spare wheel and stick it in the well)
I think I'm going to run the positive lead along the drivers side and through the bulk head through the grommet on the right hand side of the accelerator pedal and then across under where the master cylinder will sit and onto the starter motor on the back of the block!
Just got to decide if I need and ground return to the battery or if it'll be ok just to earth to the chassis only.
Probably, maybe!
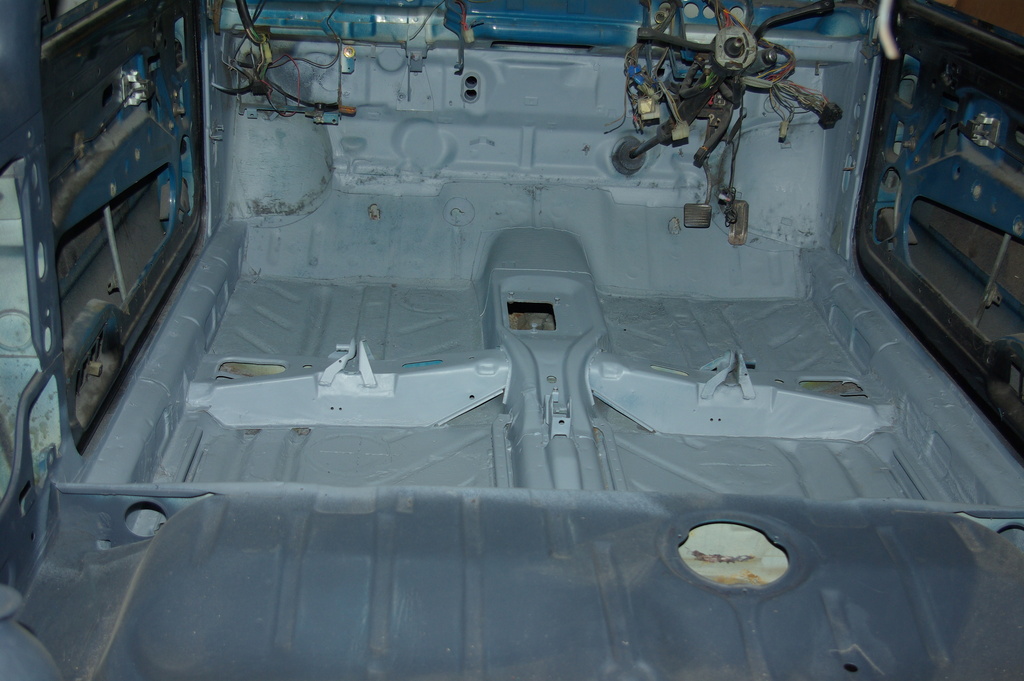
I want to get everything mocked up as much as possible before spraying the floor and the underside, so I still haven't managed this yet.
I have managed to complete the welding to the bracers across the floor where the seats mount. Just to complete this took about 8 hours!

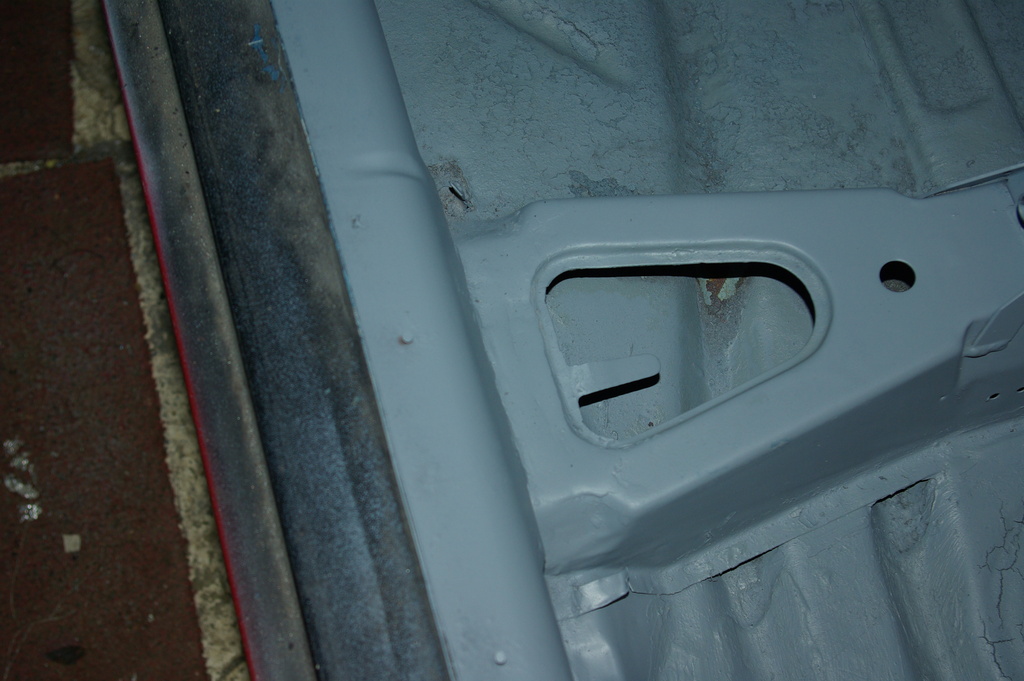
Ended up having to cut out the section where it meets the inner cill, cut out and weld in new metal to the floor, dress this up, straighten the section that I'd cut out, cut out the distressed metal and weld in new, dress this back, then weld the section back in and dress this up. On both sides!! Took way longer than I thought it would, what a complete pain in the neck! All because some one had drilled some holes and bolted in some seats.
Still done now. All the floor areas are now etch primed too so it's finally, just about all the same colour. Well it isn't actually as my supplier of UPOL etch had run out so I had to buy a different brand and it's a different colour
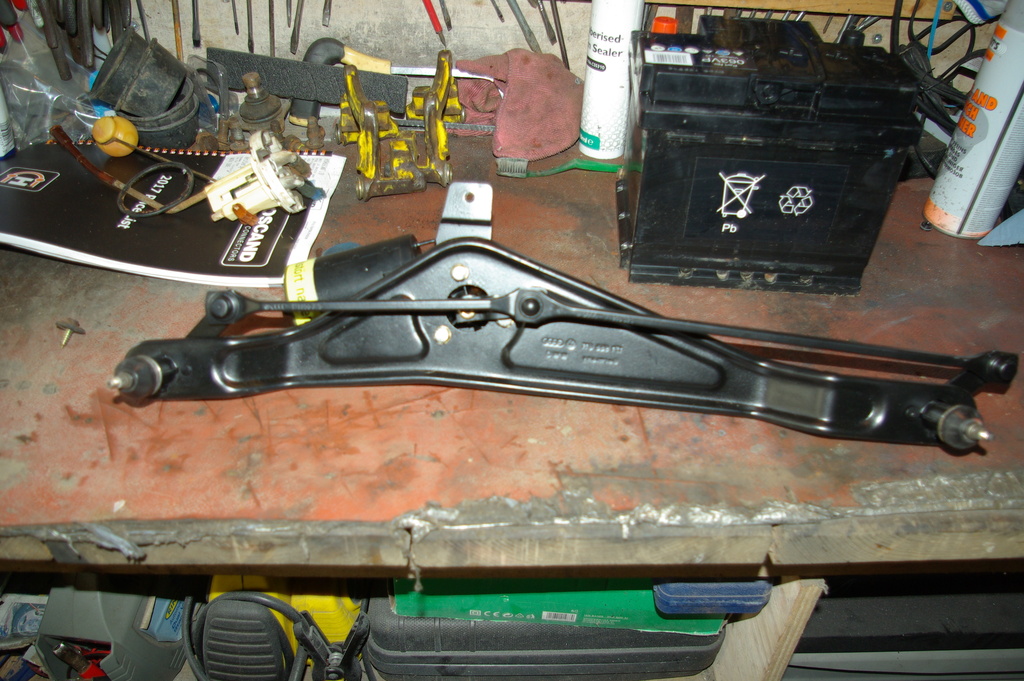
Along with replacing all the hoses ans pipes for the breather and tidying that lot up I also managed a bit of detailing to the wiper motor. A prize goes to anyone who can spot the oddness with it
So that's about it for now!
Tune in next week for more exciting updates when Ian realises that he's an idiot and has to do many things all over again!
Ian
Posted
Old Timer

0 guests and 0 members have just viewed this: None.


