


Mellow Yellow 3.2ltr 24v Conversion

Posted
Old Timer


Hummel said
I really want a picture on how your fuel system setup gonna beMine also had DSG and with my current file I'm having a non smooth torque curve, so I might need a expert handling my maps �
.
when you drive it up to him he will re map on dyno. right?
and then we need numbers! ��
That's right a remap and on the dyno, need to get the MOT first though �
 Little diagram for you �

Posted
Newbie

Just read through this whole thread! Great work and props on doing it yourself at home!
Quick Q, Are you using the Eurowise stage 2+ kit? If so, did you have issues with customs duty when you ordered it/got it delivered?
Praks
Posted
Old Timer
G60Praks said
Just read through this whole thread! Great work and props on doing it yourself at home!
Quick Q, Are you using the Eurowise stage 2+ kit? If so, did you have issues with customs duty when you ordered it/got it delivered?
Praks
Thanks for the kind words. Yes a Eurowise kit.
You will have to pay customs on items from America.
Posted
Newbie


Posted
Old Timer
77mk1_R32 said
Just thought I'd share my new downpipe which has been made for the mk5 manifolds 😁
Very nice, I can only see one lambda bung. Are you going to weld 2 more on the branch from cylinders 1-3 and cylinders 4-6?
Posted
Newbie

Old Timer
Made up a joining section from the manifold to the Miltek exhaust with a flange mating joint.


Also mounted the radiator and oil cooler. Welded up some stainless brackets (I'll get some pics up when I take them off to clean them up.) The bottom bracket utilises the stock radiator mounting point. I've welded a stainless bolt to the bottom of the bracket and then fitted a nylon stepped bush in to the mounting hole to reduce vibration.


 �
�
Posted
Old Timer
I got fed up with falling over stuff in the garage so had to sort it out. Built a work bench with some left over wood from the roof so proper overkill�


Then general clean up.


As you can see from the work bench I've amounted a collection of brake bars�
. As luck has it another member on the forum
 shepp
has sold me a South African Brake Bar setup so won't need to take my life in to my own hands with the welding�This weekend I'll get some proper updates.
shepp
has sold me a South African Brake Bar setup so won't need to take my life in to my own hands with the welding�This weekend I'll get some proper updates.
Old Timer
Jerry rigged the inlet manifold to a bumper stand.


Got some plastic primer on


Tomorrow I'll give it a light wet sand and get some top coat on�
Posted
Old Timer


Posted
Old Timer


Posted

Old Timer
Posted
Old Timer
Mellow Yellow 24v Conversion
Lol that’s the one I sold to Shepp a couple of years ago when I was thinking of selling up. I’ve since had seller’s remorse and bought another one from abfmk1.Mike 16vG60 said
Rich. said
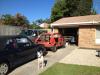
New toy arrived
Sent from my iPhone using Tapatalk
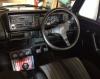
Looking forward to seeing how it fits-still need to get my new one on the car
Sent from my iPhone using Tapatalk
Old Timer
Mike 16vG60 said
Lol that’s the one I sold to Shepp a couple of years ago when I was thinking of selling up. I’ve since had seller’s remorse and bought another one from abfmk1.Mike 16vG60 said
Rich. said
New toy arrived
Sent from my iPhone using Tapatalk
Looking forward to seeing how it fits-still need to get my new one on the car
Sent from my iPhone using Tapatalk
Ha small world
Having the remote dual circuit servo, a CQ brake bias setup and then rear disc conversion I think was a recipe for disaster with all the different ratio's and proportioning valve.
The SA version is more minimalistic and efficient than stock so happy to go that route plus I will re instate the scuttle and heater vent once I have the engine running
Posted
Old Timer


Posted
Old Timer
I stored both the heater hole and scuttle carefully so I could revert back if I wanted.
�
Posted
Old Timer
 .
.I will dig out the heater system tomorrow and try underneath before finally seam welding just to be sure.
I've placed the rain tray in position, I can see where the spot welds are where it mounts to the wing. Needs a good clean up and gentle manipulation but not too bad. I'm thinking about stitch welding from the top as most of the lip where is was spot welded is gone.


Posted
Old Timer
I'll get the tack welds ground down and seam welded this week�


Marked up the rain tray to restore it and weld up some unused holes. Noticed I marked the speedo cable hole as weld oops�


Posted

Settled In

How come you've decided to put them back in after all that work & finished painting the bay?
Posted
Old Timer
Super_ted said
Looking good, great to see some progress.
How come you've decided to put them back in after all that work & finished painting the bay?
Cheers chap.
I wanted the VIN number back where it should be and also a decent heater. The BMW electric heater was never going to be great. Plus it keeps it all original

It gave me the opportunity to clean up the section under the scuttle and remove the sound proofing and give is a smooth finish so nothing lost there.
I will need to respray the rain tray and under it to the seam and probably both inner wings but they just need a scuff up and blow over. I sadly enjoy that sort of thing
I'm going to get that done in the next few weeks and then back on to the fuel and brake system
0 guests and 0 members have just viewed this: None.