


Joe90k's Rising Blue 1.8t - BBT K300 IE Rods Custom Interior

Posted
Design Manager


Joe90k's Mk1 GTi 20v Turbo
Started like this:

All glass and panels removed:

Took all of the filler off the half repaired arch to see what it was like:

Sound deadening inside removal (What a horrible job!):

Some hard work later:

Next the Mk2 lump came out:

Empty engine bay:

Master cylinder, servo and linkage removed (Spot the difference! haha)

A bit of a bodge experiment! Used a winch and the old rear bumper which someone kindly painted the same colour as the car (making it unusable!) to lift it up for subframe and tank removal:

Trailing arm out:

Tank out, just hanging:

Underneath, looks good to me:


Car up on axle stands for now:

The car will stay like that for a little while now, I have just bought another Mk1 from eBay which is also advertised on here blind, so hopefully it will be in reasonable condition! I will be taking the bits off of it that I want and putting it up for sale after doing the restoration on the shell that is needed.
I had some trouble removing the steering rack, I got the castle nut off (after playing for a long time with the split pin!) but I can't for the life of me get the linking arm out of the hub! Is there an easy way to do this? I am waiting on my haynes manual to arrive which will hopefully tell me, (I got this far without one though!) another problem I had was trying to remove the steering column which is attached to the clutch and brake pedals, it has two nuts on it which are round on one side and have odd threads on the other with like a 90 degree cut out on, I am assuming I need a special tool to remove it from the thread side!
Any comments welcome!
Joe
 Last edit: by Joe90k

2018 Up! GTi 1.0 TSI
2015 Mk7 Golf R 2.0 TSI 4motion DSG
2011 Caddy Maxi Kombi 1.6 TDi
1982 Mk1 Golf GTi 3 Door 1.8t - Build Thread
Posted
Design Manager
Been hard at work on the arch that was 90% done, quick skim of filler and it's looking better!


Welded up the hole for the aerial as I don't listen to the radio and it looked rubbish!

Degreased the inner wheel arches and they came up like new! Only a few spots of rust behind.

Steering wheel and surrounding bits taken off as well as the steering rack. The column is now off too so the car is literally just a shell now.

One side of the floor completely degreased ready for paint (What a s**t of a job!)

Did the other arch and fuel filler repair. Even though the arch wasn't that bad it was a little flaky and I want it to be perfect so I cut the old skin off and tucked the new one underneath and tacked it on. This will be getting a skim of filler to finish it off. Also did a little repair at the back as it was rotten but you can't see this here.

Welded in a little plate on the numberplate light as it had rusted out, now it's all back to square.

Driver's side bar removed and plate welded in where the metal was damaged from the weld penetration of the bar. Managed to get it looking good again though after a lot of work.

Driver's side in filler primer, the holes in the chassis leg are gone that were there when I bought it, they weren't rust just some weird cut marks? But no matter, they aren't there anymore!

Bulkhead looking smoother!

Passenger side with a skim of filler.

The bars have also been totally removed which were welded into place when I bought it. I am also on the lookout for a firewall/scuttle panel which I may get from Crazyquiff… I have also decided to fit a hydraulic clutch and do away with the brake bar along with the master cylinder and servo by fitting one of there custom pedal boxes which I will be ordering soon.
Next things on the list to do it get it flipped over which should happen in the next couple of weeks, get all the underseal stripped off then get it re-protected and start rubbing everything down ready for paint.
(A lot of the pics are mid way through me doing something rather than at the end so some of the work is not complete in the pics but it has been done properly lol I always forget to take photos at the end!)
It's getting there! Comments and Criticism welcomed!
Joe
Last edit: by Joe90k
2018 Up! GTi 1.0 TSI
2015 Mk7 Golf R 2.0 TSI 4motion DSG
2011 Caddy Maxi Kombi 1.6 TDi
1982 Mk1 Golf GTi 3 Door 1.8t - Build Thread
Posted
Design Manager
Last edit: by Joe90k
2018 Up! GTi 1.0 TSI
2015 Mk7 Golf R 2.0 TSI 4motion DSG
2011 Caddy Maxi Kombi 1.6 TDi
1982 Mk1 Golf GTi 3 Door 1.8t - Build Thread
Posted
Design Manager


and after some stripping!


Comments welcome!
Joe
Last edit: by Joe90k
2018 Up! GTi 1.0 TSI
2015 Mk7 Golf R 2.0 TSI 4motion DSG
2011 Caddy Maxi Kombi 1.6 TDi
1982 Mk1 Golf GTi 3 Door 1.8t - Build Thread
Posted
Settled In

Posted
Settling In

you da man
Posted
Settling In
Posted
Design Manager
A hot air gun, some sharp chisels and a hell of a lot of elbow grease! I finished it all today, its back to bare metal, have red oxided one sill and a few bits that were rusty. As for the good bare metal it will get a high zinc etch primer followed by stone chip. Then body colour on top of that. It's coming on well. I will upload some pics later.AMR said
what are you using to strip all the paint and underseal off in the bay and the underside?
Joe
Last edit: by Joe90k
2018 Up! GTi 1.0 TSI
2015 Mk7 Golf R 2.0 TSI 4motion DSG
2011 Caddy Maxi Kombi 1.6 TDi
1982 Mk1 Golf GTi 3 Door 1.8t - Build Thread
Posted
Design Manager


Underside is nearly there, as I said before, the pitted bits that had surface rust have been ground/wire wheeled down, then Kurust has been applied which is the blue/black, then red oxide on the top of the Kurust. Then the hole bottom will be treated with a high zinc etch primer. That sound okay to everyone? Hopefully that should stop the tin worm. On top of that to protect it will be a few coats of stone chip followed by the body colour to seal it all. All the rails and inner sections will get waxoyled with a waxoyl lance.
Joe
Last edit: by Joe90k
2018 Up! GTi 1.0 TSI
2015 Mk7 Golf R 2.0 TSI 4motion DSG
2011 Caddy Maxi Kombi 1.6 TDi
1982 Mk1 Golf GTi 3 Door 1.8t - Build Thread
Posted
Settled In
will be a minter when ur done

me: www.facebook.com/mkoneman
work: www.facebook.com/obdworks
club: www.facebook.com/dubcluboxford
instagram: mkoneman
Posted
Design Manager
mkoneman said
proper job mate 8)
will be a minter when ur done
Cheers mate! I know I'm on the right tracks when you say that! If my car comes out half as good as yours I'll be happy!

2018 Up! GTi 1.0 TSI
2015 Mk7 Golf R 2.0 TSI 4motion DSG
2011 Caddy Maxi Kombi 1.6 TDi
1982 Mk1 Golf GTi 3 Door 1.8t - Build Thread
Posted
Design Manager
First of all the back panel got the chop, the original was reasonable but it had a lot of surface rust (most I couldnt get to) and some full on rot which was difficult to plate due to the curves and angle at which I needed to get the welder in. So it came off.

Good amounts of Rot on the back of the chassis leg beneath the towing eye.

Towing eye removed, needs all the surface rot taken off of it then puddle welding back onto the leg. Took all of the rot out to butt weld a plate in it's place.

Other side cleaned up, seems in much better condition than the other haha

At this point I ran out of gas for the welder, so I spent the rest of the day cutting the hadrian panel I had up and getting it to butt up against the original panel neatly ready to be welded back on when I get more gas.

Some more angles.


Pretty happy with the fit, might need a little more playing to get it perfect.
Cheers
Joe
Last edit: by Joe90k
2018 Up! GTi 1.0 TSI
2015 Mk7 Golf R 2.0 TSI 4motion DSG
2011 Caddy Maxi Kombi 1.6 TDi
1982 Mk1 Golf GTi 3 Door 1.8t - Build Thread
Posted
Design Manager

And how the original towing eye sits.

Going to shop blast it before it's put back on to get all the rust and different layers of paint off.
Joe
Last edit: by Joe90k
2018 Up! GTi 1.0 TSI
2015 Mk7 Golf R 2.0 TSI 4motion DSG
2011 Caddy Maxi Kombi 1.6 TDi
1982 Mk1 Golf GTi 3 Door 1.8t - Build Thread
Posted
Design Manager
To start with the Towing eye has been welded back on after being cleaned up and is now solid.


The back panel has been seem welded in place.

The bottom of the car has been fully degreased and is now ready for primer and stone chip.

Both rear quarters have been filled and the rear panel as well as the numberplate holes.


The roof has also been flatted off totally back to bare metal.
The etch primer, stone chip and body colour will go on the underside next week, followed by refurbishment of the rear sub frame, front wish bones, brakes, fuel tank, fuel lines, fuel pump, and fitting of suspension, anti roll bars, wheels and then it will be taken for paint. I'm finally getting there! �
 Ordered some Kunifer brake line, am sorting out some new fuel lines atm, I've got the 1.8T mounts including the 02J mount as well as bias pedal box with hydraulic clutch courtesy of Crazyquiff �8)
Oh and one more thing…..

�
86K on her, running sweet, got a good deal with all ancillaries included and wiring looms. Very happy! Just hope it goes in with no problems and starts as she should!Full steam ahead!
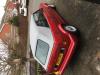
Final colour choice has been made too!�Going with Volkswagen Rising Blue Metallic as seen on the Golf and Scirocco R's. Wanted to keep it a VW colour so went the closest I could to Sprint Blue �
Joe
Last edit: by Joe90k
2018 Up! GTi 1.0 TSI
2015 Mk7 Golf R 2.0 TSI 4motion DSG
2011 Caddy Maxi Kombi 1.6 TDi
1982 Mk1 Golf GTi 3 Door 1.8t - Build Thread
Posted
Settled In
Posted
Design Manager
Right so some more pics of progress, to start with a quick mask of the bottom:

Followed by a few good coats of Etch Primer, noxious stuff this, made the mistake of taking off my respirator half way through to get a whiff as I was curious haha:


Then brush on sealer to make sure everything will be watertight for as long as possible:

Then a few (8 haha) good coats of stone chip. The pics look a little rough as I took them before the final two coats when I hadn't flatted the odd bits of sealant off to give a factory style finish:


So the bottom is entirely protected now, just need a coat of body colour to protect the stonechip from UV degradation. The DA has become by friend and I am currently in the process of mind numbingly flatting the whole car. Only a couple of things left to do before it can be painted. I have decided to smooth the engine bay and remove the scuttle panel entirely after I found one as a replacement! I'm going to make a box to go over the heater matrix with a solid duct to the wing to prevent sucking in fumes. I just think this will look less cluttered. Got a few odd holes to weld up in the front panel then flat the front and rear panels followed by a couple of coats of stonechip to protect them too. Then paint.
May not look as if a lot has gone on but if you undertake this and want it done properly it takes a lot of time, a lot!
More pics hopefully now when the paint is on �
Last edit: by Joe90k
2018 Up! GTi 1.0 TSI
2015 Mk7 Golf R 2.0 TSI 4motion DSG
2011 Caddy Maxi Kombi 1.6 TDi
1982 Mk1 Golf GTi 3 Door 1.8t - Build Thread
Posted
Old Timer
Posted
Design Manager


I am going to make a airtight box with a duct to act as a firewall to stop the heater matrix sucking in fumes. But that will be later.
Now one half of the engine bay has been smoothed and is in high build primer ready for flatting and paint.


I got some of the colour today too ready to paint the bottom of the car, its soooooo nice. Was a good choice I think! �8)
I have lost my second unit too as it has been rented now too, I'm not a squatter lol just using my girlfriends Dad's empty units until they are rented. So now I am in a squeeze. I now need to get the car in paint as soon as possible and that means it needs to be fully primered and flatted before it leaves this unit. It also means I need to sell my donor car which has actually turned out not to be a donor car. I was planning on keeping it as a second project but that's not happening so it's up for sale on here and if there is no luck then it will go on eBay!
More pics coming! I hope this is a good read!
Last edit: by Joe90k
2018 Up! GTi 1.0 TSI
2015 Mk7 Golf R 2.0 TSI 4motion DSG
2011 Caddy Maxi Kombi 1.6 TDi
1982 Mk1 Golf GTi 3 Door 1.8t - Build Thread
Posted
Settled In
Posted
Moderator


0 guests and 0 members have just viewed this: None.