


GarytheGolf

Posted

Old Timer


GarytheGolf
Unfortunately, although I have got the anti roll bars handy for a refurb, I will probably won't be able to get much done for the next fortnight as I have got familly visiting for a week.
Looking forward to the Bank holidays though!
Posted
Local Hero

Diesel Possessed
A97JCE
Feeby
A97JCE
Feeby
Posted
Old Timer
I decided to refurb the anti-roll bars I had aquired previously and retrofit them to my non GTI golf.
I also had new ARB standard bushes for the front and some blue Bonrath bushes for the rear. Notice the new saddle clamps purchased from CQs,more about them later.
The items required.


Bushes fitted.

Front ARB fitted.


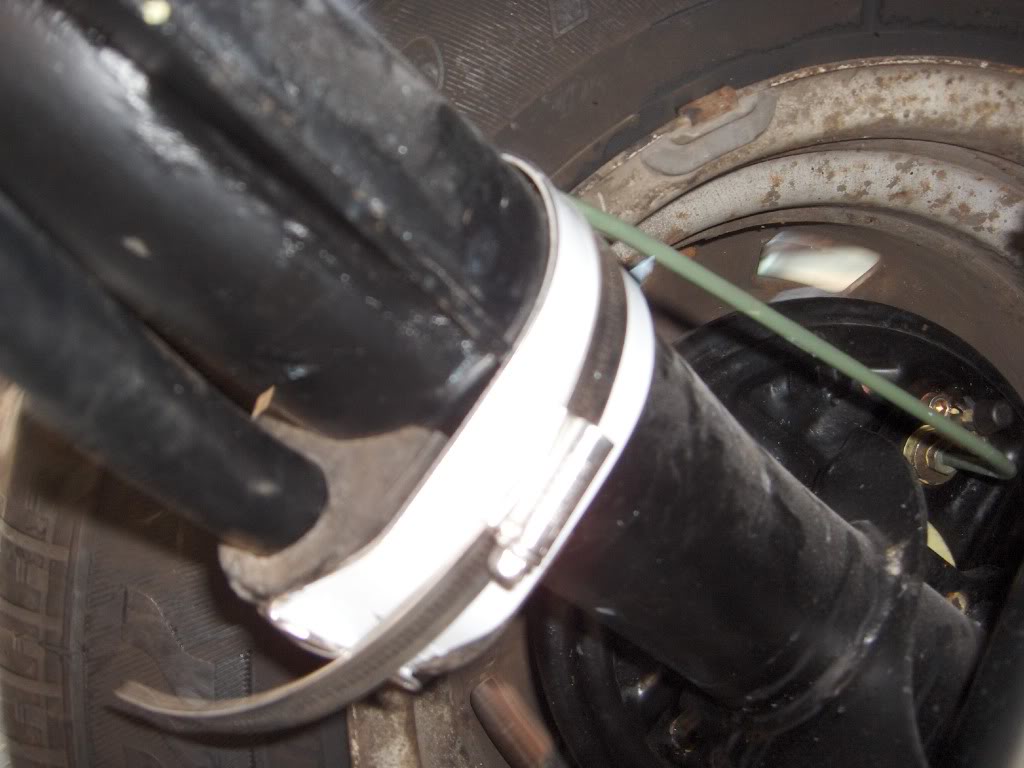
The Rear ARB has caused problems with the saddle clamps. I cannot fit and lock them. Even with a Jubilee clip, I cannot get the two sides to come together. Any pointers would be apprecaited.


They do not fit even with the old bushes.

 Last edit: by Malcolm
Posted
Old Timer
I found the best way for me for fitting was using two pairs of mole grips, tighten one, then tighen the other a little more and so on until the lock plate fits by tapping it on with a hammer and then bending the tab.


Last edit: by Malcolm
Posted
Old Timer


And discovering why my 5 speed linkage fouls the bottom gearbox mount

This item needs to be longer for the 5 speed.

Last edit: by Malcolm
Posted
Old Timer
I am glad to say I have made some progress in addressing them all.
I had not obtained the correct size lever for the change from 4 speed to 5 speed gear linkage. 4spd on left, 5 spd on right. Sorry for the quality of the pic

Fitted, note the clearance between the operating rod and the rear gearbox mounting:

New Anti roll bar fouling existing exhaust:

GTI downpipe. bought off ebay for �11.01 delivered. Compared against the 1.5 down pipe.

Fitted:

Note the heat sheet to protect the CV boot., my original down pipe did not have one.

Might need a heat sheet to protect the gear lever boot.


Last edit: by Malcolm
Posted
Old Timer
Posted
Old Timer
Posted
Settled In


Posted
Old Timer
I keep nibbling at the mountain, hoping it will dissappear. yesterday another hurdle, I found that my new radiator that I bought ages ago has been mispackaged and is for another model of engine, a 1.1/1.3 instead of a 1.5.
Onwards and upwards!
Posted
Old Timer
Focused on the radiator today. After the dissapointment that my new top fill radiator was for a small block engine, I decided to clean up my existing radiator for my 1.5.
It had already been flushed through many times before, I decided to blast the fins of external dirt.
Don't be too agrressive with a Karcher, you might do more damage than good.
There were a few areas of damage/impact on the front side only which I straightened out as best as I could.
A few picks of the assembly and installation:


Last edit: by Malcolm
Posted

Settled In
Posted
Old Timer
I had to connect a GTI downpipe to a standard 1.5 middle and back box. I have cut a about a foot from the middle box.
I acquired this connector from ebay to connect the pipes together.


I also aquired this NOS heatshield, it was clear mine was not complete.


I used the old heatshield and modified it to protect the gear linkage rubber boot.


The finished run

Lovely clearance over the anti-roll bar

Last edit: by Malcolm
Posted
Old Timer
Posted
Old Timer
So see if you can spot the difference between the first two photos:
Before:

After:


I was hoping to fit the carburettor, but I could not find it!.
Anyway found it on Sunday in the shed and gave it a clean:


Last edit: by Malcolm
Posted
Old Timer
The Weather, computer and time have been a factor.
Never the less some time was spent on the car today, plus a little in previous weeks.
I am nearly there in getting the car in a condition to start the engine.
I stripped the carb down after cleaning the outside.


You can see the �64K of contaimination within the carb.
I was fortunate enough to bag a sevice kit some time ago, including a new fuel cut of valve.
You can see the engine coming together. All the vacuum pipes have been replaced with new.
I have recently been getting the engine electrics installed and today I spun the engine over to get some oil flowing around the engine.
I also filled the cooling system up with water, one one leak around the thermostat. It seems that 2 rubber seals, one bigger than the other is the solution.


Last edit: by Malcolm
Posted
Old Timer
still haven't found a gasket for mine

Could you tell me where you got your vacuum lines from please, I need to do mine
Thanks

Posted
Old Timer
The remainder, I have use existing pipes and only replaced the connections, these can be made up from a length of vacuum rubber tubing and purchased from ebay, halfords, GSF and Europarts, etc
Posted
Old Timer
A few problems with the 1B3 carb, It would not idle, but would run by dabbing the accelerator.
Put a 36TLP Weber on it would idle but not accelerate!.
Spent a Sunday stripped the 1B3 carb down again and found a mucky jet and the emulsion tube was blocked. Cleaned thenm both up and reassembled.
Hey presto! Carb running OK, dynamically timed using a strobe and set the mixture using a Gunsons Gas Analyser.
Flushed the cooling system today including the heater matrix and filled up with 50% Blue antifreeze mix.
Checked some electrics out, everything engine wise seems to be working except the oil pressure light. Checked the pressure with an old direct oil pressure gauge. Oil pressure electrical circuit and switch fine. Seems the bulb on the dash has gone.
Posted
Old Timer


Last edit: by Malcolm
0 guests and 0 members have just viewed this: None.