


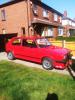
83 GTi - now MOT'd!

Posted
Old Timer


Posted
Old Timer
Nut & Bolt Resto Complete (Mars Red GTi original):��https://vwgolfmk1.org.uk/forum/index.php?page=topicview&type=misc&id=projects%2Fyour-mk1-golfs_2%2Fpistolpete-s-mars-red&start__keyed=
Nut & Bolt Resto in Progress (Lhasa 16v):� https://vwgolfmk1.org.uk/forum/index.php?page=topicview&type=misc&id=projects%2Fyour-mk1-golfs_2%2Fpistolpete-s-lhasa&redirected=1
Nut & Bolt Resto in Progress (Lhasa 16v):� https://vwgolfmk1.org.uk/forum/index.php?page=topicview&type=misc&id=projects%2Fyour-mk1-golfs_2%2Fpistolpete-s-lhasa&redirected=1

Old Timer
Yep, definately getting excited, hopefully be attempting a start-up in the next few weeks…Let's hope it works!
Been out in yours much?
 Last edit: by paceman
Posted
Old Timer
Having fully rebuilt my metering head and 16 WUR, I new I'd need to check the pressures. Also meant I got to test my diy pressure test rig (I'll share my parts list for it, as I have never found this info).
Because I have a strange desire to over complicate a solution to a problem, I knocked up a circuit with a relay to jumer my fuel pump relay. Didn't want to be wandering round to the ignition switch to keep turning the pump on and off. I don't have a picture, but it's basically an on-off switch, which flips a relay to jumper the fuel pump relay - fused as well. Connect one bit to the battery, and 2 wires that shove into the relay poition in the fuse box, press the button and Ta-Daa! Overkill, but it makes the testing so much easier.
Hooked up the pressure test rig and quickly realised I'd put the tap on the wrong side of the guage - quick adjustment, and we were off.
System pressure a pleasing 5 bar, 'cold control pressure' was a bit high, got it down to 1 bar @ 10 deg C.
So far, so good….
Connected 12v to the WUR, gauge rises steadily as it should. Finished a little low, so I adjusted the 'warm' pressure up to 3.4 bar.
Next step was to check the volume through the injectors, 4 bottles, a bit of ply and some elastic bands gave me somewhere to point the injectors. Turned the pump on, lifted the flap, 3 injectors good, 1 nothing. This made me a bit sad.
What I had noticed was that I was getting some fuel leakage from the cap screws on the metering head that cover the port adjustment screws. I hadn't tightened these down as I figured I'd need to adjust the port flow. I didn't think this could be the issue, but I nipped down the caps just to be sure. Anyway, run the test again and all 4 injectors singing away.
I marked each bottle for 100cc and ran the pump - this was the result:

Measured the volume in each bottle and got 94cc, 94cc, 90cc and 93cc (the reason none were at 100cc was that I couldn't get the bottles properly vertical during the test so couldn't see when it was at 100cc). I'm very happy with a variance of 4cc especially given I had the whole metering head in bits and set the screw positions based on measurements with a vernier.
So far, so good….
It didn't last -� I have no residual pressure. On a couple of occasions the guage would briefly hold at about 40psi, then drop, but generally it dropped off straight away. I've removed the screw from the accumulator, but there is no sign of any fuel, so I'm assuming the accumulator is good. That would suggest that the non-return valve on the pump is at fault - if it is sticking, then that would explain why it sometimes holds briefly. Of course that means I'll have to drain the tank to swap that out.
Does anyone know if there is a way to confirm it is the non-return valve without removing it?
Need to check the spark side next and then I might even try and start it….
�
Posted
Old Timer
Posted
Newbie

Ive been down a similar route with my Golf.
Ive really cheated with the fueling though.
20 years ago i had 2 mk1 gtis
A777LNW / VBU59X.
First one had no accumulator so when i worked on second one replacing fuel pipes i removed it and piped straight from tank.
Only problem i had was if i went twice round a roundabout with the older car it would splutter alittle.
So when working on this i also removed accumulator.
I then blocked the Aux air valve as i hate that high reving when cold.
It passed its Mot but was a pig to start if left 20 to 30 mins.
Sure enough i was loosing fuel pressure straight away.
Just as an experiment i wired a push button and using the redundant AAV supply with an earth from buttom to power 5 th injector.
It works so well ive left it this way.
So when starting from cold i push switch and hold for 10 seconds of engine running.
If its been parked i just push button while starters operating it fires up straight away.
I know its not how it was intended but does work really well.
Also cuts out problems with AAV. Thermo switch and acumulator.
Ive just had it mot.d again they set mixture to higher limit as i was a quarter turn too rich but it ran better before so has been set back.
Ive also found more fuel doesnt improve performance.
Ive hit button at full throttle and differnt rev ranges it makes no difference and if held floods/ splutters.
Anyone know the were abouts of A777LNW.
????
Its very distinctive in white with bbs bodykit and wheels.
Looks like an ottinger.
Owned 1999 to 2005.
Not been on road since 2016 but sold 2019.
Enjoy your rainy (Leeds) bank holiday.
Posted
Old Timer
Yeah, it was a bit wet here yesterday. Still, think the garden needed some rain.
Posted
Old Timer
Tried it on the Saturday afternoon, no joy. Confirmed a decent spark but it wouldn't go. Left it alone as I was meeting some mates in the pub for the evening (not said that for a while!).
Was discussing it with a mate I've been spannering with for over 30 years who suggested I pull the intake off and spray some carb cleaner in just to see if it would fire.
So Sunday afternoon (it was a heavy night) I did just that. Wasn't having it, and was scratching my head till my Mrs asked me if there should be flame coming from the intake! Figured something was wildly out, so despite having checked the static timing about 5 times before putting the engine in the car, I took the rocker cover off and checked it all again. It was good. decided to check the dizzy and discovered that I'd put it back on 180 deg out after removing it to spin the oil pump up. Doh! I'd lined it up with the crank pulley timing mark, not the flywheel mark (hence the 180 deg out). Set it correct and tried again. This time, it fired. So connected all the inlet tract back up, gave it another go and BINGO! Wouldn't idle, and it sounded like a dog with only the front section of the exhaust fitted, but it would run if I gave it a bit of throttle. Happy days indeed!
As I still have no residual pressure, but the accumlator seems fine, I figured it must be the return valve on the pump. I decided to buy a new fuel pump, as it comes with the valve (a �22 part on it's own) for �48. As far as I know my pump is original, it works, but a new one can't hurt. So, I need to fit that, and the exhaust, and hope that solves my residual pressure problem. Although I'm fully expecting the accumulator to now show signs of failure. Still - I'm getting there!
J
�
Posted
Newbie
paceman said
Another milestone reached last weeked (sorry, too busy to post!) I managed to start the car!!! Always a little nervous when you are the one that has done the engine rebuild.
Tried it on the Saturday afternoon, no joy. Confirmed a decent spark but it wouldn't go. Left it alone as I was meeting some mates in the pub for the evening (not said that for a while!).
Was discussing it with a mate I've been spannering with for over 30 years who suggested I pull the intake off and spray some carb cleaner in just to see if it would fire.
So Sunday afternoon (it was a heavy night) I did just that. Wasn't having it, and was scratching my head till my Mrs asked me if there should be flame coming from the intake! Figured something was wildly out, so despite having checked the static timing about 5 times before putting the engine in the car, I took the rocker cover off and checked it all again. It was good. decided to check the dizzy and discovered that I'd put it back on 180 deg out after removing it to spin the oil pump up. Doh! I'd lined it up with the crank pulley timing mark, not the flywheel mark (hence the 180 deg out). Set it correct and tried again. This time, it fired. So connected all the inlet tract back up, gave it another go and BINGO! Wouldn't idle, and it sounded like a dog with only the front section of the exhaust fitted, but it would run if I gave it a bit of throttle. Happy days indeed!
As I still have no residual pressure, but the accumlator seems fine, I figured it must be the return valve on the pump. I decided to buy a new fuel pump, as it comes with the valve (a �22 part on it's own) for �48. As far as I know my pump is original, it works, but a new one can't hurt. So, I need to fit that, and the exhaust, and hope that solves my residual pressure problem. Although I'm fully expecting the accumulator to now show signs of failure. Still - I'm getting there!
J
�
So did you have the beer glasses on when you put the timing right🍺🍺🤓
Old Timer
Posted
Old Timer
Fitted the new fuel pump, easily enough, but that hasn't solved the residual pressure problem. I've been kindly loaned another accumulator (thaks Paul!) to see if that is the issue (despite no tell-tale fuel leaks from the current one).
Got the exhaust fitted which highlighted that I needed to modify my homemade gear shift boot heat shield - but that wasn't too painless and was expected. I'll post a pic once I've painted it up.
Thought it would be wise to get some coolant in the engine - that's where it's all gone bad. Couple of pipes leaking - some fixed by nipping up the clamps, but one requires a new hose - well at least I hope that cures it. Worst part is that I have 2 leaking core plugs. Really annoyed by that as they are brand new, and seemed nice and tight when I fitted them.
I've had to remove the exhaust, and the manifold just to try and get to them. Can I get them out? Can I �@*#! Got a few more things to try, but I'm heading towards it being an engine out job. Really threw my toys out the pram about that. Usual rants of 'waste of time', 'I'll just sell it' etc etc. But the dire weather is giving me the opportunity to stay away from it and calm down a bit.
One silver lining is that I can sort out the manifold studs that were starting to strip. Bought a helicoil kit to do that, so at least I won't have to worry about the exhaust leaking!
Hopefully my next update will report some positive progress.
Old Timer

Faces in the block look fine, but the new ones will be fitted with a smear of Red Hylomar just to make sure I don't have to do that again. A real PITA!
Old Timer
New core plugs fitted (again), and no more leaking. Result.
Helicoils in place on the exhaust manifold.

Bolted all back on last night and connected the exhaust back up.
And as I promised it - a snap of the modified gear shift boot heat shield. Turns out, they aren't just right-angled for a reason.
Before:

After


The curve follows the bottom of the boot, and the exhaust bend. I don't have a picture of it fitted, but clearance is good so I shouldn't have any rattling.
Now I'm about back where I was 3 weeks ago….
�
Posted
Old Timer
Got an immobiliser fitted and tidied up some messy dash wiring, fiddly, but it works. I was wondering where I could locate the immobiliser key-hole thing (not technically a hole, but you know what I mean) without making holes in the dash. I thought I'd see what was behind the blanking panel where the choke handle would be on, errr… cars with a choke. Turns out the hole behind it was a parfect size for the immobiliser thing, so that's where I put it. Sorry, no picture, I'll have to take one. So, got the main part of the dash fitted. Looks much tidier inside now!
Whilst going through the other dash bits like the under-dash tray bits, I noticed a bit of metal attached to the back of one, no idea what it was for. Then I noticed a plate riveted to the side of the fuse box bracket…appears that the two bits should be one….

Support bracket for the under dash tray then!
Knocked up a new one (as you do).


and got it riveted in place to the side of the fuse box bracket.
Whilst in the mood for bending metal (I can't call it fabrication!) I thought I best tackle the missing number plate plinth. After I got some pictures of an original one from
 cdgthreesalmons
I started with some cardboard to get the bracket right….
cdgthreesalmons
I started with some cardboard to get the bracket right….
And after some cutting, bending and rough welding (and grinding) I ended up with this:


I did have a fold along the bottom edge, but not being able to clamp the whole length in the vice, it ended up banana-ing the whole thing, so I chopped it off. Once bolted on to the bumper, it's rather solid. One benefit of making my own was that I could reduce the space between the plinth and the bumper (vertically) so most of the bracket that come through is hidden, like so:

All told I'm quite pleased with it.
Decided to give the stalks a clean, but made the mistake of bending the wiper stalk which resulted in bits pinging out across my garage. Now, my garage isn't tidy, so I spent a good 45 mins carefully moving junk, I mean 'things that may be useful', around and sweeping the floor with a large paint brush to try and find the white plastic pin and associated spring - thankfully the smaller springs landed on the bench. Parts recovered (an amazing bit of luck I will say) I then had to re-assemble the stalk. A very fiddly job. Suffice to say I have taken steps to ensure that I cannot repeat my mistake before I refit them in the car….

Thanks for reading!
�
Old Timer
1983 Golf GTi Campaign Edition, Diamond Silver
http://vwgolfmk1.org.uk/forum/index.php?page=topicview&id=projects%2Fyour-mk1-golfs_2%2F-tag-1983-campaign&redirected=1#post_1551531
http://vwgolfmk1.org.uk/forum/index.php?page=topicview&id=projects%2Fyour-mk1-golfs_2%2F-tag-1983-campaign&redirected=1#post_1551531
Posted
Old Timer
Mainly crossing the smaller jobs off the list.
DIY replacement for the washer things that hold the carpet in place. Just a large flat washer painted black and a suitable star washer. Does the job.

Got all the dash back in, only to discover that the rev counter didn't work and the temp light wouldn't stop flashing (guage worked though) . As I don't have a level sender or associated relay, I knew they weren't at fault. Diggin around the t'internet found some posts on a van forum that suggested that the 10uF capacitor in the guage can expire leading to the flashing issue. So, I set about dismantling the instruments….Unlike most of the youtube videos, my dash has the temp guage behind the rev counter, so I had to strip it a bit further than I really wanted to….
.jpg")
The offending item…

I spent a load of time diagraming and simulating the circuit to see if I could prove it was the cap - didn't get very far. In the end I swapped out the cap for a tantalum bead version (bit more robust) and rigged up a test harness to make sure it worked before I reassembled it. Also fixed a tiny tiny track break that was stopping the rev counter working. Got it all back in the car and both issues resolved.�
 �So, dash� is back in.
I've had some issues getting the car to idle, so spent some time tweaking the mixture up little by little until it would run. Idle was very high and the timing was out, so tweaked both a few times and it's getting better. Still needs some more fettling mind, but it will get there.
My neighbour finished replacing the fabric on my lower seat bolster (she's a seamstress but said it was a real pig of a job - had to hand stich most of it!), so got the seat base done last night. I've put a bit of 1/4 inch foam over the main wear points, and made some repairs to the original foam where they split - didn't take any pics unfortunately, and I'm not taking it apart again. You wouldn't think 1/4 inch foam would do much, but it was a pig getting the covers back on. Maybe I'll just buy some new foam bolsters at some point. But it looks good to me.

She's got the upper bolster to do next as that has gone through completely. I have similar repair work to do on the foam, and I'll remember to get some photo's this time.
So what's left..?�
- finish the seat and fit it
- get my side trims painted up and fitted
- Have another look at my WUR as I can't quite get the pressures right
- Get the timing,idle and mixture right
- Wing mirror glass to fit
- Then it's probably ready for an MOT….but I'm sure there will be the odd thing that needs doing after that, but at least it will be driveable!
Posted

Local Hero

 Just think how unreliable more modern stuff thats utterly festooned with electrics and electronics are going to be when they get old
1983 Mars Red 1.8 Golf GTI
1987 Alpine White 1.8 Clipper Cabriolet
The trouble with doing nothing is that you never know when you are finished.
1987 Alpine White 1.8 Clipper Cabriolet
The trouble with doing nothing is that you never know when you are finished.
Posted
Old Timer
As for modern stuff - no need to tell me. Had a 2008 A4 estate that ended up being completely immobile on my driveway as 3 of the control units responsible for locking/immobilising/starting the car sh
 T
themselves. Cost me nearly a grand as you have to buy brand new units as 2nd hand ones cannot (Audi will not) re-program.
T
themselves. Cost me nearly a grand as you have to buy brand new units as 2nd hand ones cannot (Audi will not) re-program.
Posted
Local Hero
1983 Mars Red 1.8 Golf GTI
1987 Alpine White 1.8 Clipper Cabriolet
The trouble with doing nothing is that you never know when you are finished.
1987 Alpine White 1.8 Clipper Cabriolet
The trouble with doing nothing is that you never know when you are finished.
Posted
Old Timer
Don't worry that they aren't electrolytic. They are still polarised, but in the case of these the long leg is positive, whereas electrolytics mark the negative side.
There are too many online users to list.