Alpine White G60
Posted
Settling In

G60RGE said
we all make mistakes…


Hi,
What is the main reason why you are going to back heater and fan?
 Last edit: by .wide
Posted
Moderator


Your Moderator Manager
Sent from my Smartphone
Sent by a smartphone and not a smartperson!
Play Guess the Asking Price 'SEASON 4' as of Sunday the 29th of October 2017.
https://vwgolfmk1.org.uk/forum/index.php?page=topicview&id=chat%2Fmk1-golf-chat_2%2Fguess-the-asking-price_2
OLD.
https://vwgolfmk1.org.uk/forum/index.php?page=topicview&id=chat%2Fmk1-golf-chat_2%2Fold-guess-the-asking
Ever wondered who's behind the scenes of this forum?
https://vwgolfmk1.org.uk/index.php?page=committee
Mike
There's me building mine 28 years ago, almost finished!
Be proud of your VW Golf Mk1, it's very special!
Play Guess the Asking Price 'SEASON 4' as of Sunday the 29th of October 2017.
https://vwgolfmk1.org.uk/forum/index.php?page=topicview&id=chat%2Fmk1-golf-chat_2%2Fguess-the-asking-price_2
OLD.
https://vwgolfmk1.org.uk/forum/index.php?page=topicview&id=chat%2Fmk1-golf-chat_2%2Fold-guess-the-asking
Ever wondered who's behind the scenes of this forum?
https://vwgolfmk1.org.uk/index.php?page=committee
Mike
There's me building mine 28 years ago, almost finished!

Be proud of your VW Golf Mk1, it's very special!
Posted
Old Timer

.wide said
G60RGE said
we all make mistakes…


Hi,
What is the main reason why you are going to back heater and fan?
because its very cold and it was a stupid modification
Posted
Old Timer

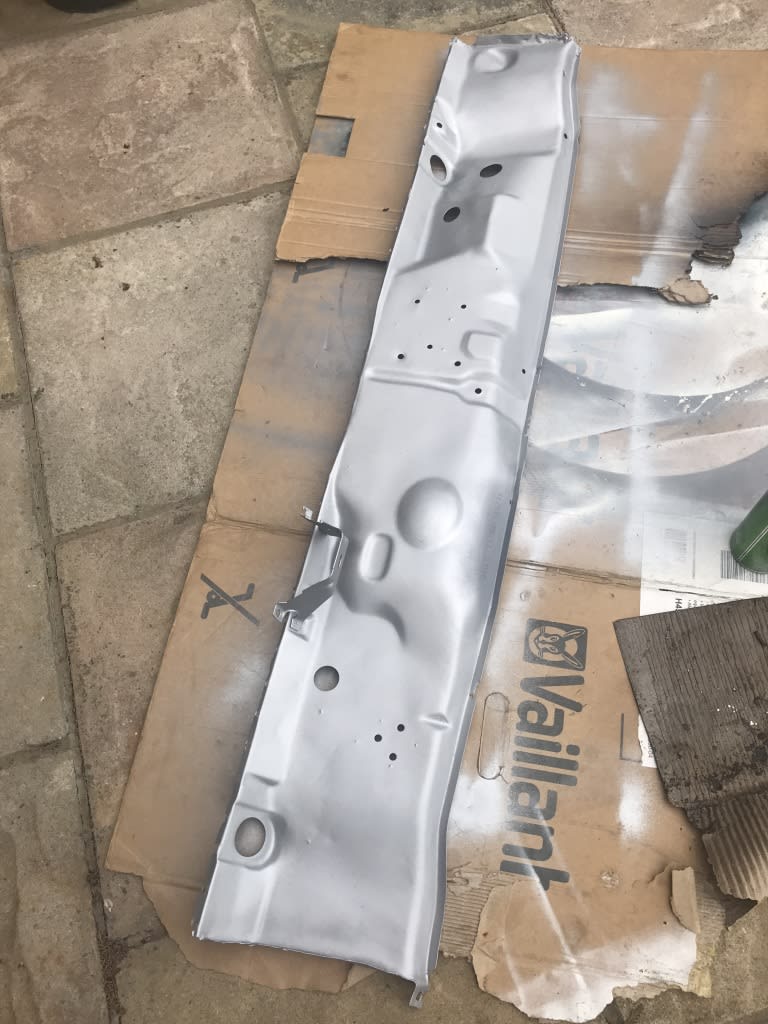
and blasted and weld through primed ready to be welded back in
any recommendations?

managed to source a heater box too
 Last edit: by G60RGE
Posted
Old Timer

It clears the alternator pully by 1mm
I still have a whistle sound on overrun i can't for the life of me find out what it is? any g60 experts on here?


looking a bit oily, i really need to get this charger checked out
Posted
Old Timer


finally got the seat centers trimmed, very happy with the results, it looks like a gti again!
Posted
Newbie

Alpine White G60
Sent from my iPhone using Tapatalk
Posted
Old Timer

Arthur83 said
Did you have to modify the air box at all? Mine looks like there isn’t any chance of squeezing it in!
Sent from my iPhone using Tapatalk
yup, a lot
i had to cut a lot off the bottom, im going to plastic weld it closed with one hole as original and make a bracket in the future
Posted
Newbie

Alpine White G60
G60RGE said
Arthur83 said
Did you have to modify the air box at all? Mine looks like there isn’t any chance of squeezing it in!
Sent from my iPhone using Tapatalk
yup, a lot

i had to cut a lot off the bottom, im going to plastic weld it closed with one hole as original and make a bracket in the future
Do you have any pictures by any chance?
I guess you had to chop the bottle bracket as well?
Sent from my iPhone using Tapatalk
Posted
Old Timer

Posted
Old Timer

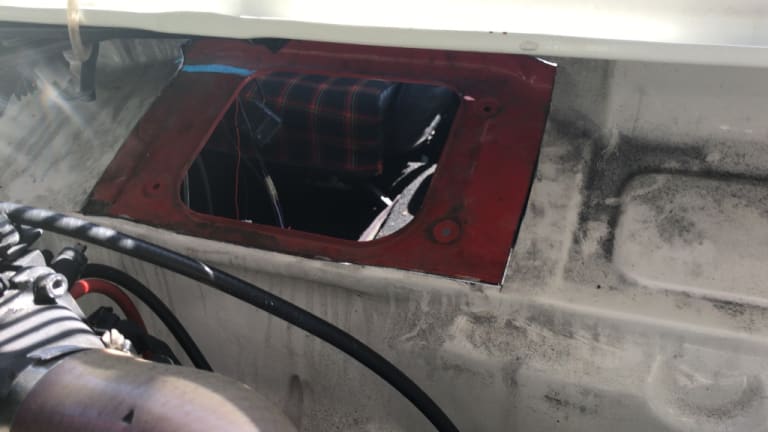
The dash has been test fitted and lines up perfectly to the heater box. Ive also ground back behind where the matrix pipes go through the bulkhead and can see where the old hole was but for some reason it seems bit off so not sure if i should drill that just yet…
i have seen the matrix hoses are angled so maybe that's me just worrying

Posted
Old Timer


Once it's back in you will be a happy chap. Are you getting the engine out for the rain tray?
Just be careful about its vertical position where the seal sits on the bonnet. Tack it up and trial fit the bonnet.
Keep the good work up
Posted
Old Timer

Rich. said
Looking good, a bit daunting isn't it.
Once it's back in you will be a happy chap. Are you getting the engine out for the rain tray?
Just be careful about its vertical position where the seal sits on the bonnet. Tack it up and trial fit the bonnet.
Keep the good work up
I've been putting it off because I was sad i had to ruin all that hard work to get it all smoothed. I also knew once i start its going to become a mammoth task. il bear the bonnet test fit in mind thanks for the heads up
thinking the engine needs to come out but im also thinking about bonding it in as another option that way i can just put it together without taking the engine out or taking it to get painted. im also not too fussed on the finish right now as im putting it all back to a standard where it can be used and not for show.. Actually, i have no plan. im just going along with it
still need to run all the brake lines and put the servo back in
Posted
Old Timer

The three holes for the servo bracket were easy to locate and drill through as the strengthening bracket on the inside was still there

Next i ground down behind the bulkhead to reveal my lovely welding where the matrix hose hole was

hole drilled out

quick lick of paint

all fitted up
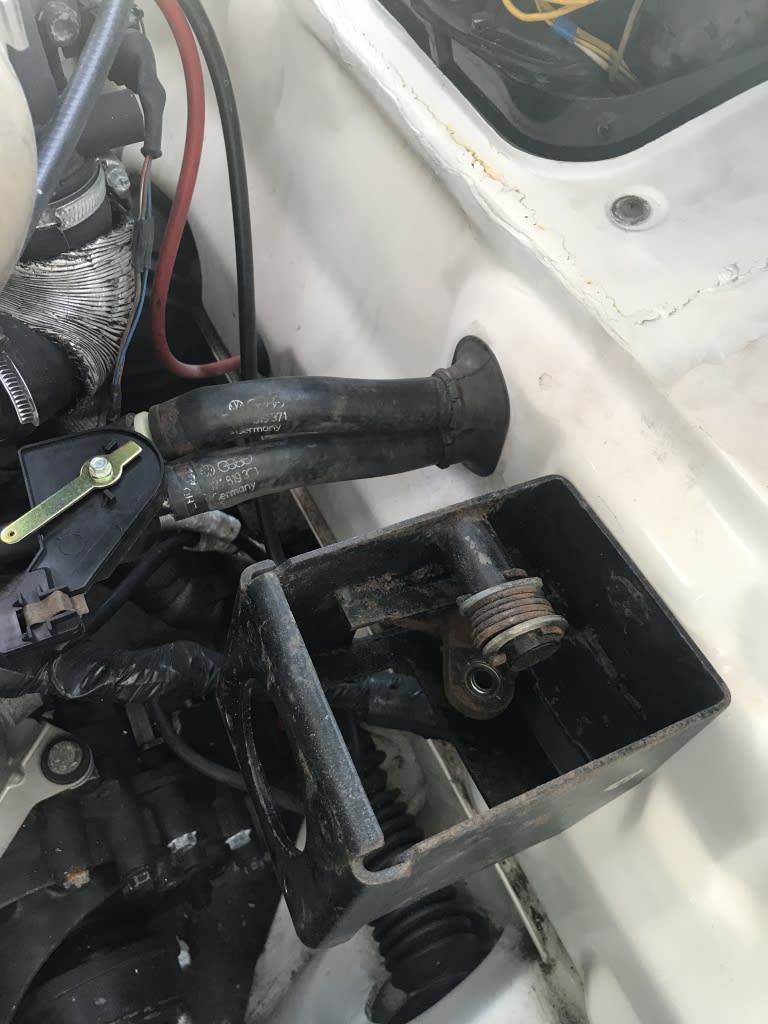
and the inside, excuse the mess, looking forward to carpet final fit making up some under trays and a bloody good valet

 Last edit: by G60RGE
Posted
Old Timer


As you can see its progressing nicely, i need to start thinking about brake lines, i remember binning the rear brake compensator which im kicking myself for now!
can anyone recommend a decent brake pipe flaring tool and brake pipe kit?
Posted
Old Timer

notice i had the bodyshop weld a strengthening plate here as the bolts were welded to the bulkhead and the support bracket in the bay was removed
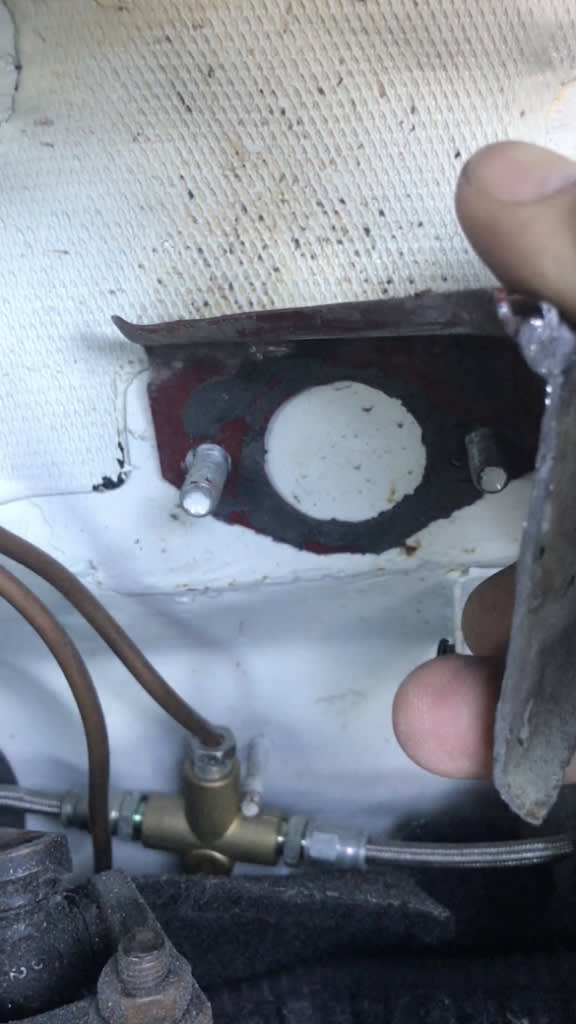
well the bolts they welded in weren't quite in the right place but my guide hole showed me exactly where i needed to be, i chopped those bolts off anyway as the standard pedal box has bolts going through the bulkhead

All done
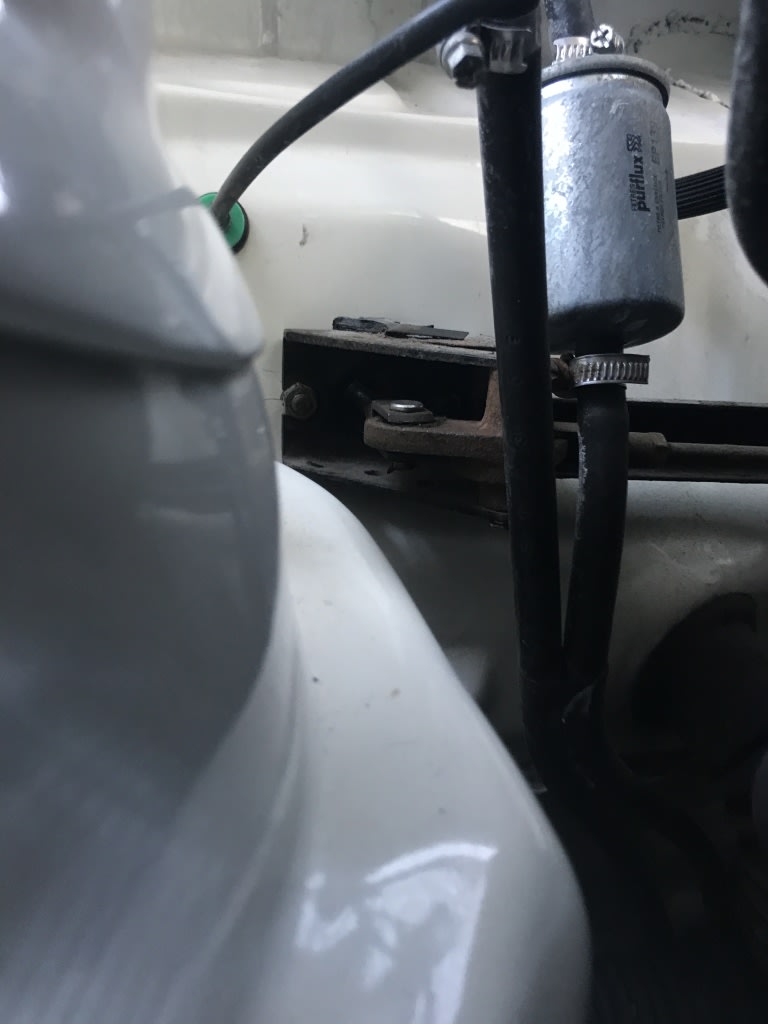

Crazyquiffs Brake Pedal box for sale

will also weld in the support bracket once i take it all off for power coating.
Very happy with this afternoons work, I've been putting this off for ages thinking it would have been a nightmare but getting stuck in has proved me wrong.
next step, brake lines
Posted
Old Timer


you can tell from pic 2 this car hasn't been driven for a while from all the cobwebs and rusty discs
parts needed
residual pressure valves x2
brake hose grommets x2
brake regulator complete with spring and hardware
brake switches x 2
shame i can't get the brake linkage and pedal box off to be powder coated right now, il get as much as i can done until i source the bit i need
Posted
Old Timer

brake servo mod, I've lost count how many times and mk1's ive done this to over the years

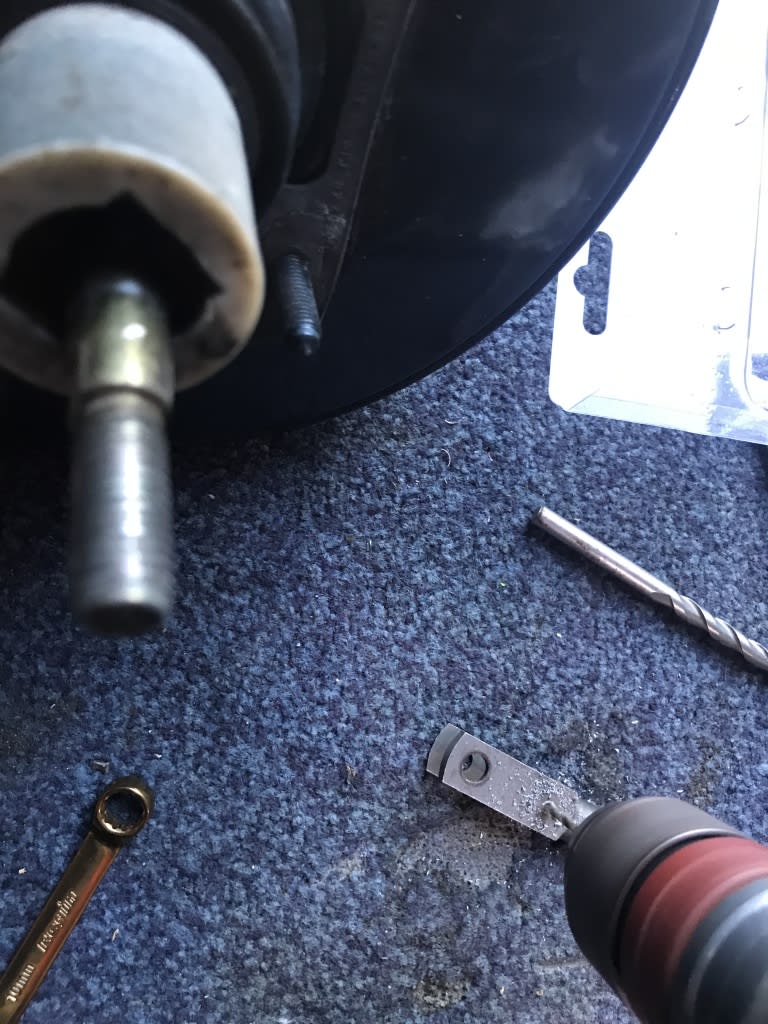
Finally managed to source a rear brake regulator but it was in a bit of a state

Little refurb, i actually found the pully in my box of bits from 10 years ago

new grommets for the brake hoses
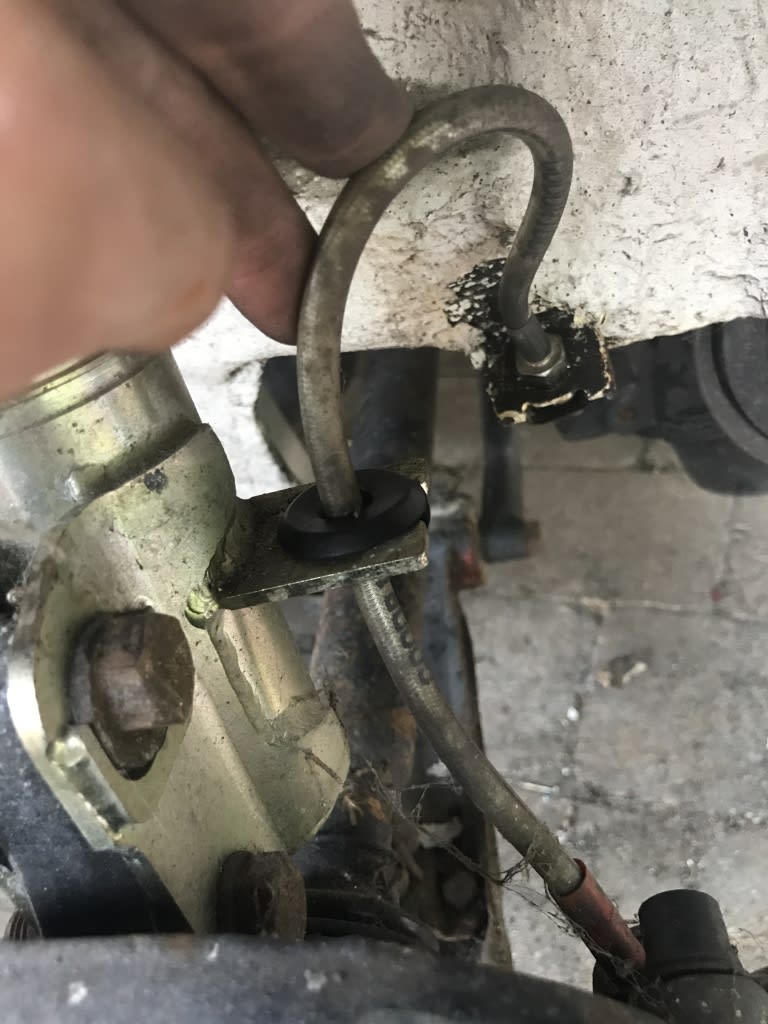
All pipework done and regulator on, yes i paid for someone to paint flakey undersea on as part of a restoration….

Re done the master cylinder pipework as it looked too messy

Was going to fill up the system but one of the front caliper bleed screws looks mangled so will leave it for tomorrow maybe
0 guests and 0 members have just viewed this: None.


