Headlight loom upgrade
Posted
#1555392
(In Topic #208654)
Settling In

Thanks in advance!
Posted
Local Hero

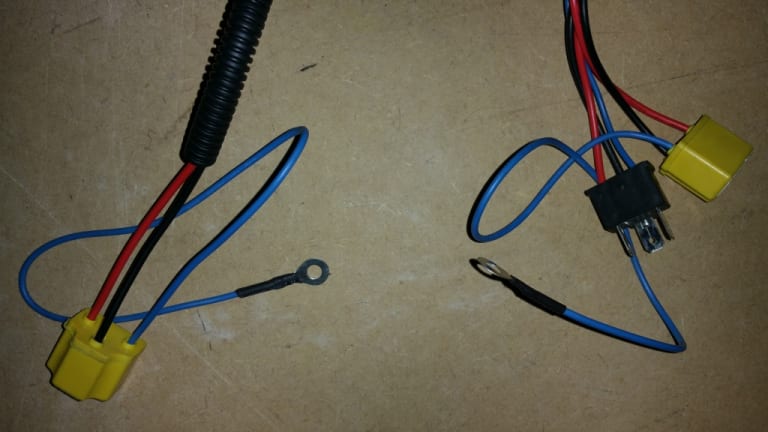
Here is the link to the harness wiring that I did. The one on top is for a 3 relay, and the one ont he bottom is for a 2 wire relay.
New design for Headlights Relay - Topless Rabbit Forums
What do Divorces, Great Coffee, and Car Electrics all have in common?
They all start with GOOD Grounds.
Where are my DIY Links?
They all start with GOOD Grounds.
Where are my DIY Links?
Posted
Settling In

 Cheers for the quick reply! Apologies I'm still confused, so where do they connect to?
If it helps, here's a photo of my loom. The wires I mean are the 2 blue ones (not red, sorry!) with the ring connectors that come out of the yellow blocks.
Posted
Local Hero

compare the harness headlight to my drawing I forgot to add the ground to the brown path.
I will correct that.
What do Divorces, Great Coffee, and Car Electrics all have in common?
They all start with GOOD Grounds.
Where are my DIY Links?
They all start with GOOD Grounds.
Where are my DIY Links?
Posted
Local Hero

I have "fixed" my drawings.
What do Divorces, Great Coffee, and Car Electrics all have in common?
They all start with GOOD Grounds.
Where are my DIY Links?
They all start with GOOD Grounds.
Where are my DIY Links?
Posted
MOTY 2013

only 1 fuse and 2 relays means there is no failover there, if a relay goes you loose both sides, and if the fuse goes you loose ALL of the lights.
Ideally you want at least 3 relays and fuses, 1 fuse and relay per side for dipped and 1 fuse/relay for main (you don't use these often so just the 1 is probably fine, but feel free to add an extra fuse and relay if you want!)
Hello my name is John and I'm a dub addict.
My wiring diagrams and other documents have moved here:
VAG Documents & Downloads
You'll need to sign into google/gmail for the link to work! (its free!)
My wiring diagrams and other documents have moved here:
VAG Documents & Downloads
You'll need to sign into google/gmail for the link to work! (its free!)
Posted
Settling In

I'll have a look at your diagrams Brian and see if I can figure out how to add the extra relay and fuses. Wish me luck!
Posted
Local Hero

What do Divorces, Great Coffee, and Car Electrics all have in common?
They all start with GOOD Grounds.
Where are my DIY Links?
They all start with GOOD Grounds.
Where are my DIY Links?
Posted
MOTY 2013

Hello my name is John and I'm a dub addict.
My wiring diagrams and other documents have moved here:
VAG Documents & Downloads
You'll need to sign into google/gmail for the link to work! (its free!)
My wiring diagrams and other documents have moved here:
VAG Documents & Downloads
You'll need to sign into google/gmail for the link to work! (its free!)
0 guests and 0 members have just viewed this: None.


