


MK1 83 GTI Lhasa Resto-mod


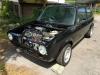
Settled In


I also own a Campaign that'll stay completely original hence wanting to play with the other a little.�
Jobs on the list:
- Upgrade to larger Audi 80 throttle body - modify inlet manifold.
- Head port, gas flow and full rebuild.
- Fast road cam�
- Rebuild fuel distributor�
- Fit stainless four branch manifold and exhaust
- Fully overhaul and upgrade brakes
- fit VDO's
……..and that's it for starters
�Black 1984 MK1 Golf GTI Campaign.
Posted
Settled In
The bits I used are:
- Some rotary rasps/cutting dies that are rated to cut alloy.�
- 80 grit porting cartridge rolls (sandpaper rolls)
- The larger throttle body gasket
- A drill
- A vice or workmate to clamp the manifold whilst working on it.�
- Compressor or compressed air to thoroughly blow all of the filings out when finished. �
- A couple of bolts to screw into inlet manifold to create a securing point to hold it during the work.�
Unfortunately I didn't photograph this but it's really simple. Firstly offer up the MK2 Golf or Audi 80 throttle body to make sure you have the correct one (037-133-073). Then take the gasket and place it on the port opening of the inlet manifold to use as a template. You'll then be able to see how much material you need to remove. Use a permanent marker to trace round and give you a guide.
Next make sure you've a way of securing the manifold. This was how I secured it with two bolts for some of the porting process and then moved it as I needed to.
Next step, using a drill and rasp remove the bulk of the unwanted material. Be aware that this is the aggressive stage of removal so don't grind off too much. What I learnt pretty quickly is to keep the rasp moving and not settle for too long in one place. Rasps picked up at Toolstation for around �4.
When you think you've removed enough, give the manifold a through blow off with compressed air and then place the new throttle body on, loosely tighten the bolts, open the throttle up so you can peer through and see if you've removed enough material. I didn't on my first attempt so placed the gasket on once again, traced with a marker and then went back with the rasp.
Next I used an 80 grit porting cartridge to smooth off the rough finish the rasp left behind.
Once I'd test fitted the throttle body again and peered through I was far more confident that I'd taken enough material off and it looked pretty good
�Black 1984 MK1 Golf GTI Campaign.
Posted
Settled In


�Black 1984 MK1 Golf GTI Campaign.
Posted
Settled In
Next I used a wire brush drill fittings to blast away all of the rust. This was a pretty quick process and brought it up brilliantly. After a good clean with grease remover I then painted it with high temperature clear. As well as protecting it from the elements it also looks great.�
Next step was to set the oven to 90 degrees and cure it for a couple of hours.
Having ordered a rebuild kit from Germany on eBay I then set about the fiddly job of cleaning and replacing all of the internal seals, gaskets and washers.�
Great video to take you through the process below:
Bosch K-Jetronic Fuel Distributor Seal Replacement - YouTube
Really pleased with how it turned out.


�Black 1984 MK1 Golf GTI Campaign.
Posted
Settled In
Went through a number of processes to strip off the old paint and rust with these. Firstly scrubbed the hell out of them in Gunk degreaser, then used an acrylic abrasive pad on the grinder to take off the paint and finished it off with wire brush fittings on the drill.�
Wasn't too happy with the Matt finish so added some clear on top, unfortunately this reacted with the base coat so I'll no be stripping it and starting again!


 Last edit: by Campaigning for Dave
�Black 1984 MK1 Golf GTI Campaign.
Posted
Old Timer

Nice bit of porting and rebuild of the fuel distributor.
Rich
Last edit: by Rich.
Posted
Settled In
Posted
Settled In
Rich, thanks a million for letting me know. Just deleted it.Rich. said
Hi chap, looking great.
Nice bit of porting and rebuild of the fuel distributor.
One thing, is there meant to be a video of a girls birthday? Towards the bottom.
Rich
Last edit: by Campaigning for Dave
�Black 1984 MK1 Golf GTI Campaign.
Posted
Old Timer
DaBullCam said
Rich thanks a million for letting me know. Just deleted it and every other photo as I'm still getting to grips this.Rich. said
Hi chap, looking great.
Nice bit of porting and rebuild of the fuel distributor.
One thing, is there meant to be a video of a girls birthday? Towards the bottom.
Rich
No problem

Liking the oven bake, wish I could get away with that

Posted
Settled In
Rich. said
DaBullCam said
Rich thanks a million for letting me know. Just deleted it and every other photo as I'm still getting to grips this.Rich. said
Hi chap, looking great.
Nice bit of porting and rebuild of the fuel distributor.
One thing, is there meant to be a video of a girls birthday? Towards the bottom.
Rich
No problem
Liking the oven bake, wish I could get away with that
Need to do it at a time when your wife is out dog walking followed by a shop around town……and be sure to open the windows. Then comment on how chilly the day is when she returns.
Last edit: by Campaigning for Dave
�Black 1984 MK1 Golf GTI Campaign.
Posted
Local Hero

Love the oven cooking and I had to do the same as you, wait for the wife to go out and get cooking.
1988 Mk1 Golf GTi Cabriolet 1.8cc DX, K-jet. Daily drive. 317,000 miles and counting
1978 Mk1 Scirocco GLS 1.6cc FR, Webber carb. Weekend toy.
1978 Mk1 Scirocco GLS 1.6cc FR, Webber carb. Weekend toy.
Posted

Local Hero
1983 Mars Red 1.8 Golf GTI
1987 Alpine White 1.8 Clipper Cabriolet
The trouble with doing nothing is that you never know when you are finished.
1987 Alpine White 1.8 Clipper Cabriolet
The trouble with doing nothing is that you never know when you are finished.
Posted
Old Timer
Posted by accident
Posted
Old Timer
I've got a spare fuel distributor that I plan to tackle. Do you happen to have a link to the ebay one you bought?
did you buy new banjo bolts or clean up the original ones? If you cleaned them - how?
Cheers,
Jason
Posted
Settled In
paceman said
Good work there.
I've got a spare fuel distributor that I plan to tackle. Do you happen to have a link to the ebay one you bought?
did you buy new banjo bolts or clean up the original ones? If you cleaned them - how?
Cheers,
Jason
Yes here's the link for the rebuild kit.
https://rover.ebay.com/rover/0/0/0?mpre=https%3A%2F%2Fwww.ebay.co.uk%2Fulk%2Fitm%2F183950579737
As for the banjo's, I was lucky to find an entire genuine set on eBay for �36 which was great.�
They're all available online apart from the step down bolt shown below VW no.063133558. After a lot of digging I discovered that the serial number changed some time ago - it is now 063133541 and associated with Porsche rather than VW.


�Black 1984 MK1 Golf GTI Campaign.
Posted
Settled In


�Black 1984 MK1 Golf GTI Campaign.
Posted
Settled In
Hello,Early-1800 said
Whilst refurbing the camcover, have you checked the mesh under the breather outlet is clear? If not now would be a good time to sort it out.
Yes I did, took quite a lot of effort but hopefully I removed �most of the rubbish in there.�
�Black 1984 MK1 Golf GTI Campaign.
Posted
Settled In
The trickiest bit was getting the vernier pulley bolt off the standard camshaft as it was seriously torqued up! I tried first with a socket set but it wouldn't budge so I then clamped it in a workmate and used my impact to loosen it. This worked really well and didn't damage the cam as it was held tight with wood.
The woodruff key was a little tight to fit into the new cam but with a few gentle taps and some assembly fluid it dropped in.�
I made sure to keep the cam caps in order when removing them as they need to be fitted in the same order, they are numbered though so it's not too tricky. I then, a few turns at a time tightened the two outer caps which gently tightened the cam to the valves. This seemed to me to be the common sense way of reassembling, not sure if it's correct though. Finally I worked my way from the outside in tightening all of the caps down to 20nm.


�Black 1984 MK1 Golf GTI Campaign.
Posted
Settled In


Please close your eyes if you own a cabby. To blank the holes and reinforce the lower edges I used the steel a rust free cabby door I have. As I don't own a cabby and the doors aren't really worth much this was the best option to hand. I chose areas that had a similar profile meaning less forming! I also intend to use the front lower corner to repair one of the doors on my car at some point.�


Once happy I'd created the best fit I could I then used 3M metal weld adhesive to attach the patches. I decided to go with this for a number of reasons. Firstly, some of the remaining steel was so thin weld would have blown straight through, secondly the adhesive creates an incredible seal and finally I'm not at a very accomplished welder.�

�Black 1984 MK1 Golf GTI Campaign.
Posted
Settled In


�Black 1984 MK1 Golf GTI Campaign.
0 guests and 0 members have just viewed this: None.