


GarytheGolf


Old Timer


GarytheGolf
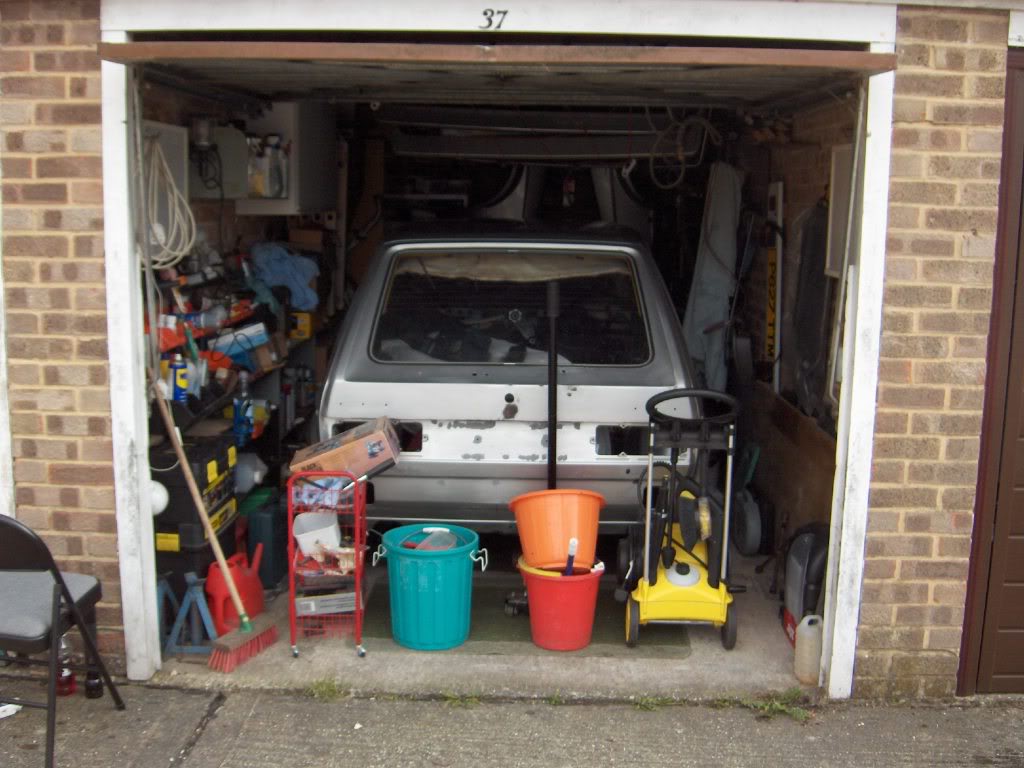
Nearly two years ago I acquired a 1983 Silver Mk1 Golf GL 1.5 5dr with blue interior and 64K on the clock.
I have been gradually / slowly refurbishing the car since I SORN'd it.
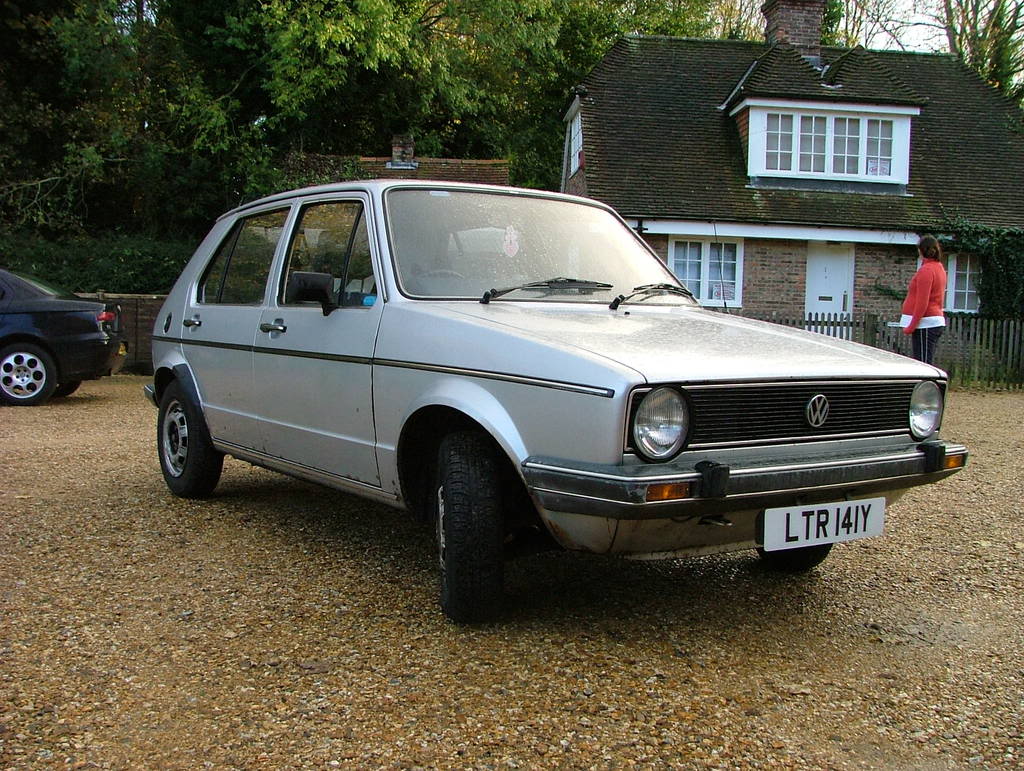

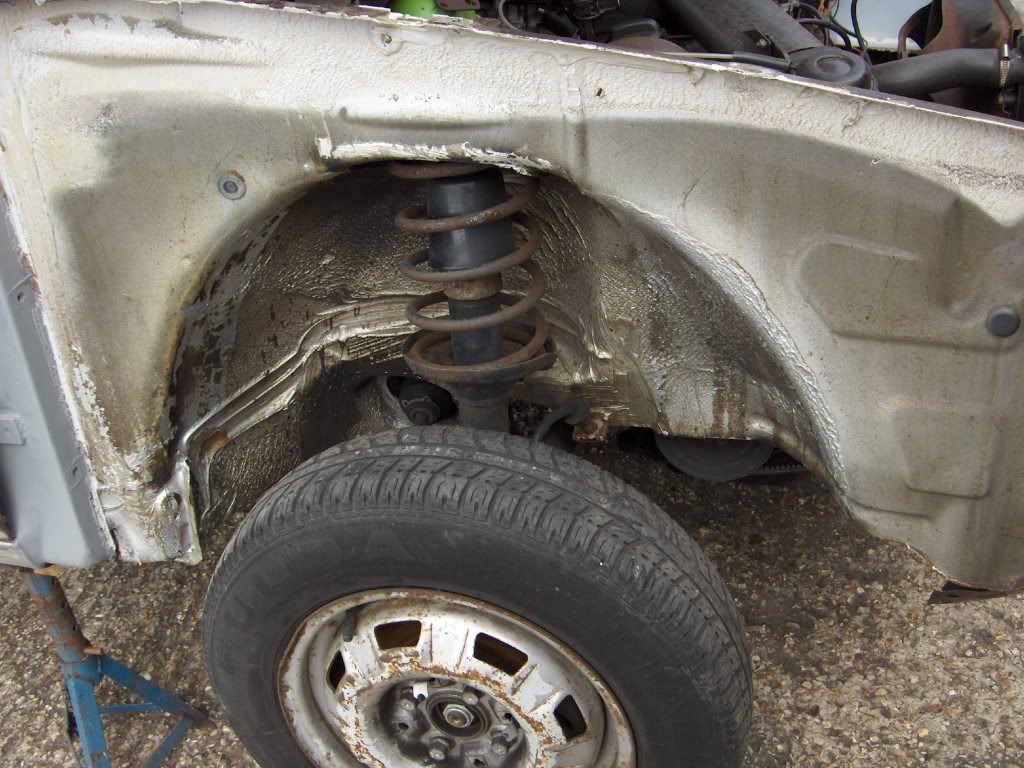
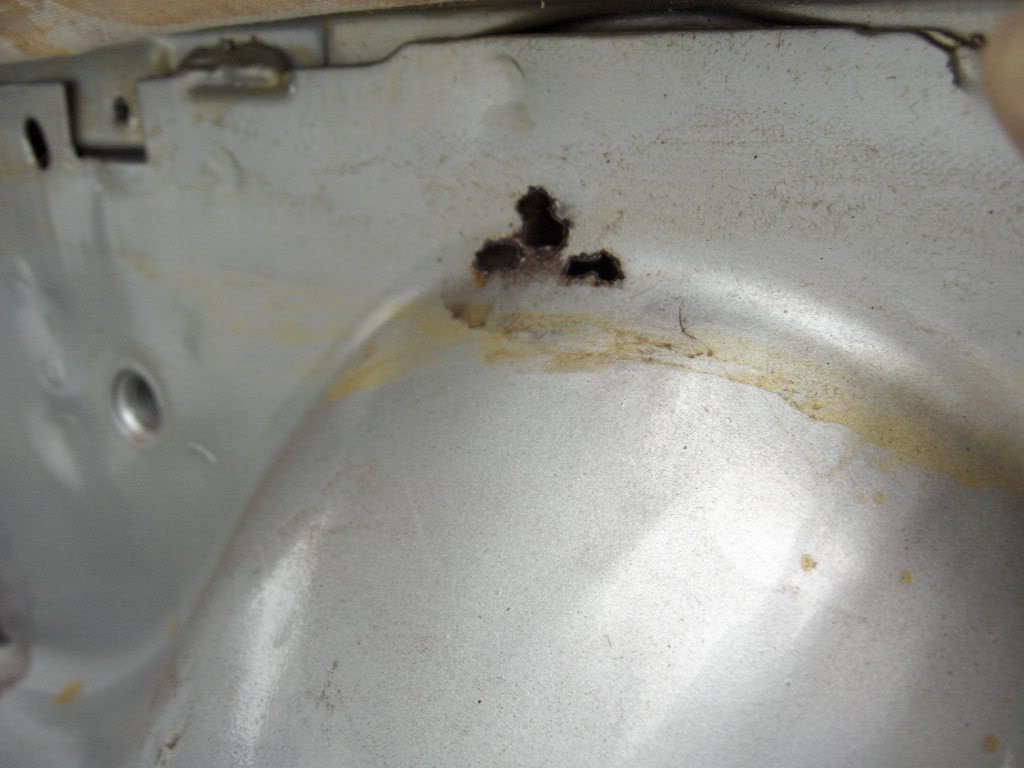
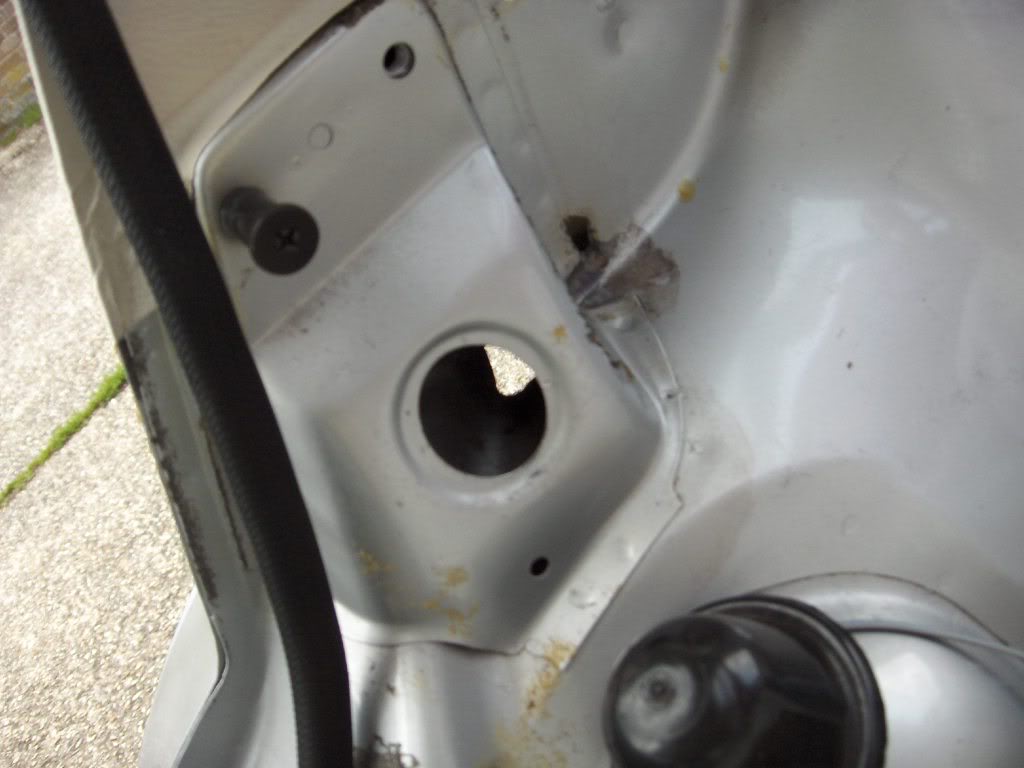
I have discovered the usual areas of rust around the axle mounts and the rear arches but they are not to the severe extent that I have seen on this website. I look forward to returning it to its former classic glory.
I have already acquired the axle mount repair sections from Crazy Quiffs who I found extremely helpful and directed me towards this site.
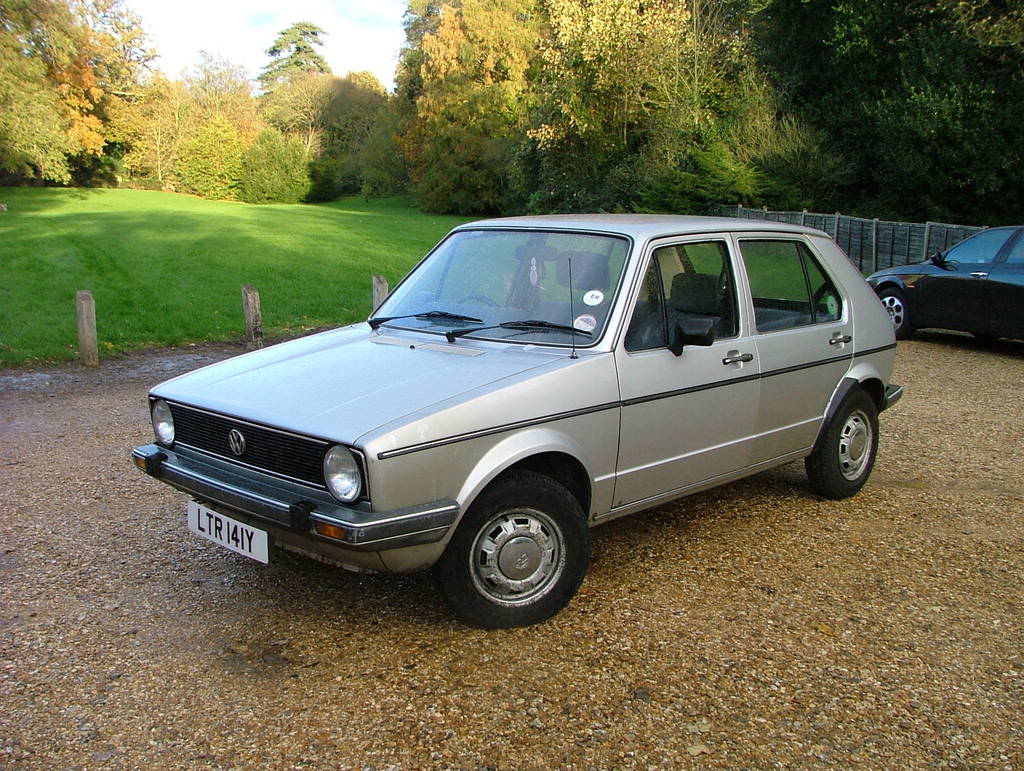
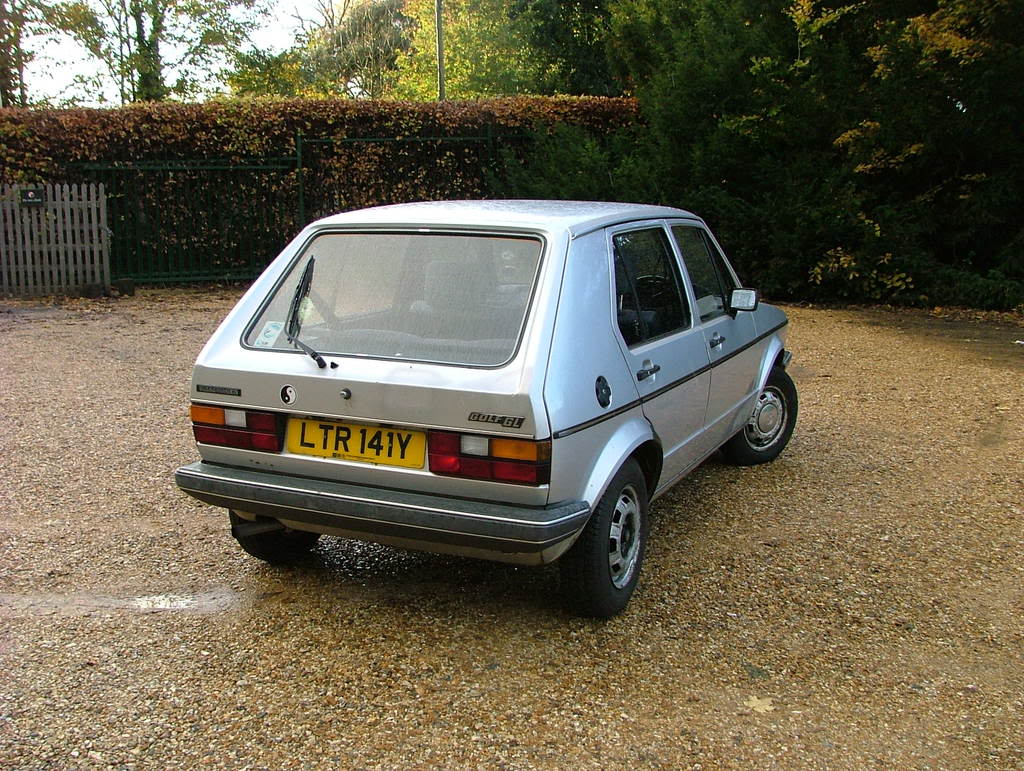
Here are some photos to date on the progress.


 Last edit: by Malcolm
Posted

Local Hero


Andy
LINCOLNSHIRE REGION -�https://www.facebook.com/groups/467122313360002/
1983 MK1 Golf GTI Campaign Model - Under (looooong) resto!
1962 Rover P4 80
2002 BMW 745i
2008 BMW Z4 2.5Si
LINCOLNSHIRE REGION -�https://www.facebook.com/groups/467122313360002/
1983 MK1 Golf GTI Campaign Model - Under (looooong) resto!
1962 Rover P4 80
2002 BMW 745i
2008 BMW Z4 2.5Si
Posted

Local Hero
Loving 5 doors, be interesting to see how yours come out next to mine..
check outlink below, they starte dthe same, was like looking at my car, even the doors look different shades of silver, just like mine
Posted
Newbie

Posted
Old Timer
I am hopefully enrolling in a DIY Welding Course at Southampton City College in September. I have done welding in training before, but need to learn about new techniques and the use of MIG welding equipment. That's so long as I can pass the required interview!.
The nearside rear door does have a different shade of silver, I have checked the door, quite clearly it has been resprayed at some time in the past but is the same base colour internally.
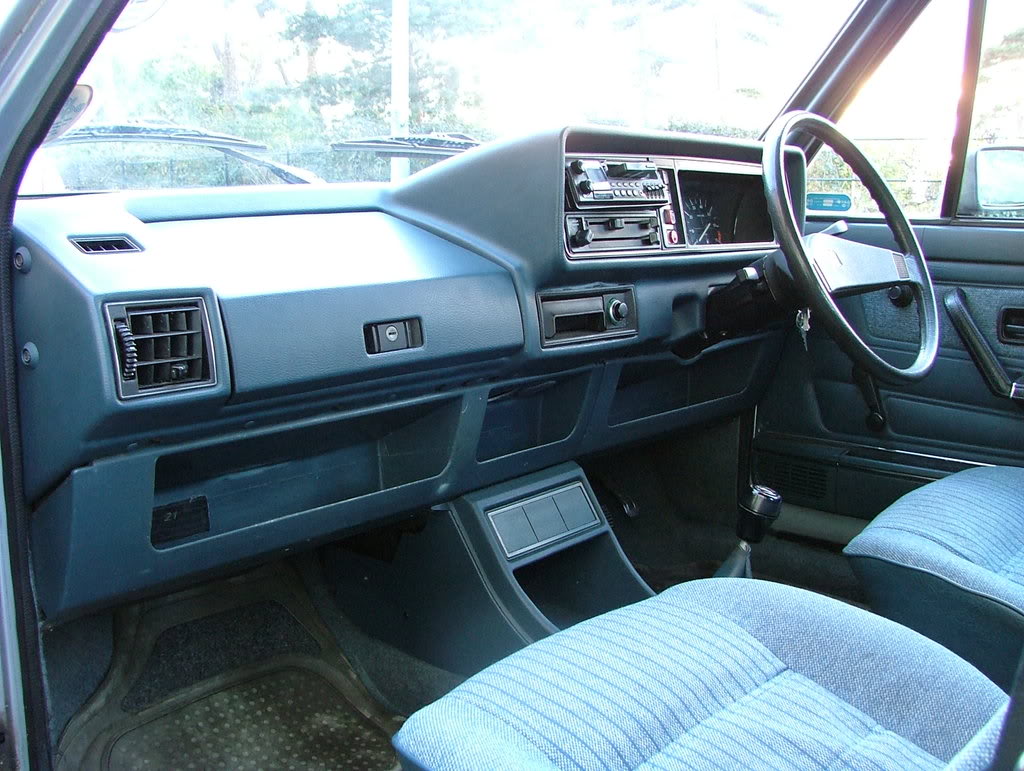
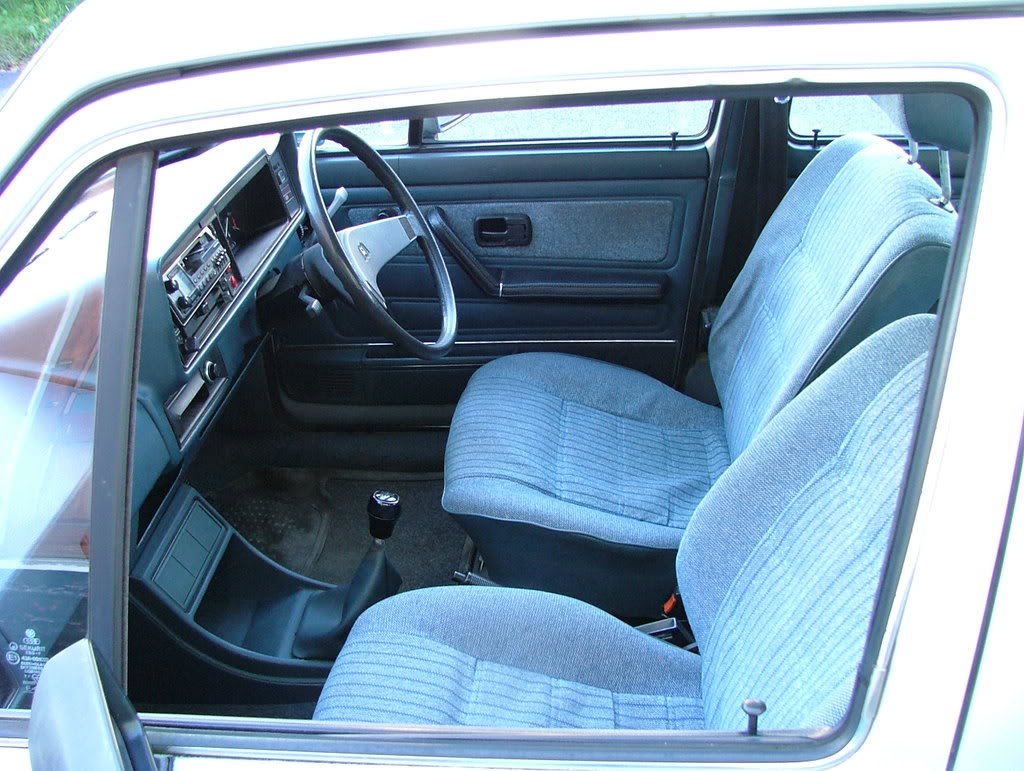
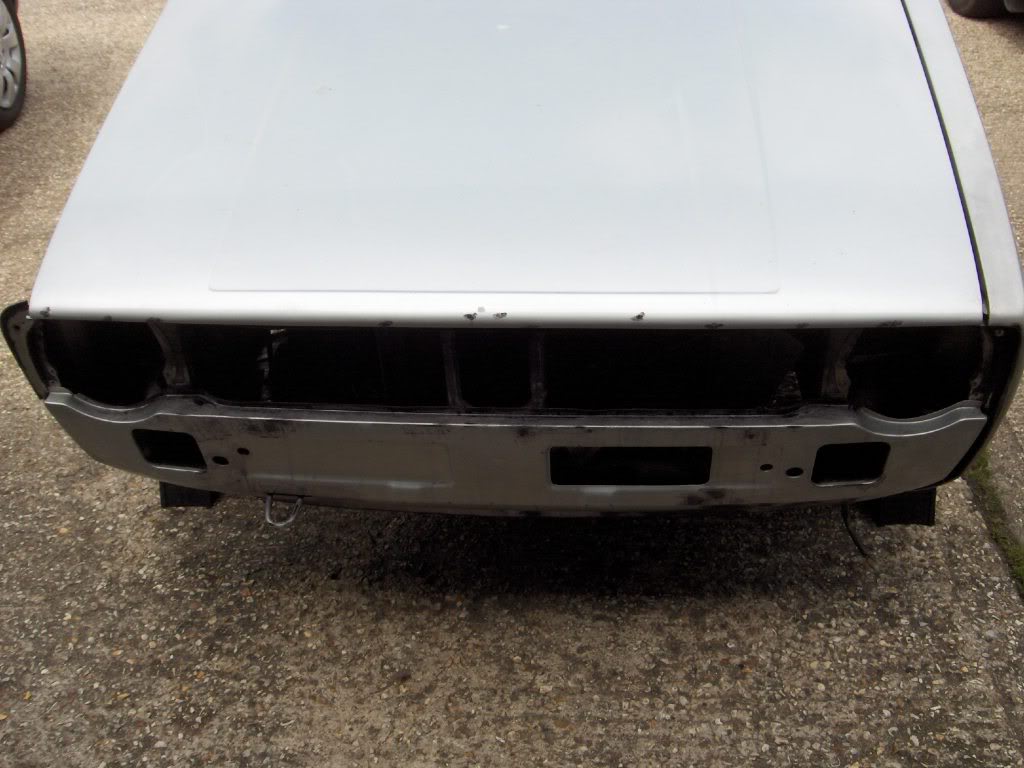
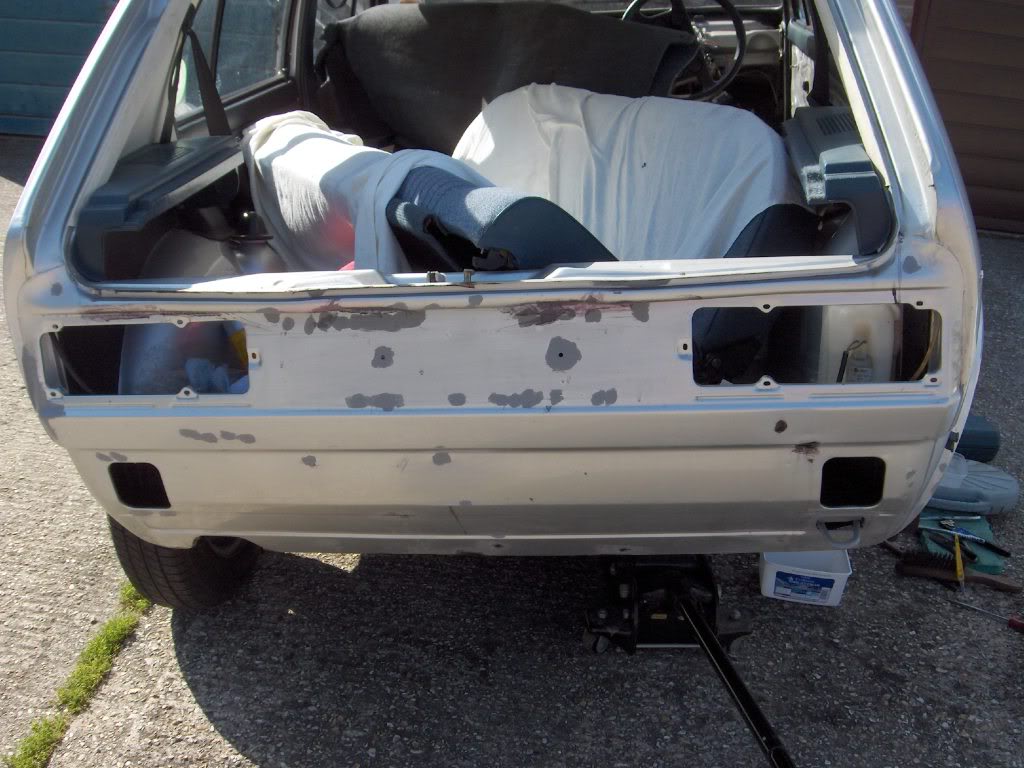
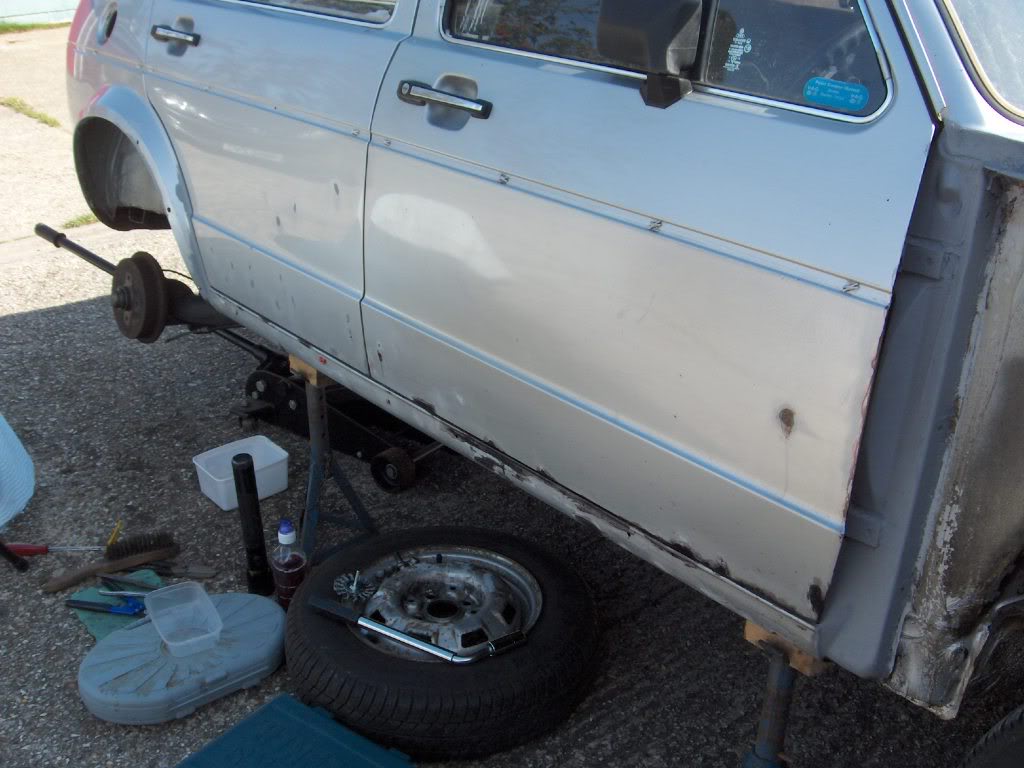
As you can imagine it will be some time before I can get Gary back on the road. I have been able to work on him once or twice a month on average. Apart from taking the engine out (which I will eventually do), I have stripped him down to practically to a bare shell. All the seats and dash are out. Until just recently I had been turning the engine about one a month and running him for half and hour or so. The battery eventually died and has since been replaced.
All seats, door cards and carpet have been cleaned using a carpet cleaner, the front seats dismantled and covers removed. The front covers have also been washed in the washing machine and came up brilliantly clean, unfortunately the thin sponge lining within the material washed away!. I have yet to come up with a solution to remedy this. I can see needle and thread coming out!.
Many items have been cleaned and stored away, many new / second hand parts have been acquired for eventual installation.
Posted
Old Timer
Gary the Golf mini update 28 Sep 08
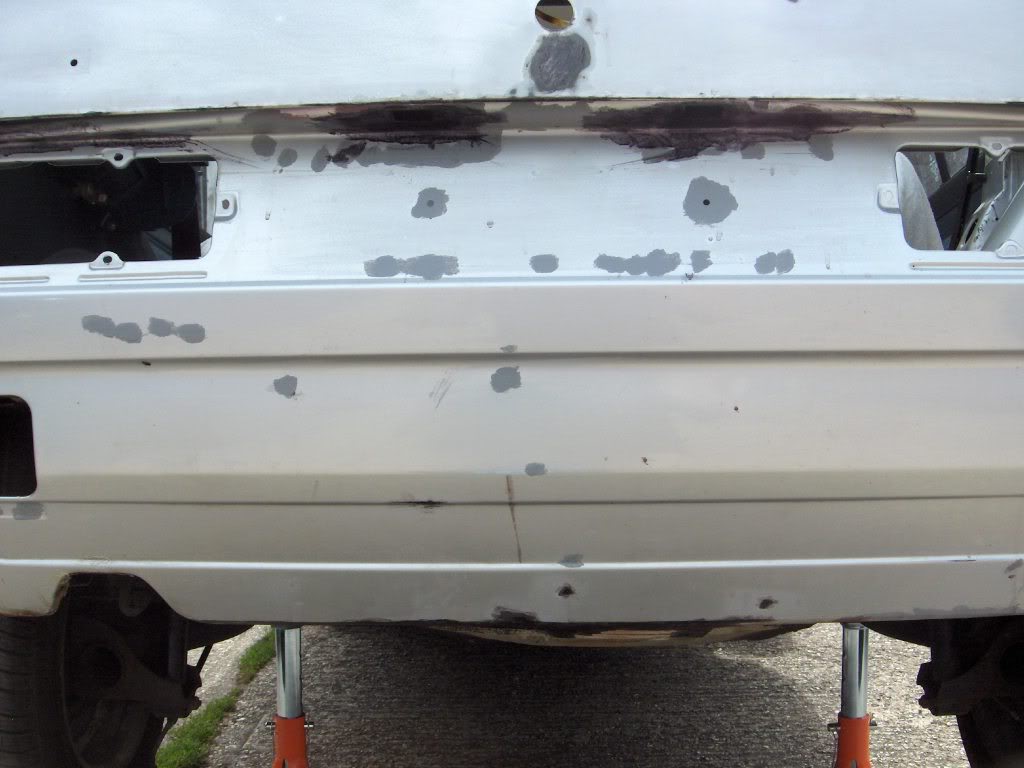
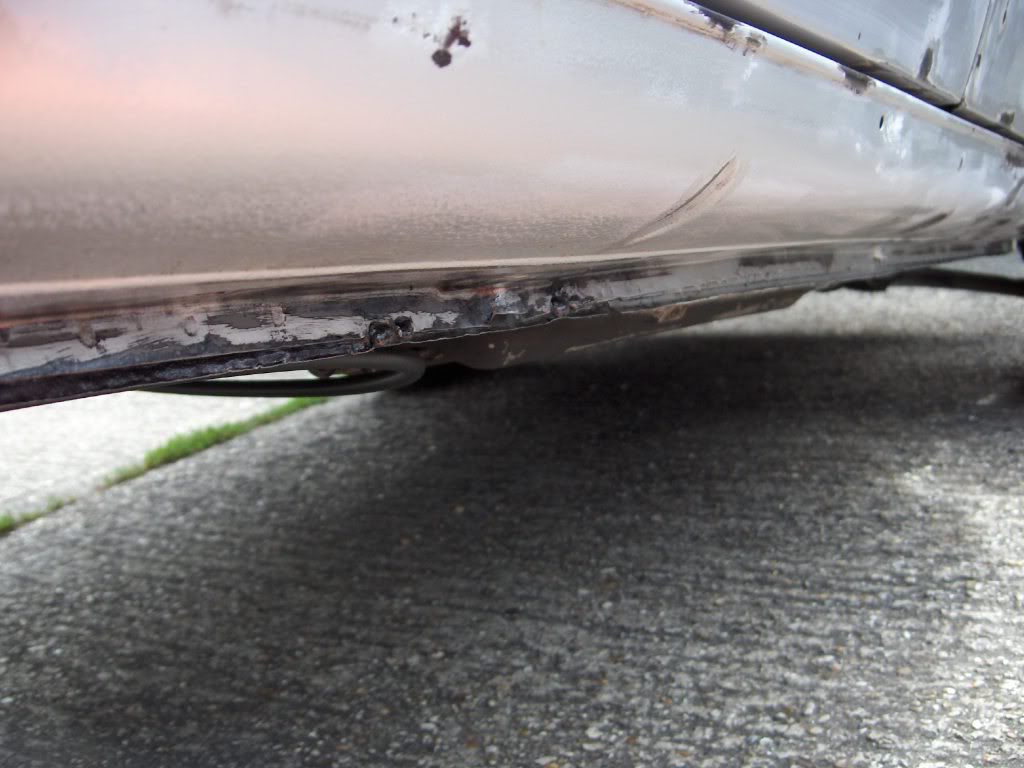
I am gradually addressing the rust areas, mostly surface rust. I have obtained an angle grinder with various wire brushes, flap wheels and grinding attachments as my drill was feeing the strain.
I have been using Kurust hence the blue tinges to bar metal areas, seems to be OK. Would welcome any comments on various rust treatments and prevention.
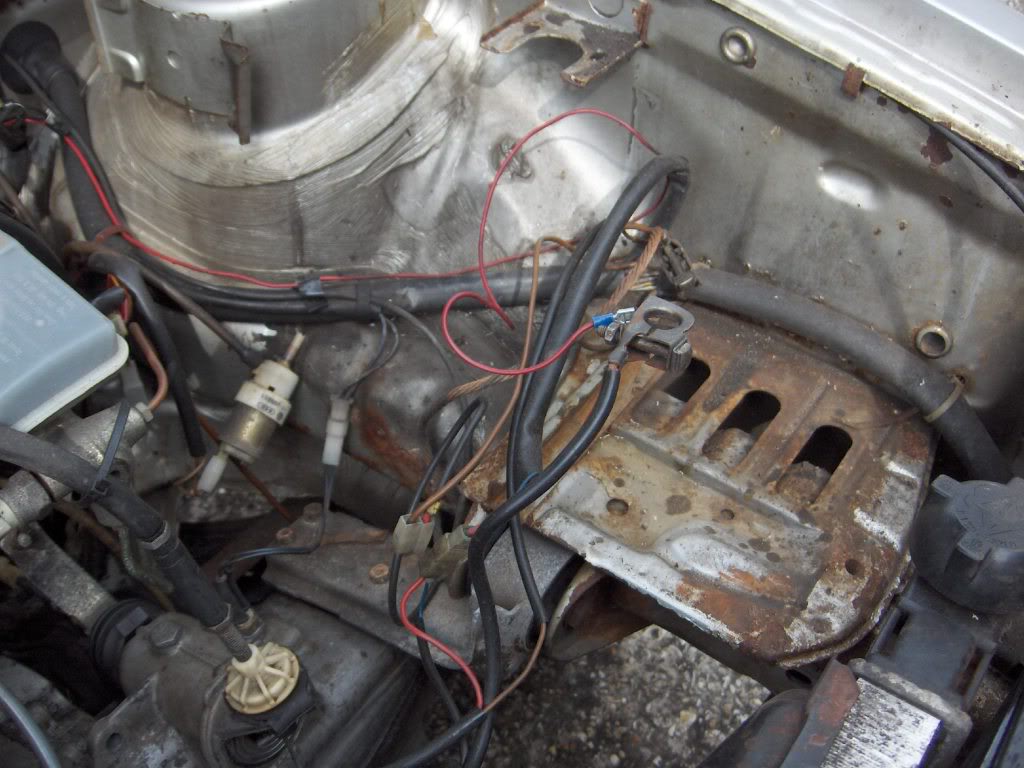
Also I have disconnected and cleaned some of the engine loom connections and identifying them for future reconnection, I hope to take the engine out for access and further treatment to the engine bay area.
I am now in second week of a welding course at Southampton City College. Though I seem to be doing reasobaly well on 3 mm plate, I don't think yet I am ready to be set loose on Gary.
Some more pictures to date.


Last edit: by Malcolm
Posted
Local Hero
Posted
Local Hero
Lawsy said
Good steady progress there malcom, keep up the good work
Slow and steady wins the race though. So technically we should end up with a great show car here

Posted
Old Timer
GarytheGolf Update 15 Nov 08
I started welding 4 mm plate reducing now to 1 mm. At this thickness, there are plenty of holes being created! but at least it is off the car. This is probably because the MIG machine I am using will not go lower than 30/40 Amp.
Being 50+, I found that I could not see where I was welding with the lowest fixed standard filter No 9. I had to buy an auto darking helmet, worth its weight in gold. The auto helmet has a range of filter from 7-13.
Yesterday, I purchased a Clarke edge setter and hole punch which I will practice flush lap and plug welds at the next session on Wednesday night.
As to the car, I am continuing to strip and derust where required. Recently the underside of the bonnet has been getting is good going over.
However, I have recently burnt out a Rolson Angle Grinder after 3 uses and its replacement from Lucas fell apart 30 seconds after switching it on. I have now bought a premium machine from Homebase for ?14.99 and paid an extra ?2.99 for 3 years insurance and it is working perfectly.
The car interior is now empty. You will see that there is hardly any rust inside as most of the floor is covered in wax. Since the photos, I have also taken the door and post cappings off for repair.


I also managed to get a full set of seats in the same colour and pattern from ebay, ?16. Described as mint, but they are not and worst than mine, they give me flexibility of refurbishing the upholstery in the future.
I have also experimented in getting the car in the air as high as I can to take the rear axle and fuel tank off to weld the chassis mountings. I did this outside the garage so that I can get some measurements. I got a height of 70+cm just rear of the axle stand.


I also fabricated a block of wood to fit the trolley jack and the rear beam to lift the car. A router is useful for this.


Lifting is two stage using the jack by itself and place on axle stands. Then fit the block to the jack then lift further to its max height and place on axle stands just forward of the rear axle mount to allow access underneath and removal of the rear axle.
It is my intention to do this in my garage. My neighbour works in a timber yard, and I hope to obtain some sleeper type wood to shore up the car for when the jack and rear axle are removed so that I can get underneath to do the welding work. I also have some wheel chocks for the front wheels, because there are no brakes.
A few questions which I would like some input, thanks in advance:
Do you think my approach to lift the car in the garage for welding is achievable and safe?
Taking into account the cost:
Has anybody used weldable zinc paint and where can you get it from?
Where is the best place to get some vinyl blue paint to refurbish the door cappings?
What is the best paint to refurbish the rear axle and suspension components arches?
What is the best stone chip paint that can be over painted for underneath and wheel ?
I am thinking of buying a SIP Machine for the welding, I note that apart from one Clarke low end machine, SIP machines go down to 25 amps irrespective of the top end range. Would a 130 amp machine be sufficient?
Last edit: by Malcolm
Posted

Settled In


you realy need 150amp fo any chassis work if you have any to do..
clarke have a much better wire feed. Mine is 30amp min and i dont haveblow through probs, unless i lose concentration……
how much have you got…..
clarke 160TM is what i have and its awesome.
you can get them for ?230 brand new….
comes ready to use large bottles with regulator. Dont bother with disposable bottles….. they last approx 7 minutes….
Posted
Settled In
im just using waxoyls stone chip spray….
Posted
Local Hero

Posted
Old Timer
Would welcome any additional input on these and other unanswered points from other members.
Posted
Settled In
keep on dubbing
Posted

Old Timer
my car in the air, (taking axle off), I just put in 1st gear so
if it slipped it didnt go anywhere. Keep us posted!.
Dibbler
Golf MK1 GLi Golf MK2 GTi Golf MK3 GTi Galaxy 2.3 Ghia X Seat Inca 1.9 Diesel Tomorrow is almost over, today went by so fast The only thing to look forward too is the past.
Posted
Old Timer
Posted
Old Timer
I completed my welding course before Xmas and feel a bit happier in having a go at some major repairs on the car.
With a few bungs for Xmas and quite a lot of my own money, or the banks I should say!, I bought myself a Cebora Mig Welder and an Argon gas cylinder, though it does come with a smaller disposable CO2 bottle.

I purchased it from MigTigArc in Portmouth during the Xmas break. Ironically the shop owners name is Gary and he was very helpful in making my choice of welder. I was able to try the actual model at the shop before I paid.
To continue with the refurbishment, I have made a frame out of wooden batons and coach bolts to support the car to allow me to remove the axle and fuel tank. I assembled it outside the garage to make sure it could be easily assembled inside the garage under the car.


I removed the rear axle with the wheels still on. Beware that the weight of the wheels has a turning motion when the rear shocks are disconnected, they need support. I then lowered the axle down using the trolley jack.
Being a single garage, leaving the wheels on the rear axle allows me to wheel it in out out when I want to work on the car.
Note that I covered the end of the brake pipes with a plastic bag to prevent dirt getting in them.
I then removed the fuel tank. I thought it was practically empty before I took it off and was amazed to get nearly a gallon of petrol out of it when i emptied it, which was surprisingly clean. I put the tank in the back garden to vent for a few days before stowing it in my shed.
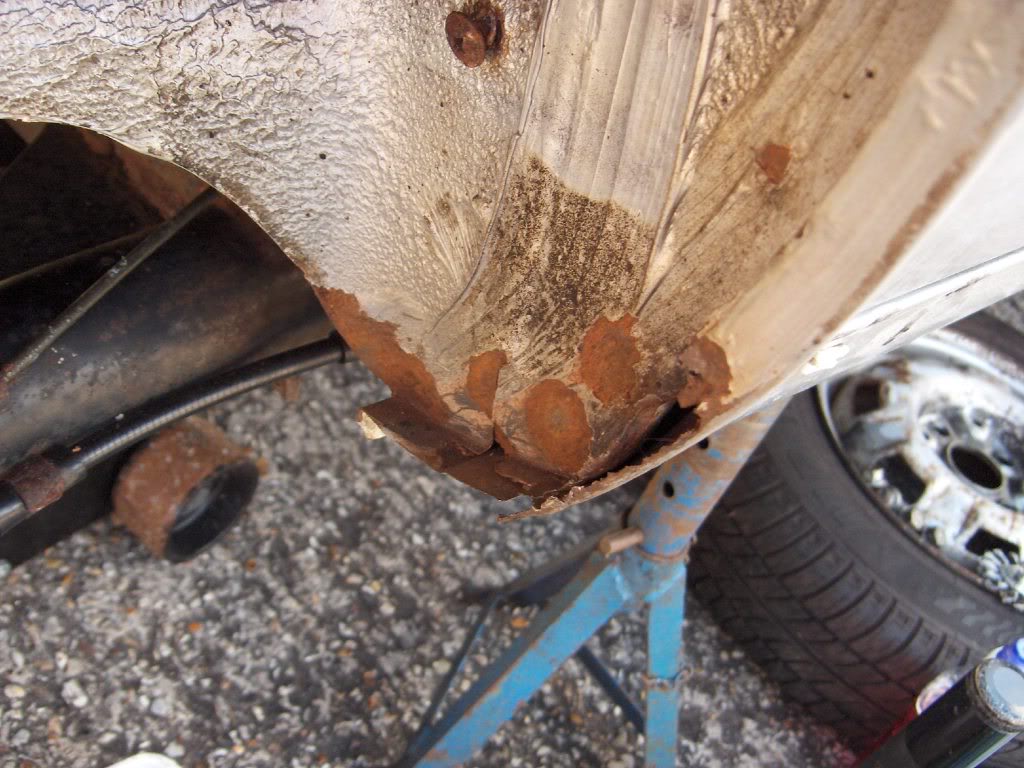
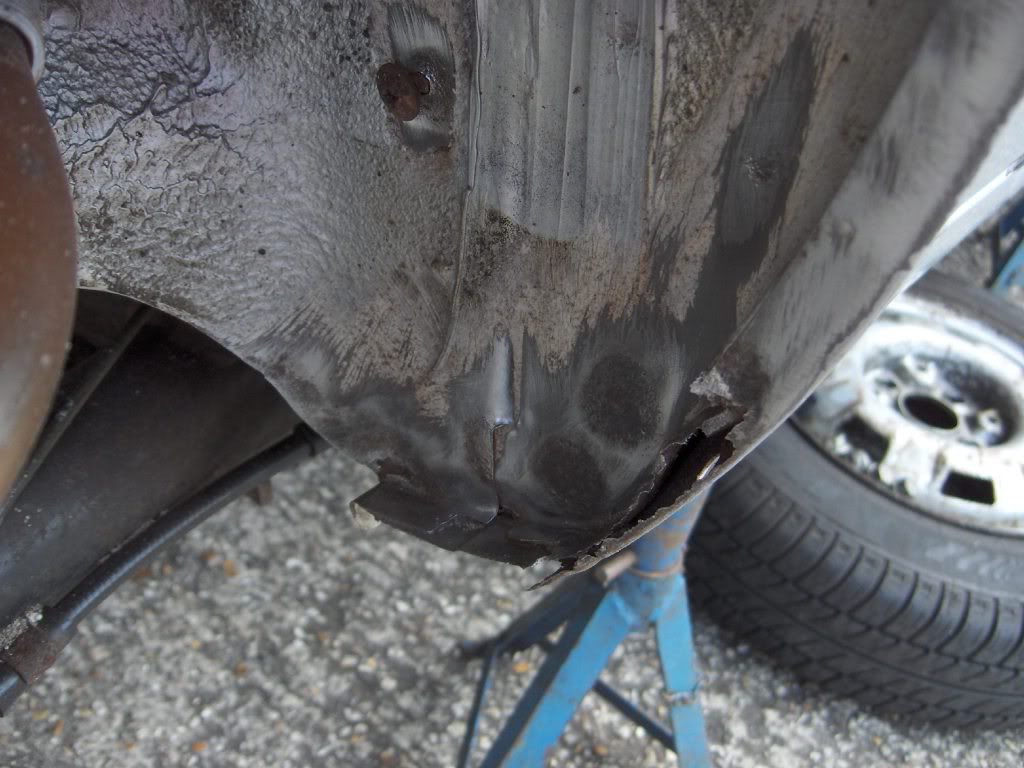
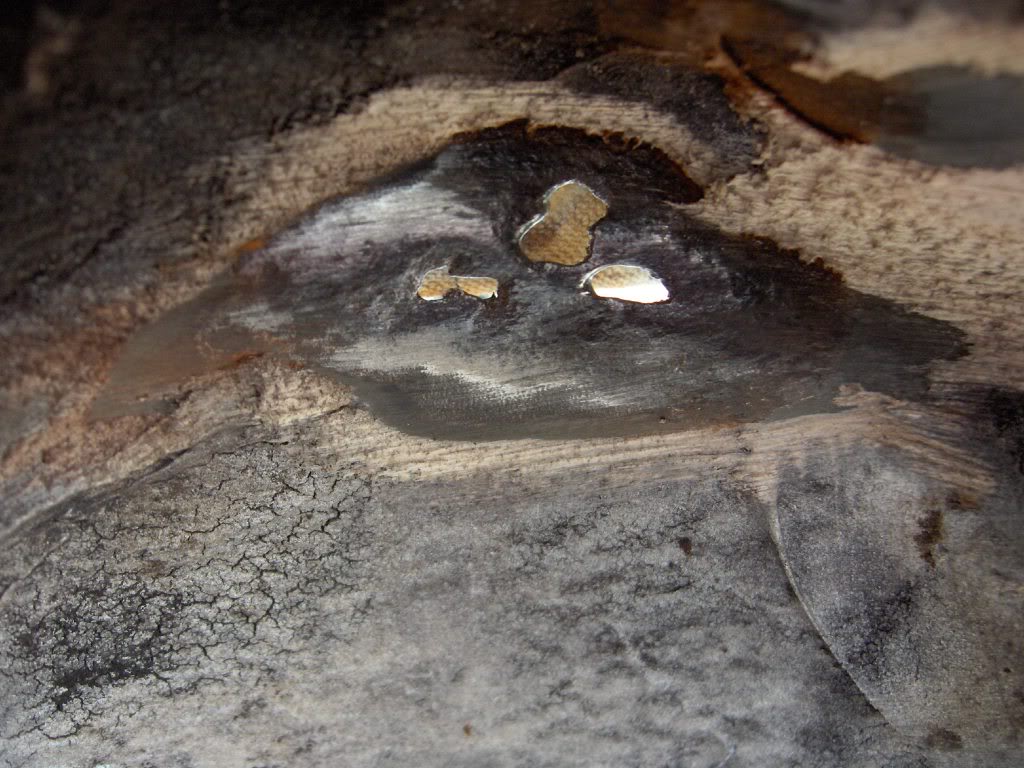
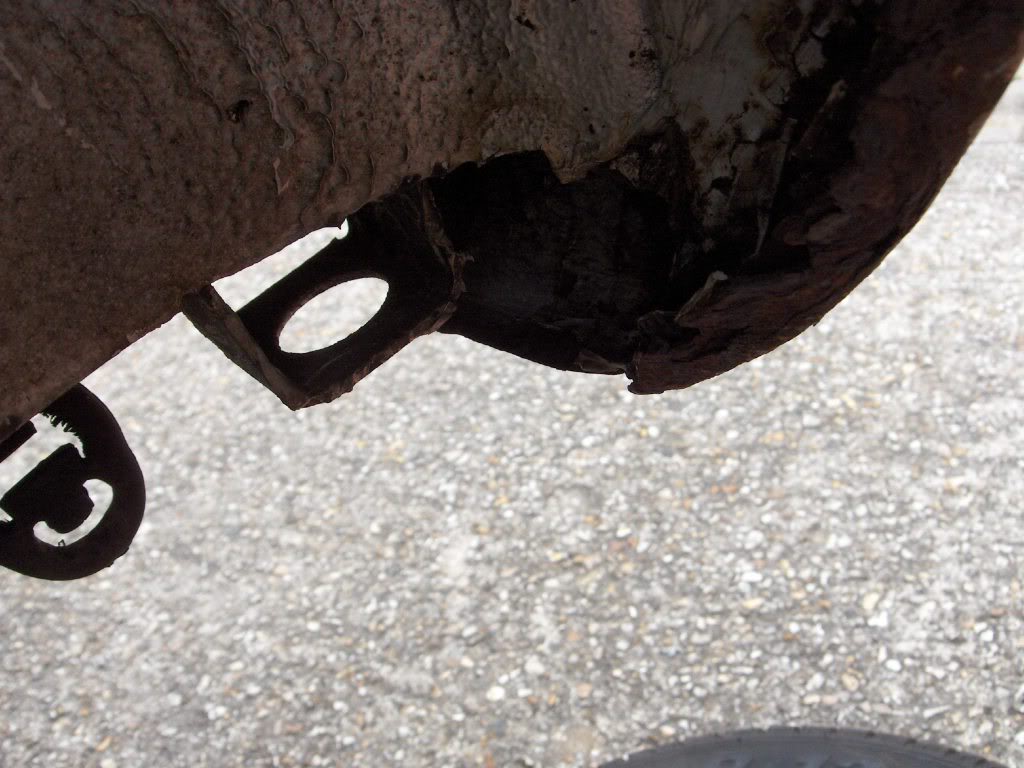
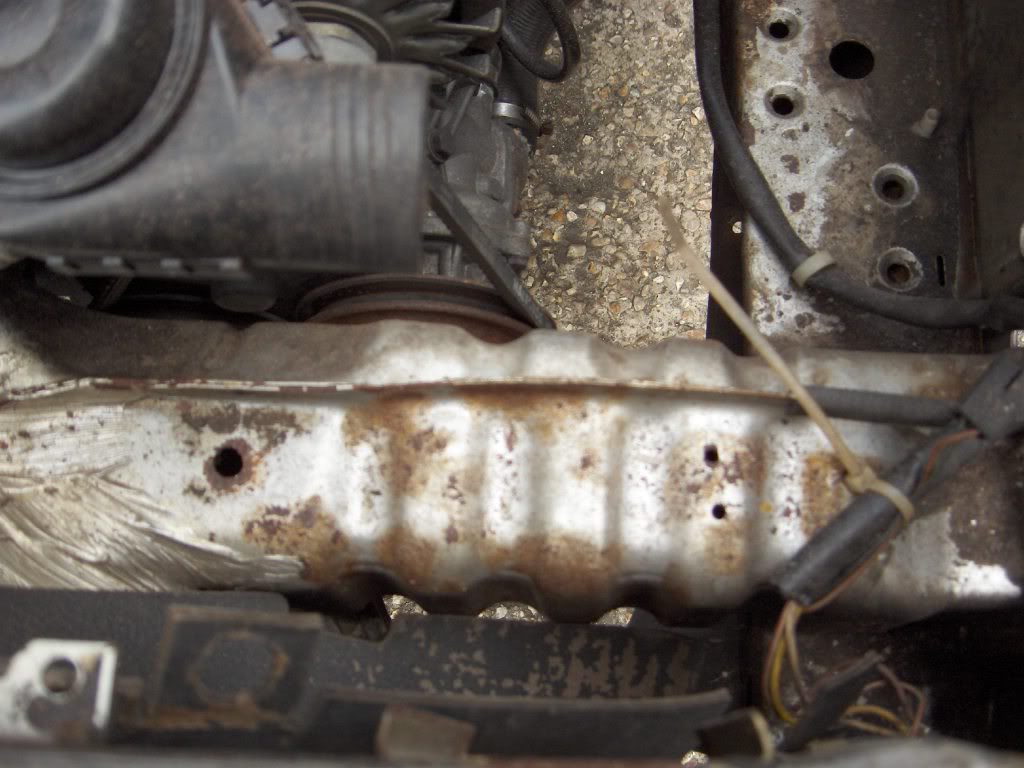
Here are some before pictures of the axle mountings, you can see that there has been some welding done here before with a hole on each side to the rear of the studs.


I have decided to start on the drivers side axle mount.

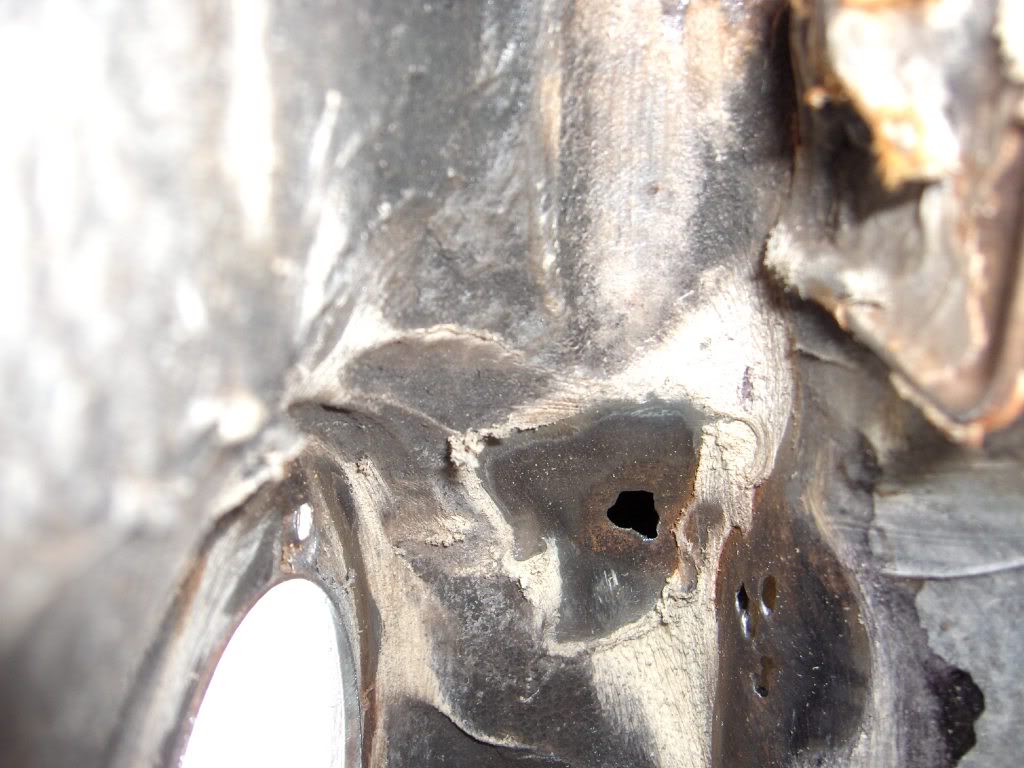
Cleaning the area up revealed more holes and the original repair which I have now decided to cut out as the metal was wafer thin having corroded quite a bit from the inside.
Even the strong / thicker material fro the mounting has corroded and revealed a few holes. I am leaving the passenger side until later to use it as a template to repair the drivers side.

I do have repair sections from CQs bought last year, which I will probably cut down when I know the full scope of repair.
Work had stalled for a bit over the winter and xmas, but getting the MIG welder kit has motivated me in getting on, though in a safe and logical manner. I do not want any accidents or overly disturb the neighbours with noise.
Last edit: by Malcolm
Posted
Local Hero
Andy
LINCOLNSHIRE REGION -�https://www.facebook.com/groups/467122313360002/
1983 MK1 Golf GTI Campaign Model - Under (looooong) resto!
1962 Rover P4 80
2002 BMW 745i
2008 BMW Z4 2.5Si
LINCOLNSHIRE REGION -�https://www.facebook.com/groups/467122313360002/
1983 MK1 Golf GTI Campaign Model - Under (looooong) resto!
1962 Rover P4 80
2002 BMW 745i
2008 BMW Z4 2.5Si
Posted
Old Timer
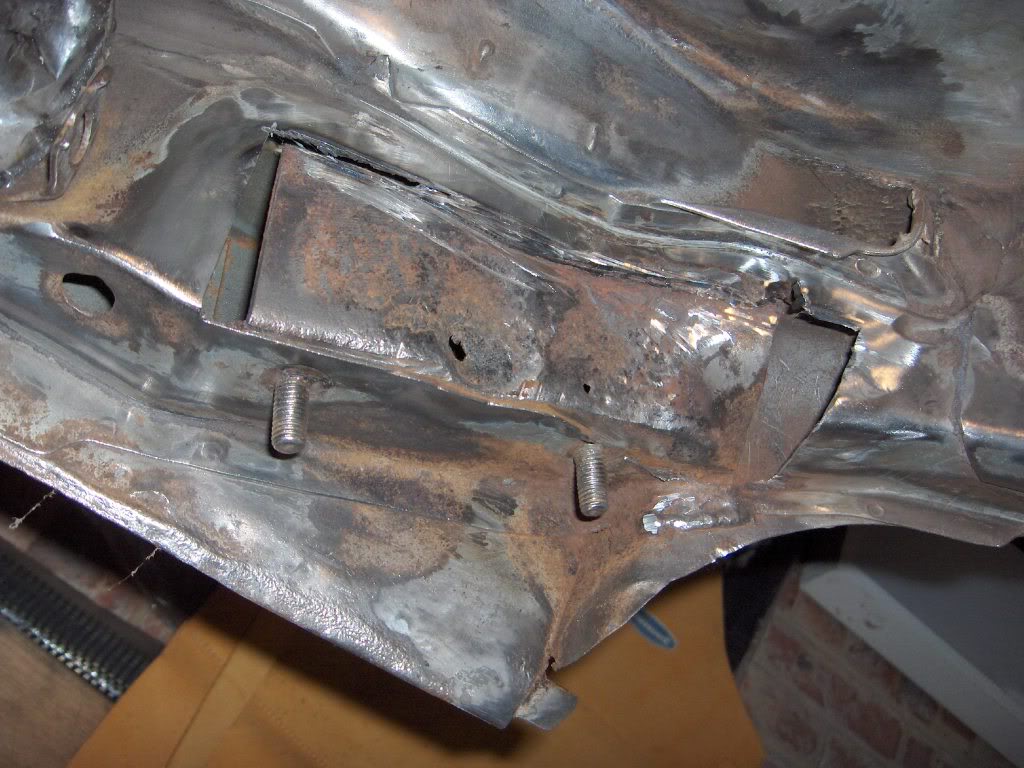
There I was thinking it would be easy!, usual things, restricted access, misted goggles, etc, etc,
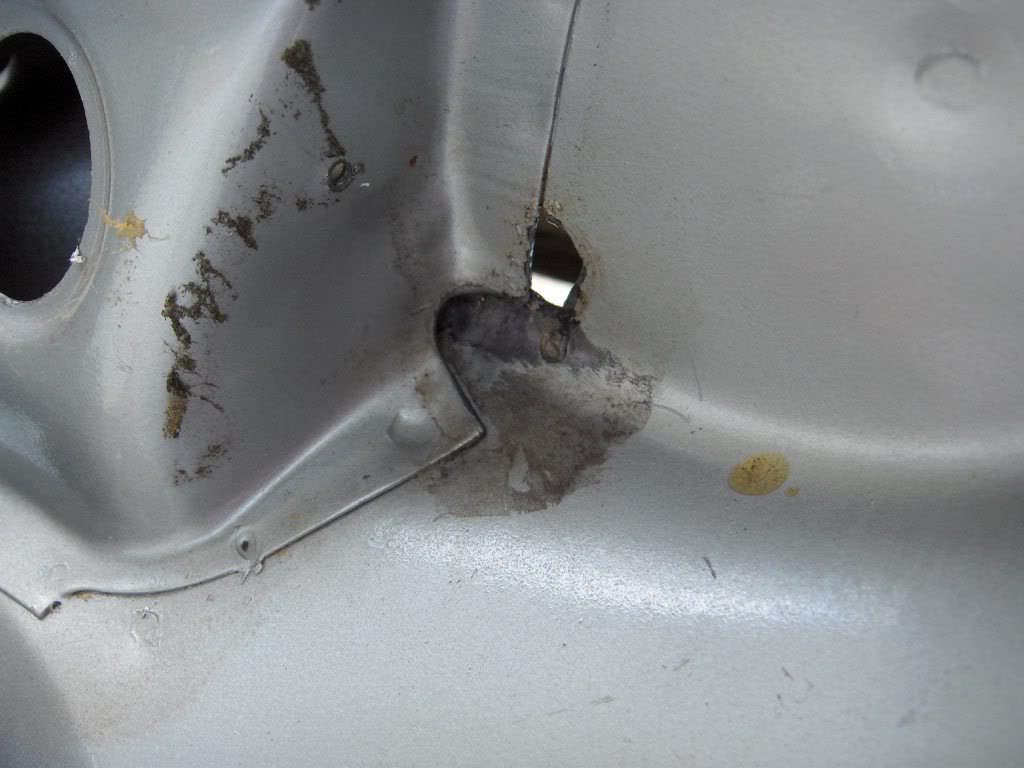
I have a problem, I cannot seem to get the thing to fit flush on the existing axle mount. It is about 1/4" away on the most reaward mount and around most of the edges. Photos below. I understand that some metal bashing maybe required.
Question: are these repair sections used to fit over existing metal? or are they used to replace existing metal?
Should I cut existing metal away to fit the section? or should I cut the new section and just replace what I consider to be
bad?
I am sure that many have done this before, your assistance is most appreciated.


Last edit: by Malcolm
Posted
Local Hero
It meant to replace metal, not fit over existing - will just rot out again.
See my resto link in my signature as I've not long done this. Not saying I did a good job but hope the pics will help?
Give the brake pipe bracket on the panel a good tug too - mine came off very easily so I welded it on good and proper!
A bit of patience and a bit of persuasion with a hammer and you should be sorted!
Cheers
Andy :wink:
Andy
LINCOLNSHIRE REGION -�https://www.facebook.com/groups/467122313360002/
1983 MK1 Golf GTI Campaign Model - Under (looooong) resto!
1962 Rover P4 80
2002 BMW 745i
2008 BMW Z4 2.5Si
LINCOLNSHIRE REGION -�https://www.facebook.com/groups/467122313360002/
1983 MK1 Golf GTI Campaign Model - Under (looooong) resto!
1962 Rover P4 80
2002 BMW 745i
2008 BMW Z4 2.5Si
There are too many online users to list.