Copper grease in oil sump?? Help
Posted
#1561621
(In Topic #209833)
Settled In

Posted
Old Timer


Do it once and do it right! ok, we've identified the problem, lets not make it worse by guessing……… Identifying the sympton is not the same as understanding the cause 
Posted
Settled In

Posted
Old Timer


Are you saying you only put copper grease on the threads of the bolts?
Threads and the washers?
Head bolts should be lightly lubricated with engine oil, to stop this sort of cross contamination but to late for that now obviously.
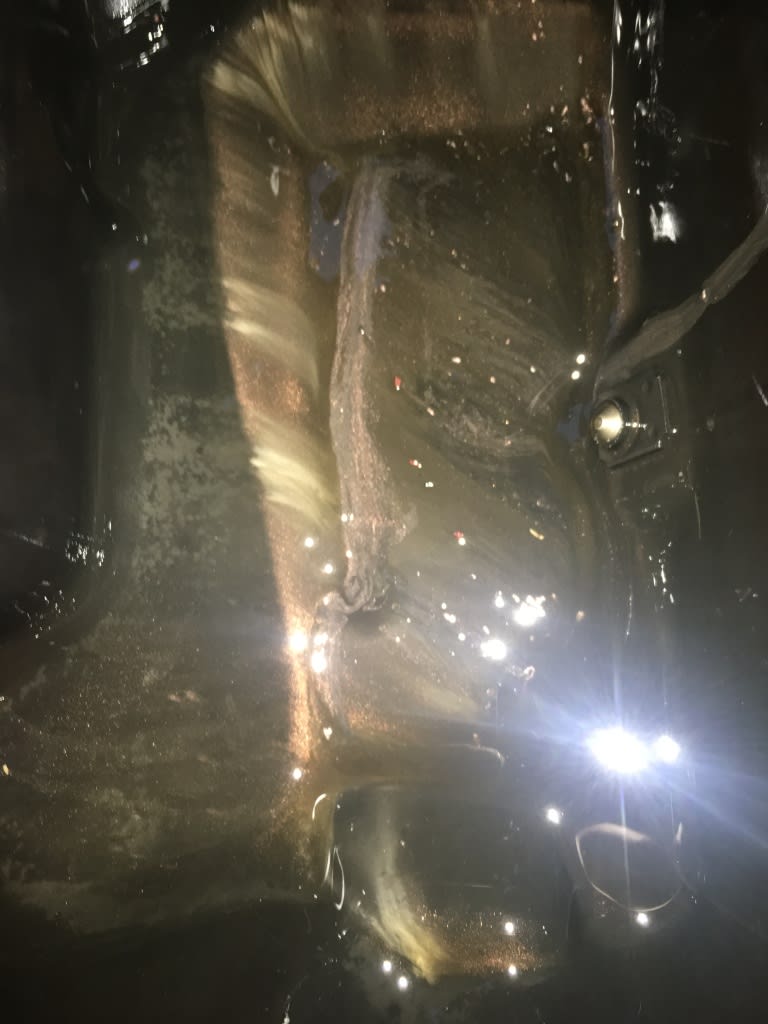
If you greased the heads of the bolts then the engine oil would quickly wash this copper into the sump, through the pump and most likely damage the bearings.
Looking at the picture of the sump I would suggest (with evidence of big end cap removal difficulty) that at least one of your big end bearings has failed.
The bearings themselves are made up of a copper back, overlaid with a soft white metal which is easily worn / damaged.
Do it once and do it right! ok, we've identified the problem, lets not make it worse by guessing……… Identifying the sympton is not the same as understanding the cause 
Posted
Settled In

Should I only use oil when putting the head back on this time?
Posted
Settled In

Posted
Old Timer


Yes it can damage main bearings.
Let's get the big end bearing cap off first and inspect.
Only use engine oil or engine lubricant designed for building engines, I use camshaft follower lubricant but too keep things simple engine oil is perfectly adequate.
Contamination is a killer for engines.
Do it once and do it right! ok, we've identified the problem, lets not make it worse by guessing……… Identifying the sympton is not the same as understanding the cause 
Posted
Settled In

Posted
Old Timer


Head is off? y/n
Piston #4 is out?
Piston #1 has big end cap removal problems?
Piston #2?
Piston #3?
Where all the pistons removed when you had the head off?
Is this the first time you have dropped the sump? And removed / replaced big end bearings?
Do it once and do it right! ok, we've identified the problem, lets not make it worse by guessing……… Identifying the sympton is not the same as understanding the cause 
Posted
Old Timer


You can tap down up on the piston to move it up the bore with a long wooden shaft ( a small toffee hammer used upside down would probably suffice)
You can keep wiggling at the cap……
Or if all else fails…
Get a flat bladed screwdriver with the widest tip possible, wrap that tip with some electrical tape and gently take turns in prying it gently between the two gaps you have made.
***THIS COULD VERY WELL DAMAGE THIS CAP AND ROD BEYOND REPAIR ARE IF YOU TO FORCEFUL, YOUR ONLY LOOKING TO EASE IT OFF THE SHOULDERED BOLTS SLOWLY A MM AT A TIME AND ABSOLUTELY NO DAMAGE MUST BE CAUSED TO THE MATING FACES, IF THE TAPE GETS WORN, STOP AND REAPPLY***
This warning may be a little late as I suspect we may be in for a nasty surprise when it comes off but if by some miracle the crank and cap are suitable for a new set of shells it would be devastating to have killed the cap and rod getting it off.
Do it once and do it right! ok, we've identified the problem, lets not make it worse by guessing……… Identifying the sympton is not the same as understanding the cause 
Posted
Settled In

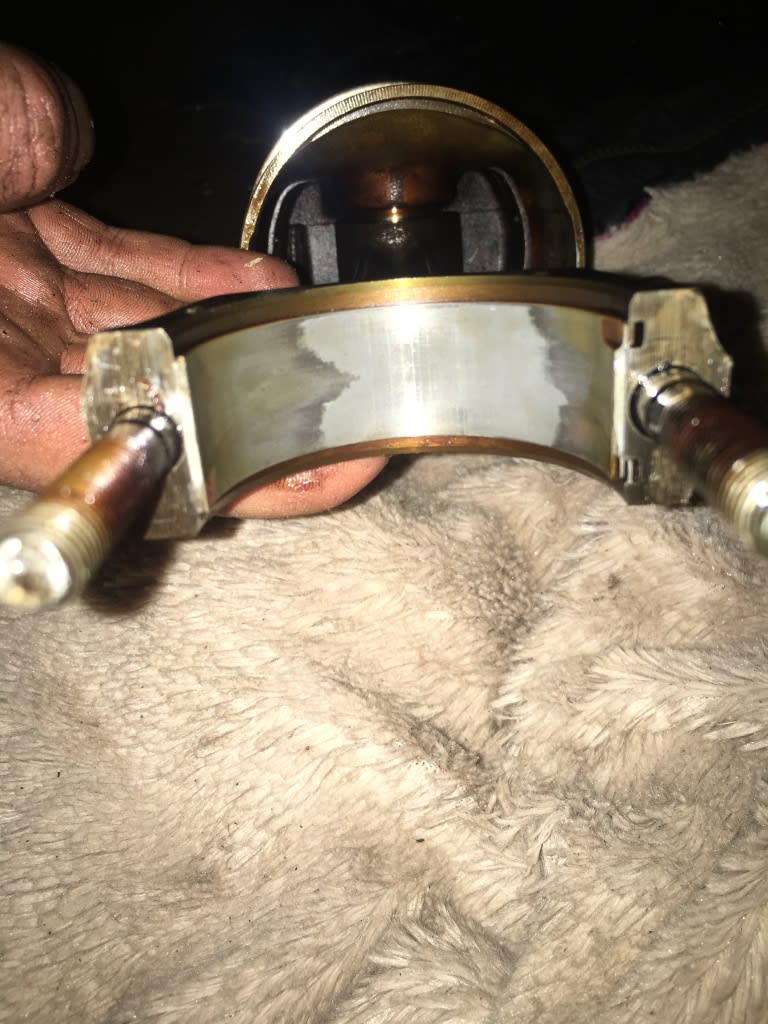
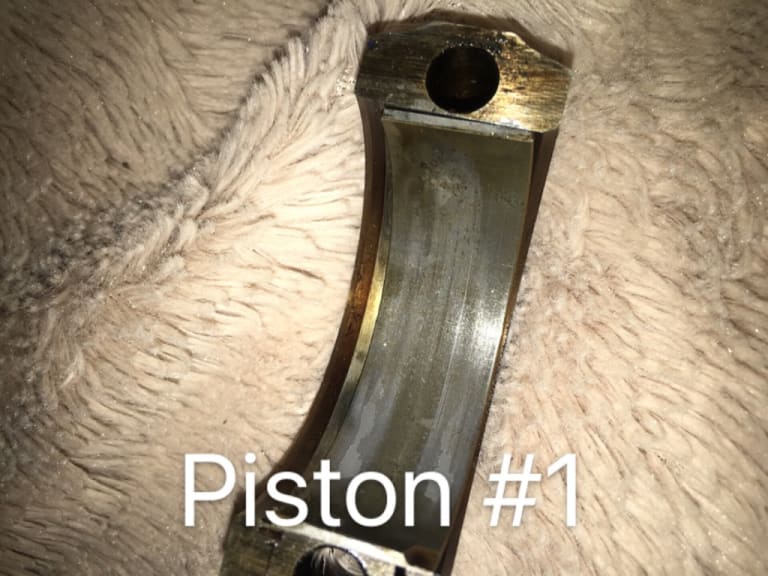
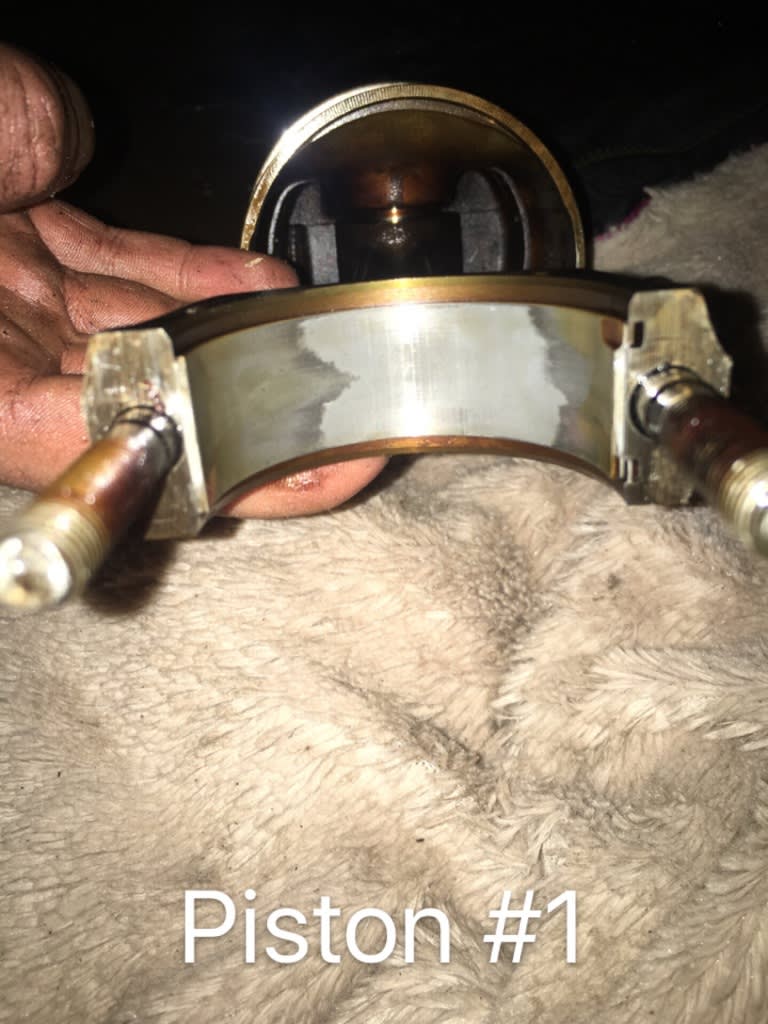
Here are the pictures of the bearings on piston 1.
This is the first time the pistons have been out in the cars lifetime

Posted
Settled In

Posted
Old Timer


Good news looking at is that although these bearings are completely worn out they shouldn't have done any damage to the crank
Looking at the picture of the bearing in the big end cap it's kinked over this has to be a result of removing it, but notice how the overlay is breaking away and clear evidence of dirt spiralling into it, hopefully you are just in time.
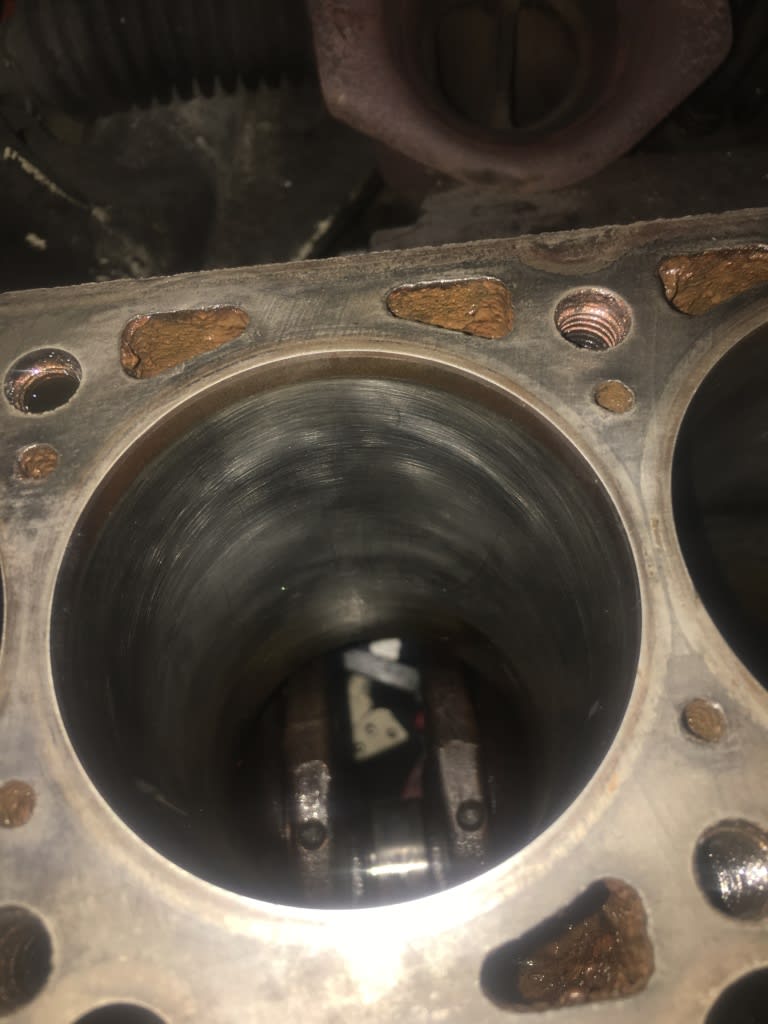
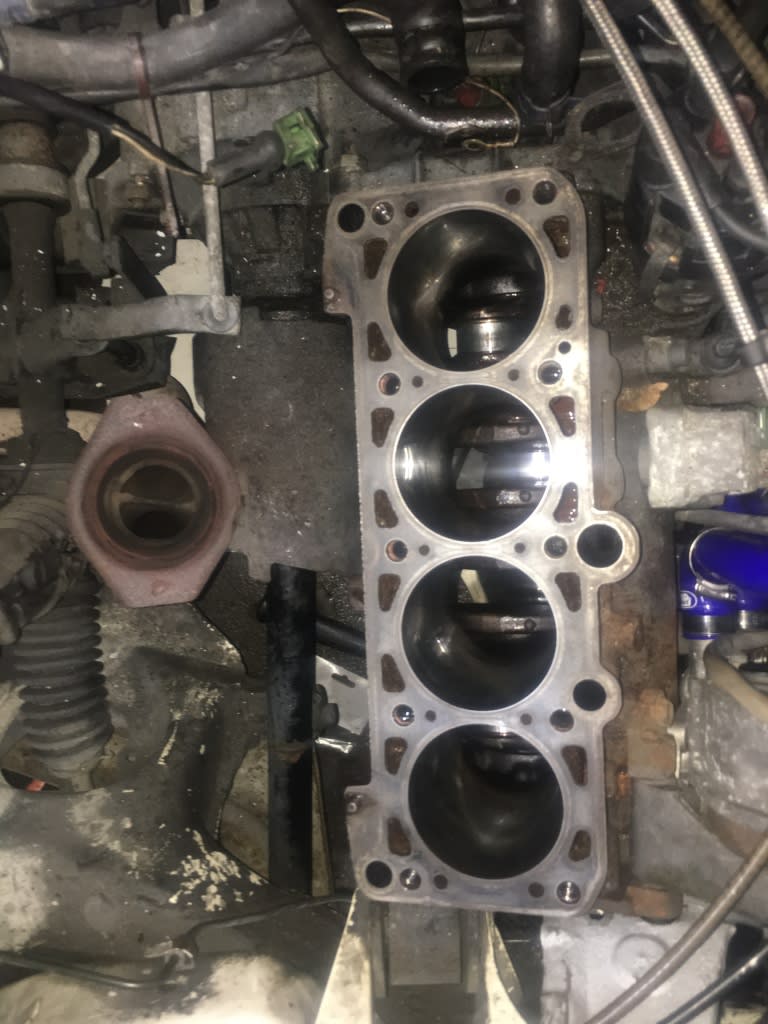
Looking at the pics of the sump you will need to remove and flush the oil filter housing, the cooler, the pump, the head and the block. Use compressed air to blow out the oil ways in the crank etc etc.
I would suggest that the main bearings will also require attention, check the middle one, it will give a good indication of the rest because this section suffers the most from deflection wear. They must all be changed in a set.
This two thread thing is killing me! Lol
Get it stripped and cleaned and get the parts on order, start a new thread and let's start from the top.
You will need an accurate torque wrench for starters if you don't have one.
Engine oil only inside engines
Do it once and do it right! ok, we've identified the problem, lets not make it worse by guessing……… Identifying the sympton is not the same as understanding the cause 
Posted
Settled In

Posted
Old Timer


Bearings are very cheap, cranks are not!
With all that muck in your sump if you want any success you will have to do a lot more than just change the oil filter.
At certain low temperatures the oil does not even flow through the oil filter, plus small micron pieces of metal will just walk straight through the filter media and wreck any good work you do.
When you get piston 3 out, line them all up and let's have a look at the bearings, don't forget all these pieces only go back one way and are matched to each other, they are not interchangeable!
Number one goes back to number one etc etc, you really need to be marking each pistons direction to ensue it goes back in the right hole, facing the correct way.
It's up to you but if you don't clean the internals properly your wasting your time and your money!
Ps don't forget you will need a piston ring compressor.
Pps forget YouTube, get a Haynes manual the old brown one was best but only cause it has bigger pictures but anything is better than nothing.
Do it once and do it right! ok, we've identified the problem, lets not make it worse by guessing……… Identifying the sympton is not the same as understanding the cause 
Posted
Old Timer


The lovely rug that all your engine components are laying on is not suitable I'm afraid. Millions of tiny particles are sticking to your oily bits lol
Lay all the parts on paper if you can, and keep them covered in lint free cloth whenever possible.
Sounds nit picky but I can assure you it's critical for a successful repair!
Anybody can rip an engine to bits, building one is not quite as straightforward as it might initially appear
Good luck and I will try to keep you straight
Do it once and do it right! ok, we've identified the problem, lets not make it worse by guessing……… Identifying the sympton is not the same as understanding the cause 
Posted
Settled In

I have got a piston ring compressor and a Haynes manual.
Thank you so much for the help I really appreciate it, it's exactly what this sites for it's amazing. I will take and upload pictures now.
Posted
Settled In

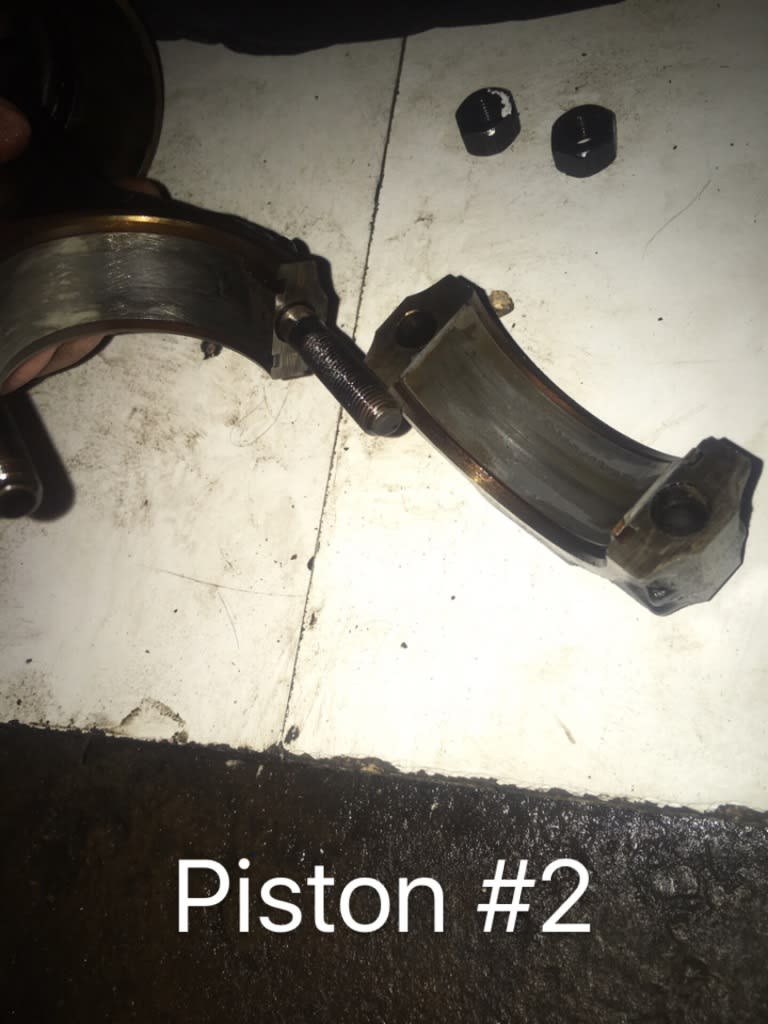

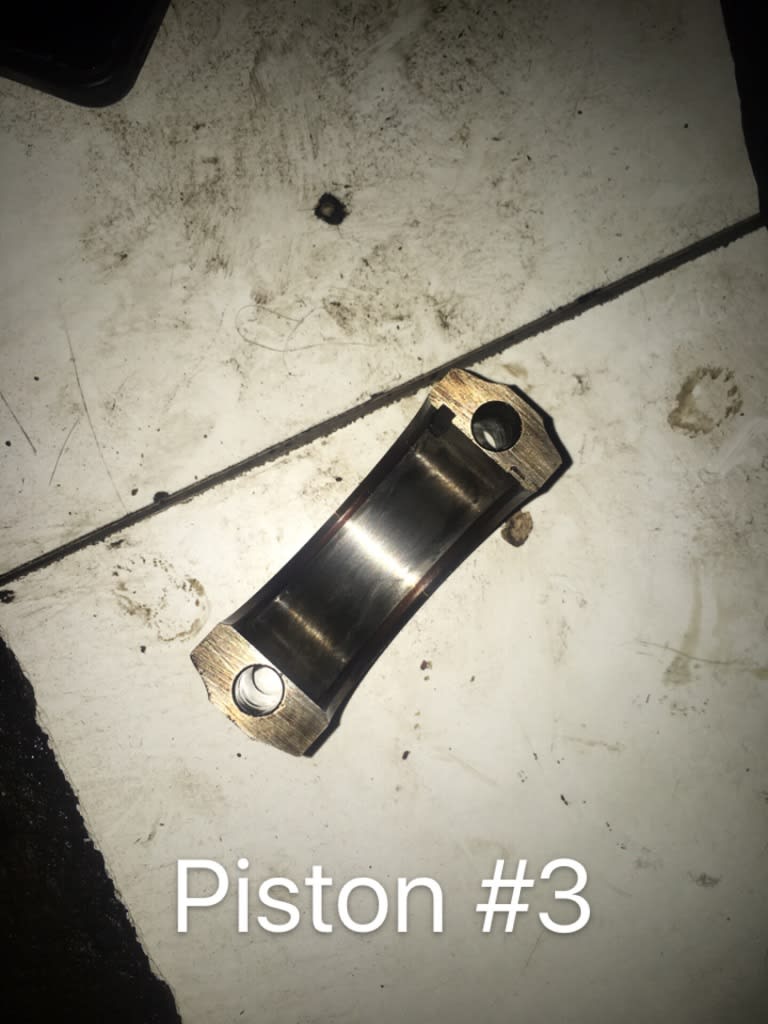
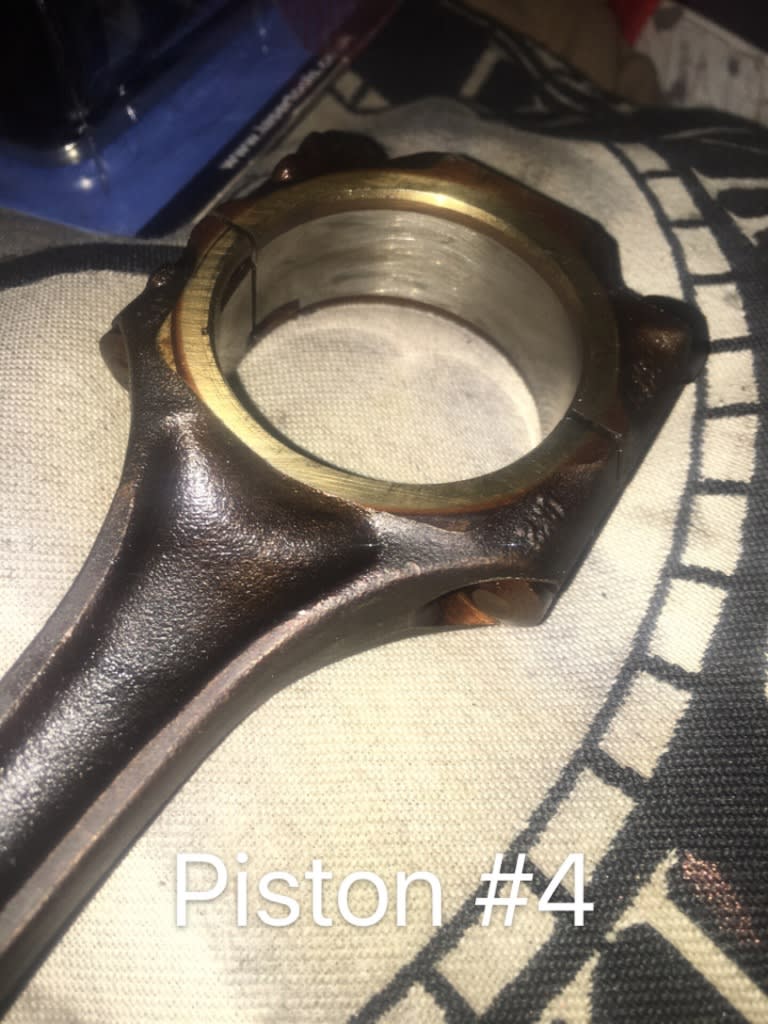
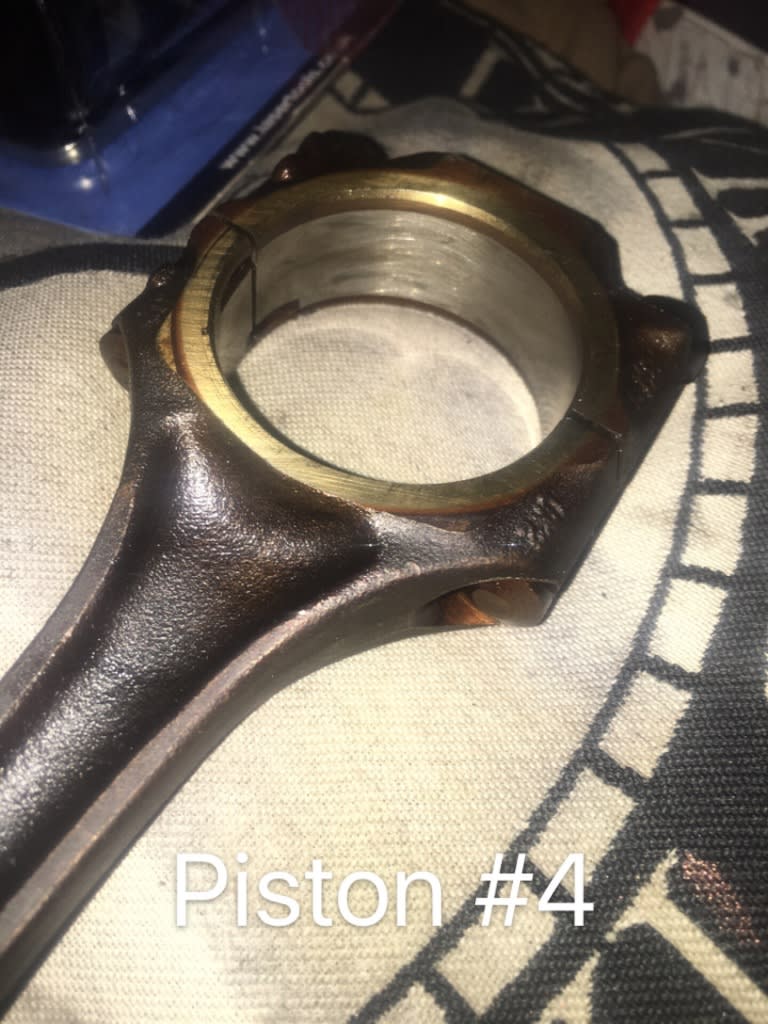
Posted
Settled In

Posted
Settled In

0 guests and 0 members have just viewed this: None.


