


Driver, to 16 valver, 2017 rebuild!

Posted
Settled In


Posted

Old Timer

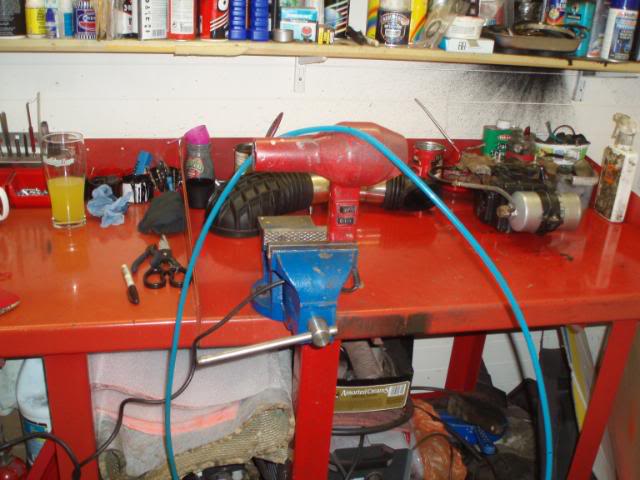
I finally have some pics, iv'e lost a few since the last update with pics, but are some of the rest.
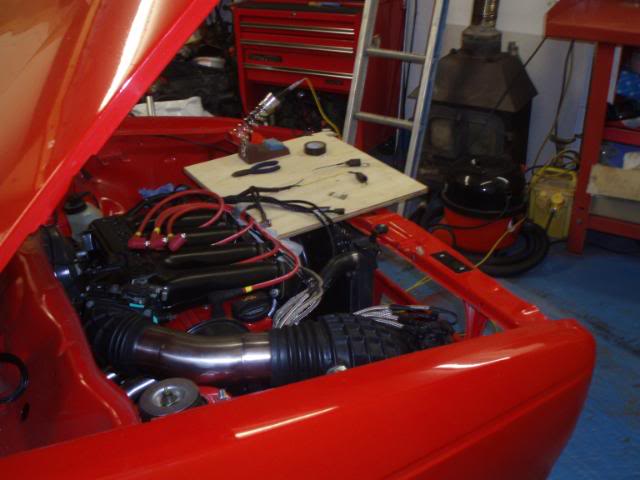
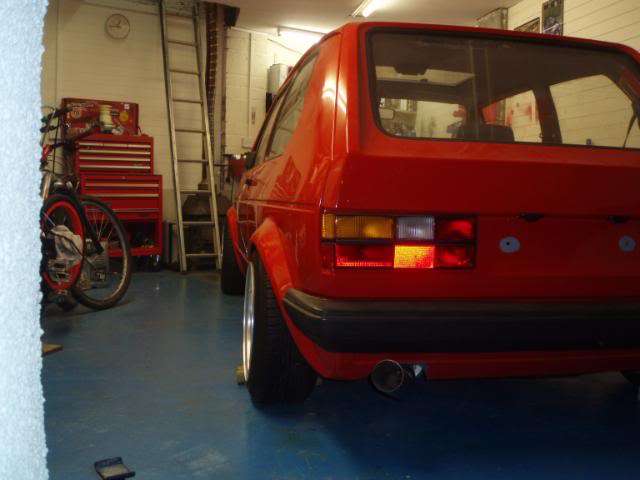
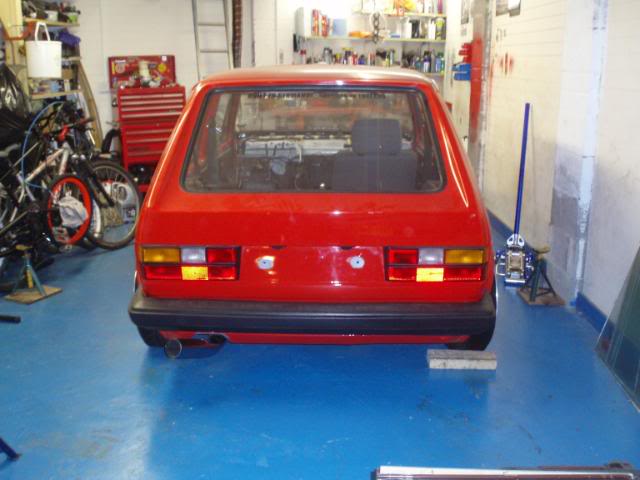
How the mk1 was looking a few months ago,

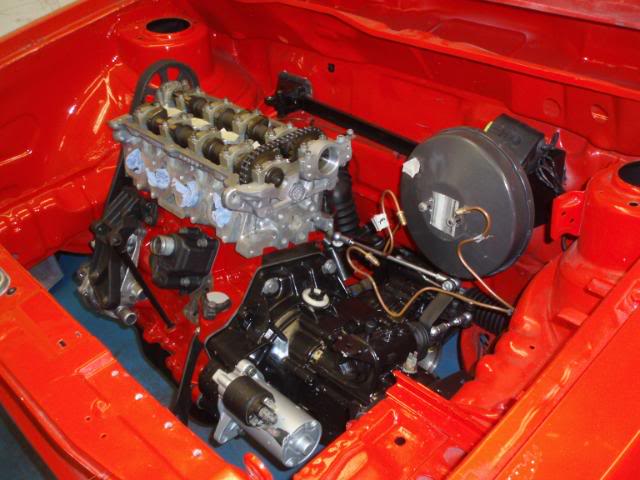
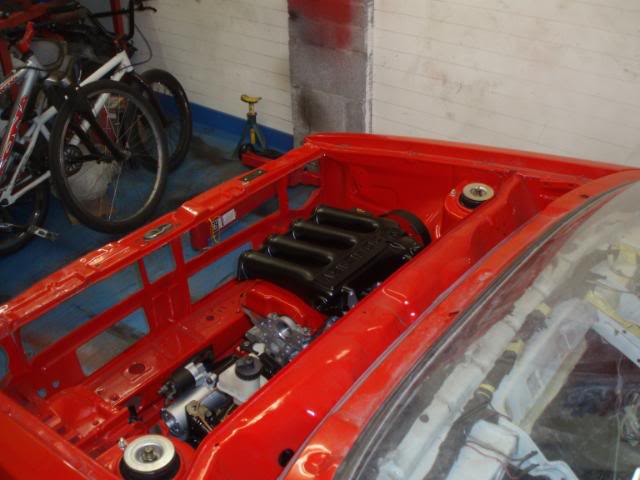
Engine in, timed up, coming together,
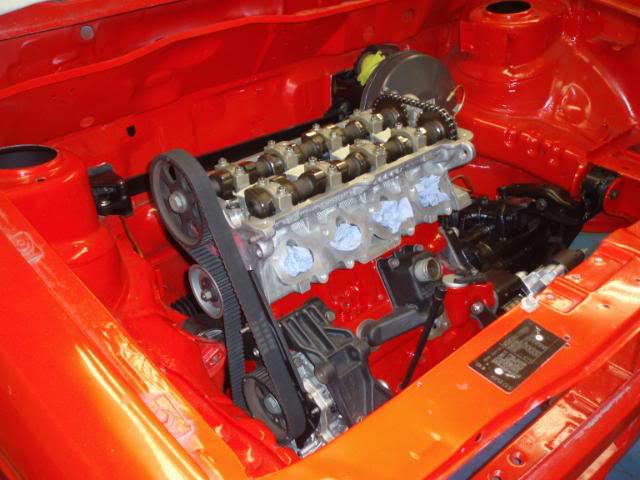
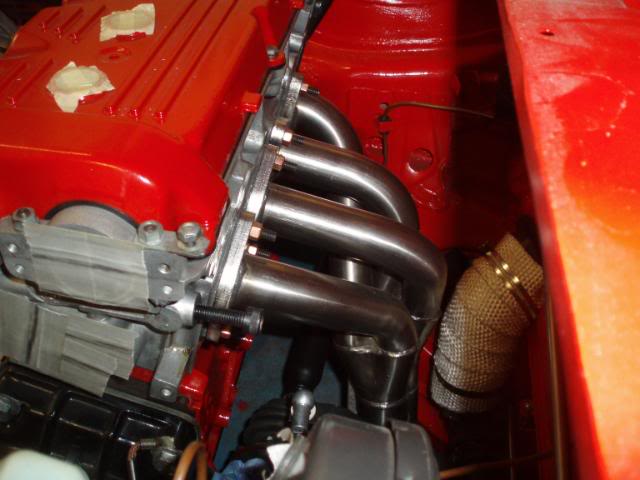
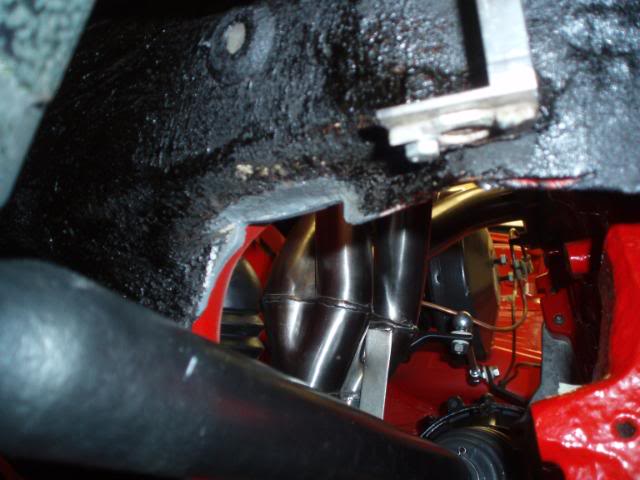
Manifold clearance, Running a g-werks manifold, good fit, very good for the money.

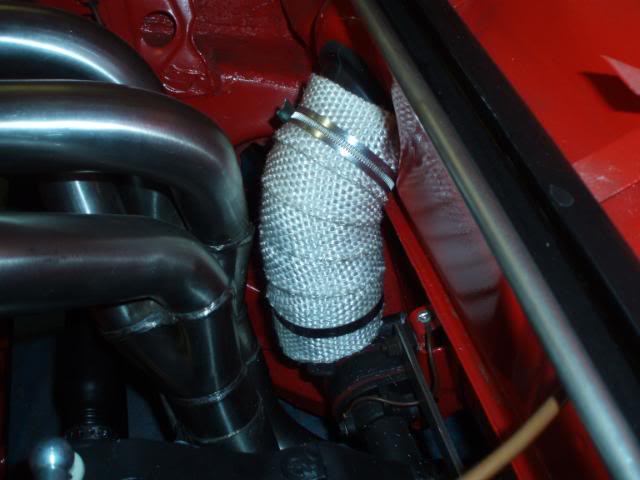
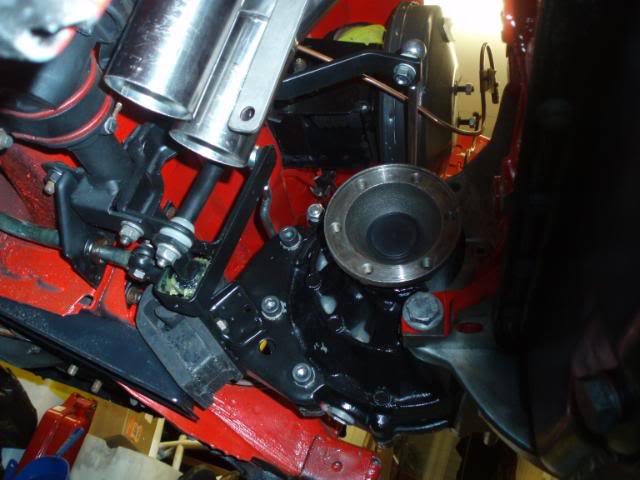
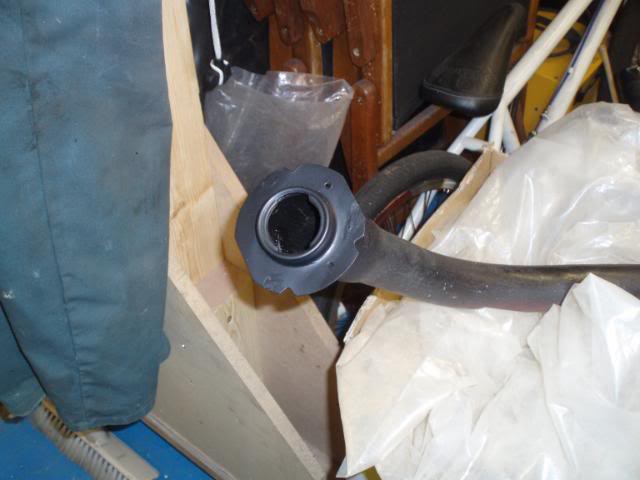
Heat wrapped the steering rack gaitor
View of steering rack, gear linkages, rear g'box mount and 90mm drive flanges
Powder coated inlet mocked up,
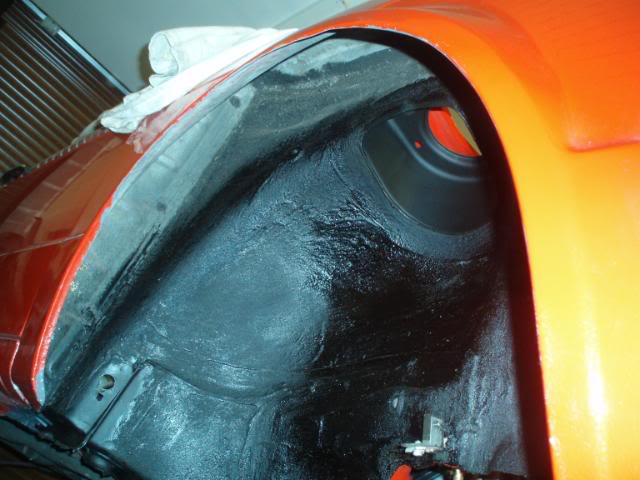
Wire wheeled, por 15, undersealed both inner turrets,
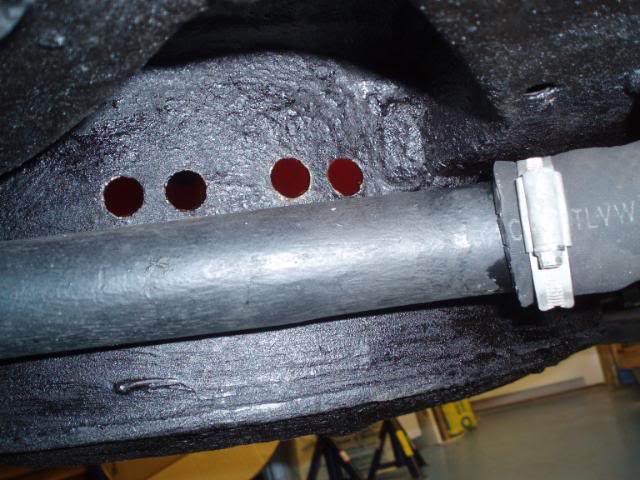
Cut part of the lip out of the drivers side chassis leg, as when lowered there is about 10mm of clearance between this and the driveshaft, will have to notch this in the future,
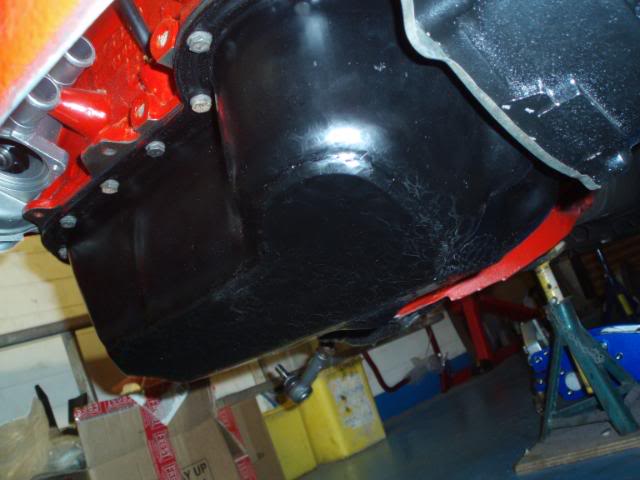
And because it's a little low, I invested in a Vagobonds, baffle and skid plated, sump, great product cheers Vagobonds :wink:
There is more, going to post this lot in-case I lose my progress :roll:
Posted
Old Timer
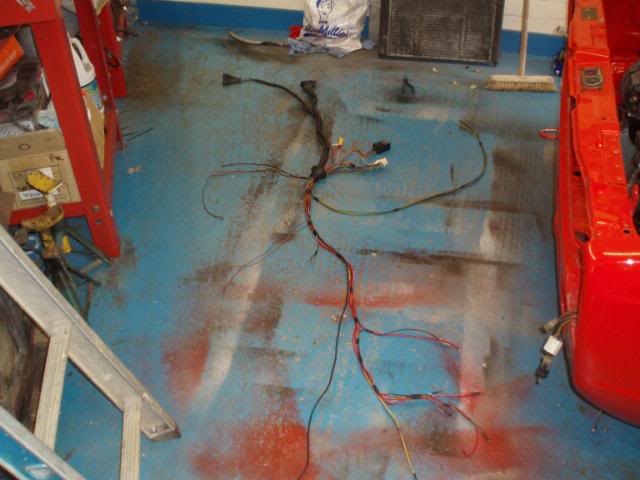
Started to go through the mk2 loom, and see what I will need, and where I will need to add in any wires. The donar mk2 was a 87' mk2 golf, so pre 90 spec, and uses the same fuse box as a late mk1 etc, so the large white loom plug will plug straight into my late mk1 fuse box, (this won't work on a early mk1 Fusebox).
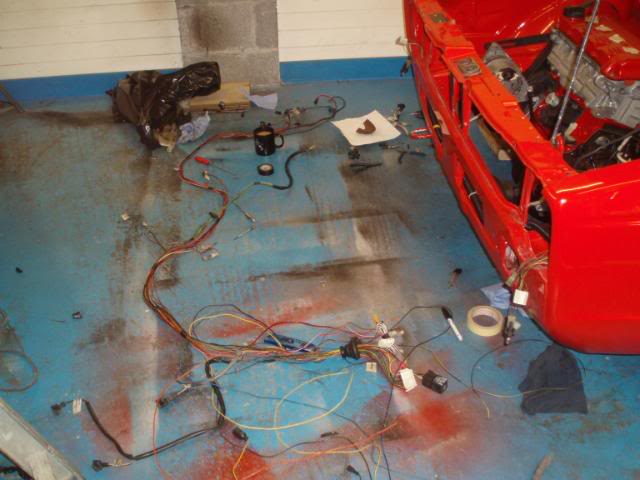
After some help from top man Mark :wink: , and sitting down with a brew and seeing how it all works, I started to cut, shorten, lengthen the loom to how I wanted it. I got rid of the ISV, and used a Aux air valve from a mk1 gti instead, and used rubjonny's excellent wiring and fusebox docs, to find where the power would have been for this from factory, (takes a live feed from the same place as the warm up reg), and then ran a permanent live to it, and earthed it. I also got rid of the throttle stop switch, diaphram switch etc, as you don't need it if you are running the aux air valve.
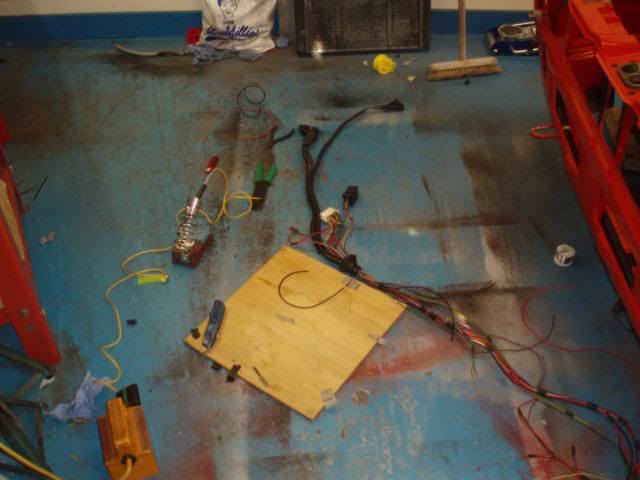
Got the loom down to how I wanted it, as I was upgraded to a mk2 wiper motor, it was plug and play with the mk2 loom. I wasn't going to hide the loom, just run it in the bay still, but tidied up. so I ordered a load of braided sleeve and heat shrink in various sizes. And put the finished loom into it, this took a while, getting my head round which piece of heat shrink goes on first

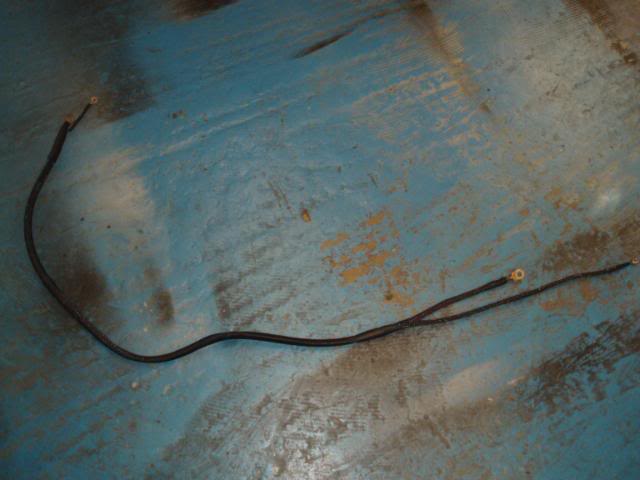
Lengthened some of the wires to suit by adding in bits of wire where needed,
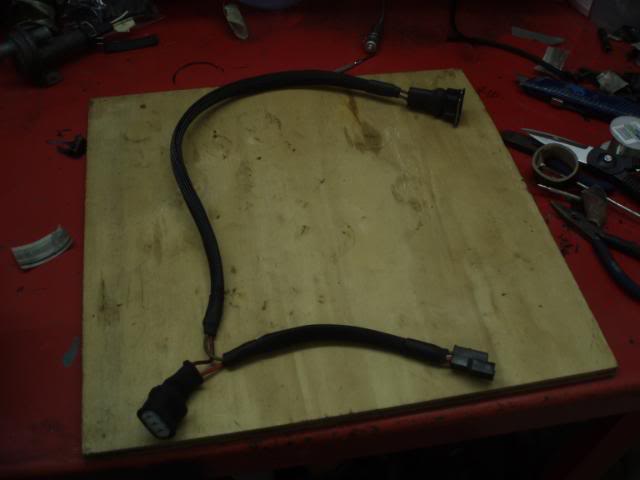
Lengthen and braided/heat shrinked the alternator loom, so I could run it through the front panel.
Heat Shrinked all the ends, = buring myself with my lighter lol!

Same for the fan and rad switch loom, used the mk2 one as it plugs straight into the mk1 loom.
Left part of the loom long so I could see where it needed to sit and completed it in the bay.
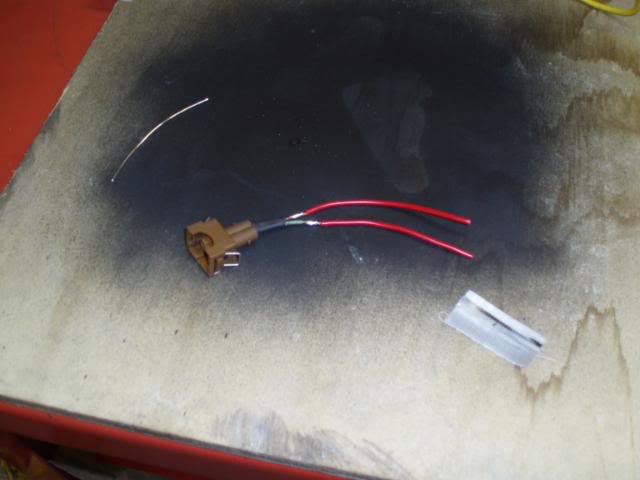
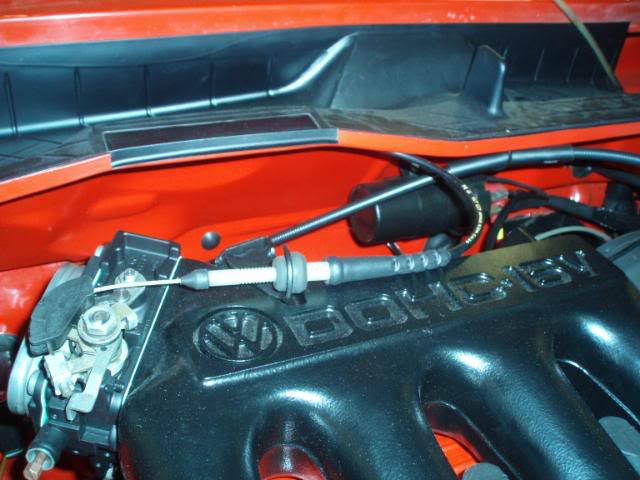
K jet part of the loom finished with added in aux air valve wiring, (bigger black connector, nicked from mk2 loom),

As I had removed the whole loom from the mk2 when I scraped it, I used the rear loom (black plug) to wire in the fuel pump etc. I removed the section of loom which feeds the lift pump, sender unit, and main fuel pump (Bonus as i'm using a non gti tank, so am using a late cab lift pump, same as mk2 gti, so plug and play again!) Then soldered in the purple wire for the fuel sender, and found where the power feed for the pumps comes from, (black loom plug, pin 14 if I remember rightly) then put the wire in the empty space in the loom plug, a wire from this also powers the aux, air valve and warm up reg as mentioned earlier, so again plug and play. I will be using the complete mk2 pump and accumlator set up, but this should be the same if using the mk1 setup. Finally plug the fuel pump relay in position 2, and it should all work like factory :wink: (he says! lol!)

And Breath!
Posted
Old Timer
I also ran the ecu and tci wiring thro' into the car and combined the mk2 engine loom with this loom to tidy things up a bit.
Then I needed a place for the mk2 pump etc to so I chose to mount it the spare wheel well, with a alu' plate.

Make a template, and a compass lol!

Then made the cover,
And added a seal to it,
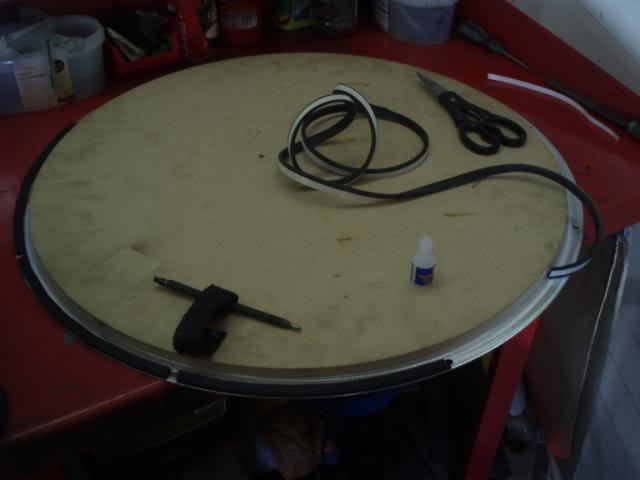
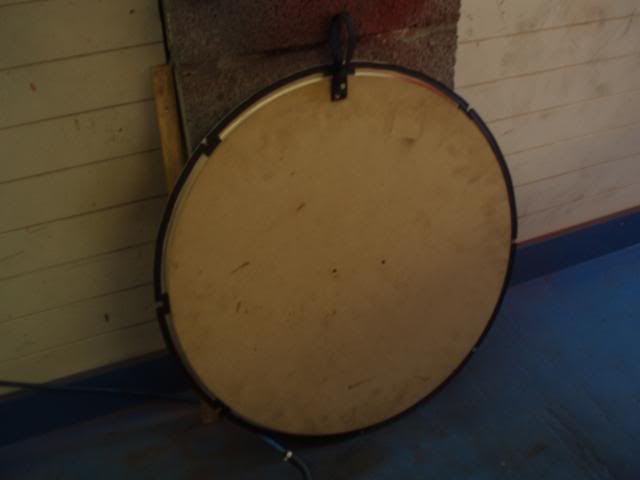
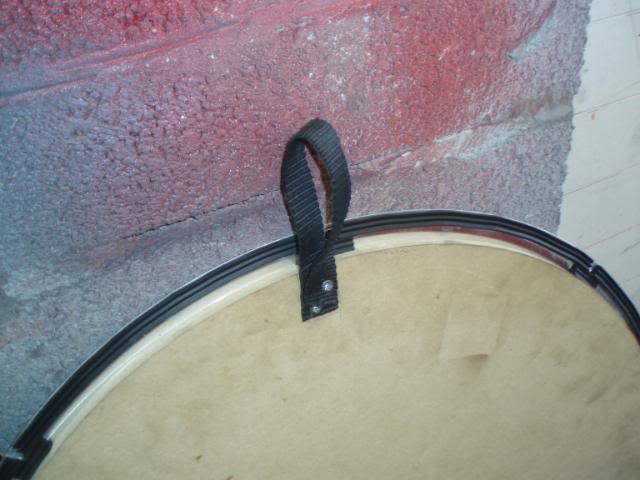
And added a handle so I can open it up.
Drilled some holes for the fuel line,
And bent and adjusted the filler neck to fit better, welded up the holes to redrill to suit, on the car,
Used my 1300 carb throttle cable as it is Shorter and tucks away under the rain tray nicely, had to bend the throttle pedal a bit tho to make it work.
Also used a diesel clutch cable as it is shorter and tucks round the back of the bay,
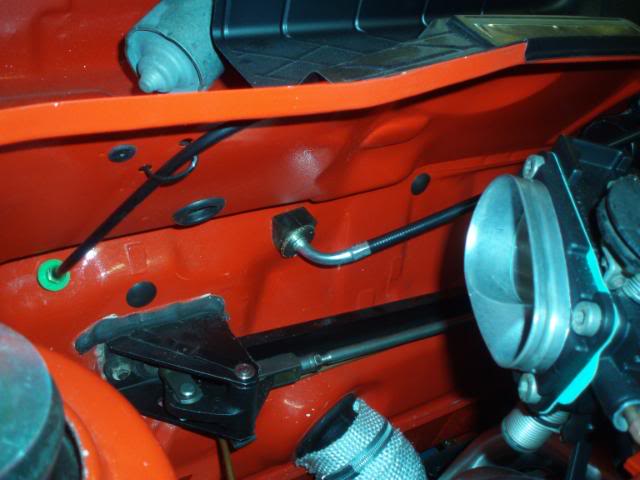
I'm also using the mk2 plastic lines, and extending them with some rubber fuel hose and some proper clips. Note hairdryer to form the lines, be careful not to put a crease in them tho.
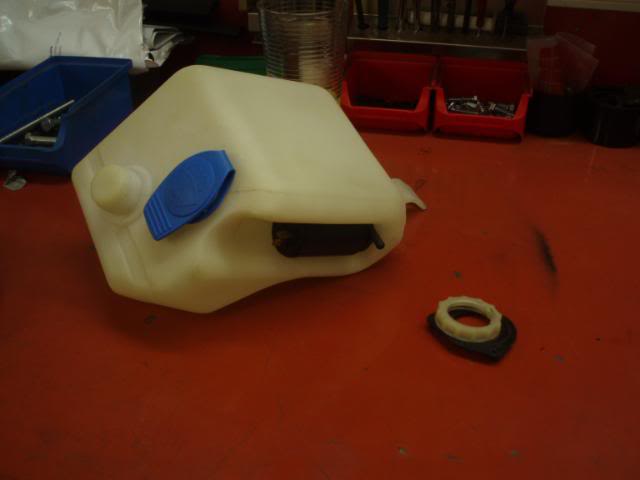
Got a washer bottle from markl on here, cheers mark
, cleaned it up and gave it refurb. 
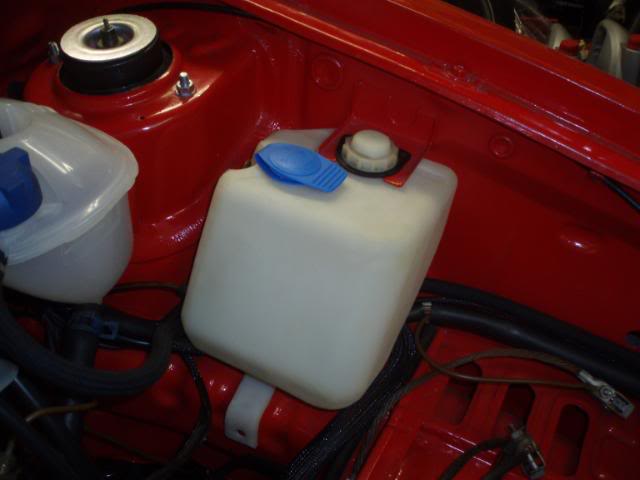
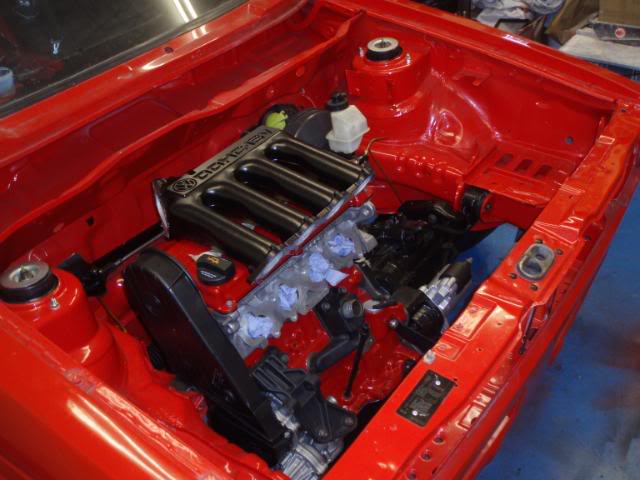
The bay now,

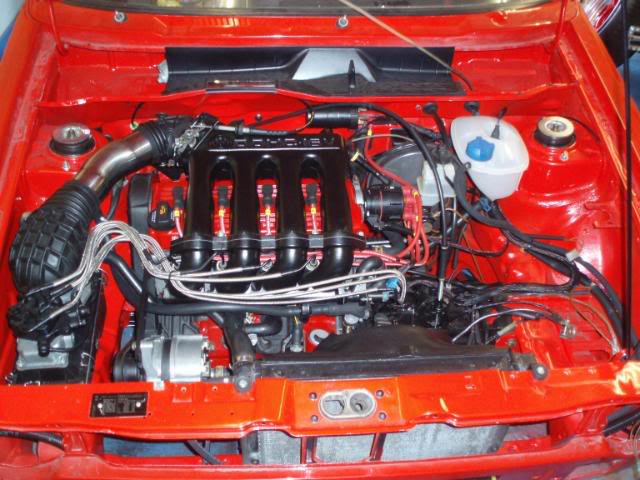
And how its sitting at the mo,
Phew!
Now it's up to date
Cheers for looking,
Pete.
Posted
Old Timer
Cables look really tidy and the black inlet sets it off. Really nice

Posted
Settled In
 <a href="http://s277.photobucket.com/albums/kk54/tamthebam16v/?action=view¤t=05092008653-1.jpg"><img src="http://i277.photobucket.com/albums/kk54/tamthebam16v/05092008653-1.jpg" border="0" alt="Photobucket"></a>
Posted
Settling In

ERROR: A link was posted here (img) but it appears to be a broken link.

currently breaking mk1 caddy,mk2 16v,mk1 cabby pm for prices!
Posted

Old Timer

Posted
Local Hero

Alex
Posted
Old Timer
MK1Allan said
Very nice, how you getting on with fitting the mk2 plastic fuel lines? I tried it on mine but the angel they had to bend through at the bottom of the engine bay was was to tight and they kinked, I guess they bend when warmed up? My mk2 fuel pump sits beside the radiator!
Cheers Allan, yeah the plastic lines can bent, but you've got to give them some heat, had a few kinks in the return when I started, but i've got better at it now. Most of those kinks are nearly out, but shouldn't hurt. Yeah I spent a while working out what to do with the pump etc, thought about in the bay.
welsh-mk1 said
Great work, what size are the wheels?
Alex
Thanks Alex, should have it started for the first time next weekend, will try and get a vid up.
As for the wheels, they are 14" et 20 all round, 7.5" fronts and 8" out back, I don't want too much poke as it can look a bit moon buggie-ish, if you get what I mean. The wheels also run a near 13" basket, which meant grinding the front cailpers to fit, and it's pretty damn close lol! (Running vauxhall 256 girling calpiers).
I may remove the helper springs to, as i'm at the bottom of 2 of the coilovers, (running fk koingsports).
Also i'm changing the exhaust tip to.
I'm now waiting on some clips grommets etc, and a k & N filter.
Will keep you updated.
Cheers
Pete.
Posted
Old Timer

Madone with the two Cabs 82 (UK RHD) and 85 (US LHD) (92 sold)
Posted
Settled In
what exhaust system have got on it? and where did you get it from? looks mad the way it comes up out the back!
Posted
Settled In
Looks like your cracking on quite nicely..nice and tidy in the bay.
oh I'm gonna wrap up my steering rack boot too, got some wrap in the garage somewhere?
Good work on the loom too,I know how frustrating wiring can be at times.
Looking forward to the vids!!
Nearly there dude!!
Posted
Old Timer
madone_si said
Loving this conversion
Cheers mate, I just can't wait to drive it!
kemk1 said
love the detail in this build, im just starting my build and am trying to source a 1.8 16v motor to go in it, these pages are going to be really useful. good luck with the rest of the build its going to be stunning when its finished.
what exhaust system have got on it? and where did you get it from? looks mad the way it comes up out the back!
The exhaust is a custom stainless job, done by these guys, http://www.infinity-ex…co.uk/pages/contactus.htm, top job as always.
I'm going to change the way the exhaust exits tho. they told me it was too much :roll:
cubed said
looking fantastic there buddy!
Looks like your cracking on quite nicely..nice and tidy in the bay.
oh I'm gonna wrap up my steering rack boot too, got some wrap in the garage somewhere?
Good work on the loom too,I know how frustrating wiring can be at times.
Looking forward to the vids!!
Nearly there dude!!
The place that done my exhaust gave me some wrap for that, think I used most of it.
Hows your mk1 coming along? Sorted the dvla out? Is it a mission to declare a engine conversion?
Cheers
Pete.
Posted
Old Timer
Posted
Old Timer

Posted
Old Timer
Carbs4ever said
Tidy install. Really good work! Bet you can't wait to get it up the road! 8)
Thanks, hows yours now, always remember it beening a very impressive build, is it on the road now?
Yeah I absolutly can't wait,ahhhhh!! I wanna drive it! (Hasn't been on the road since November 2006).
RoadBoss said
Really nice attention to detail!
Cheers, I try to work faster, but if a jobs worth doing, its worth doing properly, nearly everyting gets a mini refurb lol!
Right need to order some bit from vw now.
Cheers
Pete.
Posted
Settled In
I still got some wrap I was going to do my manifold with but decided against it.
Might do that this afternoon.
Looking great there though dude, love the stance!
Posted
Old Timer
cubed said
yeah it has been a bit of a pain witht the dvla, but I think I might have sorted it? the Rolling road are going to confirm it on headed paper for me, hopefully that'l appease them.
I still got some wrap I was going to do my manifold with but decided against it.
Might do that this afternoon.
Looking great there though dude, love the stance!
Cheers mate, yeah get that gaitor wrapped, i'm going to make a little heat shield I think.
It's quite low now but would look better lower, think I will take the helper springs out at a later date once im on the road.
Order the bits from vw, now just awaiting some hose.
Sweet!
Pete
Posted
Settled In
I really like that sump! done a search but had no joy finding it..I was looking for a sump guard but that sumps a cracker!
would go lower if I got one of those!
0 guests and 0 members have just viewed this: None.