


AL's (not so) mini build... August 2015 - Paint!

Posted
Local Hero

AL's "Mini Build" *04/12 - 6 months later...*
Alex
Posted

Settling In

Posted
Local Hero
oma said
Seats look great Al, looking forward to seeing the p's on too.
Hey there Newbie… What you doing on here!
P's not done yet - too cold and dark after work!
Made some progress on the second seat though:
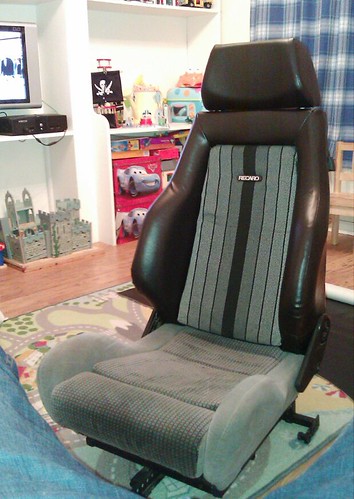
Seat number 2 by www.pix-al.co.uk, on Flickr
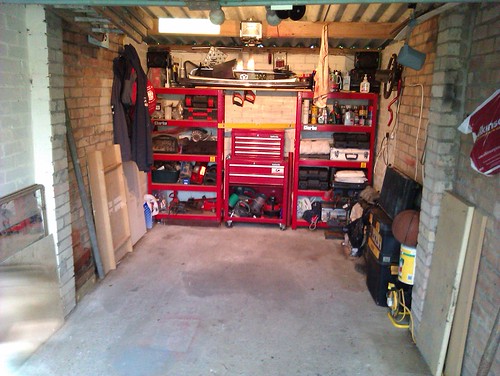
Also did a bit of tidying up in the garage.
From this (well actually, I had already started and there is a load of stuff out of shot!):
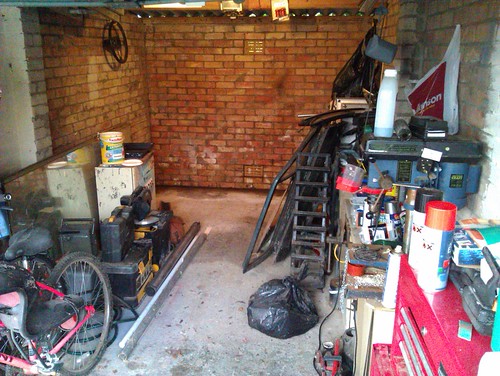
To this:
My Build Thread
All My Build Photos - https://www.flickr.com/photos/pix-al/albums/72157622794406840
My other hobby - www.pix-al.co.uk
All My Build Photos - https://www.flickr.com/photos/pix-al/albums/72157622794406840
My other hobby - www.pix-al.co.uk
Posted

Old Timer

Posted
Local Hero
I am making some slow progress and will be putting an update on here soon, I promise!
The second seat is done, though I have to get a small crack welded in the frame before I can assemble it fully.
I have also been working on the final mounting of the 6n dash. What seems to have taken ages results is nothing much being visible in a photograph!

Need to sort out my tangled mess that is supposed to be the dash loom before I can actually fit the dash, which is a task I have been dreading… :roll:
My Build Thread
All My Build Photos - https://www.flickr.com/photos/pix-al/albums/72157622794406840
My other hobby - www.pix-al.co.uk
All My Build Photos - https://www.flickr.com/photos/pix-al/albums/72157622794406840
My other hobby - www.pix-al.co.uk
Posted

Local Hero


Posted
Local Hero
Spudfingers said
Mate that is going to look stunning when done standard but with the added modern touches… gorgeous…. you HAVE to get cracking on it again mate!!!!! Well done so far!!!
That is the most enthusiastic I have seen anyone get about my car in ages, including me and I have been getting right back into it recently!!! LOL…

My Build Thread
All My Build Photos - https://www.flickr.com/photos/pix-al/albums/72157622794406840
My other hobby - www.pix-al.co.uk
All My Build Photos - https://www.flickr.com/photos/pix-al/albums/72157622794406840
My other hobby - www.pix-al.co.uk
Posted
Local Hero
Posted
Local Hero

Posted
Old Timer

Mk1 Golf Gti Abf conversion Project
Mk2 Golf Gti 16v
Mini Cooper S R53 (Daily)
Posted
Old Timer
AL_Mk1 said
Hey Pete…
I am making some slow progress and will be putting an update on here soon, I promise!
The second seat is done, though I have to get a small crack welded in the frame before I can assemble it fully.
I have also been working on the final mounting of the 6n dash. What seems to have taken ages results is nothing much being visible in a photograph!
Need to sort out my tangled mess that is supposed to be the dash loom before I can actually fit the dash, which is a task I have been dreading… :roll:
Wheels look cool to, must have missed those pics, did you get the masking marks out?
Yeah I know what you mean, it liking you are cracking on but it's hard to see progress till the very end. Maybe we could have a pic of some head scratch
 I'm sure it won't be long till some more pics. Are you using the 6n clocks?
I'm currently going backwards with my mk1, as I pranged it, and now i'm redoing work…..I rather be scratching me head going nowhere :?
Keep it up!
Pete.
Posted
Local Hero
No - not using the 6n clocks. Main feature of the dash will still be the Monster Tach and shift light, just inside the binnacle where the clocks should be!
Currently working on getting something to serve as warning lights (needed for MOT) and sorting the fuel/temp guages.
My Build Thread
All My Build Photos - https://www.flickr.com/photos/pix-al/albums/72157622794406840
My other hobby - www.pix-al.co.uk
All My Build Photos - https://www.flickr.com/photos/pix-al/albums/72157622794406840
My other hobby - www.pix-al.co.uk
Posted
Settled In

any updates?
Just wondering what thread did you use for your seats and where did you source your leather? i'd like to learn to retrim my own items as im quite impartial to most fabrics and leather is generaly a safe bet.
 plus av got a set of tombstones needing love
1.3 Driver - 1.8t in progress
http://www.vwgolfmk1.org.uk/modules.php?name=Forums&file=viewtopic&t=56551
Daily driver : e36 325 tdi se / slammed on konis and bbs rco401's
Daily offroader : discovery 1 6" lift monster
http://www.vwgolfmk1.org.uk/modules.php?name=Forums&file=viewtopic&t=56551
Daily driver : e36 325 tdi se / slammed on konis and bbs rco401's
Daily offroader : discovery 1 6" lift monster
Posted
Local Hero
ebo said
Just wondering what thread did you use for your seats and where did you source your leather?
It is only leatherette mate - Wouldn't have chanced forking out for the real thing, not knowing what it would turn out like! It is just some fire retardant stuff off ebay. Surprisingly, I bought a 5m roll and there is not a lot left! I was hoping to do door cards etc to match the seats, so I hope I can get more!
The thread was nothing special either, just standard cotton, which I have since read can rot over time :roll:
I'll see how it fares, though I don't think it will be a problem.
My Build Thread
All My Build Photos - https://www.flickr.com/photos/pix-al/albums/72157622794406840
My other hobby - www.pix-al.co.uk
All My Build Photos - https://www.flickr.com/photos/pix-al/albums/72157622794406840
My other hobby - www.pix-al.co.uk
Posted
Local Hero
Second seat is finished. I spent some more time finishing some of the areas that are unseen on this one, but it has turned out much better. Will need to revist these parts on the first seat and tidy them up at some point…
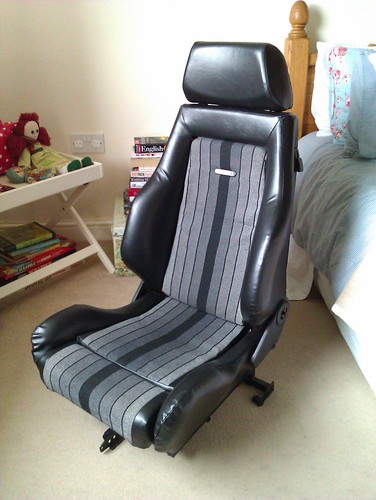
Seat 2 by www.pix-al.co.uk, on Flickr
Also did a bit of pointless fettling yesterday. This is something I have always wanted to do, though the price of Flip keys, even battered old ones has always been high. I found a seller on ebay selling the complete unit, bar electrics, brand new for £7 (Not original, but good quality none the less).
Got a key copied for £6 locally and followed guides on the net about fitting. Messed up the shaping of the shaft a little, so I might do it again at some time, but for now, it's fine.
Also, I had an brand new Moss alarm given to me that I wanted to add to the car. Not for the security really, just that it is an old period item and it has the capability of controlling central locking pumps when arming/disarming the alarm. so, I managed to fit the little circuit board from inside the Moss alarm key fob inside this key! Took a little shaping of the board and a lot of removal of the internal mouldings of the fob, but it is in and it works via the top ("LOCK") button! The alarm isn't actually in the car yet, so I hope it works!
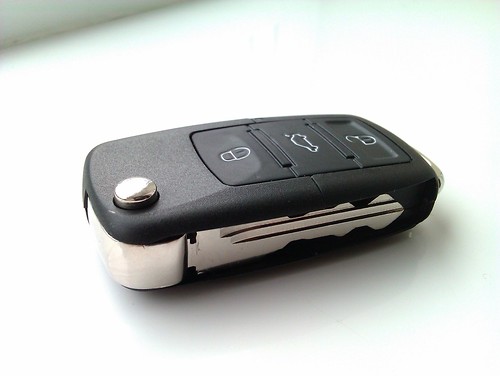
Key 1 by www.pix-al.co.uk, on Flickr
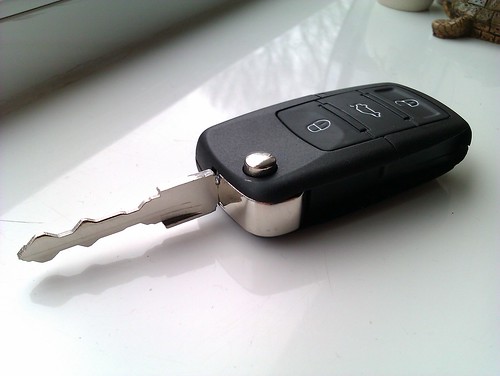
Key 2 by www.pix-al.co.uk, on Flickr
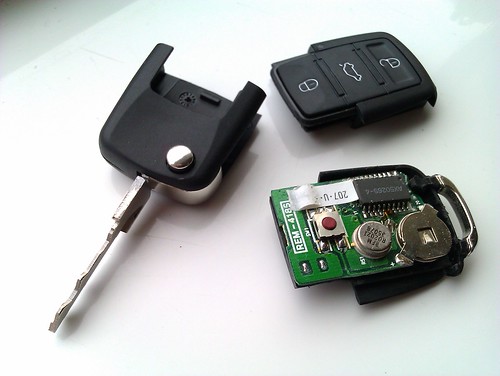
Key 3 by www.pix-al.co.uk, on Flickr
My Build Thread
All My Build Photos - https://www.flickr.com/photos/pix-al/albums/72157622794406840
My other hobby - www.pix-al.co.uk
All My Build Photos - https://www.flickr.com/photos/pix-al/albums/72157622794406840
My other hobby - www.pix-al.co.uk
Posted

Local Hero


Andy
LINCOLNSHIRE REGION - https://www.facebook.com/groups/467122313360002/
1983 MK1 Golf GTI Campaign Model - Under (looooong) resto!
1962 Rover P4 80
2002 BMW 745i
2008 BMW Z4 2.5Si
LINCOLNSHIRE REGION - https://www.facebook.com/groups/467122313360002/
1983 MK1 Golf GTI Campaign Model - Under (looooong) resto!
1962 Rover P4 80
2002 BMW 745i
2008 BMW Z4 2.5Si
Posted
Local Hero
8O
My Build Thread
All My Build Photos - https://www.flickr.com/photos/pix-al/albums/72157622794406840
My other hobby - www.pix-al.co.uk
All My Build Photos - https://www.flickr.com/photos/pix-al/albums/72157622794406840
My other hobby - www.pix-al.co.uk
Posted
Local Hero
Wife was giving me grief about car seats lying around the house, so I took the opportunity to try them in the car.
I think they look sweet, and don't seem too out of place, considering the backs are not half'n'half to match.
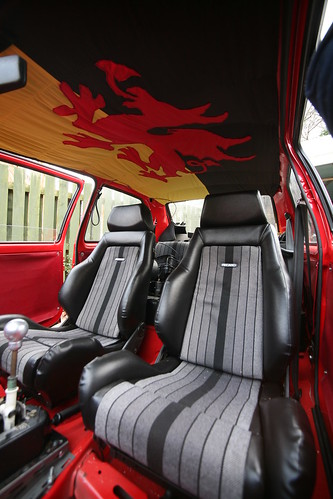
IMG_2175 by www.pix-al.co.uk, on Flickr
Quick pic of the tangled mess I have to sort out:

IMG_2178 by www.pix-al.co.uk, on Flickr
You can see the new Gear shift mount above too.
This was required to tip the shifter backwards to ensure the gear knob does not come into contact with the 6n dashboard when it is installed!
The front edge of the structure also comes up nicely to the lower edge of the dash where there is a mount point that helps secure it all in place very nicely indeed!
Don't worry, none of that angled steel will be visible when finished… :wink:
Finally, a quick before and after pic as I painted the front panel red again after rubbing back and priming.
Unsure if the shade of Mars Red is actually the correct one though as the paint suppliers I went to had at least 7 varieties! The rest of the car isn't original either as it was painted in 2004. When it dries up, it shouldn't look to bad as the front panel is not adjacent to another flat expanse of red, so any slight difference in shade shouldn't really be noticeable.
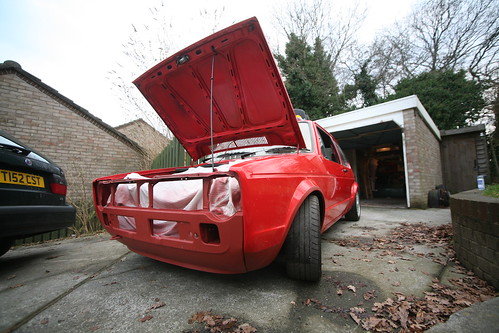
IMG_2182 by www.pix-al.co.uk, on Flickr
IMG_2190 by www.pix-al.co.uk, on Flickr
Wings are not fitted, just hung, hence the gaps look awful!
My Build Thread
All My Build Photos - https://www.flickr.com/photos/pix-al/albums/72157622794406840
My other hobby - www.pix-al.co.uk
All My Build Photos - https://www.flickr.com/photos/pix-al/albums/72157622794406840
My other hobby - www.pix-al.co.uk
Posted
Local Hero
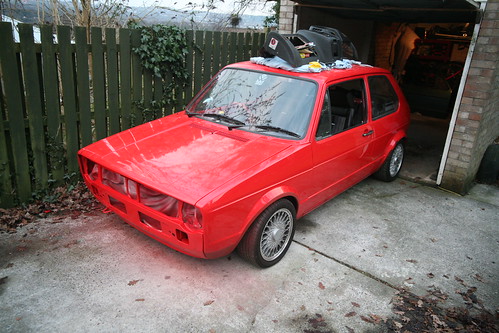
Now that the front panel is dry, it looks good. Finish isn't bad considering it isn't polished or anything, plus colour looks OK!
:-)
My Build Thread
All My Build Photos - https://www.flickr.com/photos/pix-al/albums/72157622794406840
My other hobby - www.pix-al.co.uk
All My Build Photos - https://www.flickr.com/photos/pix-al/albums/72157622794406840
My other hobby - www.pix-al.co.uk
Posted

Settling In
If it isnt broke fix it until it is.
There are too many online users to list.